Leviton 4999K-LLC Manual


Læs gratis den danske manual til Leviton 4999K-LLC (2 sider) i kategorien Ikke kategoriseret. Denne vejledning er vurderet som hjælpsom af 11 personer og har en gennemsnitlig bedømmelse på 4.5 stjerner ud af 6 anmeldelser. Har du et spørgsmål om Leviton 4999K-LLC, eller vil du spørge andre brugere om produktet?

Side 1/2
For more information please contact tech support at: 1-800-824-3005 or visit: www.leviton.com
3
2
1
NOTE: 900um boots are sold separately.
4999K-*LC
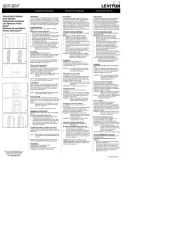
SKLC (Secure Keyed LC) Connector Field Termination
ASSEMBLY INSTRUCTIONS
PREPARE
1. Slide boot onto the ber, with the small end inserted rst, away from the
connector. (FIGURE 1)
NOTE: 900um boots are sold separately.
2. Remove 4 inches of the outer cable sheath for jacketed cable.
3. Strip the 900μm buffer as indicated in the measurements provided in the chart
below (FIGURE 2)*, strip the fiber in increments of ¼”.
4. Clean exposed ber with a lint-free wipe damped with 99% isopropyl alcohol to
remove any contaminants.
NOTE: Images are not to scale.
ASSEMBLE
1. Remove the dust cap from the connector.
2. Dry t the ber by inserting the ber into the connector. This will assure that
all coating has been removed and the ber can be inserted into the connector
ferrule.
3. Shake the adhesive bottle before using. Remove the cap from the adhesive
bottle, and attach the needle by pressing it gently onto the top of the bottle
until you feel it set into place.
NOTE: Syringes are also available for inserting adhesive. See parts list for part
number.
4. Insert the needle into the back of the connector, holding it rmly in place while
lling. Being careful not to over ll the connector, squeeze the bottle gently,
injecting the adhesive into the connector. Continue squeezing until a dot of
adhesive is visible at the ferrule end of the connector, and then remove the
needle. Wipe away any excess adhesive from the end of the ferrule.
4. Hold a lint-free wipe across the nger tips, and then gently press the ferrule
end-face against the wipe. Twist the connector in place to remove any debris.
Do not drag the connector across the lint-free wipe.
5. Wipe the bottom surface of the LC 1.25mm polishing puck and the surface of
the polishing pad with a lint-free wipe damped with 99% isopropyl alcohol to
remove any contaminants.
6. Place the 3μm film on the polishing pad, dull side up. Leviton’s 3μm film is
yellow in color. Place the polishing puck on the lm. Gently insert the
connector ferrule into the polishing puck and using very light pressure, trace 15-
20 figure 8’s on the lm. Inspect to ensure the ber is polished ush by rst
gently dragging the connector across a lint-free wipe. Fiber should not snag. If
the ber snags, continue polishing until it does not snag. Remove debris with a
lint-free wipe dampened with 99% isopropyl alcohol.
7. Repeat steps 5 and 6 with 0.3μm polishing film. Leviton’s 0.3μm film is a light
blue in color.
8. Using a Leviton 200x inspection scope, inspect the ber core to assure the core
is not scratched, cracked, broken and is clean. (FIGURE 4)
9. Replace the dust cap on the connector to maintain cleanliness.
INSPECTING THE BACKLIT FIBER:
SCRIBE AND PULL FIBER AWAY
Multimode 62.5/125 Singlemode 9/125
4
White area must be free
of all obstruction. Grey
area should be free of
scratches and dark
spots.
ALL BUFFERED CABLE
PK-93775- - -10 02 0A


Produkt Specifikationer

Mærke: Leviton
Kategori: Ikke kategoriseret
Model: 4999K-LLC
Antal pr. pakke: 1 stk
Produktfarve: Blå
Bæredygtighedscertifikater: RoHS
Overholdelse af bæredygtighed: Ja
Stik køn: Hanstik
Stiktype: LC
Fibertilstandsstruktur: Multi-mode, Single-mode
Tilslutningsmateriale: Zirconium

Har du brug for hjælp?

Hvis du har brug for hjælp til Leviton 4999K-LLC stil et spørgsmål nedenfor, og andre brugere vil svare dig