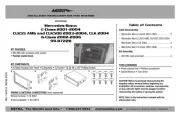
Metra 99-5832G Manual

Metra Bilsæt 99-5832G

Læs gratis den danske manual til Metra 99-5832G (4 sider) i kategorien Bilsæt. Denne vejledning er vurderet som hjælpsom af 32 personer og har en gennemsnitlig bedømmelse på 4.8 stjerner ud af 16.5 anmeldelser. Har du et spørgsmål om Metra 99-5832G, eller vil du spørge andre brugere om produktet?

Side 1/4
REV. 4/20/2016 INST99-5832G
INSTALLATION INSTRUCTIONS FOR PART 99-5832G
METRA. The World’s best kits.metraonline.com © COPYRIGHT 2016 METRA ELECTRONICS CORPORATION
CAUTION!
All accessories, switches, climate controls panels,
and especially air bag indicator lights must be connected before
cycling the ignition. Also, do not remove the factory radio with
the key in the on position, or while the vehicle is running.
• ISO DIN radio provision with pocket
• ISO DDIN radio provision
Radio trim panel is painted gray
A) Radio trim panel • B) Dash panelC) Radio brackets • D) Pocket • E) Airbag light blank
• F) (4) #8 x 3/8” Phillips truss head screws • G) (2) #8 x 3/8” Phillips pan head screws • H) (3) Metal “U panel clips
• I) (5) Metal “D panel clips • J) (4) Small metal D” panel clips • K) (4) Plastic panel clips
KIT FEATURES
KIT COMPONENTS
• Panel removal tool • Phillips screwdriver
• Socket wrench T-20 Torx screwdriver
TOOLS REQUIRED
(without 4.2” screen)
A
Table of Contents
B DC
F G H I J K
E
Dash Disassembly ..................................................2
Kit Preparation ........................................................2
Kit Assembly
– 3 ISO DIN radio provision with pocket .......................
– 3 ISO DDIN radio provision .......................................
Final Assembly .......................................................3
WIRING & ANTENNA CONNECTIONS (sold separately)
Wire harness: • 70-5524 Antenna adapter: • 40-EU10
99-5832G
1. Unclip the dash panel above the
radio. (Figure A)
2. Remove (2) T-20 Torx screws
securing the factory radio/trim
panel. (Figure B)
3. Unclip the factory radio/trim panel
from the dash, unplug and remove.
(Figure B)
4. Remove (1) T-20 Torx screw per
vent then unclip and remove the
vents from the factory radio/trim
panel. (Figure C)
5. Unclip and remove the hazard
switch assembly from the factory
radio/trim panel. (Figure D)
Continue to kit preparation
Dash Disassembly Kit Preparation
1. Secure the factory vents to the radio
trim panel using the (2) #8 x 3/8”
Phillips pan head screws provided.
(Figure A)
2. Snap the factory hazard button into the
radio trim panel. An airbag light blank
has been included for models without a
passenger airbag indicator. (Figure A)
(Figure B)
(Figure A) (Figure D) (Figure B) (Figure C)
(Figure C) (Figure A)
3. Attach the (4) plastic panel clips
provided, to the radio trim panel.
(Figure B)
4. Attach the (12) metal panel clips
provided, to the . (Figure C)dash panel
Continue to kit assembly


Produkt Specifikationer

Mærke: Metra
Kategori: Bilsæt
Model: 99-5832G

Har du brug for hjælp?

Hvis du har brug for hjælp til Metra 99-5832G stil et spørgsmål nedenfor, og andre brugere vil svare dig


Bilsæt Metra Manualer
Metra

Metra 99-8270HG Manual

3 April 2025
Metra

Metra 99-8722B Manual

3 April 2025
Metra

Metra 99-7802CH Manual

3 April 2025
Metra

Metra 99-8214TG Manual

3 April 2025
Metra

Metra 99-4000 Manual

31 Marts 2025
Metra

Metra 95-5026 Manual

28 December 2024
Metra

Metra 95-7883HG Manual

28 December 2024
Metra

Metra 99-7339B Manual

28 December 2024
Metra

Metra OESWC-7552H Manual

28 December 2024
Metra

Metra 99-8223 Manual

6 September 2024

Bilsæt Manualer

Nyeste Bilsæt Manualer

ZZ-2

ZZ-2 IC-SYM Manual

1 April 2025
Exibel

Exibel INBTK006 Manual

14 Januar 2025
Scosche

Scosche HA1714B Manual

28 December 2024
HTC

HTC Car Kit Manual

15 December 2024
BeeWi

BeeWi BBA100 Manual

13 Oktober 2024
Jay-tech

Jay-tech CK-10B Manual

11 Oktober 2024
SuperTooth

SuperTooth Mini Manual

10 Oktober 2024
Parrot

Parrot Minikit Chic Manual

29 September 2024
Nedis

Nedis DTCTCO20WT Manual

22 September 2024