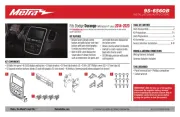
Metra XSVI-6515-NAV Manual

Metra Ikke kategoriseret XSVI-6515-NAV

Læs gratis den danske manual til Metra XSVI-6515-NAV (2 sider) i kategorien Ikke kategoriseret. Denne vejledning er vurderet som hjælpsom af 18 personer og har en gennemsnitlig bedømmelse på 4.4 stjerner ud af 9.5 anmeldelser. Har du et spørgsmål om Metra XSVI-6515-NAV, eller vil du spørge andre brugere om produktet?

Side 1/2
XSVI-6515-NAV XSVI-6515-NAV
INSTALLATION INSTRUCTIONS INSTALLATION INSTRUCTIONS
XSVI-6515-NAV XSVI-6515-NAV
INSTALLATION INSTRUCTIONS INSTALLATION INSTRUCTIONS
REV. 7/17/17 REV. 7/17/17© COPYRIGHT 2017 METRA ELECTRONICS CORPORATION © COPYRIGHT 2017 METRA ELECTRONICS CORPORATION
Integrate • AxxessInterfaces.com Integrate AxxessInterfaces.com
REV. 7/17/17 REV. 7/17/17© COPYRIGHT 2017 METRA ELECTRONICS CORPORATION © COPYRIGHT 2017 METRA ELECTRONICS CORPORATION
Integrate AxxessInterfaces.com Integrate AxxessInterfaces.com
Fiat 500 accessory and NAV output CAN interface 2012-2015
Provides accessory power (12-volt 10-amp)
Retains R.A.P. (retained accessory power)
Used in both amplified and non-amplified systems
Provides NAV outputs (parking brake, reverse, speed sense)
Pre-wired ASWC-1 harness included (ASWC-1 sold separately)
High level speaker input
Retains OE BT/USB and 3.5mm audio
Mirco "B" USB updatable
WIRING UP THE XSVI-6515-NAV
Connect the Yellow wire to the radio’s 12-volt battery or memory wire.
Connect the Black wire to the radio’s ground wire.
Connect the Red wire to the ignition wire of the aftermarket radio
Connect the Orange wire to the illumination wire of the aftermarket radio. If the aftermarket
radio has no illumination wire, tape off the Orange wire.
Connect the Blue/White wire to the radio's amp turn on wire.
Connect the White wire to the left front positive speaker output of the aftermarket radio.
Connect the White/Black wire to the left front negative speaker output of the aftermarket radio.
Connect the
Gray
wire to the right front positive speaker output of the aftermarket radio.
Connect the
Gray/Black
wire to the right front negative speaker output of the aftermarket radio
.
Connect the
Green
wire to the radio’s left rear positive speaker output.
Connect the
Green/Black
wire to the radio’s left rear negative speaker output.
Connect the
Purple
wire to the radio’s right rear positive speaker output.
Connect the
Purple/Black
wire to the radio’s right rear negative speaker output.


Produkt Specifikationer

Mærke: Metra
Kategori: Ikke kategoriseret
Model: XSVI-6515-NAV

Har du brug for hjælp?

Hvis du har brug for hjælp til Metra XSVI-6515-NAV stil et spørgsmål nedenfor, og andre brugere vil svare dig


Ikke kategoriseret Metra Manualer
Metra

Metra 95-8275 Manual

30 Oktober 2025
Metra

Metra 99-3010S-LC Manual

9 Oktober 2025
Metra

Metra 95-6560B Manual

9 Oktober 2025
Metra

Metra 99-6536 Manual

9 Oktober 2025
Metra

Metra 99-5853CH Manual

8 Oktober 2025
Metra

Metra 99-6543HG Manual

8 Oktober 2025
Metra

Metra 99-5855CH Manual

8 Oktober 2025
Metra

Metra 99-5842B Manual

8 Oktober 2025
Metra

Metra 99-5858CH Manual

8 Oktober 2025
Metra

Metra 95-7299B Manual

7 Oktober 2025

Ikke kategoriseret Manualer

Nyeste Ikke kategoriseret Manualer

Wimberley

Wimberley AP-611 Manual

30 Oktober 2025
DeWalt

DeWalt DCS374 Manual

30 Oktober 2025
Tronic

Tronic TLG 400 B2 Manual

30 Oktober 2025
Abus

Abus JC2208 Manual

30 Oktober 2025
Abus

Abus HYP-E Manual

30 Oktober 2025
DAP-Audio

DAP-Audio ZA-9250DAB Manual

30 Oktober 2025
Abus

Abus E222 Manual

30 Oktober 2025