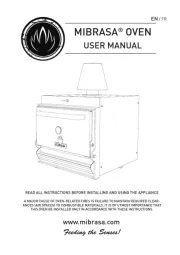
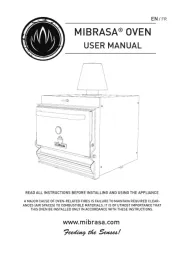
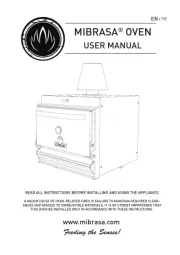
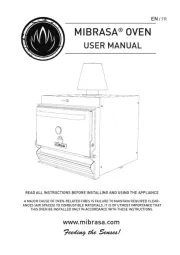
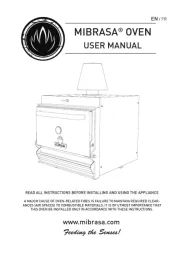
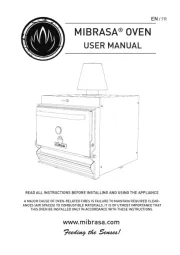
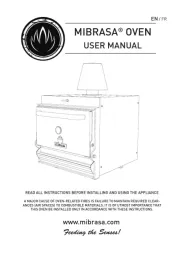
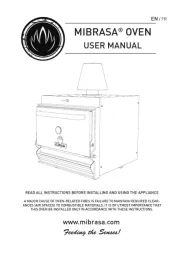
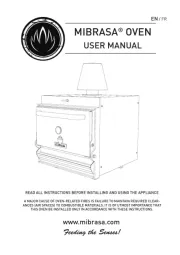
Mibrasa HMB AB 75 Manual
Læs gratis den danske manual til Mibrasa HMB AB 75 (52 sider) i kategorien Ovn. Denne vejledning er vurderet som hjælpsom af 21 personer og har en gennemsnitlig bedømmelse på 4.3 stjerner ud af 11 anmeldelser. Har du et spørgsmål om Mibrasa HMB AB 75, eller vil du spørge andre brugere om produktet?
Side 1/52

Feeding the Senses!
www.mibrasa.com
READ ALL INSTRUCTIONS BEFORE INSTALLING AND USING THE APPLIANCE
A MAJOR CAUSE OF OVEN-RELATED FIRES IS FAILURE TO MAINTAIN REQUIRED CLEAR-
ANCES (AIR SPACES) TO COMBUSTIBLE MATERIALS. IT IS OF UTMOST IMPORTANCE THAT
THIS OVEN BE INSTALLED ONLY IN ACCORDANCE WITH THESE INSTRUCTIONS.
EN / FR
MIBRASA
®
OVEN
USER MANUAL

PLEASE READ THIS ENTIRE MANUAL BEFORE YOU INSTALL THE OVEN. FAILURE TO FOLLOW
INSTRUCTIONS MAY RESULT IN PROPERTY DAMAGE, BODILY INJURY, OR EVEN DEATH.
SAVE THESE INSTRUCTIONS

Contents
1. Introduction 1
2. Mibrasa
®
oven description 3
3. Models 5
4. Installation instructions 8
4.1. Requirements for oven surroundings
4.2. Installation and assembly instructions
4.3. Smoke extraction
5. Instructions of use 16
5.1. Loading the charcoal
5.2. Lighting the charcoal
5.3. Prior to cooking
5.4. Ready to cook
5.5 After service
5.6 Reutilizing charcoal from the previous service
6. Maintenance and safety standards 19
6.1. Daily cleaning
6.2. Weekly cleaning
6.3. Special care
6.4. Safety standards
7. General conditions 21
7.1. Warranty
7.2. Returns
7.3. Property Reserve

1
Mibrasa
®
charcoal ovens are robust and solid, an essential piece of equipment for any
kitchen, giving a unique and delicious avor to all your ingredients.
Mibrasa
®
charcoal ovens comply to the strict standards & regulations set by internationally
recognized certications of quality.
Our ovens
Mibrasa
®
is a closed grill designed and developed in our workshops. Made from the
best quality steel by expert hands, our grills are designed to satisfy even the most
demanding chefs.
The technical specications allow the user to accurately control the airow through the
oven, regulating the intensity of the heat of the embers to grant a highly efcient way of
cooking while signicantly reducing the consumption of charcoal.
Mibrasa
®
charcoal ovens allow you to cook all types of foods retaining the natural avors
while bringing out a unique taste. Any other use instead of cooking food is not allowed.
1. Introduction

2
The versatility of Mibrasa
®
ovens
We have a wide range of models and accessories allowing you to completely personalize your
Mibrasa
®
oven and adapt it to your needs.
The advantages of Mibrasa
®
ovens:
The MIBRASA
®
HMB AB SB has a heating rack with an average temperature of 110ºF. It also
comes equipped with a natural heating cabinet below with a temperature between 125º and 160ºF
for keeping food warm, placed in a container provided with cover, for a maximum of 2 hours using
Mibrasa kitchenware.

3
Note: Regulating the entry of airow is controlled through the opening and closing of the lower damper
whilst the air outlet is controlled using the upper damper.
Grill sizes and approximate diners per service:
A Firebreak
B Dissipating filter
C Upper damper
D Door handle
E Thermometer
F
Lower damper /
Ash collector
G Grease collector
H Door
I Charcoal grids
J Grills
A-B
F
G
C
E
I
D
J
H
Model Grill dimensions (inches) Diners per service
HMB MINI 21.26 x 13.58 35-45
HMB MINI PLUS 21.26 x 15.55 45-65
HMB 75 21.26 x 23.43 75-95
HMB 110 29.92 x 23.43 110-130
HMB 160 29.92 x 31.30 160-190
542
600
W
D
2. Mibrasa
®
oven description

4
Included accessories:
Optional accessories and kitchenware (consult online catalog at www.mibrasa.com)
Mibrasa
®
tongs Ash shovel Grill brush
Two grills
Dissipating filter
Ember poker
Firebreak
Mibrasa
®
Ecofire firelighters

5
3. Models
Models A B C D E F G H I J K
HMB MINI 7.87 19.29 23.62 31.89 9.84 2.55 27.56 28.94 20.47 23.03 35.24
HMB MINI PLUS 9.06 20.08 24.61 35.04 9.84 2.55 27.56 28.94 25.59 28.15 40.35
HMB 75 11.81 27.56 31.89 42.32 9.84 2.55 27.56 28.94 25.59 28.15 40.35
HMB 110 11.81 27.56 31.89 45.68 9.84 2.55 36.22 37.60 29.13 31.69 43.90
HMB 160 13.78 35.43 39.76 53.54 9.84 2.55 36.22 37.60 29.13 31.69 43.90
Models A B C D E F G H I J K
HMB SB 75 11.81 27.56 31.89 42.32 9.84 2.55 27.56 28.94 31.51 34.06 45.47
HMB SB 110 11.81 27.56 31.89 45.68 9.84 2.55 36.22 37.60 35.04 37.60 49.02
HMB SB 160 13.78 35.43 39.76 53.54 9.84 2.55 36.22 37.60 35.04 37.60 49.02
HMB Worktop models
HMB SB Worktop model with heating rack
Dimensions in inches
G
K
I
F
H
J
E
C
A
B
D
J
E
F
H
G
K
I
B
C
D
A

6
Models A B C D E F G H I J* K L
HMB AB 75 11.81 25.00 31.89 42.32 9.84 27.36 28.94 25.59 29.13 6.69 54.72 66.93
HMB AB 110 11.81 25.00 31.89 45.68 9.84 36.22 37.60 29.13 27.17 6.69 56.30 68.50
HMB AB 160 13.78 32.87 39.76 53.54 9.84 36.22 37.60 29.13 27.17 6.69 56.30 68.50
Models A B C D E F G H I J* K L
HMB AB SB 75 11.81 25.00 31.89 42.32 9.84 27.36 28.94 31.50 29.13 6.69 60.63 72.05
HMB AB SB 110 11.81 25.00 31.89 45.68 9.84 36.22 37.60 35.04 27.17 6.69 62.20 73.62
HMB AB SB 160 13.78 32.87 39.76 53.54 9.84 36.22 37.60 35.04 27.17 6.69 62.20 73.62
HMB AB with cupboard below
HMB AB SB with cupboard below and heating rack
F
G
H
E
J
I
L
K
B
C
D
A
H
F
G
J
E
L
K
I
B
C
A
D
* Adjustable leg height: 6.00-7.68 in

7
A
B
HMB AC with complete cupboard
Workspace for the chef and recommended height of the worktop models
Measurements are subject to technical changes.
E
D
A
C
B
Models A B C D E
HMB AC 75 25.61 32.09 42.52 74.80 33.46
HMB AC 110 25.61 32.09 45.87 74.80 42.13
HMB AC 160 33.46 39.96 53.74 74.80 42.13
Models A B
HMB MINI 43.31 31.50
HMB MINI PLUS 43.31 27.56
HMB 75 43.31 27.56
HMB 110 43.31 23.62
HMB 160 43.31 23.62

8
4. Installation instructions
4.1. Requirements for oven surroundings
The installer should contact the local building or re ofcials concerning any installation
restrictions or need for inspection of the oven installation.
The minimum hearth extension areas to be covered with relationship to the door opening of
the oven for combustible oors should be the following:
a. 30” to each side of the door opening
b. 36” in front of the door opening
Clearances to construction/other appliances:
a. Unit to backwall = 3”
b. Unit to sidewalls = 3”
Countertop models should be placed on a reproof material table or stand, preferably
metals: stainless steel, etc. Such support must be strong enough to support the weight of
the oven.
4.2. Installation and assembly instructions
Worktop models: - HMB MINI, MINI PLUS, 75, 110, 160
- HMB SB 75, 110, 160
Lift the oven
3
1
Remove the ash collector
Make sure the forks reach
the end of the oven.
2
Insert the forks of a lifting de-
vice in the ash collector space
Lifting using a lifting device (recommended)
Due to the high weight of the ovens, it is always necessary to use lifting equipment to
handle them safely. If no such equipment is available, there must be an adequate number
of personnel in compliance with local safety regulations, to assist with the installation.

9
Open the door
1 3
Remove the charcoal grids
2
Remove the grills
Do not lift the oven from the
door handle
Lifting by hand (not recommended)
6
If lifting by hand use the two
pull-out handle bars
4
Remove the charcoal grids
support
9
Place back the ash collector,
firebreak and dissipating
filter
8
Place the oven on top of the
worktop trim
Majority of the weight is at the
front of the oven
5
Remove the ash collector,
dissipating filter and firebreak
6
Place back the ash collector
5
Place oven on top of the
worktop trim
Place the worktop trim on top
of the countertop
*A certified “NSF” silicone shall be used
to seal the trim to the countertop
4
Place the worktop trim on top
of the countertop
*A certified “NSF” silicone shall be used
to seal the trim to the countertop
7

10
Assembling the heating rack
Models with heating rack: - HMB SB 75, 110, 160
- HMB AB SB 75, 110, 160
The SB heating rack benefits from the natural heat transferred from the oven. Ideal for keeping food
warm, placed in a container provided with cover, for a maximum of 2 hours using Mibrasa kitchenware.
x2
2
Position the heating rack in
place
Connect the extension flue
4
Unscrew the two screws on
the roof of the oven
1 3
Align the screws with their
holes and screw in tightly
using an allen key 5
5
Insert the grill
x2
12
Place back the grills
11
Place back the charcoal
grids
Side with narrower slits
facing up
10
Place back the charcoal grids
support

11
Models with cupboard below: - HMB AB 75, 110, 160
- HMB AB SB 75, 110, 160
-
HMB AC 75, 110, 160 (Consists of HMB AB + top cupboard)
The AB unit is equipped with a heating cabinet that benefits from the natural heat transferred from
the oven. Ideal for keeping food warm, placed in a container provided with cover, for a maximum of 2
hours using Mibrasa kitchenware.
x16
x16
x16
Install the legs/casters of the
cupboard
1
2
Remove the ash collector
5
Place the oven on the cupboard
Make sure the forks reach the
end of the oven.
3
Insert the forks of a lifting
device in the ash collector
space
Lift the oven
4
Assemble the oven with the cupboard
6
a) Open the cupboard doors b) Attach the oven to the cupboard
The open stand is equipped
with the same ttings
x4
x4
Oven leg
Omega prole
Adjustable

12
Models with full cupboard: - HMB AC 75, 110, 160
The AC unit is equipped with a top and lower heating cabinet that benefit from the natural heat
transferred from the oven. Ideal for keeping food warm, placed in a container provided with cover, for
a maximum of 2 hours using Mibrasa kitchenware.
Assemble the oven with cupboard
below
1
An alternative option to provide more working space inside the heating cabinet is to install
the security accessories outside of the cabinet. In order to do this, connect the extended
ue duct to the oven smoke outlet prenetrating the cabinet’s roof. Assemble the rebreak
and dissipating lter over the duct.
2
Open the door
5
Place oven with cupboard
below in position
3
Remove the frontal panel
6
Place back the grill
4
Remove the grill
7
Place back the frontal panel
Follow the steps for models
with cupboard below
Option 1 Option 2

13
4.3. Smoke extraction
When the oven is installed in the interior of a closed building an hood extract of sufcient
dimensions is required.
The hood extract must have a suitable depth in order to cover the opening of the oven and
stand out laterally by 5.9”on both sides.
Installation of the exhaust hood in accordance with the standard NFPA 96.
Dissipating filter: This is installed over the
rebreak. It lters and spreads the ow of
air, slowing it down and dropping its tem-
perature.
To guarantee the correct operation of the said components, the recommended
charcoal loads mentioned in point 5.1 should be respected.
Firebreak: Is installed where the smoke
leaves the oven. Its function is to prevent
ames or sparks from escaping the oven.
MIBRASA
®
Protective components

14
This type of installation consists of an exhaust hood, which is independent of the oven.
Installation of the rebreak and the dissipating lter are needed.
For ductwork and ventilation types see point 4.3.
Installation options
Table showing exhaust hood measurements and required flow rates:
1) Oven with independent extraction
Models Flow rate (gal/s)
Minimum hood dimensions (in.)
(width, depth)
Minimum height from the
floor (in.)
HMB MINI 183 39.4” x 39.4” 78.7”
HMB MINI PLUS 183 39.4” x 39.4” 78.7”
HMB 75 205 51.2” x 51.2” 78.7”
HMB 110 235 59” x 51.2” 78.7”
HMB 160 257 59” x 59” 78.7”
+
78.7”

15
2) Oven installed under exhaust hood with other cooking appliances.
General ventilation ductwork
It is necessary to install the oven with the rebreak and dissipating lter. This will prevent
sparks and ames from escaping the oven. The smoke will be ltered reducing the ow and
cooling its temperature down prior to contact with the ventilation system.
+
78.7”
Never connect the oven outlet directly with the
exhaust hood

16
5. Instructions of use
5.1. Loading the charcoal
Model Amount
HMB Mini 11 lbs
HMB Mini Plus 14 lbs
HMB 75 22 lbs
HMB 110 33 lbs
HMB 160 40 lbs
Leave about 5.9 in of space
at the back of the oven for air
circulation
Open the door
1
3
Open upper damper
4
Load the Mibrasa charcoal
and make a heap
2
Remove the grills
Approximate quantity of charcoal according to Mibrasa
®
model.
Mibrasa has different types of high quality long burning
charcoal to get the best performance from the oven.
Important!
5.2. Lighting the charcoal
It is compulsory that a member of the kitchen staff is present for the entire lighting up process. During the re- up,
the door must remain closed. This will ensure the most effective light up while minimizing any risk of accidents.
It is very important to respect the maximum charcoal load in every Mibrasa
®
oven.
2 in
Open the ash collector/
lower damper
1 3
Close the door
2
Place and light the Mibrasa
®
firelighters

17
5.3. Prior to cooking
Wait until the charcoal has
turned into embers
1
Turn the upper damper to the desired angle.
The air outlet is controlled by using the upper
damper with the minimum setting at 0º and
the maximum at 90º.
3
Place back the grills
2
Open the door
5
Turn the upper damper
to 45º
6
Close the ash collector/
lower damper
4
Close the door
40 MIN
5.4. Ready to cook
45º 60º
Remember that the ash collector/
lower damper should remain closed
when cooking.
If the temperature of the oven needs
to be increased quickly, open the ash
collector/lower damper 2-3 mins max.
Upper damper closed
Upper damper open
Recommended upper damper position for
cooking:
Always use tongs or heat-proof gloves
to handle the upper damper.

18
5.5. After service
5.6. Reutilizing charcoal from the previous service
It is necessary to use heat-
proof gloves when removing
the grills.
Close the upper damper
1
Check the ash collector/
lower damper is closed
2
Open the door
1
Load the charcoal and
follow the steps indicated in
point 5.1
4
3
Move the charcoal around
so the ash falls into the ash
collector
2
Remove the grills

19
6. Safety and maintenance
6.1. Daily cleaning
Do not use chemical products or water to clean the inside of the oven.
Grills: Clean using the grill brush before and after each use.
Ash collector: Open the ash collector, use the ash shovel by Mibrasa
®
to remove the ash
and transfer to a metal container with a tight-tted lid. If you think it is necessary, you can
remove the ash collector from the oven completely to facilitate cleaning. Once the ashes
have completely cooled down they can be disposed of or used as fertilizer.
WARNING Do not dispose the ashes in a ammable-container or heat-deformable container.
Space between the door and the frame: This should always be kept clean so that it can be
closed properly.
6.2. Weekly cleaning
Dissipating filter: Remove the dissipating lter from the oven. Clean the inside part.
Firebreak:
Remove the rebreak from the oven. Shake gently from side to side to allow the
ash to fall. Never clean with water as the ash will stick to the base and can be difcult to
remove.
Charcoal Grids: Remove the grids and use the grill brush to clean the slits. It is important
for the operation of the oven to keep the slits clear of ash and debris.
Ash collector: Remove the ash collector and clean away any ash and cinders remaining. A
build-up of ash can make closing the ash collector difcult.
6.3. Special care
Exhaust hood It is very important to keep the exhaust hood lters clean to avoid a build up
of soot, fat and creosote
1
,
which could result in a possible re.
Mibrasa
®
is not responsible for any damages occurred caused by wrongful use, when the instal-
lation instructions have not been followed or wrongful maintenance of the exhaust hood.
1
Creosote – Formation and need for removal. When wood is burned slowly, it produces tar and other organic vapors
that combine with expelled moisture to form creosote. The creosote vapors condense in a relatively cool oven ue and
exhaust hood of a slow burning re. As a result, creosote residue accumulates on the ue lining and exhaust hood.
When ignited, this creosote makes an extremely hot re. The oven ue should be inspected at least twice a year to
determine when creosote buildup has occurred. When creosote has accumulated, it should be removed to reduce
risk of re.

20
Please read this entire manual before you install the oven.
Failure to follow instructions may result in property damage, bodily injury, or even death.
6.4. Safety standards
WARNINGS
• Only use charcoal in the Mibrasa
®
oven.
• The rst time the oven is used do not cook food for at least one hour after lighting.
• Proceed with reasonable care when operating a Mibrasa
®
oven. Never leave the oven
unattended when lit.
• Wear heatproof gloves while using the oven.
• The door must remain closed during operation. Open only the door when handling food.
• CAUTION Do not overload/re - when ames spill out of the oven, you are over-ring.
• Disposal of ashes – Ashes should be placed in a metal container with a tight-tting lid.
The closed container of ashes should be placed on a non-combustible oor or on the
ground, well away from all combustible materials, pending nal disposal. When the ash-
es are disposed by burial in soil or otherwise locally dispersed, they should be retained
in the closed container until all cinders have thoroughly cooled.
• Do not attempt to pour water over the hot coals, only close the upper and lower dampers.
• Do not clean the oven when it is in operation or hot.
• Do not use chemical products to clean the exterior of the oven when in use or hot (the
interior of the oven is self-cleaning).
• Do not use products not specied for use with this oven.
DANGERS
• When this oven is not properly installed, a re may result. To reduce the risk of re, follow
the installation instructions.
• Keep children and pets away from the oven and ammable products. Accessible parts of
the oven may be very hot.
• Do not fry food in the oven using oil. The temperature is very high and could cause seri-
ous harm or damage.
• Do not use alcohol, oil or other liquids similar to ignite or rekindle hot coals. Use only
Mibrasa
®
ecore relighters.
• In the case of installing the oven in an outdoor setting, do not cover the Mibrasa
®
oven
with any type of protective cover or inammable material when it is in operation or hot.
• Read point 4.1 for restrictions on minimum distances from combustible materials.

21
7. General conditions
7.1. Warranty
• All Mibrasa
®
ovens have a 2-year warranty against any manufacturing defect.
• The customer will be responsible for the installation, ne-tuning and maintenance of
the goods.
• The warranty is void of:
(I) damage caused by misuse or poor product installation,
(II) where the buyer or third party has started repairs, modications or adjustments
without the prior consent of Mibrasa
®
,
(III) those defects not immediately notied within the warranty period stated above,
(IV) those defects or damage due to negligence not attributable to Mibrasa
®
, or an
accident, misuse, improper installation, mishandling or abnormal conditions of
temperature, humidity or dirt,
(VI) that have become damaged through no fault of Mibrasa
®
.
7.2. Returns
• All goods must be returned in the original condition.
• All returns must be notied in writing, and must be conrmed by our sales department.
• All returns must reach Mibrasa
®
prepaid. Returned material must enclose the invoice
and delivery note number.
• Returns of goods will only be accepted in its original packaging, unused and in re-sellable
condition. Returned goods that are used, obsolete or worn out will not be considered under
warranty and a credit note will not be issued.
• For all returned goods, there will be a 10% fee of the refund amount to cover deprecia-
tion, demerit and administrative tasks.
7.3. Property Reserve
• Mibrasa
®
retains title to the goods to the total amount of the price integrity.
• Mibrasa
®
reserves the right to change their products and prices without notice.


EN / FR
Eveillant les Sens!
www.mibrasa.com
LISEZ ATTENTIVEMENT TOUTES LES INSTRUCTIONS AVANT L’INSTALLATION
ET L’UTILISATION DU MATÉRIEL.
UNE DES PRINCIPALES CAUSES D’INCENDIE PROVOQUÉ PAR LE FOUR SE DOIT
AU NON-RESPECT DE LA MAINTENANCE DES ESPACES D’AIR REQUIS POUR TOUT
MATÉRIAU COMBUSTIBLE. IL EST DE LA PLUS HAUTE IMPORTANCE QUE LE FOUR SOIT
INSTALLÉ CONFORMÉMENT AUX INSTRUCTIONS DE CE GUIDE.
FOUR MIBRASA
®
MANUEL D’INSTRUCTIONS


Index
1. Introduction 1
2. Description du Four Mibrasa
®
3
3. Modèles 5
4. Instructions d’installation 8
4.1. Restrictions relatives au four
4.2. Installation et montage
4.3. Extraction de fumée
5. Instructions d’usage 16
5.1. Charge du charbon
5.2. Allumage du charbon
5.3. Avant la cuisson
5.4. Prêt pour la cuisson
5.5 Après le service
5.6 Réutilisation de la braise du service précédent
6. Normes de maintenance et de sécurité 19
6.1. Nettoyage quotidien
6.2. Nettoyage hebdomadaire
6.3. Soins particuliers
6.4. Normes de securité
7. Conditions générales 21
7.1. Garantie
7.2. Retour
7.3. Réserve de propriété

1
Notre four Mibrasa
®
est un four à grillade robuste et solide, un outil indispensable dans
votre cuisine à n de donner une saveur unique à tous vos plats.
Le four Mibrasa
®
répond aux exigences des normes de sécurité internationales.
Nos fours à braise
Mibrasa
®
est une grille fermée, fabriquée par des mains expertes dans nos ateliers à partir
des meilleurs aciers et conçue pour satisfaire les restaurateurs les plus exigeants.
Ses caractéristiques techniques de fabrication permettent, grâce au contrôle du ux d’air,
d’aviver ou de réduire l’intensité des braises; ce qui lui confère une grande efcacité et
permet une importante économie de charbon.
Les fours Mibrasa
®
permettent de cuisiner n’importe quel aliment en toute facilité, tout en
préservant et renforçant ses saveurs naturelles. Toute autre utilisation au lieu de la cuisson
des aliments n’est pas autorisée.
1. Introduction

2
La polyvalence de nos modèles
Nous disposons d’une large gamme de modèles et de compléments de grande qualité pour
personnaliser votre four Mibrasa
®
en l’ adaptant à vos besoins.
Les avantages du four Mibrasa
®
:
Le four Mibrasa HMB AB SB muni d’un support plateaux dont la température moyenne est de
40ºC , dispose également d’une armoire basse oscillant une température entre 50ºC et 70ºC
protant de la chaleur résiduelle du four. Cela est parfait pour le maintien en température des
aliments placé dans un récipient/ustensil Mibrasa muni d’un couvercle pour une durée maximum
de 2 heures.

3
Note: Le contrôle d’admission de l’air est commandé par l’ouverture ou la fermeture du tiroir à cendres
et la sortie au moyen du levier frontal (ou régulateur du ux d’air).
Mesures des grilles et nombre de couverts approximatifs par service:
A Coupe-feu
B Filtre disperseur
C Régulateur du
tirage supérieur
D Poignée de porte
E Thermomètre
F
Tirage inférieur /
Tiroir à cendres
G Collecteur de graisse
H Porte
I Grilles en fonte
J Grilles
A-B
F
G
C
E
I
D
J
H
Modèle Mesures des grilles (mm) Couverts par service
HMB MINI 540 x 345 35-45
HMB MINI PLUS 540 x 395 45-65
HMB 75 540 x 595 75-95
HMB 110 760 x 595 110-130
HMB 160 760 x 795 160-190
542
600
A
B
2. Description du four MIBRASA
®

4
Accessoires inclus:
Ustensiles (consulter le catalogue en ligne sur www.mibrasa.com)
Pinces Mibrasa Pelle à cendre Brosse métallique
Deux grilles
Filtre disperseur
Tisonnier
Coupe-feu
Tablettes allume-feu
Ecofire Mibrasa
®

5
3. Modèles
Modèle A B C D E F G H I J K
HMB MINI 200 490 600 810 250 65 700 735 520 585 895
HMB MINI PLUS 230 510 625 890 250 65 700 735 650 715 1025
HMB 75 300 700 810 1075 250 65 700 735 650 715 1025
HMB 110 300 700 810 1160 250 65 920 955 740 805 1115
HMB 160 350 900 1010 1360 250 65 920 955 740 805 1115
Modèle A B C D E F G H I J K
HMB SB 75 300 700 810 1075 250 65 700 735 800 865 1155
HMB SB 110 300 700 810 1160 250 65 920 955 890 955 1245
HMB SB 160 350 900 1010 1360 250 65 920 955 890 955 1245
HMB four à poser
HMB SB four à poser avec support plateaux
Dimensions en mm
G
K
I
F
H
J
E
C
A
B
D
J
E
F
H
G
K
I
B
C
D
A

6
Modèle A B C D E F G H I J* K L
HMB AB 75 300 635 810 1075 250 695 735 650 740 170 1390 1700
HMB AB 110 300 635 810 1160 250 920 955 740 690 170 1430 1740
HMB AB 160 350 835 1010 1360 250 920 955 740 690 170 1430 1740
Modèle A B C D E F G H I J* K L
HMB AB SB 75 300 635 810 1075 250 695 735 800 740 170 1540 1830
HMB AB SB 110 300 635 810 1160 250 920 955 890 690 170 1580 1870
HMB AB SB 160 350 835 1010 1360 250 920 955 890 690 170 1580 1870
HMB AB avec armoire basse
HMB AB SB avec armoire basse et support plateaux
F
G
H
E
J
I
L
K
B
C
D
A
H
F
G
J
E
L
K
I
B
C
A
D
* Hauteur des pieds ajustable: 150-195mm
* Hauteur des pieds ajustable: 150-195 mm

7
A
B
HMB AC avec armoire complète
Espace de travail du chef et hauteur d’installation recommandée pour les modèles de
plan de travail
Dimensions soumises à des changements techniques.
E
D
A
C
B
Modèle A B C D E
HMB AC 75 650 815 1080 1900 850
HMB AC 110 650 815 1165 1900 1070
HMB AC 160 850 1015 1365 1900 1070
Modèle A B
HMB MINI 1100 800
HMB MINI PLUS 1100 700
HMB 75 1100 700
HMB 110 1100 600
HMB 160 1100 600

8
4. Instructions d’installation
4.1. Restrictions relatives au four
L’installateur doit contacter le responsable de la commission de sécurité incendie de l’éta-
blissement pour déterminer s’il existe des restrictions ou besoin d’inspection avant l’ins-
tallation du four.
La distance minimum de protection ignifuge face au four doit être de:
a. 762 mm de chaque côté de l’ouverture de la porte
b. 914 mm devant l’ouverture de la porte
Espace libre pour ce qui concerne les éléments existants/électroménagers:
a. 76 mm du mur arrière
b. 76 mm des murs latéraux
Les fours à poser doivent être placés sur une table ou un support ignifugé, de préférence
métallique: acier inoxydable, etc. Ce support doit être sufsamment solide pour supporter
le poids du four.
4.2. Installation et montage
Modèles de four à poser: - HMB MINI, MINI PLUS, 75, 110, 160
- HMB SB 75, 110, 160
Lever le four
3
Concernant l’élévation des fours, il est nécessaire de toujours utiliser un élévateur pour les
soulever. Si l’utilisation de cet élévateur est impossible, il est conseillé que l’installation se
fasse par du personnel suffisant afin de respecter les normes de sécurité.
1
Retirer le tiroir à cendres
S’assurer que les fourches
atteignent le fond du four
2
Insérer les fourches de
l’élévateur à place du tiroir à
cendres
Élévation en utilisant un dispositif d’élévation (recommandé)

9
Ouvrir la porte
1 3
Retirer les grilles en fonte
2
Retirer les grilles du four
Élévation manuelle (non recommandé)
4
Retirer le support des grilles
en fonte
9
Remettre en place le tiroir à
cendres, le coupe-feu et le
filtre disperseur
8
Placer le four sur la garniture
La partie frontale du four est
la plus lourde
5
Retirer le tiroir à cendres, le
filtre disperseur et le coupe-feu
6
Pour lever manuellement le
four, utiliser les manettes de la
partie postérieure du four
Ne levez pas le four en utili-
sant la poignée de la porte
6
Remettre en place le tiroir à
cendres
5
Placer le four sur la garniture
Placer la garniture su le
comptoir
*Un silicone certifié «NSF» doit
être utilisé pour sceller la garni
ture
au comptoir
4
Placer la garniture su le
comptoir
*Un silicone certifié «NSF» doit
être utilisé pour sceller la garni
ture
au comptoir
7

10
Modèles avec support plateaux: - HMB SB 75, 110, 160
- HMB AB SB 75, 110, 160
Le support plateaux SB profite de la chaleur résiduelle du four permettant ainsi un parfait maintien
en température
des aliments placé dans un récipient/ustensil Mibrasa muni d’un couvercle pour
une durée maximum de 2 heures.
2
Mettre en place le support
plateaux
Connecter l’extension
cylindrique
4
Dévisser les deux vis de la
partie supérieure du four
1
5
Insérer la grille
x2
3
Visser fermement les vis en
utilisant une clé allen T núm. 5
12
Remettre les grilles dans le
four
11
Remettre en place les grilles
en fonte
Le trou le plus petit doit se
placer dans la partie supérieure
x2
10
Remettre en place le support
des grilles en fonte

11
Modèles avec armoire basse: - HMB AB 75, 110, 160
- HMB AB SB 75, 110, 160
- HMB AC 75, 110, 160 (se compose de HMB AB + armoire
supérieure)
Le four Mibrasa HMB AB muni d’une armoire basse profite de la chaleur résiduelle du four permet-
tant ainsi un parfait maintien en température
des aliments placé dans un récipient/ustensil Mibrasa
muni d’un couvercle pour une durée maximum de 2 heures.
x16
x16
x16
Installer les pieds/roues de l’armoire basse
1
2
Retirer le tiroir à cendres
5
Placer le four sur l’armoire
basse
S’assurer que les fourches
atteignent le fond du four
3
Insérer les fourches de
l’élévateur à place du tiroir à
cendres
Lever le four
4
Monter le four avec l’armoire basse
6
a)
Ouvrir les portes de
l’armoire basse
b) Assembler le four avec
l’armoire basse
La table du four se monte de la même manière
x4
x4
Pied du four
Prol omega
Ajustable

12
Modèles avec armoire complète: - HMB AC 75, 110, 160
Le four Mibrasa HMB AB muni d’une armoire basse profite de la chaleur résiduelle du four perme-
ttant ainsi un parfait maintien en température
des aliments placé dans un récipient/ustensil Mibrasa
muni d’un couvercle pour une durée maximum de 2 heures.
Monter le four avec l’armoire
basse
1
Pour obtenir un plus grand espace de travail à l’intérieur de l’armoire il existe l’option d’installer les
accessoires de sécurité en dehors de l’armoire. Pour le faire, il faut connecter l’extension cylindrique
à la sortie de fumées grâce à la partie supérieure de l’armoire. Ensuite monter le coupe-feu et le ltre
disperseur sur le tube.
2
Ouvrir la porte
5
Placer le four avec l’armoire
basse au positionnement désiré
3
Enlever le profil frontal
6
Remettre en place la grille
4
Enlever la grille
7
Remettre le profil frontal
Suivre les instructions pour les
modèles avec armoire basse
Option 1 Option 2

13
4.3. Extraction de fumée
Lorsque le four est installé dans un local fermé, il est nécessaire que la hotte d’extraction soit
de bonnes dimensions.
La hotte d’extraction doit avoir une profondeur adéquate pour couvrir l’ouverture de la
porte du four et survoler latéralement quelques 150 mm de chaque côté
.
Il est conseillé de terminer le tuyau avec un jet de décharge verticale pour améliorer l’évac-
uation des fumées
.
Filtre disperseur: Se pose sur le coupe-
feu. Filtre et disperse doucement le ux de
l’air tout en ralentissant sa vitesse et re-
froidissant sa température.
Pour garantir le bon fonctionnement de ces éléments, voir les charges de charbon
conseillées au point 5.1.
Coupe-feu: Se pose sur la sortie de la
cheminée du four pour éviter la sortie des
ammes ou des étincelles.
Eléments de protection MIBRASA
®

14
Ce type d’installation se compose d’une hotte d’extraction indépendante pour le four. Dans
la mesure du possible, le système de ltration doit être placé sur la partie frontale de la
hotte. L’usage du coupe-feu et du ltre disperseur est hautement recommandé.
Options d’installation
Table de mesures des hottes et débits necessaires:
1) Four avec hotte d’extraction indépendante
Modéle Débit (m
3
/h)
Mesures minimales des hottes
(mm) - (largeur, profondeur)
Hauteur minimum
à partir du sol (mm)
HMB MINI 2500 1000 x 1000 2000
HMB MINI PLUS 2500 1000 x 1000 2000
HMB 75 2800 1300 x 1300 2000
HMB 110 3200 1500 x 1300 2000
HMB 160 3500 1500 x 1500 2000
+
2000 mm

15
2) Four sous hotte d’extraction avec autres éléments de cuisson
Canalisation générale:
L’installation du coupe-feu et du ltre disperseur est indispensable an d’éviter la pos-
sible sortie des ammes ou des étincelles. Il ltre et disperse doucement le ux de l’air
tout en ralentissant sa vitesse et refroidissant sa température avant de rentrer au contact
avec le système de ventilation.
+
2000 mm
Ne jamais connecter la sortie du four directement avec la hotte

16
5. Instructions d’usage
5.1. Charge du charbon
5.2. Allumage du charbon
Modèle Quantité
HMB Mini 5 kg
HMB Mini Plus 7 kg
HMB 75 10 kg
HMB 110 15 kg
HMB 160 18 kg
Laisser environ 150 mm d’es-
pace pour la partie supérieure
pour la circulation d’air
Durant le processus d’allumage du charbon la présence et le contrôle d’un responsable de cuisine est indispen-
sable. La porte du four doit en permanence rester fermée pendant le temps de combustion. De cette façon nous
nous assurons d’un allumage parfait sans risque d’accident. Important : Bien respecter la quantité de charbon
recommandée par Mibrasa
®
selon le modèle de four.
50 mm
Ouvrir la porte
1
Ouvrir le tirage inférieur/
tiroir à cendres
1
3
Ouvrir le tirage
supérieur
4
Charger de charbon Mibrasa
®
et faire un tas
3
Fermer la porte
2
Retirer les grilles du four
2
Disposer les pastilles
Ecofire Mibrasa
®
et les
allumer
Quantité de charbon selon le modèle de four Mibrasa
®
Mibrasa possède différents types de charbon de haute qualité
dotés d’une longue combustion pour obtenir un four très
performant.
Important

17
5.3. Avant la cuisson
Attendre que le charbon
devienne braises
1
Tourner le régulateur et le positionner à l’angle
désiré.
La sortie d’air se contrôle avec le régulateur du
tirage supérieur de 0° (le minimum) et 90° (le maxi-
mum).
3
Replacer les grilles
2
Ouvrir la porte
5
Tourner le régulateur du
tirage supérieur à 45º
6
Fermer le tirage inférieur/tiroir
à cendres
4
Fermer la porte
40 MIN
5.4. Prêt pour la cuisson
45º 60º
Le tirage inférieur/le tiroir à cendres doit
être en permanence fermé pendant le temps
de cuisson.
Pour une augmentation rapide de la tem-
pérature du four, ouvrir le tirage inférieur/
tiroir à cendres 2-3 minutes maximum.
Tirage supérieur fermé
Tirage supérieur ouvert
Position recommandée du tirage supérieur
pour cuisiner:
Utilisez les pinces ou des gants de protection
thermique pour manipuler le régulateur de
tirage supérieur.

18
5.5. Après le service
5.6. Réutilisation de la braise du service précédent
L’utilisation de gants isolants
thermiques est indispensable
pour enlever les grilles.
Fermer le régulateur de tirage
supérieur
1
Vérifier que le tirage inférieur/
tiroir à cendres est bien fermé
2
Ouvrir la porte
1
Charger de charbon et suivre les
indications du point 5.1
4
3
Mélanger le charbon afin que
les cendres tombent dans le
tiroir à cendres
2
Retirer les grilles du four

19
6. Les normes de sécurité et de maintenance
6.1. Nettoyage quotidien
Ne pas utiliser de produits chimiques ou de l’eau pour nettoyer l’intérieur du four.
Grilles: Nettoyer à l’aide d’une brosse métallique avant et après chaque service.
Tiroir à cendres:
Ouvrir le tiroir à cendres et à l’aide d’une pelle métallique, retirer les
cendres. Si nécessaire, vous pouvez retirer le tiroir en entier pour faciliter son nettoyage.
Une fois refroidies, les cendres peuvent être utilisées comme engrais.
ATTENTION!
N’oubliez pas de vider les cendres de charbon dans un récipient non inam-
mable ou déformable. Placer les dans un récipient métallique.
Zone de contact entre le cadre et la porte:
La surface de contact entre la porte et le
cadre du four doit être toujours propre an que la porte puisse fermer parfaitement.
6.2. Nettoyage hebdomadaire
Filtre disperseur: Enlever le ltre disperseur du four. Nettoyer la partie intérieure.
Coupe-feu: Enlever le coupe-feu du four. Secouer et appuyer sur les deux extrémités pour
faciliter la chute des cendres. Ne jamais nettoyer avec de l’eau car les cendres peuvent se
solidier.
Grilles en fonte:
Enlever les grilles et en utilisant une brosse métallique, nettoyer les fentes
intérieures. Il est important de garder les rainures propres pour le bon fonctionnement du
four.
Tiroir à cendres:
Retirer le tiroir et nettoyer les cendres et la suie qui se trouvent au fond du
four. Une accumulation de cendres pourrait entraver et gêner la fermeture complète du tiroir.
6.3. Soins particuliers
Hotte d’extraction et conduits: Il est très important de conserver les ltres de la hotte
d’extraction propres et de nettoyer l’intérieur du plénum et des conduits pour éviter une
accumulation de suie et de graisse, ce qui pourrait conduire à la propagation d’un éventuel
incendie.
Nettoyage hebdomadaire et entretien annuel de la hotte, du caisson de ventilation et des
conduits selon les recommandations du fabricant de la hotte.
Mibrasa
®
ne sera en aucun cas responsable de possibles dommages qui pourraient être
causés par une mauvaise utilisation du four et des installations qui ne correspondraient pas
aux recommandations données.

20
A lire attentivement avant d’utiliser le four Mibrasa
®
.
Ne pas tenir compte des préventions de dangers, avertissements et précautions indiqués
dans ce manuel, pourra occasionner de sérieuses lésions corporelles ou un feu ou une
explosion avec dommages matériels.
6.4. Normes de sécurité
• Utiliser uniquement du charbon végétal dans le four Mibrasa
®
.
• Lors du premier allumage du four, attendre au minimum une heure avant la mise en
service.
• Utilise le four Mibrasa
®
avec vigilance. Il ne doit jamais être laissé sans surveillance ou
déplacé pendant son fonctionnement.
• Lorsque vous utilisez le four, portez des gants résistants à la chaleur.
• En fonctionnement, la porte doit rester fermée. Ouvrez-la uniquement pour la manipula-
tion des aliments.
• PRECAUTION Ne pas surcharger le four. Une charge trop lourde peut provoquer des
ammes hors du four. Consulter la table de charge du point 5.
• Les cendres doivent être déposées dans un récipient métallique. Ce récipient doit être
placé dans un lieu loin des matériaux combustibles en attendant d’être vidé. Avant de
vider le récipient, les cendres doivent refroidir complètement.
• Ne pas essayer d’éteindre les braises avec de l’eau
, fermer uniquement les tirages infé-
rieur et supérieur.
• Ne pas nettoyer le four lorsqu’il est chaud ou en marche.
• Lorsque le four est chaud ou en marche, ne pas utiliser des produits chimiques pour
nettoyer l’extérieur du four (l’intérieur du four est auto-nettoyant).
• Ne pas utiliser de produits non recommandés pour ce four.
LES DANGERS
• Une mauvaise installation du four peut provoquer un incendie. Suivre les instructions
d’installation recommandées.
• Éloigner les enfants et les animaux domestiques du four. Certaines parties accessibles
du four peuvent être très chaudes.
• Ne pas utiliser d’huile de friture dans le four. La température est très élevée et pourrait
causer de sérieux dommages.
• Ne pas utiliser d’alcool, d’essence ou autres liquides similaires pour allumer ou raviver
les braises. Utiliser seulement les tablettes allume-feux Ecore Mibrasa
®
.
• Si le four Mibrasa
®
est installé à l’extérieur, ne pas le couvrir avec une housse ni aucun
autre produit inammable lorsqu’il est en fonctionnement ou chaud.
• Revoir les restrictions du point 4.1 concernant les distances minimales des matériaux
combustibles..

21
7. Conditions générales
7.1. Garantie
• Tous les fours Mibrasa
®
sont garantis 2 ans contre tout défaut de fabrication.
• Le client est responsable de l’installation, la mise en service et la maintenance du pro-
duit.
• La garantie est annulée en cas de:
(I)
dommages causés par un mauvais usage ou mauvaise installation du produit
,
(II) réparations, modications ou réglages effectués par l’acheteur ou tierce sans
l’autorisation préalable de Mibrasa
®
,
(III) défauts ou dommages non communiqués dans la période de garantie ci-dessus
indiquée,
(IV) dommages dus à une négligence non attribuable à MIBRASA
®
, accident,
mauvaise utilisation, installation inappropriée, mauvaise manipulation ou condi-
tions anormales de température, humidité, salissure, corrosion ou toute autre
cause extérieure à Mibrasa
®
.
7.2. Retours
• Le matériel retourné doit être en parfaite condition de conservation.
• Tous les retours doivent être notiés par écrit et doivent être conrmés par notre service
commercial.
• Tous les retours doivent être renvoyés à Mibrasa
®
aux frais du client et doivent être
accompagnés de la facture et du numéro du bon de livraison.
• Les retours seront acceptés à condition que le four soit dans son emballage d’origine,
non utilisé et à l’état neuf. Si le four est utilisé, obsolète ou abimé, il sera détruit sans
aucun remboursement effectué
• Pour tout retour, une décote de 10 % sera appliquée pour couvrir les frais de gestion.
7.3. Résérve de propriété
• Mibrasa
®
conserve la propriété des biens vendus jusqu’au paiement effectif de l’intégralité
de leur prix.
• Mibrasa
®
se réserve le droit de modier sans préavis ses produits et ses prix.


Feeding the Senses!
8950 SW 74th Ct., Suite 1406
Miami, Florida 33156
(408) 348-7607
www.mibrasa.com
mibrasa@mibrasa.com
Version 1.6
Produkt Specifikationer
Mærke: | Mibrasa |
Kategori: | Ovn |
Model: | HMB AB 75 |
Har du brug for hjælp?
Hvis du har brug for hjælp til Mibrasa HMB AB 75 stil et spørgsmål nedenfor, og andre brugere vil svare dig
Ovn Mibrasa Manualer
26 August 2025
12 August 2024
12 August 2024
11 August 2024
10 August 2024
10 August 2024
9 August 2024
9 August 2024
9 August 2024
9 August 2024
Ovn Manualer
- Imperial
- Bauknecht
- Hoover-Grepa
- Orbegozo
- JennAir
- Clatronic
- Adler
- Sheffield
- Atag
- Dometic
- Superior
- Tesla
- Kunft
- Bush
- Zavor
Nyeste Ovn Manualer
1 September 2025
1 September 2025
1 September 2025
1 September 2025
1 September 2025
1 September 2025
1 September 2025
1 September 2025
1 September 2025
1 September 2025