© MuxLab Inc. 94-000853-A
8495 Dalton Rd, Montreal, Quebec, Canada. H4T 1V5
Tel: (514) 905-0588 Fax: (514) 905-0589
Toll Free (North America): (877) 689-5228
E-mail: videoease@muxlab.com URL: www.muxlab.com
Specifications
2CH analog audio distribution over multiple zones via an IP network
2CH audio source equipment, microphone systems, speakers, PA systems.
50W/ch (PMPO) into 8 ohm
100W (PMPO) into 4 ohm (mono)
20 – 20,000 Hz (+/- 1 dB)
Maximum Volume Preset setting (screw).
Soft reset.
4 LEDs for Power, IP status, Amp Overload & Amp clip.
Any Cat5e/6 UTP cable for Ethernet.
AWG 12-18 for speaker.
Four (4) Binding post with removable plug for speaker.
One (1) 3.5mm for IR.
One (1) RCA connector for digital audio out.
One (1) RJ45 connector for Ethernet link.
One (1) male RS-232.
One (1) locking power coaxial jack, 2.0x5mm.
Directional IR: 38KHz to 56KHz
One (1) Cat 5e/6 or better twisted pair cables required.
Cat5e/6: 330ft (100m)
Note: When installed in an electrically noisy environment, an STP cable must be used. Also,
cross-connections in the signal path reduce the effective distance depending on the grade of
cable used.
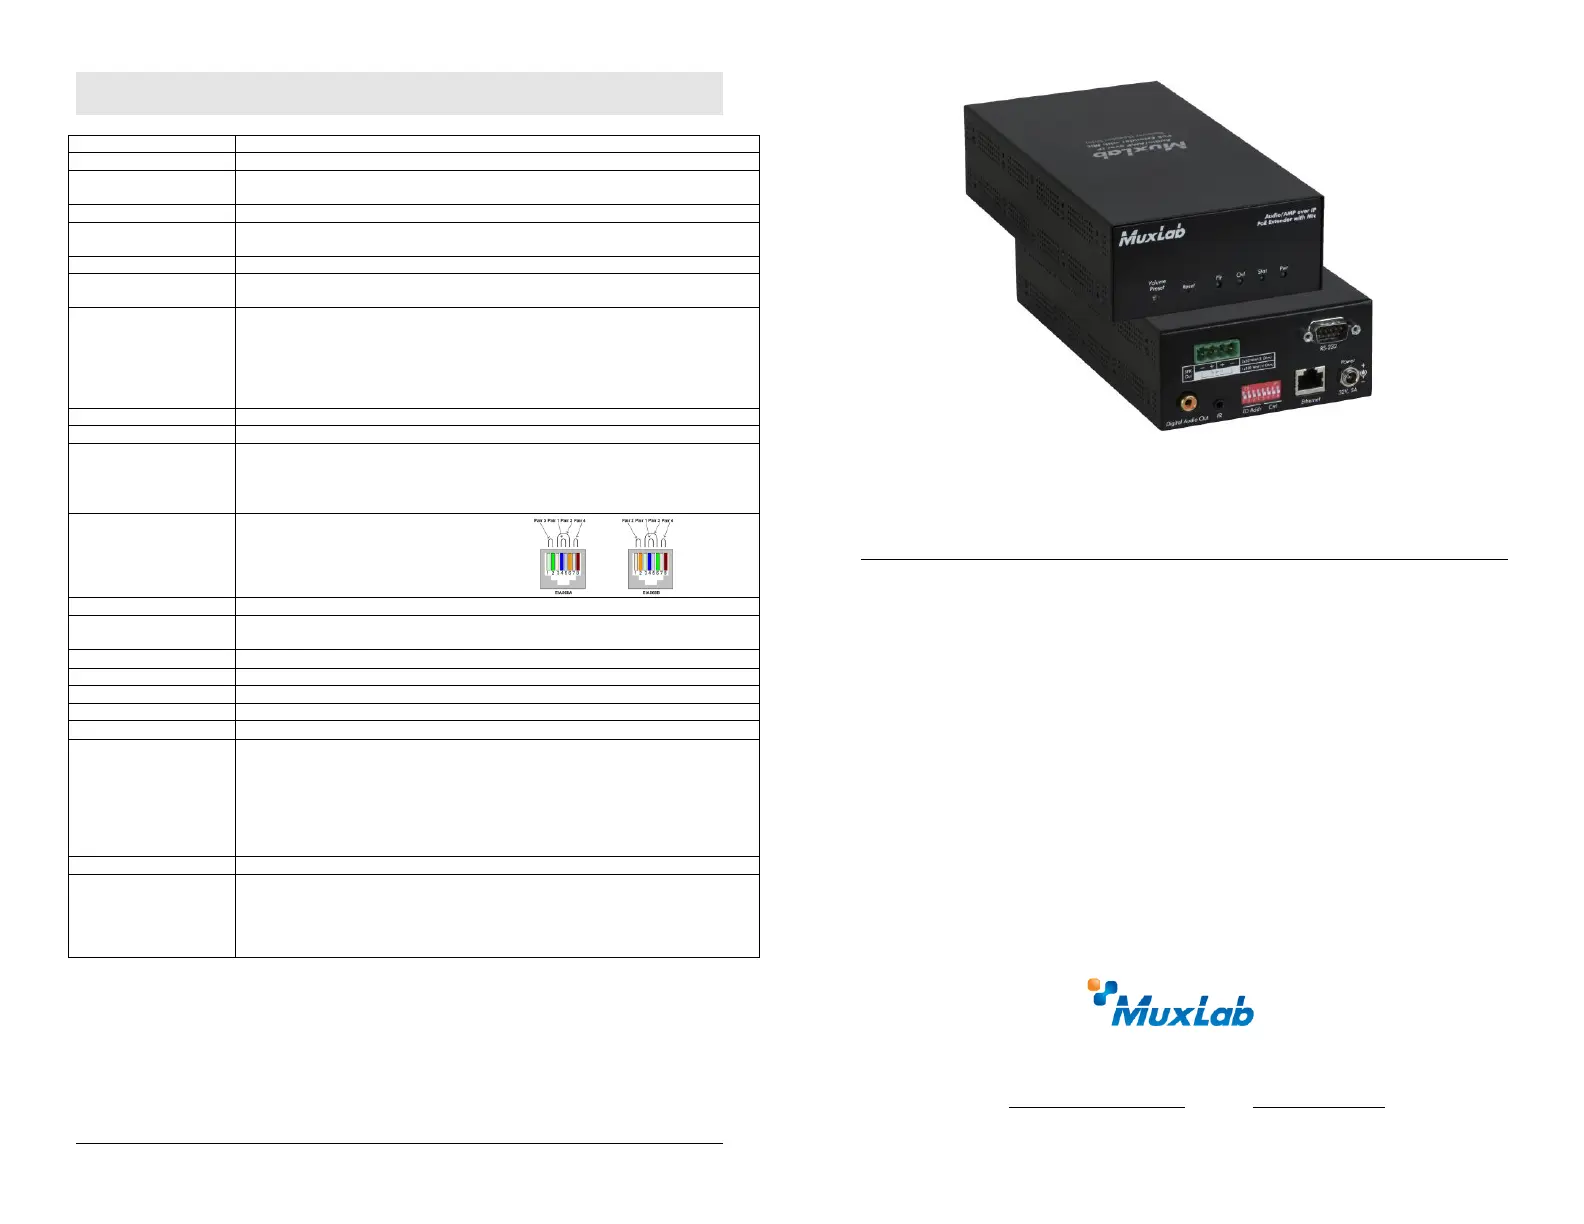
RJ45 Pin Configuration
Reverse Polarity Sensitive.
Use EIA/TIA 568A or 586B
straight-through wiring.
RJ45 Link
Pin 1 (R) Pin 2 (T)
Pin 3 (R) Pin 6 (T)
Pin 4 (R) Pin 5 (T)
Pin 7 (R) Pin 8 (T)
160W maximum, using 32V 5A.
Operating : 32° to 90°F (0° to 40°C)
Storage: -4° to 185°F (-20° to 85°C)
Maximum 90% (non-condensing)
4.33” x 7.91” x 1.97” (11 x 20.1 x 5 cm)
500755-AMP-US Audio/AMP over IP Extender Kit, with Mic & AMP 50W/CH, US
500755-AMP-UK Audio/AMP over IP Extender Kit, with Mic & AMP 50W/CH, UK
500755-AMP-EU Audio/AMP over IP Extender Kit, with Mic & AMP 50W/CH, EU
500755-AMP-TX Audio/AMP over IP Transmitter, with Mic, US
500755-AMP-RX-US Audio/AMP over IP Receiver, with AMP 50W/CH, US
500755-AMP-RX-UK Audio/AMP over IP Receiver, with AMP 50W/CH, UK
500755-AMP-RX-EU Audio/AMP over IP Receiver, with AMP 50W/CH, EU
500755, 755-AMP-TX, 500755-70V, and other MuxLab AV over IP devices.
500755-70V 70V Audio Converter
500917 Wall Mount Transceiver Bracket Kit
500920 16-Port Rackmount Transceiver Chassis
500994 IR Sensor
500998 IR Emitter
Audio/AMP over IP RECEIVER, with AMP 50W/CH
500755-AMP-RX
Quick Installation Guide
Overview
The AUDIO/AMP over IP Receiver, with AMP 50W/CH allows 2CH audio signals to
be extended up to 330ft (100m) via one (1) Cat5e/6 UTP cable in a point-to-point
configuration. Point-to-multipoint and multipoint-to-multipoint is possible by
connecting several Transmitters or Receivers to the same local Ethernet network. These
units support RS232 and IR transmission for remote control of end devices. IR emitters
and sensors are not included, but may be purchased separately if required.
For the point-to-multipoint and multipoint-to-multipoint configuration the Ethernet
Switch must have Gigabit ports and DHCP Server capability and additionally support
the IGMP communication protocol for the multipoint-to-multipoint case. MuxLab
recommends using the Cisco SG300 Series Managed Switches. The MuxLab ProDigital
Network Controller (500811) is available to simplify the configuration and utilization of
the 500755-AMP and other MuxLab IP based products via an Ethernet web interface.
Applications
Audio Distribution Systems