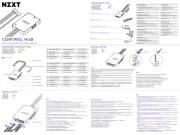
NZXT Control Hub Manual

NZXT Joystick Control Hub

Læs gratis den danske manual til NZXT Control Hub (2 sider) i kategorien Joystick. Denne vejledning er vurderet som hjælpsom af 4 personer og har en gennemsnitlig bedømmelse på 5.0 stjerner ud af 2.5 anmeldelser. Har du et spørgsmål om NZXT Control Hub, eller vil du spørge andre brugere om produktet?

Side 1/2
COMPONENT LIST
INSTALLATION
D I G I T A L R G B L I G H T I N G & F A N S P E E D C O N T R O L L E R
LISTA DE COMPONENTES
LISTE DES COMPOSANTS
KOMPONENTENLISTE
ELENCO DEI COMPONENTI
LISTA DE COMPONENTES
INSTALACIÓN
INSTALLIEREN
INSTALLAZIONE
INSTALAÇÃO
구성품 목록
部品リスト
零件表
零件表
설치
付け
安装
安裝
A .
NZXT Control Hub
B .
Divisor NZXT de 8 pines
C .
Divisor RGB NZXT (de 1 a 3 divisiones)
D .
Divisor de ventilador de 4 pines PWM (de 1 a 3 divisiones)
E .
3M Dual Lock
A .
NZXT Control Hub
B .
partiteur à 8 broches NZXT
C .
partiteur RGB NZXT (1 à 3)
D .
partiteur de ventilateur PWM à 4 broches (1 à 3)
E .
3M Dual Lock
A .
NZXT Control Hub
B .
NZXT-8-Pin-Splitter
C .
NZXT-RGB-Splitter (Dreifach-Verteilung)
D .
4-Pin-PWM-ftersplitter (Dreifach-Verteilung)
E .
3M Dual Lock
A .
NZXT Control Hub
B .
Splitter da 8 pin NZXT
C .
Splitter RGB NZXT (ripartizione da 1 a 3)
D .
Splitter per ventola PWM da 4 pin (ripartizione da 1 a 3)
E .
3M Dual Lock
A .
NZXT Control Hub
B .
Splitter de 8 pinos NZXT
C .
Splitter RGB NZXT (split 1 para 3)
D .
Spliter de Ventoinha PWM de 4 pinos (split 1 para 3)
E .
3M Dual Lock
CONTROL HUB
A .
NZXT Control Hub
B .
NZXT 8 분배기
C .
NZXT RGB 분배기 분할(13 )
D .
4 ) PWM 배기(13
E .
3M Dual Lock
A .
NZXTトロールハ
B .
NZXT 8-ピン スプター
C .
NZXT RGBター1 3 スプ
D .
4- PWM 1 3
E .
3M
A .
NZXT Control Hub
B .
NZXT 8-pin 分线器
C .
NZXT RGB 线器1 3
D .
4-pin PWM 风扇分线1 3
E .
3M Dual Lock
A .
NZXT Control Hub
B .
NZXT 8-pin 分配器
C .
NZXT RGB 配器1 3
D .
4-pin PWM 風扇分配1 3
E .
3M Dual Lock
A1 .
8 PCIe 전원
A2 .
내장 커넥터 USB 2.0
A3 .
8 (PWM ) 전용
A4 .
8 (DC+PWM)
A5 .
4 NZXT RGB
A6 .
4 PWM (DC+PWM)
A1 .
8-pin PCIe 电源
A2 .
内置 接口 USB 2.0
A3 .
8-pin PWM(仅
A4 .
8-pin (DC+PWM)
A5 .
4-pin NZXT RGB
A6 .
4-pin PWM (DC+PWM)
A1 .
8-pin PCIe 電源
A2 .
內部 連接器 USB 2.0
A3 .
8-pin PWM(僅
A4 .
8-pin DC+PWM
A5 .
4-pin NZXT RGB
A6 .
4-pin PWM DC+PWM
A1 .
Alimentacion PCIe de 8 pines
A2 .
Conector interno USB 2.0
A3 .
8 pines (solo PWM)
A4 .
8 pines (DC+PWM)
A5 .
RGB de 4-pines NZXT
A6 .
4 pines PWM (DC+PWM)
A1 .
Alimentation PCIe à 8 broches
A2 .
Connecteur USB 2.0 interne
A3 .
8 broches (PWM uniquement)
A4 .
8 broches (DC+PWM)
A5 .
NZXT RGB à 4 broches
A6 .
PWM (DC+PWM) à 4 broches
A1 .
Cabo de Alimentação PCIe de 8 pinos
A2 .
Conector Interno USB 2.0
A3 .
8 pinos (Apenas PWM)
A4 .
8 pinos (DC+PWM)
A5 .
RGB 4 pinos NZXT
A6 .
PWM 4 pinos (DC+PWM)
A1 .
8-Pin-PCIe-Stromversorgung
A2 .
Interner USB-2.0-Anschluss
A3 .
8-Pin (nur PWM)
A4 .
8-Pin (DC und PWM)
A5 .
4-Pin-NZXT-RGB
A6 .
4-Pin-PWM (DC und PWM)
A1 .
Alimentazione PCIe a 8 pin
A2 .
Connettore USB 2.0 interno
A3 .
8 pin (solo PWM)
A4 .
8 pin (CC+PWM)
A5 .
NZXT RGB a 4 pin
A6 .
PWM a 4 pin (CC+PWM)
A1 .
8- PCIe 電源
A2 .
内部USB 2.0ター
A3 .
8- PWM のみ)
A4 .
8- DC+PWM
A5 .
4- NZXT RGB
A6 .
4- PWM DC+PWM
STE P 1
Ensure your PC is turned off. Connect the PCIe power cable from the controller to the PCIe power cable on the power supply.
Asegúrate de que el PC esté apagado. Conecta el cable de alimentacn PCIe del controlador al cable de alimentacn PCIe
en la fuente de alimentación.
Assurez-vous que votre PC est éteint. Connectez le câble d'alimentation PCIe du contleur au câble d'alimentation PCIe de
l'alimentation.
Stelle sicher, dass dein PC ausgeschaltet ist. Verbinde das PCIe-Stromkabel vom Controller mit dem PCIe-
Stromkabel am Netzteil.
Assicurati che il PC sia spento. Collega il cavo di alimentazione PCIe del controller al cavo di alimentazione PCIe
dell'alimentatore.
Certifica-te de que o PC está desligado. Conecta o cabo de energia PCIe do comando ao cabo de energia PCIe da fonte de
alimentão.
PC 꺼져 있는지 확인합니. 컨트롤러 PCIe 이블 PCIe 장치의 PCIe 이블 결합니다.
PC電源オフになてい確認ますPCIe源ケルをトロ電源のPCIe電源ケーブルに接続ます
确保你的电脑处于关机状态。连接控制器上的 电源线和电源上的 电源线。 PCIe PCIe
確認電腦已關閉。將 電源線從控制器連接到電源供應器上的 電源線。 PCIe PCIe
STE P 2
Connect the USB Cable to an available internal USB 2.0 port on the motherboard.
Conecta el cable USB a un puerto interno USB 2.libre de la placa base.
Connectez le ble USB à un port USB 2.0 interne disponible sur la carte re.
Verbinde das USB-Kabel mit einem freien internen USB-2.0-Port auf dem Motherboard.
Collega il cavo USB a una porta USB 2.0 interna disponibile sulla scheda madre.
Conecta o Cabo USB a uma porta interna USB 2.0 dispovel na motherboard.
USB 이블 더보드의 사용 가능한 내장 USB 2.0 포트에 결합니다.
USBブルをマザーボード上の空いている内部USB 2.0ポートに接続ます
线连接到主板上可用的内置 接口。 USB USB 2.0
線連接到主機板上可用的內部 端口。 USB USB 2.0
A
NZXT Control Hub
x1
D
4-pin PWM Fan splitter (1 to 3 split)
x1
C
NZXT RGB splitter (1 to 3 split)
x1
x1
B
NZXT 8-pin splitter
x2
E
3M Dual Lock
Connect 8-pin NZXT RGB fans directly to an available 8-pin port.
Note: Please connect case version RGB fans to Channel 4 which supports RPM control for DC fans.
Conecta los ventiladores NZXT RGB de 8 pines directamente a un puerto de 8 pines libre.
Nota: conecta los ventiladores RGB versión torre al canal 4 que soporta control de RPM para ventiladores de CC.
Connectez les ventilateurs NZXT RGB à 8 broches directement à un port 8 broches disponible.
Remarque : veuillez connecter les ventilateurs RGB de la version boîtier au canal 4 qui prend en charge le
contrôle du régime des ventilateurs à courant continu.
Verbinde die 8-Pin-NZXT-RGB-Lüfter direkt mit einem freien 8-Pin-Port.
Hinweis: Bitte verbinde Gehäuseversions-RGB-Lüfter mit Kanal 4, der die Drehzahlsteuerung für DC-Lüfter
unterstützt.
Collega le ventole RGB NZXT a 8 pin direttamente a una porta a 8 pin disponibile.
NB: collega le ventole RGB della versione case al canale 4, il quale supporta il controllo RPM per ventole DC.
Conecta as ventoinhas RGB NZXT de 8 pinos diretamente a uma porta de 8 pinos disponível
Nota: conecta as ventoinhas RGB da versão da caixa ao Canal 4 que suporta o controlo do RPM para
ventoinhas DC.
8 . NZXT RGB 팬을 사용 가능한 8 트에 직접 결합니다
참고: 케이스 버전 RGB 팬을 DC 팬의 RPM 제어를 지원하는 4번 채널에 연결하십시오.
8−ピンNZXTRGBンを空いてい8–ピンポートに直接接続ます
ケース型RGBンは、DCンのRPM制御をポール4に接続ださ
风扇直接连接到可用的 接口。 8-pin NZXT RGB 8-pin
注意:请将机箱 风扇连接到支持直流风扇转速控制的通道 RGB 4
風扇直接連接至可用的 端口。 8-pin NZXT RGB 8-pin
注意:請將機殼版本的 風扇連接至通道 ,此通道支援 風扇的 控制。 RGB 4 DC RPM
STE P 3
Use the included splitter(s) as needed to connect to fans and other RGB accessories.
Warning: Do not use more than one 1-to-3 splitter per channel.
Usa el divisor o divisores incluidos según sea necesario para conectar los ventiladores a otros accesorios RGB.
Advertencia: no uses más de entre 1 y 3 divisores por canal.
Utilisez le(s) répartiteur(s) fourni(s) selon vos besoins pour connecter les ventilateurs et autres accessoires RGB.
Attention : n'utilisez pas plus d'un répartiteur 1 à 3 par canal.
Verwende den/die beiliegenden Splitter nach Bedarf, um Lüfter und anderes RGB-Zubehör anzuschließen.
Warnung: Verwende nicht mehr als einen Dreifach-Splitter pro Kanal.
Utilizza gli splitter inclusi secondo necessità per effettuare il collegamento con ventole e altri accessori RGB.
Avvertenza: non utilizzare più di uno splitter con ripartizione da 1 a 3 per canale.
Usa o(s) splitter(s) incluído(s) conforme necessário para conectar às ventoinhas e outros acessórios RGB.
Aviso:o uses mais do que um splitter 1 para 3 por canal.
동봉 분배기를 요에 따라 다른 액세서리 연결합니 RGB .
경고: 1대3 분배기를 채널당 한 개 이상 사용하지 마십시오.
ンやその他のRGBセサ接続るには、必要に応じて付属のスプリター使用さい。
各チネルに1対3のーを1つ以上使用いで
根据需要使用附带的分线器连接风扇和其他 配件。 RGB
警告:每个通道不要使用超过一个 分线器。 1 3
根據需求使用隨附的分配器連接風扇和其他 配件。 RGB
警告:每個通道請勿使用超過一個 分配器。 1 3
Spl itt er( s) (Optio na l)
The Control Hub LED will flash twice continuously for 10 seconds and run the fans at 100% speed to
indicate when the USB cable is disconnected.
The Control HUB LED will blink continuously to indicate when the PCIe power cable is not connected.
El led del Control Hub parpareará continuamente dos veces durante 10 segundos y activará los ventiladores
al 100% de velocidad para indicar que el cable USB no está conectado.
El led del Control Hub parpadeará continuamente para indicar que el cable de alimentación PCIe no está
conectado.
La DEL du Control Hub clignote deux fois en continu pendant 10 secondes et fait tourner les ventilateurs à
100 % pour indiquer que le câble USB est déconnecté.
La DEL du Control Hub clignote en continu pour indiquer que le câble d'alimentation PCIe n'est pas
connecté.
Die Control-Hub-LED leuchtet zwei Mal durchgehend für 10 Sekunden auf und lässt die Lüfter mit 100 %
Geschwindigkeit laufen, um anzuzeigen, dass das USB-Kabel nicht angeschlossen ist.
Die Control-Hub-LED blinkt durchgehend, um anzuzeigen, dass das PCIe-Stromkabel nicht angeschlossen
ist.
Il LED del Control Hub lampeggerà due volte ininterrottamente per 10 secondi e farà funzionare le ventole al
100% della velocità per indicare che il cavo USB è scollegato.
Il LED del Control Hub lampeggerà ininterrottamente per indicare che il cavo di alimentazione PCIe non è
collegato.
O LED do Control Hub irá piscar duas vezes continuamente durante 10 segundos e as ventoinhas irão correr
na velocidade máxima para indicar que o cabo USB foi desconectado.
O LED do Control Hub irá piscar continuamente para indicar quando o cabo de alimentação PCIe não está
conectado.
이블이 분리된 경우, Control Hub LED가 10초 동속해씩 깜빡이이 100% 속도로 작
됩니다.
PCIe 전원 케이블결되어 있 않은 경우, Control HUB LED가 계속해서 깜빡입니다.
• USBーブルが切断れると、トロールハのLEDが10秒間連て2回点し、ンを100%の速度で作動さ
お知ます
• PCIe電源ケブルが接続されて場合ロールハのLEDが連点滅
Control Hub LED 10 100% USB 将连续闪烁两次,持续 秒,并以 的速度运行风扇,以指示 线断开。
PCIe Control Hub LED 电源线未连接时, 会连续闪烁。
USB Control Hub LED 100% 線斷開時, 燈將連續閃兩次,持續十秒,並以 的速度運行風扇以示提醒。
PCIe Control HUB LED 電源線未連接時, 燈將持續閃爍以示提醒。
Note
INSTALLATION
INSTALACIÓN
INSTALLATION
INSTALLIEREN
INSTALLAZIONE
INSTALAÇÃO
설치
付け
安装
安裝
HARDWARE INTRODUCTION
INTRODUCCIÓN DE HARDWARE
DESCRIPTION DU MATÉRIEL
VORSTELLUNG DER HARDWARE
PRESENTAZIONE DELL'HARDWARE
INTRODUÇÃO AO HARDWARE
하드웨어 설명
ハーアの概要
硬件介绍
硬體介紹
A1
A2
NZXT Control Hub
8-pin PCIe Power
Internal USB 2.0 Connector
A3
A3
A5
8-pin (PWM Only)
8-pin (PWM Only)
4-pin NZXT RGB
8-pin (DC+PWM)
8-pin (DC+PWM)
4-pin PWM (DC+PWM)
A6
A4
A4
S T E P 1- P OW E R S T E P 2 - MB
A1 A2
D
C
B
OŚWIADCZENIE ZGODNOŚCI
Urządzenie jest zgodne z wymaganiami określonymi w
odpowiednich unijnych Dyrektywach harmonizacyjnych
Rady:
Dyrektywa EMC 2014/30/UE
Dyrektywa RoHS 2011/65/UE i (UE) 2015/863
UYUM BEYANI
Aygıt, Konsey Yönergeleri ile ilgili Birlik uyum mevzuatında
belirtilen şartlara uygundur:
EMC Yönergesi 2014/30/EU
RoHS Yönergesi 2011/65/EU & (EU) 2015/863
OVERENSSTEMMELSESERKLÆRING
Enheden er i overensstemmelse med kravene i Rådets
direktiv, relevant til EU's lovgivning om harmonisering:
EMC-direktiv 2014/30/EU
RoHS-direktiv 2011/65/EU og (EU) 2015/863
VAATIMUSTENMUKAISUUSVAKUUTUS
Laite on Euroopan neuvoston direktiivien olennaisen unionin
harmonisointilainsäädännön vaatimusten mukainen:
EMC-direktiivi 2014/30/EU
RoHS-direktiivi 2011/65/EU & (EU) 2015/863
SAMSVARSERKLÆRING
Enheten overholder kravene i EU-rådets
harmoniseringsdirektiver:
EMC-direktiv 2014/30/EU
RoHS-direktiv 2011/65/EU & (EU) 2015/863
KONFORMITETSDEKLARATION
Enheten uppfyller kraven som anges i dets direktivs
relevanta harmoniseringslagstiftning r Europeiska
unionen:
EMC-direktivet 2014/30/EU
RoHS-direktiv 2011/65/EU & (EU) 2015/863
DECLARAŢIE DE CONFORMITATE
Dispozitivul respectă cerinţele menţionate în Directivele
Consiliului şi în legislaţia armonizată relevantă la nivelul Uniunii:
Directiva privind compatibilitatea electromagnetică
2014/30/UE
Directiva RoHS 2011/65/UE şi (UE) 2015/863
PROHLÁŠENÍ O SHODĚ
Zařízení odpovídá požadavkům stanovem ve sm rnicích Rady ě
podle příslušných harmonizačních právních předpisů Unie::
Směrnice o elektromagnetické kompatibilitě 2014/30/EU
Směrnice o RoHS 2011/65/EU a (EU) 2015/863
DECLARATION OF CONFORMITY
The device complies with the requirements set out in the
Council Directives relevant Union harmonisation legislation:
EMC Directive 2014/30/EU
RoHS Directive 2011/65/EU & (EU) 2015/863
DÉCLARATION DE CONFORMITÉ
L'appareil est conforme aux exigences définies dans
les directives du Conseil relatives à la législation
d'harmonisation de l'Union :
Directive EMC 2014/30/UE
Directive RoHS 2011/65/UE et (UE) 2015/863
DECLARACIÓN DE CONFORMIDAD
El dispositivo cumple los requisitos impuestos en
las directivas del Consejo relativas a la legislación de
armonización de la Unión Europea:
Directiva sobre compatibilidad electromagnética
2014/30/UE
Directiva sobre sustancias peligrosas 2011/65/UE y
(UE) 2015/863
DECLARAÇÃO DE CONFORMIDADE
O dispositivo está conforme aos requisitos das
Diretivas do Conselho e relevante legislação de
harmonização da União Europeia:
Diretiva EMC 2014/30/UE
Diretiva RoHS 2011/65/UE & (UE) 2015/863
DICHIARAZIONE DI CONFORMITÀ
Il dispositivo è conforme con i requisiti definiti
nelle Direttive del Consiglio relative alla Norma
sull'armonizzazione dell'Unione:
Direttiva EMC 2014/30/UE
Direttiva RoHS 2011/65/UE e (UE) 2015/863
KONFORMITÄTSERKLÄRUNG
Das Gerät entspricht den Anforderungen der
entsprechenden EU-Harmonisierungsrichtlinien des
Rates:
EMV-Richtlinie 2014/30/EU
RoHS-Richtlinie 2011/65/EU & (EU) 2015/863
ЗАЯВЛЕНИЕ О СООТВЕТСТВИИ
Это устройство отвечает требованиям изложенным, в
Директивах Совета о гармонизациисоответствующих законов
государств, входящих в составЕвропейского союза (EU):
Директива об электромагнитной 2014/30/EU
совместимости
Директива об 2011/65/EU (EU) 2015/863 и ограничении
использования определенных видов опасных веществ в
электрическом и электронномоборудовании (RoHS)
UKCA Declaration of Conformity
The object of the declaration described above is in conformity with the relevant UK harmonisation legislation:
Electromagnetic Compatibility Regulations 2016
Electrical Equipment (Safety) Regulations 2016
The Restriction of the Use of Certain Hazardous Substances in Electrical and Electronic Equipment Regulations2012
RoHS Statement
This product is compliant to implemented RoHS (Restriction of Hazardous Substances) type regulations worldwide,
including but not limited to China, India, Japan, Korea and European Union.
REACH statement
EU REACH SVHC Disclosure on Candidate List
REACH (Registration, Evaluation, Authorization and Restriction of Chemicals, EC 1907/2006) is the European
Union's (EU) chemical substances regulatory framework. REACH requires NZXT Inc. to provide customers with
sufficient information on Substances of Very High Concern (SVHC) contained in products in concentration above
0.1% weight by weight (w/w) to allow safe use of the product.
R E G U L ATO R Y STAT E M E N T
To enable control of the Control Hub, download and install NZXT CAM from nzxt.com/software/cam.
Para habilitar el control del Control Hub, descarga NZXT CAM de nzxt.com/software/cam e instálalo.
Pour permettre le contle du Control Hub, téléchargez et installez NZXT CAM à partir du site nzxt.com/
software/cam.
Lade NZXT CAM von nzxt.com/software/cam herunter und installiere es, um die Steuerung des Control Hubs zu
aktivieren.
Per abilitare il controllo del Control Hub, scarica e installa NZXT CAM da nzxt.com/software/cam.
Para ativar o controlo do Control Hub, descarrega e instala a NZXT CAM a partir de nzxt.com/software/cam.
Control Hub (nzxt.com/software/cam) NZXT CAM .제어를 활성화하려면, 웹사이트 에서 다운로드하여 설치하십시오
トロールハブの制を有効にすには、nzxt.com/software/cam NZXT CAMい。
为了控制 下载并安装 Control Hub NZXT CAM nzxt.com/software/cam地址是
要啟用 的控制請從 Control Hub nzxt.com/software/cam NZXT CAM下載並安裝
SOFTWARE SETUP
> Visit nzxt.com/warranty support.nzxt.com and for information on warranty coverage and
service.
> Visite el sitio Web nzxt.com/warranty support.nzxt .com y para obtener información sobre la
cobertura y el servicio de la garantía.
> Visitez nzxt.com/warranty support.nzxt.com et pour les informations de la couverture de la
garantie et du service.
> Informationen zu Geltungsbereich und Service der Garantie finden Sie unter support .nzxt.com
und nzxt.com/warranty.
> Visitare il sito nzxt.com/warranty support .nzxt.com e per informazioni sulla copertura e sul
servizio della garanzia.
> Visite nzxt.com/warranty support.nzxt.com e para obter informações sobre a cobertura da
garantia e assistência.
> 제품 보증 범위와 서비스 정보를 확인하시려면 nzxt.com/warranty support.nzxt .com
.
>
およービに関するいては、support.nzxt.com nzxt.com/warranty クセスし
> 访nzxt.com/warranty support .nzxt.com
> 請訪問 nzxt.com/warranty support .nzxt.com
产品名称:控制器,型號(型式):AC-2301
Unit
(Pb)
Lead
(Hg)
Mercury
(Cd)
Cadmium
六价(Cr
+6
)
Hexavalent
chromium
(PBB)
Polybrominated
biphenyls
(PBDE)
Polybrominated
diphenyl ethers
本表格依据 的规定编制。SJ/T 11364
表示该有害物质在该件所有均质材料中的含均在 规定的限量要求下。 : GB/T 26572
: 表示该有害物质至少在该件的某一均质材料中的含超出 规定的 限量要求 然该件仍符合欧盟命 GB/T 26572 ,
的规范。 2011/65/EU
说明电路板单板 路模块上电子元器件的或玻璃中/
備考 超出1. 0.1 wt % 0.01 wt %〞及〝超 〞係物質之百分比超出百分比含基準值。
備考 ○〞係指項限物質之百分比未超出百分比含基準值。2.
備考 〞係指該項限用物質為除項3.
/
NZX T, I nc. | NZ XT, I nc. | 605 E Hun tingt on Dr ive, Suite 2 13, Monr ovia , CA 91016 USA
NZX T Eu rope Gmb H | A mmert halst rasse 32 K irchh eim b ei Muen chen 855 51, Germa ny
NZX T UK Ltd . F irst Floor 5 Fl eet P lace Lo ndon EC4 M 7R D, GB Unit ed Ki ngdom|
+1 (800 ) 22 8-93 95 / / ser vice @nzx t.co m nzx t.co m
設備名稱 : : AC-2301
Unit
(Pb)
Lead
(Hg)
Mercury
(Cd)
Cadmium
六價(Cr
+6
)
Hexavalent
chromium
(PBB)
Polybrominated
biphenyls
(PBDE)
Polybrominated
diphenyl ethers
NZXT GLOBAL WARRANTY POLICY
This NZXT Global Warranty Policy governs the sale of products by NZXT to you.
Any replacement product will be covered under warranty for the remainder of the warranty period or thirty
days, whichever is longer. Proof of purchase is required for warranty service.
I. WARRANTY LENGTH
Refurbished NZXT Product
Warranty Length for Parts
NZXT Controller
2 Years
II. WHO IS PROTECTED
The Warranty covers only NZXT products purchased by the original consumer.
III. WHAT IS AND IS NOT COVERED
Please note that our warranty is not an unconditional guarantee. If the product, in NZXT's reasonable
opinion, malfunctions within the warranty period, NZXT will provide you at its sole discretion with a
repaired or replacement product, either new or refurbished, with a similar function that is equal or
greater in value depending on supply. Our warranty does not cover the following:
any product or serial number/warranty sticker modification applied without permission from NZXT;
any damage that is not a manufacturing defect;
damage, deterioration or malfunction resulting from: accident, abuse, misuse, neglect, fire, water, lightning,
or other acts of nature, unauthorized product modification or failure to follow instructions included with the
product;
improper installation, unauthorized alterations or modifications, or repair or attempted repair by anyone not
authorized by NZXT;
shipping or transport damage (claims must be made with the carrier);
normal wear and tear.
NZXT does not warrant that this product will meet your requirements. It is your responsibility to
determine the suitability of this product for your purpose. For NZXT Store orders, we cover two way
return shipping for all exchanges and returns. For all other authorized dealers, NZXT Support does
not cover return shipping and only covers one way shipping from NZXT back to the end user for
exchanges. Two way expedited shipping is provided for all PSUs covered under the Less Than Three
program, indiscriminate of purchase location, provided the location is an approved NZXT reseller.
C O M PAT I B I L I T Y W A R N I N G
COMPATIBILITY WARNING
AVERTISSEMENT DE COMPATIBILITÉ
KOMPATIBILITÄTSWARNUNG
AVVERTENZA SULLA COMPATIBILITÀ
AVISO DE COMPATIBILIDADE
호환성 경고
互換性に関す警告
兼容性警告
相容性警告
The NZXT Control Hub is compatible with all NZXT RGB fans and lighting products. NZXT RGB channel
supports a maximum of 40 LEDs. The 8-pin port(s) supports up to a total of 96 LEDs per channel.
Please note to use the channels that support DC voltage fan control when connecting a 3-pin fan.
Different types of lighting accessories (i.e., F-series RGB Fans, Aer RGB Fans, LED strip, etc.) cannot be
mixed within a channel.
El NZXT Control Hub es compatible con todos los ventiladores y productos de iluminación NZXT RGB. El canal
NZXT RGB admite un máximo de 40 leds. El puerto o puertos de 8 pines admite hasta un total de 96 leds por
canal.
Ten en cuenta usar los canales que admitan control de CC de ventilador al conectar ventiladores de 3 pines.
No se pueden mezclar distintos productos de iluminación (como ventiladores F-series RGB Fans,
ventiladores Aer RGB, tiras led, etc.) en el mismo canal.
Le NZXT Control Hub est compatible avec tous les ventilateurs et produits d'éclairage NZXT RGB. Le canal
NZXT RGB prend en charge un maximum de 40 DEL. Le(s) port(s) à 8 broches prend (prennent) en charge
jusqu'à un total de 96 DEL par canal.
Veuillez noter qu'il faut utiliser les canaux qui supportent le contrôle des ventilateurs à tension continue
lorsque vous connectez un ventilateur à 3 broches.
Différents types d'accessoires d'éclairage (ventilateurs RVB de la série F, ventilateurs RVB Aer, bande DEL,
etc.) ne peuvent pas être mélangés au sein d'un canal.
Der NZXT Control Hub ist mit allen NZXT-RGB-Lüftern und -Beleuchtungsprodukten kompatibel. Der NZXT-
RGB-Kanal unterstützt maximal 40 LEDs. Der/die 8-Pin-Port(s) unterstützt bis zu insgesamt 96 LEDs pro
Kanal.
Bitte verwende beim Anschließen eines 3-Pin-Lüfters die Kanäle, die die DC-Lüfter-Steuerung unterstützen.
Unterschiedliche Arten von Beleuchtungszubehör (d. h. RGB-Lüfter der F-Serie, Aer-RGB-Lüfter, LED-
Streifen usw.) können nicht innerhalb eines Kanals gemischt werden.
Il Control Hub NZXT è compatibile con tutte le ventole e i prodotti di illuminazione RGB NZXT. Il canale RGB NZXT
supporta un massimo di 40 LED. La porta a 8 pin supporta fino a un totale di 96 LED per canale.
Quando si collega una ventola a 3 pin, utilizzare i canali che supportano il controllo di ventole con tensione CC.
Non è possibile combinare diversi tipi di accessori di illuminazione (ad esempio ventole RGB serie F, ventole Aer RGB,
strisce LED, ecc.) all'interno di un canale.
O NZXT Control Hub é compatível com todas as ventoinhas e produtos de iluminação RGB da NZXT. O canal
RGB da NZXT suporta no máximo 40 LEDs. A(s) porta(s) de 8 pinos suporta(m) até 96 LEds por canal
Tem em atenção que usas os canais que suportam o controlo de ventoinha de tensão DC ao conectar a
ventoinha de 3 pinos.
Não é possível misturar diferentes tipos de acessórios de iluminação (por exemplo, Ventoinhas RGB F-series,
Ventoinhas RGB Aer, fita LED, etc) no mesmo canal.
NZXT Control Hub NZXT RGB 조명 제품과 됩니. NZXT RGB 채널은 최대 40개의 LED 지원합
니다 포트는 채널당 최대 개의 지원합니다. 8 96 LED .
3 , DC 제어 채널을 사용 바랍.
하나의 채널 내에서 여러 종류의 조명 액세서리를 혼합하여 사용할 없습니다 시리즈 (: F RGB , Aer RGB ,
LED ).스트립
NZXTコントロルハブは、NZXT RGB ァンおよ照明の全てと互換があす。NZXT RGB ンネルは最
40 LED個の をサポします8ンポートは、ネルあたり合計96 LED をサポーします。
3ピンフ接続する場合DC電圧ン制サポるチャルを使るようご注
なる照明サリFRGBAer RGB ン、LEDプなど)チャル内在させ
るこきません
NZXT Control Hub NZXT RGB NZXT RGB 40 LED容所 产品 通道 8-pin
96 LED
3-pin 注意使持直扇控制的
LED 同类 F RGB Aer RGB 灯带等
NZXT Control Hub NZXT RGB NZXT RGB 40 LED 8-pin 相容於所有 扇和燈光產品。 通道最多可支援 燈。 端口
每個通道最多可支援共 燈。 96 LED
3-pin DC 扇時請注意使用支援 扇控制的通道
RGB Aer RGB LED 不同型的燈光例如 F 系列的 扇、 扇、 燈條等不可在同一個通道內混合使用。
C O N T R O LL E R M O U N T I N G
MONTAJE DE CONTROLADOR
MONTAGE DU CONTRÔLEUR
CONTROLLERANBRINGUNG
MONTAGGIO DEL CONTROLLER
MONTAGEM DO CONTROLADOR
컨트롤러 장착
ローラーの付け
控制器底座
控制器安裝
Magnets 3M Dual Lock M3 Screws
The controller has built-in magnets on the rear side. Place this side close to a magnetic surface to attach it.
El controlador tiene imanes incorporados en el lateral. Coloca ese lateral en una superficie magnética para que se pegue.
Le contrôleur est équipé d'aimants intégrés à l'arrière. Placez ce té près d'une surface magnétique pour le fixer.
Der Controller verfügt über integrierte Magneten an der Rückseite. Führe zur Anbringung diese Seite dicht an eine
magnetische Oberfläche.
Il controller è dotato di magneti integrati sul lato posteriore. Posiziona questo lato vicino a una superficie
magnetica per fissarlo.
O controlador tem ímanes embutidos na traseira. Aproxima este lado de uma supercie magtica para o afixar.
컨트롤러 뒷면에 자석이 내장되어 있습니다 뒷면을 자성이 있는 표면에 가까이 대면 부착됩니다 . .
トローラー裏面にはマグネトが内蔵されていますの面を磁石面に近づけて付けださい。
控制器背有内置磁。将面靠近磁性表面进行吸
控制器背有內置磁。將面靠近磁性表即可裝上。
Remove the backing from one side of the Dual Lock tape and apply to the rear side of the controller. Remove the
backing from the other side, and press the controller to the surface you are mounting it to. The Velcro tape is
intended for a one-time application. Removing and reapplying it is not recommended.
Retira la cubierta de un lado de la cinta Dual Lock y apcala al lateral del controlador. Retira la cubierta de la otra cara y
presiona el controlador contra la superficie de montaje. La cinta de velcro está diseñada para aplicarla una única vez, no se
recomienda quitarla y reaplicarla.
Retirez le support d'un côté du ruban Dual Lock et appliquez-le sur la face arrière du contrôleur. Retirez le support de l'autre
côté et appuyez le contrôleur sur la surface sur laquelle vous le fixez. La bande Velcro est destinée à une application unique. Il
n'est pas recommandé de l'enlever et de la réappliquer.
Entferne die Folie von einer Seite des Dual-Lock-Bands und bringe es an der Rückseite des Controllers an. Entferne
die Folie von der anderen Seite und drücke den Controller gegen die Oberfläche, auf der du ihn befestigst. Das
Klettband ist für die einmalige Anbringung vorgesehen. Das Entfernen und erneute Anbringen wird nicht empfohlen.
Rimuovi la protezione da un lato del nastro Dual Lock e applica quest'ultimo sul lato posteriore del controller. Rimuovi
la protezione dall'altro lato e premi il controller sulla superficie su cui desideri fissarlo. Il nastro in velcro è destinato a
un singolo utilizzo; non è consigliabile rimuoverlo e riapplicarlo.
Remove a película de um dos lados da fita Dual Lock e aplica-a na traseira do controlador. Remove a película do outro lado
e pressiona o controlador contra a supercie onde o ess a montar. A fita de Velcro deve ser aplicada uma vez. o é
recomendado que a removas e apliques novamente.
Dual Lock 테이프 한쪽의 뒤판을 제거하고 컨트롤러 뒷면에 부착합니. 테이프 다른 쪽의 뒤판을 제거한 , 트롤러를
장착하려 표면 바짝 눌러 착합니다 해당 크로 이프 회용이므 떼었다가 착하 것은 장하 . ,
습니다.
アルクテプの片面の台紙を剥がし、トローラー裏面に貼付けま反対側の台紙を剥がコンローーを取付け
る面に押し付けますベルクロテープは、
1回限の貼付けを想定ていま剥がて貼直すのはお勧めせん。
胶带的一侧撕下离膜并粘在控制器的背。从另一边撕下离膜将控制器粘到安装控制器的表 Dual Lock
术贴是一次性的。不建议撕下再新粘贴。
撕下 雙面膠其中一的保護膜並將其貼到控制器的背。撕下另一的保護膜然後將控制器按壓到要 Dual Lock
安裝的表上。魔鬼氈膠帶僅用於一次性使用。撕下後不建議再次貼使用。
Two screw holes are available to install the Control Hub onto any 2.5"" tray. Please check for header and
connector clearance and compatibility and use the M3 from your PC case accessory box.
Hay dos agujeros de tornillo disponibles para instalar el Control Hub en cualquier bandeja de 2.5. Comprueba el espacio
libre y la compatibilidad de los conectores y utiliza los tornillos M3 de los accesorios de la caja del PC.
Deux trous de vis sont disponibles pour installer le Control Hub sur n'importe quel plateau de 2,5 pouces. Veuillez vérifier
l'espacement et la compatibilité de l'en-te et du connecteur et utilisez la vis M3 de la boîte d'accessoires de votre boîtier PC.
Zwei Schraubenlöcher stehen zur Verfügung, um den Control Hub auf jedem 2,5-Zoll-Träger zu installieren. Bitte
überprüfe Abstand und Kompatibilität von Header und Anschluss und verwende die M3-Schrauben aus deiner PC-
Gehäuse-Zubehörbox.
Sono disponibili due fori per viti per installare il Control Hub su qualsiasi vassoio da 2,5 pollici. Verifica lo spazio
disonibile e la compatibilità dell'header e del connettore e utilizza viti M3 prese dalla cassetta degli accessori del
case del PC.
Estão disponíveis dois buracos para parafusos para instalar o controlador num tabuleiro de 2.5"". Confirma o espaçamento e
compatibilidade do conector e usa o M3 da cxa de acesrios do teu PC.
모든 인치 트레이에는 설치할 있는 개의 나사 구멍이 있습니다 헤더와 커넥터의 간격 호환성을 2.5 Control Hub .
인한 케이스 액세서리 상자에 있는 나사를 사용하십시오 , PC M3 .
ロールハブを チのレイに取付けるためのネジ穴が2.5 2つあヘッダーネクーの間隔互換性を確認お客
様のPCスのアーボッスにあM3をお使いください。
两个螺丝孔可用于将 安装到任何 托盘上。请检查头接器的间隙和兼容性并使用 机箱 Control Hub 2.5 '''' PC
件盒的 螺丝。 M3
Control Hub 2.5 有兩個螺絲孔可用於安裝在任何 磁碟托盤上。請檢查腳座和接器間隙和相容性並使用腦機
件盒中的 螺絲。 M3
To protect the global environment and as an environmentalist, NZXT must remind you that:
Under the European Union ("EU") Directive on Waste Electrical and Electronic Equipment,
Directive 2002/96/EC, which takes effect on August 13, 2005, products of "electrical and electronic equipment"
cannot be discarded as municipal waste anymore and manufacturers of covered electronic equipment will be
obligated to take back such products at the end of their useful life. NZXT will comply with the product take back
requirements at the end of life of NZXT-branded products that are sold into the EU. You can return these products
to local collection points.
En tant qu'écologiste et afin de protéger l'environnement, NZXT tient à rappeler ceci:
Au sujet de la directive européenne (EU) relative aux déchets des équipement électriques et électroniques,
directive 2002/96/EC, prenant effet le 13 août 2005, que les produits électriques et électroniques ne peuvent être
déposés dans les décharges ou tout simple-ment mis à la poubelle. Les fabricants de ces équipements seront
obligés de récupérer certains produits en fin de vie. NZXT prendra en compte cette exigence relative au retour des
produits en fin de vie au sein de la communauté européenne. Par conséquent vous
pouvez retourner localement ces matériels dans les points de collecte.
FCC, ISED Statement
This device complies with Part 15 of the FCC Rules. Operation is subject to the following two conditions: (1) This
device may not cause harmful interference, and (2) this device must accept any interference received, including
interference that may cause undesired operation.
CAN ICES-003(B) / NMB-003(B)
VERKLARING VAN OVEREENSTEMMING
Het apparaat voldoet aan de vereisten van de relevante richtlijnen van de Raad met betrekking tot
harmonisatiewetgeving in de Unie:
EMC-richtlijn 2014/30/EU
RoHS-richtlijn 2011/65/EU & (EU) 2015/863
MEGFELEL SÉGI NYILATKOZATŐ
Az eszköz megfelel a Tanács irányelvek releváns uniós harmonizálási rendelkezései által felállított ő
követelményeknek:
2014/30/EU EMC-irányelv
2011/65/EU és (EU) 2015/863 RoHS-irányelv
ДЕКЛАРАЦИЯ СЪОТВЕТСТВИЕ ЗА
Устройството отговаря на изискванията на уместното законодателство на Съюза за хармонизация на директивите
на Съвета :
EMC 2014/30/Eдиректива С
RoHS 2011/65/ & ( ) 2015/863директива ЕС ЕС
DEKLARACIJA O USKLAĐENOSTI
Ovaj ure aj sukladan je s odredbama postavljenim u direktivama Vije a vezanim uz relevantne harmonizacijske đ ć
zakone Unije:
EMC Direktiva 2014/30/EU
RoHS Direktiva 2011/65/EU & (EU) 2015/863
ΔΗΛΩΣΗ ΣΥΜΜΟΡΦΩΣΗΣ
Η συσκευή συ ορφώνεται ε τις α αιτήσεις ου καθορίζονται στις Οδηγίες αϊκού βουλίου σχετίζονται μμ μ π π του Ευρωπ Συμ και
μ μ π μ :ε τη νο οθεσία ερί εναρ όνισης της Ένωσης
Οδηγία ΗΜΣ ΕΕ περί 2014/30/
Οδηγία ΕΕ ΕΕ περί RoHS 2011/65/ & ( ) 2015/863
E
A
Scan the QR code or visit
manuals.nzxt.com/control-hub
to view or download the latest
manual.
English
Français
Español
Italiano
Português
Deutsch
Polski
Svenska
Dansk
Suomi
Norsk
Türkçe
Pyccкий
Ελληνικά
Български
Hrvatski
Magyar
Nederlands
Čeština
Română
P05-0000028-V2


Produkt Specifikationer

Mærke: NZXT
Kategori: Joystick
Model: Control Hub

Har du brug for hjælp?

Hvis du har brug for hjælp til NZXT Control Hub stil et spørgsmål nedenfor, og andre brugere vil svare dig