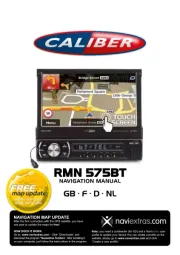
Pioneer DVH-340UB Manual

Pioneer Bilradio DVH-340UB

Læs gratis den danske manual til Pioneer DVH-340UB (40 sider) i kategorien Bilradio. Denne vejledning er vurderet som hjælpsom af 30 personer og har en gennemsnitlig bedømmelse på 4.8 stjerner ud af 15.5 anmeldelser. Har du et spørgsmål om Pioneer DVH-340UB, eller vil du spørge andre brugere om produktet?

Side 1/40
Installation Manual
Manuel d installation
Manuale d installazione
Manual de instalación
Installationsanleitung
Installatiehandleiding
DVD RDS RECEIVER
AUTORADIO DVD RDS
SINTO LETTORE DVD CON RDS
RADIO RDS CON DVD
DVD-RDS-EMPFÄNGER
DVD RDS-ONTVANGER
DVH-340UB
English NederlandsDeutschEspañolItalianoFrançais
WARNING
!To avoid the risk of accident and the potential
violation of applicable laws, no viewing of
front seat video should ever occur while the
vehicle is being driven. Also, rear displays
should not be in a location where they are
visibly distracting to the driver.
!In some countries or states the viewing of im-
ages on a display inside a vehicle even by
persons other than the driver may be illegal.
Where such regulations apply, they must be
obeyed and this unit s DVD features should
not be used.
CAUTION
!PIONEER does not recommend that you in-
stall or service your display unit yourself. In-
stalling or servicing the product may expose
you to risk of electric shock or other hazards.
Refer all installation and servicing of your
display unit to authorized Pioneer service
personnel.
!Secure all wiring with cable clamps or elec-
trical tape. Do not allow any bare wiring to re-
main exposed.
!Do not drill a hole into the engine compart-
ment to connect the yellow cable of the dis-
play unit to the vehicle battery. Engine
vibration may eventually cause the insulation
to fail at the point where the wire passes
from the passenger compartment into the
engine compartment. Take extra care in se-
curing the wire at this point.
!It is extremely dangerous to allow the display
lead to become wound around the steering
column or shift lever. Be sure to install the
display in such a way that it will not obstruct
driving.
!Make sure that wires will not interfere with
moving parts of the vehicle, such as the shift
lever, parking brake or seat sliding mecha-
nism.
!Do not shorten any cables. If you do, the pro-
tection circuit may fail to work properly.
Important
!When installing this unit in a vehicle without
an ACC (accessory) position on the ignition
switch, failure to connect the red cable to the
terminal that detects operation of the ignition
key may result in battery drain.
O
N
S
T
A
R
T
O
F
F
ACC position No ACC position
!Use of this unit in conditions other than the
following could result in fire or malfunction.
Vehicles with a 12-volt battery and negative
grounding.
Speakers with 50 W (output value) and 4 Wto
8W(impedance value).
!To prevent a short-circuit, overheating or mal-
function, be sure to follow the directions
below.
Disconnect the negative terminal of the bat-
tery before installation.
Secure the wiring with cable clamps or adhe-
sive tape. Wrap adhesive tape around wiring
that comes into contact with metal parts to
protect the wiring.
Place all cables away from moving parts,
such as the shift lever and seat rails.
Place all cables away from hot places, such
as near the heater outlet.
Do not connect the yellow cable to the battery
by passing it through the hole to the engine
compartment.
Cover any disconnected cable connectors
with insulating tape.
Do not shorten any cables.
Never cut the insulation of the power cable of
this unit in order to share the power with
other devices. The current capacity of the
cable is limited.
Use a fuse of the rating prescribed.
Never wire the negative speaker cable directly
to ground.
Never band together negative cables of multi-
ple speakers.
!When this unit is on, control signals are sent
through the blue/white cable. Connect this
cable to the system remote control of an ex-
ternal power amp or the vehicle s auto-anten-
na relay control terminal (max. 300 mA
12 V DC). If the vehicle is equipped with a
glass antenna, connect it to the antenna
booster power supply terminal.
!Never connect the blue/white cable to the
power terminal of an external power amp.
Also, never connect it to the power terminal
of the auto antenna. Doing so may result in
battery drain or a malfunction.
!The black cable is ground. Ground cables for
this unit and other equipment (especially,
high-current products such as power amps)
must be wired separately. If they are not, an
accidental detachment may result in a fire or
malfunction.
Connections
2
Section
Connections
En
01


Produkt Specifikationer

Mærke: Pioneer
Kategori: Bilradio
Model: DVH-340UB
Produktfarve: Sort
Indbygget skærm: Ja
Skærmtype: LCD
Bluetooth: Ingen
USB-port: Ja
FM radio: Ja
Understøttede videoformater: DIVX, MP4, MPEG1, MPEG2
Understøttede lydformater: AAC, MP3, WAV, WMA
Linie-udgang (RCA): 2
Understøttede billedformater: JPG
Lyd-output kanaler: 4.0 kanaler
Understøttede disktyper: CD, CD-R, CD-RW, DVD, DVD-R, DVD-RW
USB version: 2.0
Maksimal effekt pr. kanal: 50 W
Antal USB-porte: 1
AUX-indgang: Ja
Understøttede radiobånd: AM, FM
MP3-afspilning: Ja
Direkte USB-afspilning: Ja
CD-R-afspilning: Ja
CD-RW-afspilning: Ja
Lydsystem: MOSFET
Afspilning af diskformater: CD audio, CD video, VCD
Belysningsfarve: Hvid
Antal forudindstillede stationer: 18
CD-tekst: Ja
CD-afspiller: Ja
Vigtig belysningsfarve: Rød
DVD-afspiller: Ja
Afspilning af DVD-lyd: Ja
DVD-videoafspilning: Ja
Forudindstillet udgående port: Ja

Har du brug for hjælp?

Hvis du har brug for hjælp til Pioneer DVH-340UB stil et spørgsmål nedenfor, og andre brugere vil svare dig