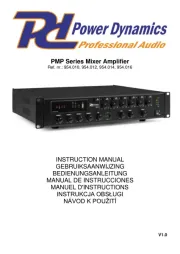
Power Dynamics PMP360 Manual


Læs nedenfor 📖 manual på dansk for Power Dynamics PMP360 (26 sider) i kategorien Ikke kategoriseret. Denne guide var nyttig for 42 personer og blev bedømt med 4.5 stjerner i gennemsnit af 2 brugere

Side 1/26
PMP Series Mixer Amplier
Ref. nr.: 954.010, 954.012, 954.014, 954.016
INSTRUCTION MANUAL
GEBRUIKSAANWIJZING
BEDIENUNGSANLEITUNG
MANUAL DE INSTRUCCIONES
MANUEL D'INSTRUCTIONS
INSTRUKCJA OBSŁUGI
NÁVOD K POUŽI
V1.0
2
3
ENGLISH
Congratulations to the purchase of this Power Dynamics product. Please read this manual thoroughly prior to using the unit in
order to benet fully from all features.
Read the manual prior to using the unit. Follow the instructions in order not to invalidate the warranty. Take all precautions to
avoid re and/or electrical shock. Repairs must only be carried out by a qualied technician in order to avoid electrical shock.
Keep the manual for future reference.
- Prior to using the unit, please ask advice from a
specialist. When the unit is switched on for the rst time,
some smell may occur. This is normal and will disappear
after a while.
- The unit contains voltage carrying parts. Therefore, do
NOT open the housing.
- Do not place metal objects or pour liquids into the unit
This may cause electrical shock and malfunctio n.
- Do not place the unit near heat sources such as
radiators, etc. Do not place the unit on a vibrating
surface. Do not cover the ventilation holes.
- The unit is not suitable for continuous use.
- careful with the mains lead and do not damage it. A Be
faulty or damaged mains lead can cause electrical shock
and malfunction.
- When unplugging the unit from a mains outlet, always
pull the plug, never the lead.
- Do not plug or unplug the unit with wet hands.
- If the plug and/or the mains lead are damaged, they
need to be replaced by a qualied technician.
- If the unit is damaged to such an extent that internal
parts are visible, do NOT plug the unit into a mains outlet
and DO NOT switch the unit on. Contact your dealer. Do
NOT connect the unit to a rheostat or dimmer.
- To avoid re and shock hazard, do not expose the unit to
rain and moisture.
- All repairs should be carried out by a qualied technician
only.
- Connect the unit to an earthed mains outlet (220-
240 16Vac/50Hz) protected by a 10- A fuse.
- During a thunderstorm or if the unit will not be used for a
longer period of time, unplug it from the mains. The rule
is: Unplug it from the mains when not in use.
- If the unit has not been used for a longer period of time,
condensation may occur. Let the unit reach room
temperature before you switch it on.
- For use in humid rooms or outdoors: refer to the
installation guidelines for safe assembly.
- To prevent accidents in companies, you must follow the
applicable guidelines and follow the instruction s.
- Do not repeatedly switch the xture on and o. This
shortens the lifetime.
- Keep the unit out of the reach of children. Do not leave
the unit unattended.
- Do not use cleaning sprays to clean switches. The
residues of these sprays cause deposits of dust and
grease. In case of malfunction, always seek advice from
a specialist.
- Do not force the controls.
- This unit is with speaker inside which can cause
magnetic eld. Keep this unit at least 60cm away from
computer or TV.
- is produc has a built-in lead-acid rechargeablIf th t e
battery: Please recharge the battery every 3 months if
you are not going to use the product for a long period of
time. Otherwise, the battery may be permanently
damaged.
- If the battery is damaged, please replace with same
specications battery. And dispose the damaged battery
environment friendly.
- If the unit has fallen, always have it checked by a
qualied technician before you switch the unit on again.
- Do not use chemicals to clean the unit. They damage the
varnish. Only clean the unit with a dry clot h.
- ep away from electronic equipment that may cause Ke
interference.
- Only use original spares for repairs, otherwise serious
damage and/or dangerous radiation may occur.
- Switch the unit o prior to unplugging it from the mains
and/or other equipment. Unplug all leads and cables
prior to moving the unit.
- Make sure that the mains lead cannot be damaged when
people walk on it. Check the mains lead before every use
for damages and faults!
- The mains voltage is 220-240Vac/50Hz. Check if power
outlet match. If you travel, make sure that the mains
voltage of the country is suitable for this unit.
- Keep the original packing material so that you can
transport the unit in safe conditions.
This mark attracts the attention of the user to high voltages that are present inside the housing and that are of sucient
magnitude to cause a shock hazard.
This mark attracts the attention of the user to important instructions that are contained in the manual and that he should
read and adhere to.
The unit has been certied CE is prohibited to make any changes to the unit. They would invalidate the CE certicate and . It
their guarantee!
NOTE: To make sure that the unit will function normally, it must be used in rooms with a temperature between 5°C/ °F 41 and
35 95°C/ °F .
Electric products must not be put into household waste. Please bring them to a recycling centre. Ask your local
authorities or your dealer about the way to proceed. The specications are typical. The actual values can s ghtly li
change from one unit to the other. Specications can changed without prior noticebe .
Do not attempt to make any repairs y self. This our would invalid yo war . Do not make any changes to the unit. This would also invalid ur ranty
your warranty. The warranty is not app ble in case of accidents or damages caused by inappropriate use or disrespect of the warnings lica
contained in this manual. Pow Dynamics canno be held responsible for personal injuries caused by a disrespect of the safety er t
recommendations and warnings. This is also applicable to all damages in whatever form.
4
UNPACKING INSTRUCTION
CAUTION! Carefully unpack the box on receipt. Check the contents to ensure that all parts are present and have been up
received in good condition. Notify the shipper immediately and retain packaging material if any parts appear damaged from
shipping or the package itself shows signs of mis dling. Save the package and all packaging materials. If the product must han be
returned, it is important that the product is returned in the original factory box and packaging. If the device has been exposed to
drastic temperature uctuation (e.g. after transportation), do not switch it on immediately. The arising condensation water might
damage your device. Leave the device switched o until it has reached room temperature.
POWERSUPPLY
The label on the back/under side of the product indicates the mains ltage to which it must be connected. Check that the mains vo
voltage corresponds to this. Any other voltage than the one indicated may cause irreparable damage to the unit. The unit must
also be connected directly to the mains voltage and no dimmer or adjustable power supply may be used.
Always connect the device to a protected circuit (circuit breaker or fuse). Make sure the device has an appropriate
electrical ground to avoid the risk of electrocution or re.
FRONT PANEL
1. ZONE SELECT
Press to (de)select separate zones, or press ALL ZONES to (de)select all zones at once.
2. ZONE VOLUME
Rotate to adjust the volume level per zone.
3. STATUS INDICATORS
LED status indicators (power, level, protect).
4. CHANNEL VOLU ME
Rotate to adjust the volume level per channe l.
5. AUX CONTROLS
Press the button to select AUX and media (M) sources. Rotat the knob to adjust th AUX/MEDIA volume level. (A or B) e e
6. BASS
Rotate to adjust the bass level.
7. TREBLE
Rotate to adjust the treble level.
8. MASTER VOLUME
Rotate to adjust the master (main) volume.
9. POWER ON/OFF
Press to turn the device on/o.
MEDIA PLAYER FRONT
A. US STAT /MODE INDICATORS
LED status and source (mode) indicators (power, W i/USB BT, AUX iF , ).
B. MODE
Press to change operating modes.
C. PLAY/PAUSE
Press to start/resume or pause playback.
D. PREVIOUS
Press to change to previous track.
E. XT NE
Press to skip to next tra ck.
F. AUX INP UT
3.5mm input jack for auxiliary input.
G. USB
USB input socket.
MEDIA PLAYER REAR
H. OUTPUT
Stereo line output connector block.
I. LAN
RJ45 input connector for cabled intern radio function. et
J. WIFI ANTENNA
Connector for installing a WiFi antenna.
K. BT ANTENNA
Connector for installing antenna.a BT
5
REAR PANEL
1. AC IN AND FUSE HOLDER
Socket for plugging in the supplied power cord. For instructions on how to change the fuse, see “REPLACING THE FUSE”.
2. SPEAKER OUTP UT
Speaker tput terminal for connecting speak s (individual zones (100V) d 100V, 70V, 4 Ohm). ou er an
3. EMERGENCY MESSAGE
Terminal to enable the recording or playback of an emergency message.
4. EXTERNAL EVACUATION
Terminal to enable an external evacuation message, with options of muting and bypassing individual zones.
5. CHIME
Chime enable switches and level knob. If a chime on channel 2 is desired set the channel 2 dip switch to enable dip , “ ”
position. Adjust the chime level by rotating the knob.
6. VOX
V enable dip switches and level VOX (voice-operated exchange) provides the option to enable a channel when OX knob.
voice input (above a certain threshold) is detected. Set the dip switch(es) to enable position to make use of this function.“ ”
7. LINK- AND REC OUTPUT
RCA connectors for link- rec output. and
8. AUX INPUT
RCA connectors for AUX A- and B inp (left and right). ut
9. REMOTE MIC
Remote microphone input connect (RJ45). or
10. CHANNEL INPUT AND INPUT SELECTORS
Balanced line/mic input for channel input 1-4, including pre-announcement chime possibility.
The inputs are equipped th line, phantom power and microphone setting switches. wi
Phantom power: set the input switch to PH to supply +48V phantom power to accommodate the use of a condenser DC
microphone.
REPLACING THE FUSE
If the fuse is defe ive, replace the fuse with a fu the same typ value. fore replacing the fuse, unplug mains lead. ct se of e and Be
Procedure:
Step 1: Open the fuse holder on the rear nel with a tting screwdriver. pa
Step 2: Remove e old fuse from the fuse holder th .
Step 3: stall the new fuse in the fuse holder. In
Step 4: ce th fuse holder in the housing. Repla e
CONNECTING WITH BT
Connecting your BT-device to the amplier, follow below steps:
1. Turn on BT on your smartphone or tablet.
2. Press the MODE button until the BT LED is illuminated.
3. Searc MPlayer A in the BT menu of the smartphone or tablet. h for “
4. C MPlayer A . onnect with “
WIFI
Download the latest version of the LEGACY Player app via Appl store or Google play. Here you will also nd the latest features e
and explanations on how to use them.
Legacy Pla Apple Store Legacy Player Google Play yer
6
SPEAKER TERMINALS
These terminals are oering a low voltage output 4 (minimum load). A 100V commercial output is also available. of Ω
Please note that one wire only should be connected to COM screw and one wire to the selected impedance or voltage.
ATTENTION: Multiple combinations cannot be done at the output level.
Two dierent types of connections are provided. The low impedance section: 4 (minimum load) is designed for a small amount Ω
of speakers to be connected to your amplier. The 100V section is especially designed for a multiple speaker distribution. When
using the 100V output, speakers have to be equipped with a 100V transformer. The maximum amount of speakers to be placed
on your distribution line is in relation to the power allocated to each speaker. The total wattage set on the secondary side of the
transformers on your speaker line must not exceed the maximum RMS output power of the device. Failure to respect this may
cause permanent damage to the amplier.
OPERATION STEPS
When all connections to the amplier are made, turn all rotary controls down and switch on the power (the power LED will
illuminate). Turn BASS and TREBLE controls to the 12 o’clock position (pointing straight up) and turn MASTER rotary
control up part way for testing.
Ensure a signal is being fed to one of the inputs and gradually increase the volume control for that channel until the output
is heard through the speakers. Turn up the MASTER to the maximum required volume level and reduce the channel
volume control if necessary.
Note: The initial test can be made using the built-in USB audio player. The output of the amplier is represented on the
level meter LEDs and care should be taken that the CLIP LED is not (constantly) ing use. Illumination of this LED lit dur
may be indicating distortion or clipping of the output signal and the MASTER/MAIN VOLUME should be turned down.
If a microphone is connected, make sure it is switched on and if it requires phantom power, make sure this feature is
enabled. Gradually increase its volume control whilst speaking into the microphone until the required volume level is
reached. The (detect) the speakers, which can cause feedback (squealing or microphone should not be able to “hear”
howling noise).
In addition to channel and MASTER volume controls, there are BASS and TREBLE EQ controls to adjust the tone of the overall
output. At th ting the BASS control e 12 o’clock position, these controls are applying no effect to the signal (no boost or cut). Rota
clockwise boosts the low frequencies in the audio, whilst rotating it anticlockwise will cut these low frequencies. Likewise,
rotating the TREBLE control clockwise boosts the high frequencies in the audio, whilst rotating it anticlockwise will cut these
high frequencies. Adjust these EQ controls to suit the type of audio signal or compensate for the room acoustics.
Normally, playback will start automatically when a USB stick is inserted in the corresponding slot. If not, select USB by
pressing MODE to initiate the U mode manually. Press PLAY / PAUSE to start playback. Press PREVIOUS and/or SB
NEXT to change tracks.
100V LINE SYSTEM
For 10 line systems, connect the amplier to the rst speaker in the system using double-insulated speaker wire which has 0V
adequate ent rating to handle the total output of the amplier. curr
Connect the “100V” ou f the speaker and “COM” output to the negative (tput terminal to the positive (+) connection o -)
connection of the speaker. Connect further speakers in parallel to the rst s aker with all positive terminals and connectpe ed
together and all negative terminals connected together as shown below.
A 100V line speaker system can comprise of many speakers connected together. The determining factor for how many
speakers can be us on a single amplier is the power rating. r most purposes, it is advised to connect as many speakers ed Fo
as needed with a combined wattage of no more than 90% of the amplifier’s output power rating.
The terminals of a 100V speaker are connected to a tra rmer and in some cases, this transformer may nsfo be “tapped” for
dierent power ratings. These tapings can be used to adjust t wattage (and output volume) of each speaker in the system to he
help achieve the ideal total power of the system for the amplie r.
7
NEDERLANDS
Hartelijk dank voor de aanschaf van dit Power Dynamics product. Neemt u a.u.b. een paar momenten de tijd om deze
handleiding zorgvuldig te lezen, aangezien wij graag willen dat u onze ucten snel en volledig gebruikt. prod
Lees ei deze handl ding eerst door alvorens het product te gebruiken. Volg de instructies op anders zou de garantie wel eens
kunnen vervallen. Neem ook altijd alle veiligheidsmaatregelen om brand en/of een elektrische sc te voorkomen. Tevens ihok s
het ook raadzaam om rep ies / modicaties e.d. over te laten aan gekwaliceerd personeel om een elektrische schok te arat
voorkomen. Bewaar deze handleiding ook voor toekomstig gebruik.
- Bewaar de verpakking zodat u indien het raat defect is, appa
dit in de originele verpakking opsturen om kunt
bes en.chadigingen te voorkom
- V dat het apparaat in werking wordt gesteld, altijd eerst oor
een deskundige raadplegen. Bij het voor de eerste keer
inschakelen kan een bepaalde reuk optreden. is normaDit al
en verdwijnt na een poo s.
- In het app t bevinden zich spanning staande araa onder
onderdelen; open daarom NOOIT dit apparaat.
- Plaats geen metalen objecten en mors geen vloeistof in het
eect. Dit kan leiden tot elektrische schokken of defecten.
- estel niet opstellen in de buurt van warmtebron zoals To nen
radiatoren etc. en niet op een vibrer e onder- grond end
plaatsen. Dek ventilatieopeningen nooit af.
- Het apparaat is niet geschikt voor continu gebruik.
- Wees voorzichtig met het netsnoer en beschad deze nietig .
Als het snoer kapot of beschadigd is, k dit leiden tot an
elektrische schokken of defecten.
- Als u de stekker uit het stopcontact neemt, trek dan niet aan
het snoer, maar aan de stekker.
- Om brand of elektrische schok te voorkomen, dient u dit
apparaat niet bloot te stellen aan regen of vocht.
- ijder of plaats een stekker nooit met natte nden resp. Verw ha
uit en in het stopcontact.
- Indien zowel de stekker en/of netsnoer als snoeringang in het
apparaat beschadigd zijn dient dit door een vakman hers teld
te worden.
- Indien het apparaat zo beschadigd i t inwendige s da
(onder)delen zichtbaar zijn mag stekker NOOIT in het de
stopcontact worden geplaatst en het apparaat NOOIT
worden ingeschakeld. Neem in dit geval contact op met de
dealer.
- Sluit het appara nooit op een dimmer aan. at
- Reparatie aan het appar dient te geschieden door een aat
vakman of een deskundige.
- Sluit het apparaat alleen aan op een 220-240VAC / 50Hz
(geaard) stopcontact, verbonden met een 10-16A
meterkastgroep.
- Bij onweer altijd de stekker u het stopcontact halen, zo ook it
wan voor een langere tijd niet gebruikt neer het appa atra
wordt. elregel: Bij geen gebruik stekker verwijderen. St
- Als u het apparaat lang niet gebruikt heeft en het weer wil
gebruiken kan er condens ontstaan; laat het appa eerst raat
op kamertemperatuur komen alvorens het w in werking eer
te stellen.
- B gebruik in vocht ruimten of buiten: raadpleeg de ij ige
installatierichtlijnen voor een veilige montage.
- Om ongevallen in bedrijven te voorkomen moet rekening
worden gehouden met d daarvoor geldende richtlijnen en e
moeten de aanwijzingen/waarschuwingen worden gevolgd.
- Het apparaat buiten bereik van kinderen houden.
Bovendien mag het apparaat nooit onbeheerd gelaten
worden.
- Gebruik geen schoonmaakspray om de schakelaars te
reinigen stanten van deze spray zorgen ervoor dat . Re
smeer en stof ophopen. Raadpleeg bij storing te allen jde ti
een deskundige.
- Gebruik geen overmatige kracht bij het bedienen van het
apparaat.
- Dit apparaat kan magnetisch veld veroorzaken. Houd dit
apparaat ten m e 60 cm afstand van de computer of tv. inst
- Indien dit apparaat beschikt over een loodaccu, dient deze
tenminste elke 3 maanden opgeladen te worden indien
deze voor een langere periode niet wordt gebruikt anders
bestaat de kans dat de accu permanent beschad igd.
- Bij een ongeval met dit product altijd eerst een des-
kundige raadplegen alvorens euw te bruiken. opni ge
- Tracht het apparaat niet schoon te maken met chemische
oplossingen. Dit kan de lak beschadigen. Gebruik een
droge doek om schoon te maken.
- Blijf u de buurt van elektronische apparatuur die it
bromstoringen zouden kunnen veroorzaken.
- Bij reparatie dienen altijd originele onderdelen te worden
gebruikt om onherstelbare beschadigingen en/of
ontoelaatbare straling te voorkomen.
- Schakel eerst het toestel u voordat u het netsnoer it
verwijdert. Verwijder netsnoer en aansluitsnoeren voordat u
dit product gaat verplaatsen.
- Zorg ervoor dat het netsnoer niet beschadigd/defect kan
raken wanneer mensen erover heen lopen. Het netsnoer
vóór ieder gebruik controleren breuken/defecten! op
- In Nederland/België is de nets ing 220-240Vac/50Hz. pann
Indien u reist (en u neemt het apparaat mee) informeer dan
naar de netspanning in het land waar u verblijft.
Deze markering wordt weergegeven om u erop attent te maken dat een nsgevaarlijke spanning in het product leve
aanwezig is en dat bij aanraking van deze delen een elektrische schok wordt verkregen.
Deze instructiemarkering wordt weergegeven om u erop te wijzen dat de instructie zeer belangrijk is om te lezen en/of op
te volgen.
OPMERKING: Om zeker te zijn van een correcte werking, dient u dit apparaat in een ruimte te gebruiken waar de temperatuur
tussen de 5°C/ °F en 35°C/ °F ligt. 41 95
Raadpleeg eventueel www.wecycle.nl en/of www.vrom.nl v.w.b. het afdanken van elektronische apparaten in het k r van de ade
WEEE-regeling. Vele artikelen kunnen worden gerecycled, gooi ze daarom niet bij het huisvuil maar lever ze in bij een gemeentelijk
depot of uw dealer. Lever ook afgedankte batterijen in bij uw gemeentelijk depot of bij de dealer, zie www.stibat.nl
Alle (defecte) artikelen dienen gedurende de garanti altijd retour te worden geeperiode zonden de originele verpakking. Voer zelf geen in
reparaties uit aan het toestel; in élk geval vervalt de totale g antie. Ook mag het toestel niet eigenmachtig worden gemodiceerd, ook in dit ar
geval vervalt de totale garantie. Ook vervalt garantie bij gevallen en beschadigingen in élke vorm t.g.v. onoordeelkundig gebruik en de on
het niet in achtnemen van het gestel in deze gebruiksaanwijzing. Tevens aardt Power Dynamics geen enkele aansprakelijkheid in de aanv
geval van persoonlijke ongelukken als gevolg va het niet naleven van veiligheidsinstructies en waarschuwingen . Dit geldt ook voor n
gevolgschade in wélke vorm ook. dan
8
UITPAKKEN
LET OP! k na ontvangst de doos zorgvuldig uit. Controleer of alle onderdelen aanwezig- en in goede staat ontvangen zijn. Bij Pa
transportschade of bij het ontbreken van onderdelen onmiddellijk de verkopende partij inlichten. Bewaar de verpakking en het
verpakkingsmateriaal. Indien het product moet worden teruggestuurd, is het belangrijk dat het product in originele verpakking
wordt geretourneerd. Schakel het apparaat niet onmiddellijk in als het apparaat is blootgesteld aan drastische
temperatuurverschillen (bv. na ansport). De ontstane condensatie kan het apparaat beschadigen. Zorg ervoor dat het het tr
apparaat eerst op kamertemperatuur komt alvorens het aan te sluiten.
AANSLUITSPANNING
Op het label aan de achterzijde/onderzijde van het product staat aangegeven op welke netspanning deze moet worden
aangesloten. Controleer of de netspanning hiermee overeenkomt. Bij alle andere netspanningen dan aangegeven kan het
apparaat onherstelbaar worden bescha d. Tevens moet het apparaat direct op de netspanning worden aangesloten en mag dig
géén dimmer of regelbare voeding worden gebruikt.
Sluit het apparaat altijd aan op een beschermd circuit (aardlekschakelaar of zekering). Zorg ervoor dat het apparaat
voldoende elektrisch is geaard om het risico op elektrocutie of brand te vermijd en.
VOORPANEEL
1. ZONE SELECT
Indrukken om afzonderlijke zones te (de)selecteren. Druk op ALL ZONES om alle zones tegelijk te (de)selecteren.
2. ZONE VOLUME
Draaien om het volumeniveau per zone aan te passen.
3. STATUSINDICATOREN
LED-statusindicatoren (voeding, niveau, protect).
4. VOLUME KANAAL
Draaien om het volumeniveau per kanaal aan te passen.
5. -REGELAARS AUX
Indrukken om AUX (A B) en media (M) bronnen te selecteren. Draaiknop gebruiken om het volumeniveau van of
AUX/MEDIA aan te passen.
6. BASS
Draaien om de lage tonen aan te passen.
7. TREBLE
Draaien om de hoge tonen aan te passen.
8. HOOFDVOLUME
Draaien om het hoofdvolume aan te passen.
9. AAN/UIT
Indrukken om het apparaat aan-/uit te zetten.
MEDIASPELER VOORKANT
A. STATUS/MODUSINDICATOREN
LED-status en bron (modus) indicatoren (voeding, WiFi/USB, BT, AUX).
B. MODE
Indrukken om van afspeelmodus te wisselen.
C. AFSPELEN/PAUZEREN
Indrukken om het afspelen te starten/hervatten of pauzeren.
D. VORIGE
Indrukken om naar het vorige nummer te gaan.
E. VOLGENDE
Indrukken om naar het volgende nummer te gaan.
F. AUX
3,5mm aux-ingangsaansluiting.
G. USB
USB-ingangsaansluiting.
MED SPELER ACHTERKANT IA
H. UITGANG
Stereo-lijnuitgang aansluitblok.
I. LAN
RJ45-ingang voor bekabelde internetradiofunctie.
J. W -ANTENNE IFI
Aansluiting voor het installeren van een WiFi-antenne.
K. BT ANTENNE
Aansluiting voor het installeren van een BT-antenne.
9
ACHTERPANEEL
1. STROOMINGANG EN ZEKERINGHOUDER
Aansluiting voor het bijgeleverde netsnoer. Zie "VERVANGEN ZEKERING" voor instructies over het vervangen van de
zekering.
2. LUIDSPREKERUITGANG
Luidsprekeruitgang voor het aansluiten van luidsprekers (afzonderlijke zones (100V) en 100V, 70V, 4 Ohm).
3. EMERGENC (NOODBERICHT) Y
Terminal voor het opnemen of afspelen van een noodbericht.
4. EVACUATIE (EXTERN)
Terminal om een extern evacuatiebericht in te schakelen, met opties om individuele zones te dempen en te overbruggen.
5. CHIME
Dipswitches voor het inschakelen van een gong corresponderende niveauknop. Als een gong op kanaal 2 gewenst is, zet en
u de dipschakelaar voor kanaal 2 in de stand "enable". Stel het niveau in door aan de knop te draaien.
6. VOX
VOX-inschakeldipschakelaars en niveauknop. VOX (voice-operated exchange) biedt de optie om een kanaal in te schakelen
wanneer spraakinvoer (boven een bepaalde drempel) wordt gedetecteerd. Zet de dipswitch(s) in de stand "enable" om
gebruik te maken van deze functie.
7. LINK- REC UITGANG EN
L - REC uitgangsaansluitingen. ink en RCA
8. AUX INGANG
RCA ingangsaansluitingen voor AUX A en B (links en rechts).
9. REMOTE MIC
RJ45 ingang voor het aansluiten van een extern microfoonstation.
10. KANAALINGANG EN INGANGSKEUZESCHAKELAARS
Gebalanceerde lijn/microfooningang voor kanaalingang 1-4, inclusief de mogelijkheid voor het instellen van een
vooraankondiging. De ingangen zijn voorzien van lijn-, fantoomvoeding- en microfooninstellingsschakelaars.
Fantoomvoeding: zet de ingangsschakelaar op PH om DC +48V fantoomvoeding te leveren voor het gebruik van een
condensatormicrofoon.
VERVANGEN ZEKERING
Indien de zekering defect is dient u de zekerin te vervangen door een zekering van hetzel e type en waa e. Voor het , g fd rd
vervangen van de zekering, schakel rst de stroom u volg de onderstaande stap . ocedure: ee it en pen Pr
Stap 1: Open de zekeringhouder op het achter paneel m een passende tte schroevendraaier. et pla
Stap 2: Verwijder de oude zekering uit de zekeringhoude r.
Stap 3: Installeer de nieuwe zek g in de zekeringhoude erin r.
Stap 4: Plaats de zekering der in de behuizing. hou
BT-VERBINDING
Volg onderstaande stappen om je BT-apparaat aan te sluiten op de versterker:
1. Zet BT aan op je smartphone of tablet.
2. Druk op MODE totdat de BT LED oplicht.
3. Zoek naar "MPlayer A" in het BT-menu van de smartphone of tablet.
4. Maak verbinding met "MPlayer A".
WIFI
Download de laatste versie van de LEGACY Player app via Apple store of Google play. Hier vind je ook de nieuwste functies en
uitleg over het gebruik ervan.
Legacy Player Apple Store Legacy Player Google Play


Produkt Specifikationer

Mærke: Power Dynamics
Kategori: Ikke kategoriseret
Model: PMP360

Har du brug for hjælp?

Hvis du har brug for hjælp til Power Dynamics PMP360 stil et spørgsmål nedenfor, og andre brugere vil svare dig


Ikke kategoriseret Power Dynamics Manualer
Ikke kategoriseret Manualer

Nyeste Ikke kategoriseret Manualer