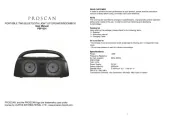
Proscan PSP1580 Manual


Læs gratis den danske manual til Proscan PSP1580 (2 sider) i kategorien Højttaler. Denne vejledning er vurderet som hjælpsom af 39 personer og har en gennemsnitlig bedømmelse på 4.6 stjerner ud af 20 anmeldelser. Har du et spørgsmål om Proscan PSP1580, eller vil du spørge andre brugere om produktet?

Side 1/2
2 3 5 6 8 97
4
DEAR CUSTOMER
In order to achieve the best performance of your product, please
read this instruction manual carefully before using, and keep it
for future reference.
NOTE
This unit may be submitted to changes in specifications,
characteristics and/or operation without prior notice to the user,
PACKIN LIST
Upon opening the package, please check for the following items:
1 x Speaker
1 x Instruction manual
1 x remote
PRODUCT OVERVIEW
SPECIFICATION
Power: 100W
Frequency Response: 38Hz-20KHz
SNR:≥75dB
THD: ≤10%
DC input: 22V/4A
Woofer Unit: 15"x2
FM: 87.5~108.0 MHz
Midrange Unit: 4"x2
Dimension: (WxHxD): 465*1240*370mm
PROSCAN
TM
IS A REGISTERED TRADEMARK OF TECHNICOLOR USA INC.
AND USED UNDER LICENSE TO CURTIS INTERNATIONAL LTD.
USER MANUAL
REAR PANEL
FCC STATEMENT
NOTE: This equipment has been tested and found to comply
with the limits for a Class B digital device, pursuant to part 15 of
the FCC Rules. These limits are designed to provide reason-
able protection against harmful interference in a residential
installation. This equipment generates uses and can radiate
radio frequency energy and, if not installed and used in
accordance with the instructions, may cause harmful interfer-
ence to radio communications. However, there is no guarantee
that interference will not occur in a particular installation. If this
equipment does cause harmful interference to radio or televi-
sion reception, which can be determined by turning the
equipment off and on, the user is encouraged to try to correct
the interference by one or more of the following measures:
- Reorient or relocate the receiving antenna.
- Increase the separation between the equipment and receiver.
-Connect the equipment into an outlet on a circuit different from
that to which the receiver is connected.
-Consult the dealer or an experienced radio/TV technician for
help Changes or modifications not expressly approved by the
party responsible for compliance could void the user's authority
to operate the equipment.
This device complies with Part 15 of the FCC Rules. Operation
is subject to the following two conditions:
(1) this device may not cause harmful interference, and
(2) this device must accept any interference received, including
interference that maycause undesired operation.
DOS AND DONTS
Do not play music at excessive levels as damage to hearing
and / or equipment may result.
Do not use outdoors in wet or in damp surroundings.
90 DA WARRANTY
This product is warranted to be free from defects in material and
workmanship for a period of ninety (90) days from the date of
original purchase. During this period, your exclusive remedy is
repair or replacement of this product or component found to be
defective, at our option; however, you are responsible for all
costs associated with returning the product to us. If the product
or component is no longer available, we will replace with a
similar one of equal or greater value. Prior to a replacement
being sent, the product must be rendered inoperable or returned
to us.
This warranty does not cover glass, filters, wear from normal
use, use not in conformity with the printed directions., or damage
to the product resulting from accident, alteration, abuse, or
purchaser or gift recipient. Keep the original sales receipt, as
warranty is void if the product is used for other than single-family
household use or subjected to any voltage and waveform other
than as on the specified rating on the label (e.g., 120V~60Hz).
We exclude all claims for special, incidental, and consequential
damages caused by breach of express or implied warranty. All
liability is limited to the amount of the purchase price. Every
implied warranty, including any statutory warranty or condition of
merchantability or fitness for a particular purpose, is disclaimed
except to the extent prohibited by law, in which case such
warranty or condition is limited to the duration of this written
warranty. This warranty gives you specific legal rights. You may
have other legal rights that vary depending on where you live.
Some states or provinces do not allow limitations on implied
warranties or special, incidental, or consequential damages, so
the foregoing limitations may not apply to you.
For faster service, locate the model, type, and serial numbers on
your appliance.
For service assistance and product information,
please call: 1-800-968-9853.
Curtis International Ltd.
7045 BECKETT DRIVE, UNIT 15, MISSISSAUGA, ON,
L5S 2A3 www.curtisint.com
ATTACH YOUR PROOF OF PURCHASE HERE, PROOF OF
PURCHASE IS REQUIRED TO OBTAIN WARRANTY
SERVICE.
Please have the following information available when you
contact the Support Team:
Name, address and telephone number.
Model number and serial number.
• A clear, detailed description of the problem.
Proof of purchase including dealer or retailer name,
address and date of purchase.
To make a warranty claim, please email support@curtiscs.com
or call 1-800-968-9853.
1 x wired micphone
1 x adaptor
GGGGGG
YYYYY
1.
2.
3.
4.Power switch
5.MIC
6.
7.MIC
.
.MIC.VOL:Microphone volume control
10.ECHO:
11.TREBLE:Treble adjustment
12.BASS:Bass adjustment
13.
14.
15.
1 .
1
d 3 seconds to pairing another TWS
speaker;Under FM mode long ress Play/Pause&TWS to enter into
automatic scan and all the scanned radio stations will be saved automatically.)
21.
SD card input
USB Player
LED Display IR
TREBLE: Music treble adjust
DELAY: Microphone karaoke delay adjust
BASS: Music bass adjust
8 MIC1: Microphone input
9
Microphone karaoke echo adjust
MIC2: Microphone input
VOLUME Music volume adjust
INPUT/STANDBY Short press for playing mode selection for Line , FM Radio ,
Bluetooth, USB,and SD card.
Press STANDBY button on the panel control for a few seconds,the device will
enter into stanby state,the LED display wil
Next song
:
.
18.EQ adjustment : enhance the adjustment of music to choose the effect you like
.
19.Previous song
20.Play/Pause&TWS&FM:(Wirless Bluetooth Connection: under bluetooth
mode, press TWS button for aroun
REMOTE CONTROL
EQ
VOICE
MIC.P RI
1.Standby
2.Master volume +/-
3.
Press EQ button on the remote to select EQ modes: Pop,
Classical, Jazz and Rock.
Voice changer
Signal input button
8.
Play/ Pause
10.Mute button
11.MIC Priority
Previous
4.LED button
5.EQ button
6.
7.
Next
9.
1
2
3
4
5
6
2
7
8
9
10
11
Instructions
1.Remote control should be available within 6 meters and 60 degree.
2.Remote control should be operated straight to the VFD Remote transducer area.
No obstacle should be placed between the remote control and the unit.
3.Remote control might be unavailable under strong light, In this case, remote
controller should be removed from the strong light.
1.playing
Plug the power cord in, and adjust the main volume knob to proper place.
Switch on, and adjust Treble and Bass in accordance with your preferences.
You then are able to enjoy the wonderful & professional glamour brought by
the product.
2.Karaoke performance
Plug in the microphone, and then turn the knobs to adjust microphone
volume and reverberation for optimizing the performance. You only need to
install the microphone battery and switch on.
Note: after using, please turn down the volume first. Then switch off the
power and pull out the power plug.
Short ress Input button to switch to FM mode, longt press PLAY/PAUSE
button to automatically scan radio station, by pressing PREVIOUS or NEXT you
can select a previous or next radio station.
:
Short he INPUT button on the panel control to select Bluetooth mode.
Simultaneously open the Bluetooth setting on your phone, tablet or any other
Bluetooth enabled audio device and select " ".
OPERATIN INSTRUCTIONS
GGGGGG
FM OPERATION
BLUETOOTH
2 x 15" LIGHT UP BLUETOOTH
SPEAKER-FM RADIO
Model No:PSP1580
Tweeter: 1"x 1
Pro PSP1580
STANDBY
VO LU MEMI C VO L
VOICE
1 2 4
5
6
7
8
9
10
11
12
13
14
15 1 1 1 1 26 7 8 9 20 1
3
1.DC input
2.LINE input
L
L
L
LLINE
INE
INE
INEINE IN
IN
IN
IN IN
DC22V/4A
DC22V/4A
DC22V/4A
DC22V/4ADC22V/4A
DC IN
DC IN
DC IN
DC INDC IN
21
in
, p
p
Insert USB/SD card directly for playing.
TWS: (True Wireless Speaker)
It needs two speakers to make TWS feature. When you had two
speakers, you can make a TWS as below steps:
1. Don't connect to this speaker with Bluetooth devices.
2. Turn on both speakers and press the mode button to change
to Bluetooth mode.
3. Press and hold one speaker's play/pause button for 3
seconds and wait for both speakers to connect each other. It
will have a tone coming out from these speakers after
connected successfully.
4. Turn the Bluetooth devices to search the Bluetooth name
Pro PSP1580" and tap to connect it. It will have a tone
coming out from this speaker after connected successfully.
5. Now you can play the music form your Bluetooth devices.
LINE IN JACK
1.Connect an audio cable to the LINE IN JACK of the speaker
and to the audio output socket on the external audio devices
such as MP3 player, discman,etc,then select LINE by
pressing the INPUT button on the control panel .
2.Play from an external audio device.
USB/SD MODE
l show off, press and hold it for 2 seconds
to turn on again.
6 Voice changer
t
7 LED/MIC PRI: Short press LED/MIC PRI button to change the LED light effect and
turn on off the LED light. Press and hold this button to turn on the priority microphone
or turn off this feature.
INPUT


Produkt Specifikationer

Mærke: Proscan
Kategori: Højttaler
Model: PSP1580

Har du brug for hjælp?

Hvis du har brug for hjælp til Proscan PSP1580 stil et spørgsmål nedenfor, og andre brugere vil svare dig


Højttaler Proscan Manualer

Proscan

Proscan PSP1820 Manual

30 September 2025
Proscan

Proscan PRCD386 Manual

29 September 2025
Proscan

Proscan PSP1201 Manual

28 September 2025
Proscan

Proscan PMIS157 Manual

28 September 2025
Proscan

Proscan PSP1176 Manual

10 Juli 2025
Proscan

Proscan PSP999 Manual

10 Juli 2025

Højttaler Manualer

Nyeste Højttaler Manualer

Trust

Trust Orada 25878 Manual

4 November 2025
DS18

DS18 PRO-SDF6R Manual

4 November 2025
DS18

DS18 35D200NO-4 Manual

4 November 2025
DS18

DS18 6PRO600SE-8 Manual

4 November 2025
Lenco

Lenco BTC-020 Manual

4 November 2025
W-KING

W-KING T9-2 Manual

4 November 2025
Orava

Orava Capella-1B Manual

4 November 2025