E Series Yoke
Quick Start Guide
E Series Loudspeakers can be installed using an optional yoke mount, which attaches
to the loudspeaker at the M8 mounting points. A 6 mm hex key is required.
Use the appropriate QSC Yoke Mount Kit for your loudspeakers.
• E110 YM (for E110)
• E12 YM (for E12 or E112)
• E15 YM (for E15 or E115)
All kits include one 40 mm M8 screw for the top of the loudspeaker and one 30 mm
M8 screw for the bottom.
WARNING!:
Consult a structural engineer before mounting the yoke
mount to any surface or structure. Make sure the surface or structure can
support the weight of the loudspeaker and that appropriate fasteners are used to attach the yoke.
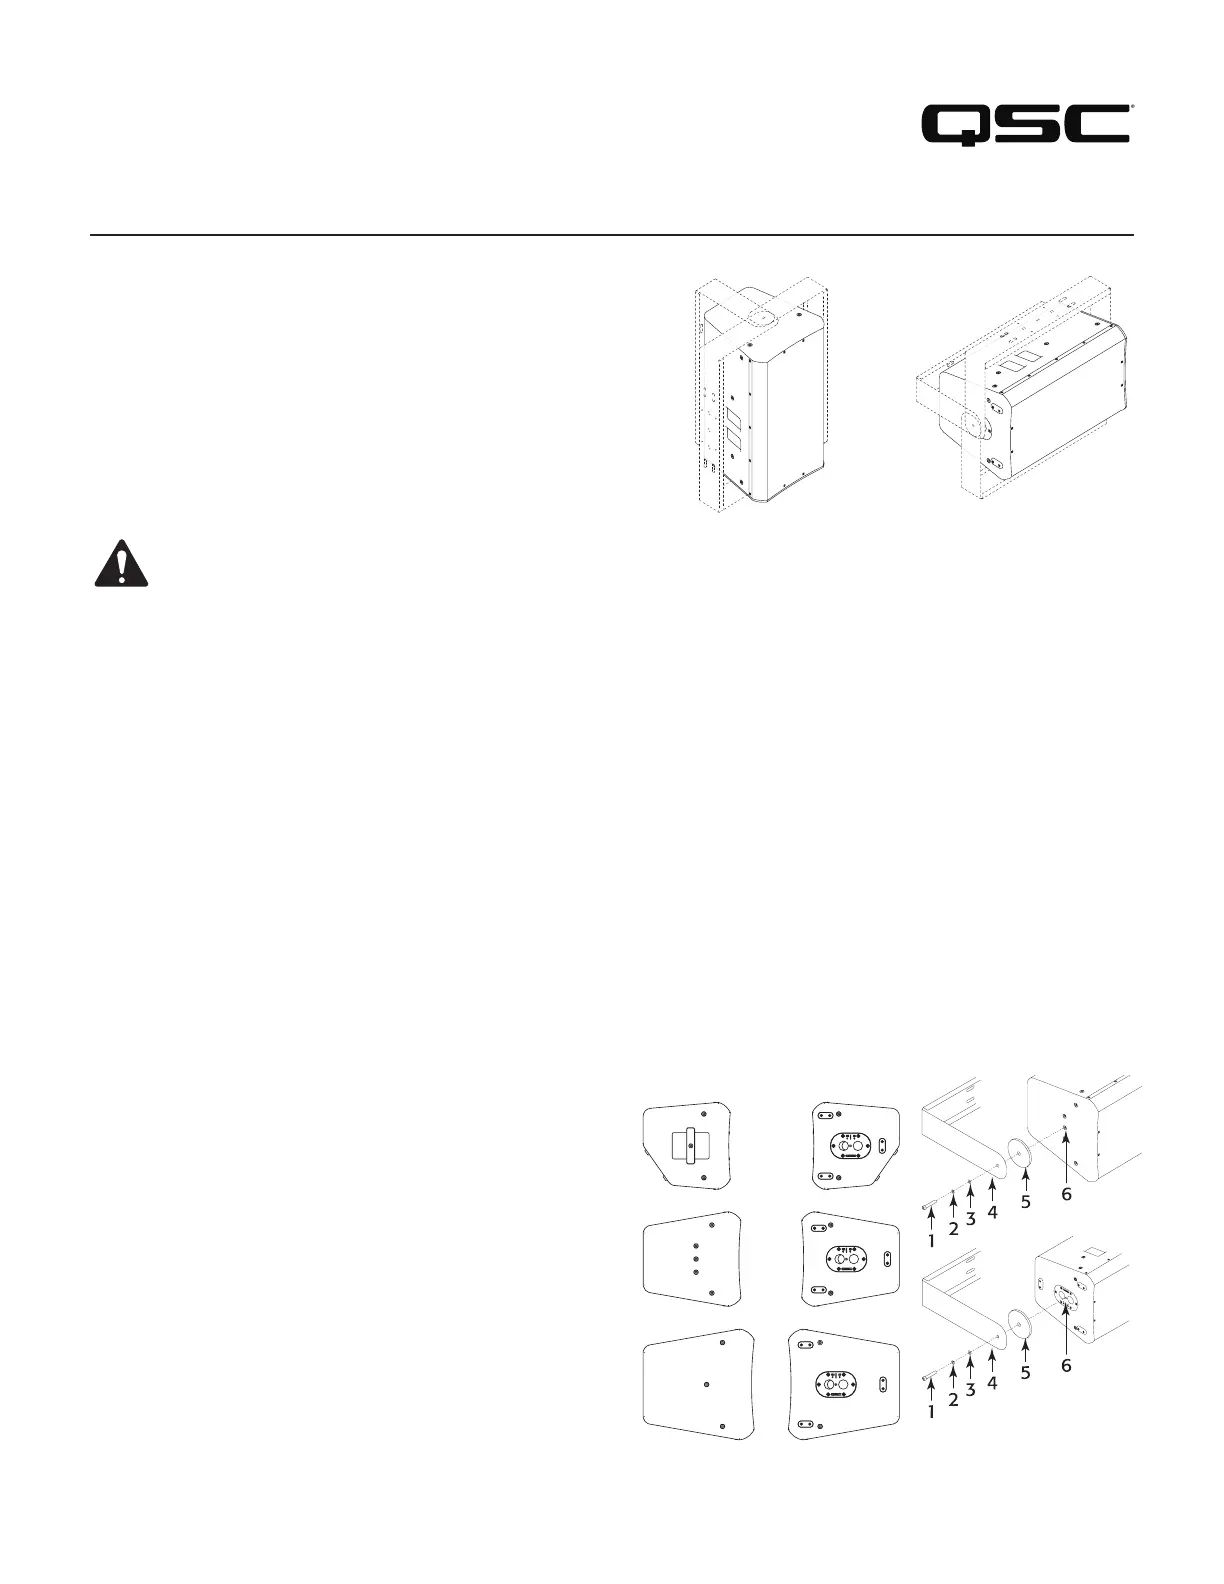
Refer to Figure 1.
1. Select the yoke location and orientation, then properly secure the yoke mounting bracket to the mounting surface. (Attaching hardware is not
included.) The dashed lines show the available yoke positions on the loudspeaker enclosures.
To mount the yoke using cheeseborough clamps, half couplers, or other types of pipe clamp:
◦ The E110 YM or E12 YM can mount using one or two clamps.
◦ The E15 YM must use two clamps.
◦ The clamp must have a ½-inch or 10 to 12 mm mounting bolt or stud that is separate from its clamping mechanism; never attach the yoke to
a bolt that is part of the clamping mechanism. The mounting bolt must use a suitable washer and a locking nut. Before reusing a locking nut,
inspect it; replace the nut if its locking insert is worn or damaged.
Refer to Figure 2.
2. Figure 2 shows the top and bottom attachment point for each model. Remove the M8 hex plug in these attachment points.
Refer to Figure 3.
3. Using safe and proper lifting techniques, place the loudspeaker in the yoke, with the two circular pads (5) inserted between the top and bottom of
the loudspeaker enclosure and the yoke.
4. Install the M8 socket head cap screw (1) through the split washer (2), flat
washer (3), yoke (4), pad (5), and into the yoke-mount point
(6). Repeat for the other end of the loudspeaker enclosure. Do not fully
tighten the screws at this point.
NOTE:
The yoke kits use a 40 mm M8 screw at the top of the loudspeaker
and a 30 mm M8 screw at the bottom. To avoid damage to the
loudspeaker enclosure, use the correct screw in each location.
5. Adjust the angle of the loudspeaker as required.
6. Tighten the M8 cap screws. Do not overtighten.
Figure 1
Figure 2
E110
E12
E15
Top Bottom
Figure 3
TD-000531-00-D
*TD-000531-00*