Raijintek Mya RBW Manual
Raijintek
Computer køling komponent
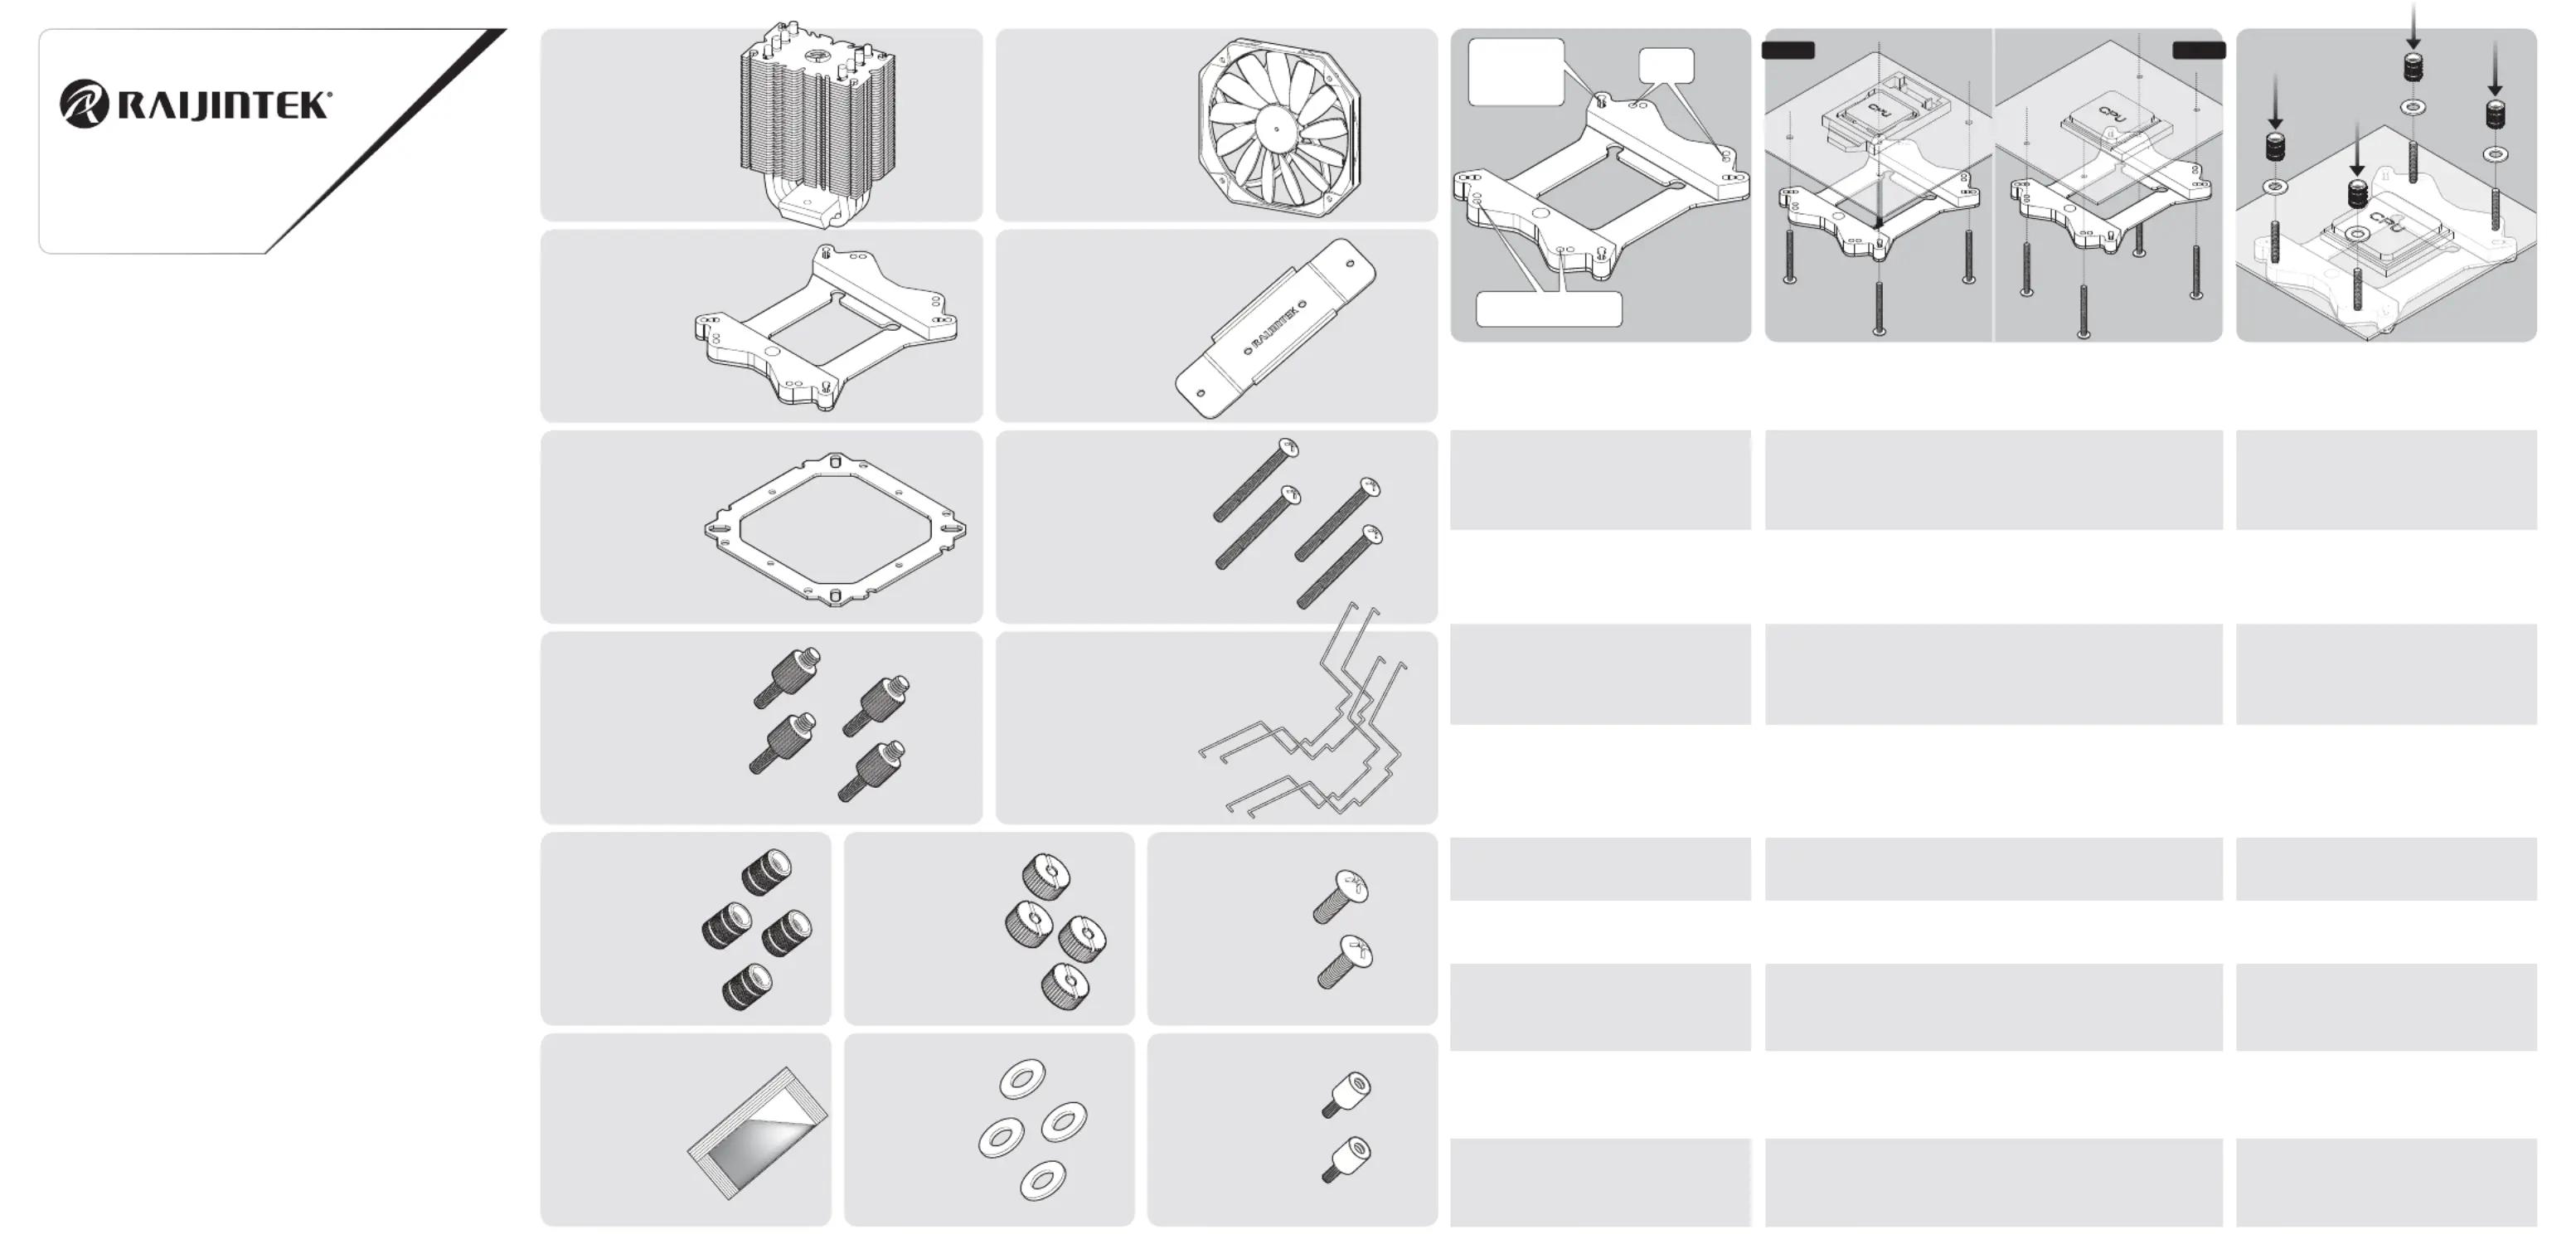
Mya RBW
| Mærke: | Raijintek |
| Kategori: | Computer køling komponent |
| Model: | Mya RBW |
| Type: | Luftkøler |
| Bredde: | 130 mm |
| Dybde: | 86 mm |
| Højde: | 163 mm |
| Vægt: | 925 g |
| Antal pr. pakke: | 1 stk |
| Produktfarve: | Sort |
| Omdrejningshastighed (min.): | 200 rpm |
| Omdrejningshastighed (maks.): | 1400 rpm |
| Materiale: | Aluminium, Plastic |
| Gennemsnitstid mellem fejl (MTBF): | 40000 t |
| Belysningsfarve: | Flere |
| Støjniveau (høj hastighed): | 28.43 dB |
| Antal blæsere: | 1 blæser(e) |
| Passende til rumtype: | Processor |
| Ventilator diameter: | 120 mm |
| Maksimal luftstrøm: | 41.71 kubikfod/min. |
| Kompatibel processor serie: | AMD Athlon II, AMD Athlon II Dual-Core, AMD Athlon II X3, AMD Athlon II X4, AMD Athlon X2 Dual-Core, AMD Phenom II X2, AMD Phenom II X3, AMD Phenom II X4, AMD Phenom II X6, AMD Phenom II X8, AMD Ryzen, Intel Celeron G, Intel Core i3, Intel Core i5, Intel Core i7, Intel Core i9, Intel Pentium G |
| Antal ventilatorblade: | 17 |
| Ventilatorstik: | 4-polet |
| Køler materiale: | Aluminium |
| Understøttede procesorsokler: | LGA 1150 (Socket H3), LGA 1151 (Socket H4), LGA 1155 (Socket H2), LGA 1156 (Socket H), LGA 2011 (Socket R), LGA 2011-v3 (Socket R), LGA 2066, LGA 775 (Socket T), Socket AM2, Socket AM2+, Socket AM3, Socket AM3+, Socket AM4, Socket FM2, Socket FM2+ |
| Understøttelse af puls-bredde modulering (PWM): | Ja |
| Nominel strøm: | 0.2 A |
| Maksimalt lufttryk: | 0.67 mmH2O |
| Nominel spænding: | 12 V |
| Ventilator dimensioner (BxDxH): | 120 x 120 x 13 mm |
| Varmerør diameter: | 6 mm |
| Antal varmerør: | 6 |
| Startspænding: | 6 V |
| Belysning LED: | Ja |
| Materiale for grundplade: | Kobber |
| Lejetype: | Hydraulisk |
| Lamelmateriale: | Aluminium |
Har du brug for hjælp?
Hvis du har brug for hjælp til Raijintek Mya RBW stil et spørgsmål nedenfor, og andre brugere vil svare dig
Computer køling komponent Raijintek Manualer

1 September 2025
1 September 2025

9 Juli 2024

9 Juli 2024

9 Juli 2024
Computer køling komponent Manualer
- Cooler Master
- Lian Li
- DeepCool
- ALSEYE
- Phanteks
- ID-Cooling
- ModeCom
- SilentiumPC
- Xigmatek
- Gigabyte
- Be Quiet!
- Renkforce
- Fractal Design
- Gelid
- NZXT
Nyeste Computer køling komponent Manualer

19 December 2025

18 December 2025

18 December 2025

17 December 2025

17 December 2025

16 December 2025

16 December 2025

16 December 2025

16 December 2025

16 December 2025