Realme Q5x Manual
Læs nedenfor 📖 manual på dansk for Realme Q5x (150 sider) i kategorien Telefon. Denne guide var nyttig for 46 personer og blev bedømt med 5.0 stjerner i gennemsnit af 23.5 brugere
Side 1/150

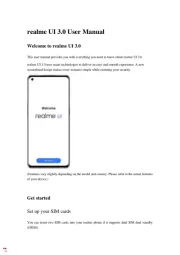
realme UI 3.0 User Manual
Welcome to realme UI 3.0
This user manual provides you with everything you need to know about realme UI 3.0.
realme UI 3.0 uses smart technologies to deliver an easy and smooth experience. A new
streamlined design makes every scenario simple while ensuring your security.
(Features vary slightly depending on the model and country. Please refer to the actual features
of your device.)
Get started
Set up your SIM cards
You can insert two SIM cards into your realme phone if it supports dual SIM dual standby
(DSDS).

You can set the default number to be used for making calls or choose a number when making
a call. Similarly, you can choose which SIM card is to be used for mobile data.
Use the secondary data SIM for mobile data during calls
If you use the primary SIM card for Internet access, this feature lets you use your secondary
SIM card's data temporarily while you are on a VoLTE call using your secondary SIM card.
This ensures an uninterrupted network connection during the call. When the call ends, it will
switch back to the primary SIM card.
Path: Settings - Mobile network - Advanced settings - Use mobile data during calls.

Manage mobile data
Allow your apps to use Wi-Fi, mobile data, or both for Internet access, or do not allow apps to
connect to a network. You can also check the total mobile data usage of your system and apps.
Path: Settings - Mobile network - Data usage - Network access.
Quickly connect to a Wi-Fi network
Set up Wi-Fi network connections
• Connect to a Wi-Fi network without a password:
Simply tap the Wi-Fi network.
• Connect to a Wi-Fi network with a password:
Tap the Wi-Fi network and enter the password.
• Connect to a Wi-Fi network with authentication:
Tap the Wi-Fi network and sign in or complete the authentication steps.
• Add a network:

If you do not find the network you want to connect to in the network list, tap "Add network"
and enter the network name and password.
Once your device successfully connects to a Wi-Fi network, it will automatically connect to the
Wi-Fi network whenever the network is available, without needing you to enter the password
again. If you do not want to connect to a Wi-Fi network automatically, tap the icon to the right
of the Wi-Fi network and remove it. Check and manage saved networks in "Advanced settings".
Share a Wi-Fi password
To share a Wi-Fi account and password with another phone, open the Wi-Fi details page and
tap " -Fi QR code" to display a QR code. On the other phone, go to the "Wi-Fi" page and tap Wi
the button in the upper right corner to scan the QR code. The phone will automatically connect
to the Wi-Fi network.
Use Wi-Fi Assistant
Use Wi-Fi Assistant when your Wi-Fi signal is unstable.
Turn on "Auto connect to the best Wi-Fi". Your phone will monitor the quality of the Wi-Fi
networks and automatically connect to the best network.

You can also turn on "Auto switch to mobile network". When all current Wi-Fi networks are
slow and your mobile data is enabled, your phone will automatically switch to the mobile
network.
Path: Settings - -Fi - -Fi Assistant - Auto connect to the best Wi-Fi. Wi Wi
Use dual channel acceleration
Dual channel acceleration uses both mobile data and Wi-Fi for smoother and faster Internet
access.
Apps that support dual channel acceleration are displayed on the page.
Path: Settings - -Fi - -Fi Assistant - Dual channel acceleration. Wi Wi
Use dual Wi-Fi acceleration
Dual Wi-Fi acceleration allows your phone to switch between two Wi-Fi channels seamlessly
for faster Internet access.
Path: Settings - -Fi - -Fi Assistant - Dual Wi-Fi acceleration. Wi Wi
Note:

There are two Wi-Fi hotspots: a 2.4 GHz hotspot and a 5 GHz hotspot, which can send and
receive data independently without interfering with each other.
The two hotspots can have the same or different names. They can share the same router or
connect to different routers.
Passpoint Wi-Fi Direct
realme UI 3.0 comes preinstalled with a Passpoint certificate, which allows direct connections
with hundreds of branded Wi-Fi networks. Discovering and connecting to networks are
automatic and do not require a password. Wi-Fi encryption and two-way authentication
between your phone and the server also ensure connection security and prevent information
leakage.
Path: Settings - -Fi - Advanced settings - Passpoint. Wi
Connection & sharing
Tethering
There are three tethering methods:
• Personal hotspot

NFC
Near-field communication (NFC) enables contactless exchange of data over short distances.
Go to "Settings - Connection & sharing - NFC" and turn on "NFC".
You can then use contactless payment and Android Beam to pay or transfer data.
Wireless transmission
• Screencast
Go to "Settings - Connection & sharing" and turn on "Screencast".
You can then display your phone's content on a large screen. Make sure your phone and the
large screen device are connected to the same network or the wireless display feature is enabled
on the large screen device.
• Screen sharing
Go to "Settings - Connection & sharing - Screen sharing".
• Printing
Go to "Settings - Connection & sharing - Print".

Choose a printing service in the pop-up window, for example, printing documents, images,
emails, or web pages on your phone.
VPN
A virtual private network (VPN) creates a private network over a public network. It allows you
to access intranet resources easily, securely, and remotely over the Internet, whether you are
away on a business trip or working at home.
Set a VPN
To add a VPN, go to "Settings - Connection & sharing - VPN", tap "+", and enter information
such as the VPN name, type, and server address.
Easily wake up your phone
Multiple methods are available for you to wake up your phone.
Press the power button
Simply press the power button to wake up your phone.
Raise to wake

With "Raise to wake" turned on, the screen will turn on automatically when you pick up your
phone.
Path: Settings - System settings - Gestures & motions - Raise to wake.
Double-tap to wake or turn off screen
You can double-tap the screen to turn it on or off when "Double-tap to wake or turn off screen"
is turned on.
Path: Settings - System settings - me screen Lock screen - Lock screen - Double-tap to Ho &
wake or turn off screen.
Quickly unlock your phone
For security purposes, realme UI 3.0 provides multiple phone unlock methods such as password
unlock, fingerprint unlock, and face unlock. You can enable one or more methods to suit your
needs in different scenarios.
Password unlock
You can use a pattern, 4 to 16 digits, or 4 to 16 digits and letters as your lock screen password.
When face unlock is disabled, wake up your phone, swipe up on the lock screen, and enter your
password to unlock it.
Path: Settings - Password security - Lock screen password. &
If you forgot your password, please contact a realme after-sales service center for help.
Fingerprint unlock
You can unlock your phone quickly with your fingerprint. You can enroll up to five fingerprints
as prompted. To unlock your phone, wake it up and press the fingerprint sensor.
Path: Go to "Settings - Password security - Fingerprint", enter your lock screen password, &
and enroll one or more fingerprints. You can use an enrolled fingerprint for phone unlock, app
lock, Private Safe, app installation, and SMS payment verification.
Face unlock
Face recognition lets you unlock your phone even more easily and faster.

Path: Settings - Password secur - Face. & ity
* For accurate face recognition, keep the phone 20 50 cm away from your face. Do not enroll –
your face in an environment that is too bright or dark.
Omoji, your virtual you
Omoji is a new virtual image feature of realme UI 3.0. It automatically recognizes facial
features and expressions and provides numerous fashion accessories and emoji icons, so that
you can create a unique virtual you.
*Some devices and regions do not support this feature, please kindly refer to the actual feature
of your device.
Create and edit an Omoji
Create your Omoji just how you like it. Go to the "Edit Omoji" page, and choose your skin,
head, hair, eyebrows, eyes, nose, mouth, ears, hat, and glasses. The colors can be adjusted. You
can create multiple Omojis for different moods and situations.
Path: Settings - realme account - Omoji.
Omoji camera

Infinite Always-On Display, your one- -a-kind screen of
realme UI offers a wide range of Always-On Display styles such as text-only signatures, images,
analog clocks, Omojis, and art albums. You can also draw your own personalized Always-On
Display patterns, or turn a photo of your parent, child, or friend into a portrait silhouette and
use it as your Always-On Display wallpaper.
*Note: only some phones support this function
Path: Settings - Personalizations - Always-On Display.
Scope of application: Features vary slightly depending on the model and country. Please refer
to the actual features of your device.
Draw a pattern
A variety of drawing styles, effects, and patterns are available for you to draw your
desired Always-On Display pattern.

Portrait silhouette
The system can turn a color portrait into an exclusive portrait silhouette. You can use a
portrait silhouette of your favorite person as your Always-On Display wallpaper.
Path: Settings - Personalizations - Always-On Display - Personalized - Portrait
silhouett e.
Personalized signature
You can display your favorite motto on your Always-On Display and edit the text, color,
font size, and layout as you like.

Custom image
In addition to text, you can use a photo of your loved one, family, pet, or favorite
celebrity as your Always-On Display wallpaper, so that you can see them every time
you glance at your phone. You can add text below the image and adjust the text color,
size, and alignment.
Personalize your icons
You can choose to use material style icons, pebble style icons, custom ART+ icons, or a third-
party icon package, and resize the icons as you like. You can also resize the text underneath the
icons or even hide the text to make your home screen simpler. Are you ready to create your
own home screen style? Start with the icons!
Path: Tap and hold a blank space on the home screen (or zoom in on the home screen with two
fingers) and tap an icon.

The system is compatible with third-party icon packages. After you install a third-party icon
package, the icon style will be displayed to the right of the default style.
Path: Tap and hold a blank space on the home screen (or zoom in on the home screen with two
fingers) and tap an icon.
Organize your home screen with one tap
In realme UI, you can easily organize your home screen by swiping down or up, without
needing to drag icons one by one.
Path: Tap and hold a blank space on the home screen to enter edit mode, and swipe up (or
down). All icons on the home screen will be automatically moved to the top (or bottom) of the
screen.

Manage folders
Dismiss or merge folders efficiently with just one tap.
To dismiss a folder on the home screen, tap and hold it and tap "Remove folder". To merge two
folders, simply drag one folder into the other.

Real-time icon layout preview
In home screen edit mode, you can set and preview in real time the home screen layout and
icon style.
Path: Tap and hold a blank space on the home screen and tap "Layout".
You can also preview the home screen wallpaper and flip page effects in real time in Settings.

Set your preferred sound mode
realme UI offers more user-friendly sound adjustment options for more scenarios. You won't
get disturbed by notifications during meetings, and music can now be adjusted separately.
Press the volume buttons to adjust the volume
Press a volume button. A volume bar will be displayed on the left of the screen. Drag the slider
to increase or decrease the volume.
To change the default adjusted volume type, go to "Settings - Sound & vibration - Advanced
settings - Volume button function" and choose "Media volume" or "Ringtone volume".
Drag the black icon to adjust the volume separately for media, ringtones, and alarms. For
example, before going to bed, you can turn off media and ringtones, turn on an alarm, and set
an appropriate alarm volume to have a comfortable night's sleep.

Reduce notification feedback in full screen
When you're playing games or watching videos in full screen, realme UI will soften notification
sounds and reduce the vibration intensity to not interrupt your immersive experience.
Path: Settings - Notifications & status bar - Manage notifications - More - Reduce notification
feedback on full screen.

Weather Adaptive 2.0
realme UI 3.0 comes with Weather Adaptive 2.0, which provides three to four more ringtones
for each weather scenario to make your alarms more interesting.
Path: Clock - Add alarm - Ringtone - Weather adaptive.

Turn Silent mode on to enjoy some quiet time
In Silent mode, your phone calls and app notifications will be silenced, so that you can rest
without disturbance.
Path: Swipe down from the top of the screen to open Quick Settings, and tap "Silent mode".
Immersive Dolby Atmos®
Dolby Atmos® is enabled by default in Speaker mode, and you can choose to disable it while
using earphones.
The new Dolby Atmos® features ambient sounds and scene sounds. Ambient sounds can be
switched to suit your environment, and scene sounds are adapted to fit three scenes: theater,
games, and music. You can enable the sound effects based on your needs.
Path: Settings - Sound & vibration - Dolby Atmos®.
Easy- -use navigation gestures to
As phone screens get bigger and bigger, to make the phone easier to use, realme UI offers a
navigation bar and gestures for you to choose from based on your preferences.

You can customize gestures to suit your needs and preferences.
Menu control
In menu mode, tapping the Assistive Ball will display five buttons, which correspond to the
following actions:
• Go back to the previous page
• Take a screenshot
• Multitask
• Lock screen
• Go back to the home screen
To personalize your Assistive Ball:
• Drag it to your preferred position on the screen.
• Adjust its visibility.
• Automatically hide it in full screen mode.
Glare-free screen
Adjust the screen brightness to make the screen easier to read in different light conditions,
whether at night or in the bright sunshine.
Manual brightness
• Swipe down from the top of the screen to open Quick Settings, and drag the slider to adjust
the brightness.
• Go to "Settings - Display & brightness" and drag the slider to adjust the brightness.

Auto brightness
With auto brightness turned on, the screen brightness changes automatically based on the
ambient light conditions to help relieve eye strain and save power.
Paths:
• Swipe down from the top of the screen to open Quick Settings, and tap the button to the right
of the brightness bar.
• Go to "Settings - Display & brightness" and turn on "Auto brightness".
Eye comfort modes
realme UI offers two eye comfort modes to make it easier for you to use your phone during
nighttime or in dim environments and to relieve your eye discomfort due to prolonged screen
time.

Turn Dark mode on
To turn on Dark mode:
Go to "Settings - Display & brightness" and turn on "Dark mode".
Open Quick Settings and tap "Dark mode".
Set a Dark mode schedule
Dark mode can remain on at all times or you can set a schedule.
Go to "Settings - Display & brightness - Auto switch" and choose "Sunset to sunrise". Dark
mode will then automatically turn on at sunset and off at sunrise. If you choose "Custom", you
can specify the Dark mode on and off times.
Multiple Dark mode styles
realme UI provides three Dark mode styles for you to choose from: Gentle, Medium, and
Enhanced, which support an adaptive contrast ratio.
Path: Settings - Display & brightness - Dark mode - Dark mode settings.

Easy- -change wallpapers to
Your wallpaper, your choice. realme UI provides a wide range of beautifully designed static
and live wallpapers, including interactive live wallpapers. You can also use your photos as
wallpapers to make your realme phone beautiful and unique.
Change the wallpaper
1. Go to "Settings - Personalizations - Wallpapers".
2. Choose a desired static or live wallpaper, and zoom in or move the wallpaper to adjust it.
3. If you choose a static wallpaper, you can use it as your home screen wallpaper, lock screen
wallpaper, or both. If you choose a live wallpaper, you can use it as your home screen wallpaper
or home screen and lock screen wallpaper.
Use a photo from Photos as a wallpaper
1. Go to "Settings - Personalizations - Wallpapers" and tap "Album".
2. Choose a photo, and zoom in or move the photo to adjust it.
3. Set the photo as your home screen wallpaper, lock screen wallpaper, or both.
Create your own wallpaper
In addition to the preset beautiful static and live wallpapers, realme UI supports custom
wallpapers. Choose an image from Photos, tap "Set as wallpaper", and tap "Inventive
wallpapers". The system will then extract the main colors of the image and use algorithms to
generate creative wallpapers in a variety of styles such as simple, abstract, complex, and
Chinese style.
Path: Settings - Personalizations - Wallpapers - Inventive wallpapers.

Search for setting options
Open Settings and enter keywords in the top search box to search for relevant feature settings.
Tap a search result to open the corresponding settings page. For example, if you search for
"Bluetooth", Bluetooth related settings will be displayed on the screen.
Produkt Specifikationer
Mærke: | Realme |
Kategori: | Telefon |
Model: | Q5x |
Har du brug for hjælp?
Hvis du har brug for hjælp til Realme Q5x stil et spørgsmål nedenfor, og andre brugere vil svare dig
Telefon Realme Manualer
20 August 2024

20 August 2024

20 August 2024

20 August 2024

20 August 2024

19 August 2024

19 August 2024

19 August 2024

19 August 2024

19 August 2024
Telefon Manualer
- Telefon Marshall
- Telefon CSL
- Telefon Aastra
- Telefon Prestigio
- Telefon Roland
- Telefon Clear Sounds
- Telefon Belgacom
- Telefon Vimar
- Telefon Grandstream
- Telefon RugGear
- Telefon Oregon Scientific
- Telefon Hitachi
- Telefon T-Mobile
- Telefon Edge-Core
- Telefon Amplicom
Nyeste Telefon Manualer

6 Juni 2025

2 Juni 2025

9 April 2025

1 Marts 2025

1 Marts 2025

25 Februar 2025

22 Februar 2025

22 Februar 2025

11 Februar 2025

7 Februar 2025