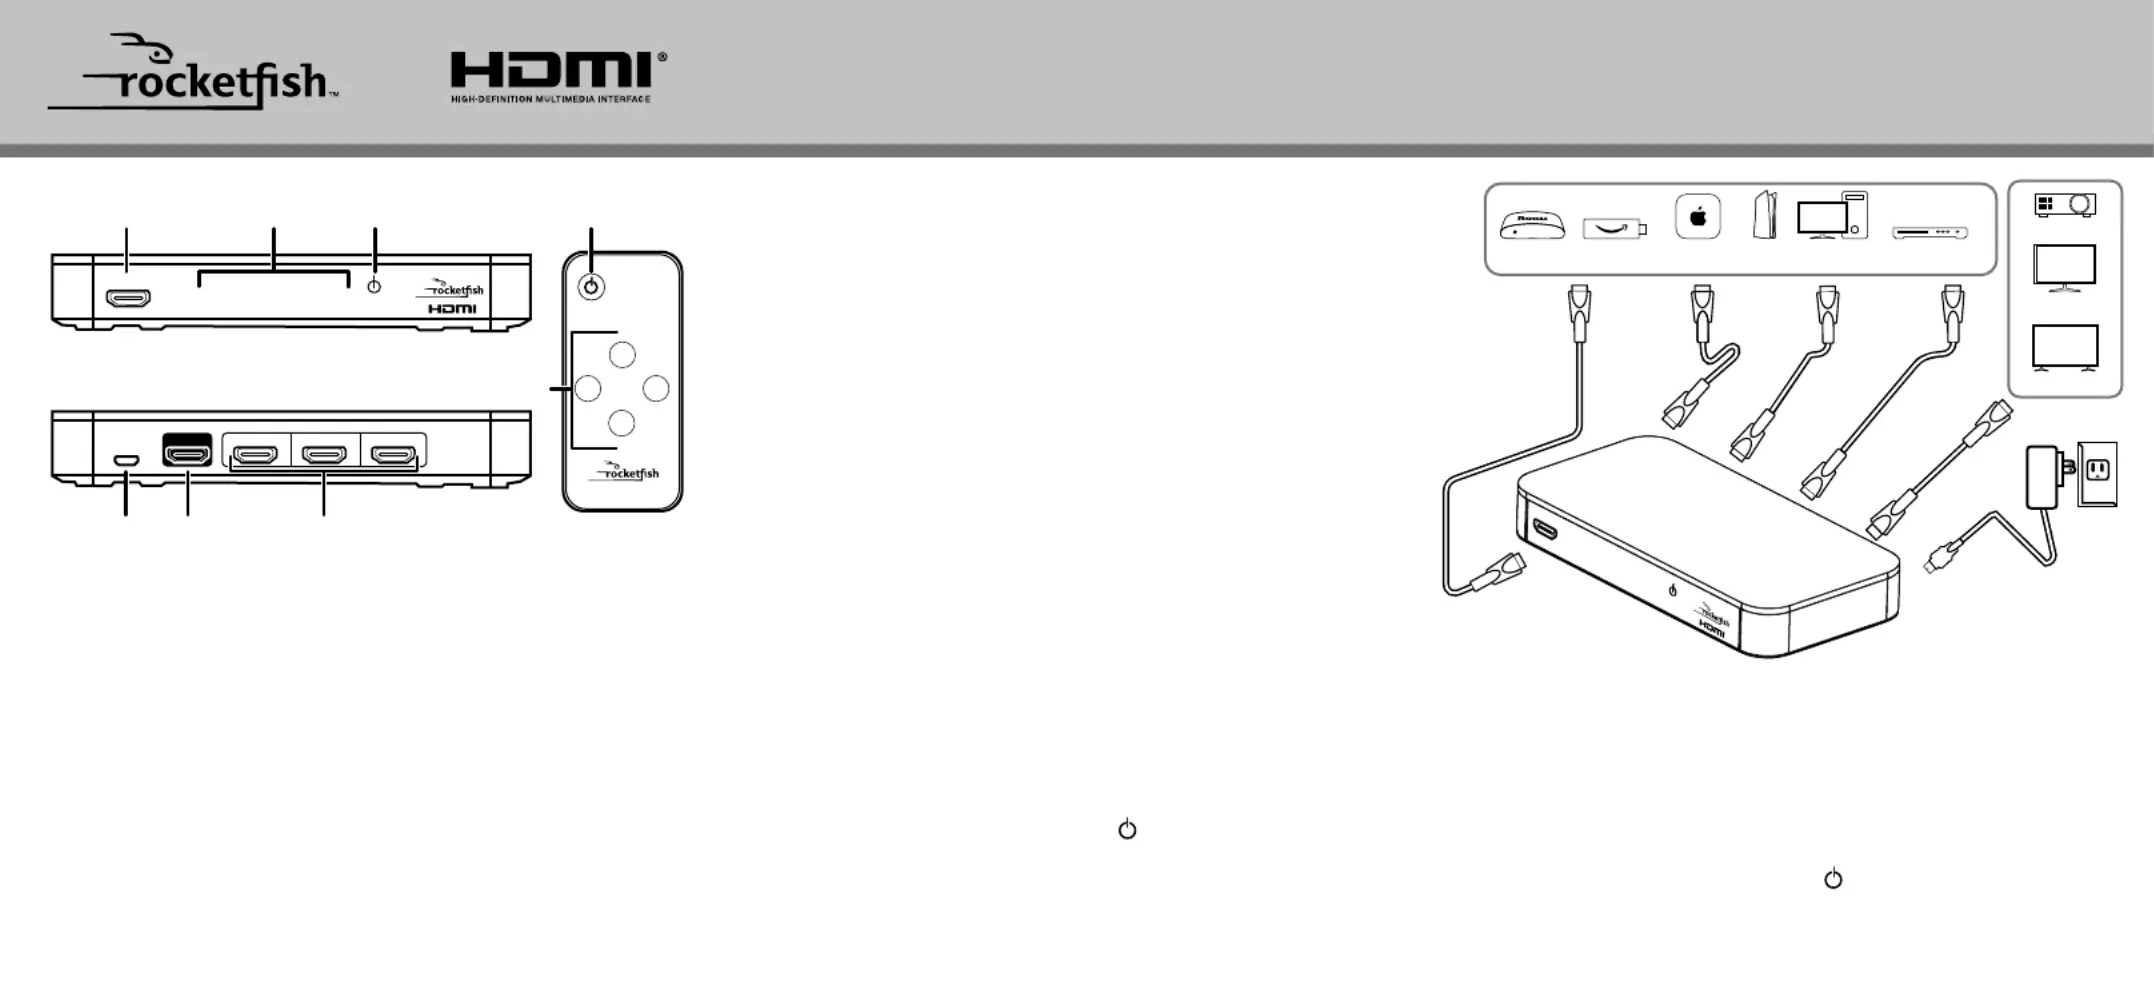
INPUT 4OUTPUT INPUT 3 INPUT 2
3 To select a source device:
• Press the number on your remote that matches the input of
the source device you want.
• Tap the number on your switch that matches the input port
that your source device is connected to.
The corresponding input LED lights.
4 Use your source device as usual to play video and audio.
5 When nished, press and hold the (power) button to turn o
Note: You may leave the power on while not in use.
Before using your new product, please read these instructions to prevent any damage.
RF-G1501 / RF-G1501-C, 4-Port HDMI Switch with 4K Compatibility
• 4-Port HDMI Switch • Remote control
• Power adapter • Quick Setup Guide
Your 4-Port HDMI Switch supports 4K video and next-generation
• Compatibility with most CEC-enabled HDMI devices
• : 480p, 720p, 1080p, and 4K (4096 × 2160)Resolution
• Frame Rate: Up to 4K at 60Hz (1080p at 240Hz)*
• Color: Deep Color, HDR, and other enhanced color specications
• Audio: Works with Dolby TrueHD, DTS-HD, and all audio formats
supported by the HDMI 2.0 standard
• Auto Switch: When a source device is turned on, the switch
automatically detects and switches to that device’s input
*Note: TVs with high internal refresh rates (such as 240Hz) are compatible.
The specications refer to source signal and not the TV refresh rate.
SETTING UP YOUR HDMI SWITCH
1 Connect HDMI cables from your source devices to the switch’s
2 Connect an HDMI cable from your TV (or projector) to the
3 Connect the power adapter from the port to a power DC 5V
outlet. The power LED and an input LED light up.
Note: To fully support 4K resolution, connect the input and output
channels using HDMI Premium Certied cables 9.6 ft. (3 meters) or less in
Optional wall-mounting: Install two screws 4 in. (10.2 cm) apart into your
wall, then hang the switch on the screws. Mounting hardware is not included.
1 Turn on your TV and the source device.
2 Turn on your switch by pressing the POWER ON/OFF button on
your remote control or pressing the (power) button on your
Note: When the switch is turned on, it automatically switches to the last
input that was used, unless Auto Switch is turned on. If Auto Switch is on,
the switch goes to the device that is turned on.
Apple TVFire stickRoku DVD/Blu-ray playerPC