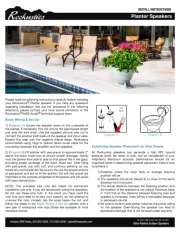
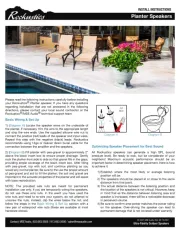
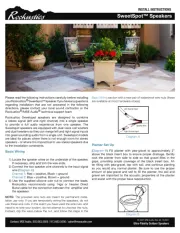
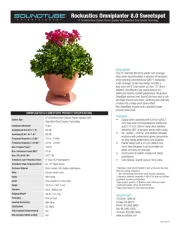
Rockustics Cherry Bomb Manual

Rockustics Højttaler Cherry Bomb

Læs gratis den danske manual til Rockustics Cherry Bomb (3 sider) i kategorien Højttaler. Denne vejledning er vurderet som hjælpsom af 27 personer og har en gennemsnitlig bedømmelse på 4.4 stjerner ud af 14 anmeldelser. Har du et spørgsmål om Rockustics Cherry Bomb, eller vil du spørge andre brugere om produktet?

Side 1/3
Cherry Bomb (CB5)
INSTALL INSTRUCTIONS
© 2024 MSE Audio. Rev. 01.04.2024
Ultra-Fidelity Outdoor Speakers
Contact: MSE Audio, 855.663.5600 / 913.663.5600 / sales@mseaudio.com
Thank you for purchasing your CB5 landscape speaker
from Rockustics®. Cherry Bomb’s patented three-way
design includes a 5 double-chamber, band-pass sub-
woofer, a 4 woofer and a .75” tweeter all in one. When
properly installed, these speakers will provide years of
listening enjoyment. If you have any questions that are not
answered in the following directions, please contact your
local sound contractor or the Rockustics®/MSE Audio®
technical support team.
Site Preparation
There are several factors to consider when choosing
mounting locations for your CB5 landscape speaker:
1) The speakers are designed to be partially buried in the
ground, but the CB5 unit can also be installed by simply sitting
on its base above ground.
2) The CB5 speaker is a full-range system with integrated sub
woofer. Plan the speaker locations to provide even audio
coverage and attempt to keep an even distance between
each of the CB5 speakers.
3) It is preferred to place the CB5 speakers around, or near the
perimeter of the listening area where the audio is intended
to be heard.
4) There should be a direct line of sight from the speaker to
the listening area.
5) Position each speaker so they are all approximately the
same distnace away from the listening area.
6) Do not place the speakers in areas that are prone to
ooding with standing water.
7) The speakers should not be positioned directly in front of, or
in direct spray from, sprinklers.
8)
Do not aim the top speaker at more than 45º from horizontal to
keep the unit from collecting water on the cone.
We cannot antiicpate or accomodate every possible
installation conguration. Trial and error methods may have to
be employed to achieve acceptable audio dispersion. Included
are some typical installation layouts for your reference.
HOUSE
PATIO
PATIO POOL
HOUSE
Cherry Bomb (CB5)
INSTALL INSTRUCTIONS
© 2024 MSE Audio. Rev. 01.04.2024
Ultra-Fidelity Outdoor Speakers
Contact: MSE Audio, 855.663.5600 / 913.663.5600 / sales@mseaudio.com
Wiring Diagram
The CB5 speakers all come equipped with high voltage
(70.7V/100V*) transformers and may also be run in an
direct mode. The speaker comes with hard wire leads for the
two options. See the gures below for typical high voltage
(70.V/100V*) and 8Ω wiring congurations.
Step-by-Step Setup
~12”
~16”
HOUSE
PATIO
AMP
1. Layout Design
Determine the layout of your
system. Place each speaker
in the general location it will
be installed. Also place your
amplier where it will be
installed.
2. Digging
Dig a hole sufcient to bury
the speaker(s) to the correct
depth (noted above) and
to also accomodate 2-3”
of gravel or crushed rock
under the speaker housing.
8 Ohm -8 Ohm +
8 Ohm Wiring
Soldered leads with
pre-installed wire nuts
3. 8Ω Wiring
Locate the green and white wires. Disconnect the red wire from
the green wire and the black wire from the white wire. Connect
the positive (+) lead from the amp to the green wire on the CB5,
then connect the negative (-) lead from the amp to the white wire
on the CB5. You will NOT use the red, black, yellow, or blue
wires in an 8Ω installation. Simply tape or cap them off.
Speaker Installation
Rockustics recommends using either 14 gauge or 16 gauge
direct-burial wire. It is best to lay out the wire to each of the
intended speaker locations before installing the speakers.
8 Ohm Wiring
Green
8 Ohm +
White
8 Ohm -
8 Ohm Wiring Diagram
Audio
Source
Amplier must be able to
handle an 8Ω load for this
conguration
4. Test
Fully wire the rest of your
system and test to make
sure sound is coming from
each unit.
5. Bury Speakers
Place your speakers in each
hole, and aim in the desired
direction. Begin lling back
up. Be sure the speaker is
deep enough in the ground
that the wire(s) can be
buried at least 2” below
nal landscaping. Pack
down the dirt.
IMPORTANT: Remember to
NOT cover the port with dirt
so your speaker functions
properly.
Expandable
70.7V/100V Wiring Diagram
*Please see Page 3 for details and instructions on 70.7V/100V use.
SoundTube MCA2004t
or other 70.7/100V Amplier
CH1 CH2 CH3 CH4
CH1 CH2
CH3 CH4 CH3 CH4
LEVEL S
OUTPUT
POWER
ON
ON/OFF
1-HI-Z /LO W-Z
2-4 Ohm / 8 Ohm
3-HI-Z 25V/70V
4-HI-Z 100V
5-S UB -1
6-S UB -2
1-HPF 70Hz/120Hz S UB
2-S LEEP
3-AMP ST ATUS
4-CH3 TO CH4
5-CH2 TO CH3
6-CH1 TO CH2
DEEP
SLEEP
AMP
STATUS
100-240V~50/60Hz MAX 1200W
T12AH~250V
G
1 2 3 4 5 6
ON
1 2 3 4 5 6
2001310
CONFORMS TO
UL STD. 62368- 1
CERTIFIED TO
CSA STD. C22.2
NO. 6236 8-1
Made in China
CH1
IN P U T
CH2
GG
913. 663 .560 0 | ww w.ms e audi o.com
PLEASE NOTE:
The dial on the back-side of the speaker
head is NOT a volume knob. It is xed in
place and is NOT meant to be rotated.


Produkt Specifikationer

Mærke: Rockustics
Kategori: Højttaler
Model: Cherry Bomb

Har du brug for hjælp?

Hvis du har brug for hjælp til Rockustics Cherry Bomb stil et spørgsmål nedenfor, og andre brugere vil svare dig