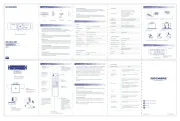
ROCWARE RC16 Manual


Læs gratis den danske manual til ROCWARE RC16 (1 sider) i kategorien Ikke kategoriseret. Denne vejledning er vurderet som hjælpsom af 2 personer og har en gennemsnitlig bedømmelse på 4.6 stjerner ud af 1.5 anmeldelser. Har du et spørgsmål om ROCWARE RC16, eller vil du spørge andre brugere om produktet?

Side 1/1
5V (USB power supply)
600mA (max.)
0°C~40°C
-40°C~60°C
3.0W (max.)
118mm x37.2mm x 30.8mm
(Bracket not included
0.2Kg
Current Consumption
Operating Temperature
Storage Temperature
30000hWTBF
Power Consumption
Size
Net Weight
General Specification
Input/Output Interface
1xUSB 3.0: Type C, female
USB Interface
Support
IR Remote
Camera
Sensor
Scanning Mode
Lens Mount
Lens
1/2.7'', CMOS, Effective Pixel: 8.29M
Progressive
M12
Focus: f=2.2mm, FOV: 110°
Minimum Illumination
Shutter
White Balance
Camera Bracket
0.5 Lux @ (F1.8, AGC ON)
1/30s~1/10000s
Auto, Indoor, Outdoor, One Push, Manual
Bracket with damper
Digital Noise Reduction
Backlight Compensation
Digital Zoom
2D&3D Digital Noise Reduction
Support
8X
3
Specification
1
Packing List
RC16
Remote Con ro USB Cat l ble
Convenient Operation
With the infrared remote control and exclusive soware, auto framing and
humanoid tracking can be initiated with one button. As well as, preset positions,
ePTZ, and image parameters can be set at the same time.
USB 3.0
Full-function USB 3.0 interface offers power supply, video, and audio all in one
USB cable/USB port. It can also support 2 USB video signal sources (optional), +1
channel audio source at the same time.
USB Features
USB Protocol
2.4 GHz Intel® Core 2 Duo CPU or higher;
2 GB RAM or more; USB 2.0 interface
YUY2 / H.264 / MJPEG
4K30/25, 1080P30/25, 720P30/25,
960x540P30/25, 640x360P30/25 etc.
UVC 1.1
UVC PTZ
Support (EPTZ)
Operate System
Hardware
Requirement
Color System/
Compression
Video Format
Windows® 7 (1080P and under only),
Windows 8.1, Windows 10 or higher
macOS™ 10.10 or higher
Google™ Chromebook™ Version
29.0.1547.70 or higher
Linux (support UVC)
Type C USB 3.0 Interface
For power supply & audio and
video data transmission
1/4''-20
Standard Screw Holes
Various brackets and tripods
can be easily installed
Base Stand
Various angles of the bracket
can be adjusted freely (see
the picture on the right)
1. Check whether the camera is recognized in the system.
If not, restart the Android platform.
2. Set H264 to off by default on the tool and restart the
camera.
Image flip
Check the anti-flicker frequency of the camera. Set the
power supply frequency to the same value as the
anti-flicker frequency.
Image has stripes
that scroll up and
down
Image comes and
goes from time to time
Check whether the cable of the video platform and TV is
properly connected.
Android platform
device has no image
If the image is flipped, please use the remote control to call
up the “Image Rotation” option in the menu bar to adjust.
Troubleshooting
Fault Phenomenon utionSol
No image output
Upgrade failed
The camera cannot
be recognized aer
power on
Check whether the USB cable of camera is properly
connected.
1. Check whether the privacy cover is open.
2. Whether to enable multiple soware access. The camera
supports only one access.
7
Safety Precautions
In the process of transportation, storage, and installation, the damage caused
by heavy pressure, violent vibration, and immersion should be prevented.
The product should be placed on a stable surface or other horizontal
platforms, The shell of this product is made of organic materials; avoid contact
with liquids, gases, or solids that may cause corrosion of the shell.
Do not disassemble the product without authorized permission.
This product has no parts that consumers can repair by themselves; damage
caused by consumer disassembly is not covered by a warranty.
Operating this equipment in a residential environment may cause radio
interference.
8
Maintenance and Troubleshooting
Camera Maintenance
Unqualified Application
Avoid shooting particularly bright objects, such as sunlight, lightings, etc.
Do not operate in unstable lighting conditions. Otherwise, the image will
flicker.
Do not use around powerful electromagnetic radiation, such as television
stations or radio transmitters, etc.
If the camera will not be used for a long time, turn off the power switch aer
use.
Use a socloth to clean the camera body.
Use a soand dry cloth to clean the camera lens. If the lens is very dirty,
clean it with diluted neuter detergent. Do not use any type of solvents, which
may damage the surface.
1. Check whether the camera is recognized correctly aer
connecting to PC, and whether the connection is successful.
If yes, re-upgrade it.
2. Check if multiple soware is trying to access the camera.
The camera supports only one access.
3. Open the upgrade soware, if it shows that the
connection fails, but the camera is connected to the PC and
can be accessed normally. It is recommended to try
connecting to another PC.
V1.0
2
Product Main Features
Ultra-high Definition and Ultra-large Field of View
Equipped with a new generation UHD CMOS image sensor, accurate native
resolution, richer color, and 4K video with full detail. With a 110-degree ultra-large
angle and low distortion 4K lens, the panoramic view is unobtrusive.
AI Ability
Multi-layer convolutional neural network design with cutting-edge deep learning
algorithms, enable intelligent camera features, and high quality analysis data can
be accessed through open APIs.
Auto Framing
This advanced deep learning algorithm is adapted to automatically adjust the size
of the picture according to the people in the detectable field of view, eliminating
the need for manual adjustment, and bringing you a new intelligent experience.
AI Humanoid Tracking
Embedded NNE hardware unit, using deep learning technology, through the
extraction of target features, no matter where one is facing, smooth humanoid
tracking can be achieved , suitable for tracking a speaker or other application
scenarios.
Microphone Array
Built-in beamforming microphone array with unique noise reduction and
automatic gain control algorithms, allow for a pick up distance of up to 6 meters,
and makes your voice sound crystal clear.
4
Simple Operation Steps
5
Product Details
1. Connect RC16 to computer with USB cable 2. Clip the RC16 to the computer and adjust
the angle
3. Choose Rocware RC16
Rocware RC16
5. Adjust the bracket according to the needs of landscape and portrait modes.
4. Start the meeting
4K Camera
Built-in 6-meter Pickup
Microphone
User Manual
V1.0
4K Ultra HD
USB Webcam
RC16
4K Ultra HD
USB Webcam
RC16
6
Remote Control
Standby Key
Turn on/off or wake
up the device
Mu Keyte
Turn the e microphon on or
off. When the emicrophon is
t eurn d off, there a is mute
icon on the video
HOME Key
ZOOM + Key
D Zigital oom In
ZOOM - Key
D Zigital oom Out
SWITCH Key
Click therst "SWITCH
Key", the age im disp y isla
curr tly en the tra cking
func targettion ( tracking)
or aut ame omatic fr
s ctele ion func ion (t auto
fr minga ).
Click the se SWIT cond " CH
Key" t to swi ch the current
func iont .
No. 1 /No. 2 Preset Key
N es to. 1 pr et posi ion, ongl
pr conds e ess for 3 s to set
the es t t pr et posi ion, shor
pr ss o e t a t the es djus pr et
posi iont
TRACKING OFF Key
Turn on/off or wake the e. up devic
Menu Key
Open the me nu or
exit the menu
Return Key
upp r e level of
the menu
Direction Key
Adjust the e m nu
cursor nua end m
parameters
079.79.11010082_V1.0www.roc .coware m
@rocwareav
@Rocware2
@ROCWARE Audio Visual Expert


Produkt Specifikationer

Mærke: ROCWARE
Kategori: Ikke kategoriseret
Model: RC16

Har du brug for hjælp?

Hvis du har brug for hjælp til ROCWARE RC16 stil et spørgsmål nedenfor, og andre brugere vil svare dig


Ikke kategoriseret ROCWARE Manualer

ROCWARE

ROCWARE RC16 Manual

29 September 2025
ROCWARE

ROCWARE RC18 Manual

27 September 2025
ROCWARE

ROCWARE RC08 Manual

27 September 2025

Ikke kategoriseret Manualer

Nyeste Ikke kategoriseret Manualer

API Audio

API Audio 527A Manual

29 September 2025
NEO Tools

NEO Tools 15-902 Manual

29 September 2025
Gourmetmaxx

Gourmetmaxx 03806 Manual

29 September 2025
Martin Audio

Martin Audio AQ210 Manual

29 September 2025
Sani-Lav

Sani-Lav N4 Manual

29 September 2025
Warm Audio

Warm Audio WA76-D Manual

29 September 2025