RTS OKI Manual


Læs gratis den danske manual til RTS OKI (2 sider) i kategorien Ikke kategoriseret. Denne vejledning er vurderet som hjælpsom af 29 personer og har en gennemsnitlig bedømmelse på 4.6 stjerner ud af 15 anmeldelser. Har du et spørgsmål om RTS OKI, eller vil du spørge andre brugere om produktet?

Side 1/2
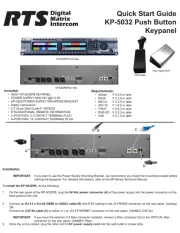
Quick Start Guide
OKI - OMNEO Keypanel Interface KP 12 CLD
Included:
• OMNEOKeypanelModule
• RearPanel,KP12CLD,Expansion
• 2-Screw,4-40x.25LG.
• 3-Screw,PH,4-40x3/16LG.
• SafetyInstructionsST-CO
• OKIQuickStartGuide
• OKIDocumentationResourceDisk
Requirements:
Youmusthavethefollowing:
• PhillipsScrewdriver
• HexNutDriver
Firmware Requirements
• KP12CLDversion1.30
IMPORTANT Thekeypanelrmwaremustbeupdatedbefore
youinstalltheOKImoduleintothekeypanel.
Reference View - OKI KP 12 CLD
Description
1.J1&J2 RJ-45Connectors(2)
2.J3 LCFiberConnector(Optional)
OKI Installation – KP 12 CLD
Toinstall the OKI board set for the KP 12 CLD,dothe
following:
NOTE:Becauseallthechangesaremadetothe
expansionbox,removetheexpansionboxfrom
theKP12CLDunit.
1. Power theKP12CLDunit.off
2. Removethe fromtheKP12CLDexpansion box
unit.
NOTE:Steps3and4areonlynecessaryifanRCoption
isinstalled.
3. Usingahexnutdriver,removethe 12 hex screws
fromtheKP12CLDexpansionbox.
4. Usingthesamescrewdriver,removetheeight (8)
pan head screwsfromtheKP12CLDexpansion
box.
5. UsingaPhillipsscrewdriver,removethesix (6) at
head screws from KP12CLDexpansionbox.
F01U280811Rev01 01/2013
Quick Start Guide
OKI - OMNEO Keypanel Interface KP 12 CLD
6. Removethe .KP 12 CLD expansion box cover
7. Ifinstalled,removethe .RVON standoffs
8. Replacethestandoffswiththeprovidedpan head
screws (3).
Caution: EnsurethatallRJ-45connectorsonthe
boardareushwiththechassisopenings.
9. Usingtheprovidedpanheadscrews(2),secure
theOKI board set to the OKI KP 12 CLD
expansion box replacement cover.
NOTE:ItiseasiertoinstalltheOKIboardsettothe
OKIKP12CLDexpansionboxbackpanel
whiletheboardsetandthechassisarelaying
upsidedown,seepicturebelow.
NOTE: AligntheredstripeonthecablewithPin1.
10. Attachone end of the provided ribbon cable to
J2ontheOKIboardset.
11. Attachthe other end of the ribbon cable to J5
ontheKP12CLDexpansionboxmainboard.
12. Replacetheexisting cover with the OKI KP 12
CLD expansion box cover.
Caution: EnsurethatallRJ-45connectorsonthe
boardareushwiththechassisopenings.
13. Replacethe .eight (8) pan head screws
14. Replacethe .six (6) at head screws
15. Replacethe .12 hex screws
16. Usingtheexistingscrews,securetheOKI KP 12
CLD expansion box covertothechassis.
17. Remountthe totheKP 12 CLD expansion box
KP12CLDunit.


Produkt Specifikationer

Mærke: RTS
Kategori: Ikke kategoriseret
Model: OKI

Har du brug for hjælp?

Hvis du har brug for hjælp til RTS OKI stil et spørgsmål nedenfor, og andre brugere vil svare dig


Ikke kategoriseret RTS Manualer
RTS

RTS 4030-M Manual

16 December 2024
RTS

RTS TIF-2000A Manual

11 December 2024
RTS

RTS TIF-4000 Manual

11 December 2024
RTS

RTS OKI Manual

31 August 2024
RTS

RTS OMI Manual

31 August 2024
RTS

RTS OEI-2 Manual

9 August 2024

Ikke kategoriseret Manualer

Nyeste Ikke kategoriseret Manualer