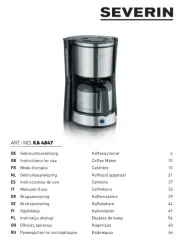
Severin KA 4141 Manual


Læs gratis den danske manual til Severin KA 4141 (84 sider) i kategorien Kaffemaskine. Denne vejledning er vurderet som hjælpsom af 33 personer og har en gennemsnitlig bedømmelse på 4.7 stjerner ud af 17 anmeldelser. Har du et spørgsmål om Severin KA 4141, eller vil du spørge andre brugere om produktet?

Side 1/84
www.severin.com
DE Gebrauchsanweisung
GB Instructions for use
FR Mode d’emploi
NL Gebruiksaanwijzing
ES Instrucciones de uso
IT Manuale d’uso
DK Brugsanvisning
SE Bruksanvisning
FI Käyttöohje
PL Instrukcja obsługi
GR Oδηγίες χρήσεως
RU Руководство по эксплуатации
Kaffeeautomat 4
Coffee Maker 10
Cafetière 16
Kof ezet apparaat 22
Cafetera 28
Caffettiera 35
Kaffemaskine 42
Kaffekokare 48
Kahvinkeitin 54
Ekspres do kawy 60
Καφετιέρα 67
Кофеварка 74
2
Liebe Kundin, lieber Kunde,
wir wünschen Ihnen mit dem Qualitätsprodukt aus dem Hause SEVERIN
viel Freude und bedanken uns für Ihr Vertrauen.
Die Marke SEVERIN steht seit über 120 Jahren für Beständigkeit,
deutsche Qualität und Entwicklungskraft. Jedes Gerät wurde mit Sorgfalt
hergestellt und geprüft.
Mit der sprichwörtlichen Sauerländer Gründlichkeit, Genauigkeit und
Ehrlichkeit überzeugt das Familienunternehmen aus Sundern seit der
Gründung 1892 mit innovativen Produkten Kunden in aller Welt.
In den sieben Produktgruppen Kaffee, Frühstück, Küche, Grillen,
Haushalt, Personal Care und Kühlen & Gefrieren bietet SEVERIN mit über
250 Produkten ein umfassendes Elektrokleingeräte-Sortiment. Für jeden
Anlass das richtige Produkt!
Lernen Sie die SEVERIN-Produktvielfalt kennen und besuchen Sie uns
unter www.severin.de www.severin.com oder .
Ihre
Geschäftsleitung und Mitarbeiter
der SEVERIN Elektrogeräte GmbH
3
1
2
3
4
13
12
11
14
9
10
8
7
6
5
5
Arbeitsumgebungen,
-in landwirtschaftlichen Betrieben
-von Kunden in Hotels, Motels
und weiteren typischen
Wohnumgebungen
-in Frühstückspensionen
Das Gerät kann von Kindern ab
8 Jahren sowie von Personen
mit reduzierten physischen,
sensorischen oder mentalen
Fähigkeiten oder Mangel an
Erfahrung und/oder Wissen benutzt
werden, wenn sie beaufsichtigt oder
bezüglich des sicheren Gebrauchs
des Gerätes unterwiesen wurden und
die daraus resultierenden Gefahren
verstanden haben.
Kinder rfen nicht mit dem Gerät
spielen.
Reinigung und Benutzer-Wartung
dürfen nicht durch Kinder
durchgeführt werden, es sei denn sie
sind 8 Jahre und älter und werden
beaufsichtigt.
Kinder jünger als 8 Jahre sind vom
Gerät und der Anschlussleitung
fernzuhalten.
Kinder von Verpackungsmaterial
fernhalten. Es besteht u.a.
Erstickungsgefahr!
Vor der Inbetriebnahme das komplette
Gerät inkl. Anschlussleitung und
eventueller Zubehörteile auf Mängel
und Beschädigungen überprüfen, die
die Funktionssicherheit des Gerätes
beeinträchtigen könnten. Falls das Gerät
z.B. zu Boden gefallen ist oder an der
Anschlussleitung gezogen wurde, können
von außen nicht erkennbare Schäden
vorliegen. In diesen Fällen das Gerät
nicht in Betrieb nehmen.
Das Gerät auf eine ebene rutschfeste und
wasserunemp ndliche Fläche stellen.
Weder das Gehäuse noch die
Anschlussleitung dürfen einer heißen
Kochplatte oder offenem Feuer zu nahe
kommen.
Bevor der Kaffeeautomat geöffnet oder
Zubehör entnommen wird, muss das
ausgeschaltete Gerät erst abkühlen.
Andernfalls kann heißes Wasser oder
Dampf austreten.
Nach jedem Gebrauch das Gerät
ausschalten.
Den Netzstecker ziehen,
-bei Störungen während des
Betriebes,
-vor jeder Reinigung,
-bei längerem Nichtgebrauch.
Nach erneuter Inbetriebnahme muss die
Uhr wieder eingestellt werden.
Den Netzstecker nicht an der
Anschlussleitung aus der Steckdose
ziehen, sondern den Netzstecker
anfassen.
Die Anschlussleitung nicht
herunterhängen lassen und von heißen
Geräteteilen fernhalten.
Wird das Gerät falsch bedient, oder
zweckentfremdet verwendet, kann keine
6
Haftung für evtl. auftretende Schäden
übernommen werden.
Uhrzeit einstellen
Den Netzstecker in eine Steckdose
stecken. Es leuchtet keine
Kontrollleuchte. Der Kaffeeautomat
ist ausgeschaltet. In der LCD-Anzeige
erscheint . 12:00
Nach dem Drücken der PROG Taste kann
die Uhrzeit eingestellt werden.
Bei der Uhr handelt es sich um eine
24-Stunden-Uhr. Durch Drücken der Taste
H wird die Stunde, mit der Taste die M
Minute eingestellt.
Beispiel:
Es ist 15.30 Uhr.
Taste
PROG . drücken Im Display
erscheint CLOCK.
Taste
H mehrfach drücken bzw. gedrückt
halten bis in der LCD-Anzeige 15:00
erscheint.
Taste
M mehrfach drücken bzw. gedrückt
halten bis in der LCD-Anzeige 15:30
erscheint.
Nach ca. 15 Sekunden erlischt CLOCK
und das Gerät ist betriebsbereit.
Timer
Falls der Brühvorgang zu einer
bestimmten Uhrzeit beginnen soll,
zunächst wie folgt die gewünschte Uhrzeit
einstellen:
Taste
PROG zweimal drücken. In der
LCD-Anzeige erscheint und die TIMER
zuletzt eingestellte Zeit bzw. .12:00
Nun mit den Tasten und die H M
gewünschte Zeit einstellen (Erfolgt
innerhalb von 15 Sekunden keine
Eingabe, erlischt die Anzeige )TIMER.
Zum Einschalten die Ein/Aus-Taste
( ) zweimal drücken. Die blaue I/0
Kontrollleuchte leuchtet. Der AUTO
Kaffeeautomat schaltet sich dann zur
eingestellten Zeit ein. Dann erlischt die
blaue Kontrollleuchte und die rote leuchtet
auf.
Ein/Aus-Taste (I/0)
Mit der Ein/Aus-Taste kann zwischen den
drei Einstellungen - - gewechselt 0 I AUTO
werden:
0 - Das Gerät ist ausgeschaltet.
Keine Kontrollleuchte leuchtet.
I - Das Gerät ist eingeschaltet. Die
rote Betriebskontrollleuchte
leuchtet.
AUTO - Das Gerät schaltet sich zur vorher
eingestellten Zeit ein. Die blaue
Kontrollleuchte leuchtet. AUTO
Automatische Abschaltung
Um unnötigen Stromverbrauch zu
vermeiden, schaltet sich das Gerät nach
dem Ende des Kaffeedurchlaufs automatisch
ab.
Aromafunktion
Um ein stärkeres Kaffeearoma zu erhalten,
ist das Gerät mit einer Aromafunktion
ausgestattet. Bei dieser Einstellung wird das
Kaffeemehl intervallartig überbrüht. Diese
Einstellung emp ehlt sich besonders bei der
Zubereitung von geringen Kaffeemengen.
Zur Auswahl der Funktion den Ein-/Aus-
Taster für ca. 2 Sekunden drücken, bis die
Kontrollleuchte zu blinken beginnt.
Diese Funktion kann nicht im Timer-Betrieb
mit vorgewählter Start-Zeit benutzt werden!
7
Vor der ersten Inbetriebnahme
Vor der ersten Kaffeezubereitung ca. 2-3
Wasserdurchläufe mit max. Tassenzahl
kaltem Wasser ohne Kaffeemehl
durchführen. Dieses gilt auch, wenn der
Automat einmal über längere Zeit nicht
benutzt wurde oder nach einer Entkalkung.
Allgemein
Am Wasserbehälter be ndet sich
eine Skalierung zur Dosierung der
Frischwassermenge. Bei zweiskalig
ausgeführter Wasserstandsanzeige gilt
die linke Skalierung für normalgroße
Tassen mit einem Inhalt von ca.
125 ml, die rechte für kleine Tassen.
Die angegebene max. Tassenzahl nicht
überschreiten.
Den Schwenk
lter nicht während
des Brühvorganges öffnen.
Verbrühungsgefahr!
Sind mehrere Brühvorgänge
hintereinander erforderlich, so ist nach
jedem Brühvorgang der Kaffeeautomat
auszuschalten und eine Abkühlpause (ca.
5 Min.) einzulegen.
Wichtig: Beim Einfüllen von Frischwasser
kurz nach dem Brühvorgang kann heißer
Dampf aus dem Wasserauslauf austreten
(Verbrühungsgefahr).
Kaffeezubereitung
Wasser einfüllen:
Wasserbehälterdeckel öffnen, gewünschte
Menge kaltes Wasser einfüllen und Deckel
wieder schließen.
Papier lter einlegen:
Schwenk lter aufschwenken und den
Filtereinsatz einsetzen. Der Filtereinsatz
muss so eingesetzt werden, dass er durch
Herunterklappen des Bügels arretiert
wird. Einen Papier
lter Größe
4 in den
Filtereinsatz einlegen. Vorher die perforierten
Seiten umknicken.
Kaffeemehl einfüllen:
Wir empfehlen für jede normalgroße
Tasse (125 ml) ca. 6g = 1½ - 2 Teelöffel
mittelfein bis fein gemahlenes Kaffeemehl
zu verwenden. Anschließend Schwenk lter
zuschwenken.
Kanne vorbereiten:
Den Durchbrühdeckel auf die Kanne setzen,
im Uhrzeigersinn verriegeln und die Kanne in
das Gerät stellen. Durch den Deckel wird der
Tropfverschluss im Schwenk lter während
des Brühvorganges geöffnet.
Brühvorgang starten:
Den Kaffeeautomaten durch einmaliges
Drücken der Ein/Aus-Taste einschalten. Die
rote Betriebskontrollleuchte leuchtet.
Falls der Brühvorgang zu einer bestimmten
Uhrzeit beginnen soll, die zuvor
programmierte Uhrzeit durch zweimaliges
Drücken der Taste kontrollieren. PROG
Anschließend zweimal die Ein/Aus-Taste
drücken. Die blaue Kontrollleuchte AUTO
leuchtet. Der Kaffeeautomat schaltet sich zur
eingestellten Zeit ein.
Kaffee entnehmen:
Wasserdurchlauf durch den Filter abwarten
und die Kanne entnehmen.
Kaffeeautomaten ausschalten:
Das Gerät schaltet sich nach dem Ende
des Kaffeedurchlaufs automatisch ab. Es
kann auch während des Brühvorgangs
durch zweimaliges Drücken der Ein/
Aus-Taste ausgeschaltet werden. Die rote
Betriebskontrollleuchte erlischt.
Durchbrühdeckel
Der Durchbrühdeckel kann während des
Brühvorgangs und zum Ausgießen auf der
9
Keine scharfen oder scheuernden
Reinigungsmittel verwenden.
Zur Entnahme des verbrauchten
Kaffeemehls den Schwenk lter
aufschwenken und den Filtereinsatz
am Bügel entnehmen. Verbrauchtes
Kaffeemehl entnehmen. Das
Kaffeemehl kann kompostiert werden.
Filtereinsatz spülen. Anschließend den
Filtereinsatz wieder einhängen, den Bügel
herunterklappen und den Filtereinsatz
dadurch verriegeln. Den Schwenk lter
zuschwenken.
Die Warmhaltekanne nicht zerlegen, nicht
in der Spülmaschine reinigen und nicht in
Wasser tauchen.
Nach dem Gebrauch die Kanne innen
ausspülen und außen mit einem feuchten
Tuch abwischen.
Zur Beseitigung von Kaffeerückständen
in der Warmhaltekanne kann diese
mit heißem Wasser gefüllt werden.
Anschließend einen Esslöffel
Spülmaschinenreiniger hinzugeben
und mit dem Deckel verschließen. Die
Mischung einige Stunden einwirken
lassen und die Kanne anschließend
gründlich mit Wasser ausspülen.
Zur Reinigung des Durchbrühdeckels
diesen durch Drehung gegen den
Uhrzeigersinn entriegeln, abnehmen,
im Spülwasser reinigen und mit Wasser
abspülen.
Ersatzteile und Zubehör
Ersatzteile oder Zubehör können bequem
im Internet auf unserer Homepage www.
severin.de unter dem Unterpunkt „Service /
Ersatzteil-Shop“ bestellt werden.
Entsorgung
Geräte, die mit diesem Symbol
gekennzeichnet sind, müssen
getrennt vom Hausmüll entsorgt
werden. Diese Geräte enthalten
wertvolle Rohstoffe, die wiederverwertet
werden können. Eine ordnungsgemäße
Entsorgung schützt die Umwelt und die
Gesundheit Ihrer Mitmenschen. Ihre
Gemeindeverwaltung bzw. Ihr Fachhändler
gibt Auskunft über die ordnungsgemäße
Entsorgung.
Garantie
Von den nachfolgenden
Garantiebedingungen bleiben die
gesetzlichen Gewährleistungsrechte
gegenüber dem Verkäufer und eventuelle
Verkäufergarantien unberührt. Wenden
Sie sich im Garantiefall daher direkt an
den Händler. Zusätzlich gewährt SEVERIN
eine Herstellergarantie von zwei Jahren ab
Kaufdatum. In diesem Zeitraum beseitigen
wir kostenlos alle Mängel, die nachweislich
auf Material- oder Fertigungsfehlern beruhen
und die Funktion wesentlich beeinträchtigen.
Weitere Ansprüche sind ausgeschlossen.
Von der Garantie ausgenommen sind:
Schäden, die auf Nichtbeachtung der
Gebrauchsanweisung, unsachgemäße
Behandlung oder normalen Verschleiß
zurückzuführen sind, ebenso leicht
zerbrechliche Teile wie z. B. Glas, Kunststoff
oder Glühlampen. Die Garantie erlischt bei
Eingriff nicht von SEVERIN autorisierter
Stellen. Sollte eine Reparatur erforderlich
werden, setzen Sie sich bitte telefonisch
oder per Mail mit unserem Kundendienst in
Verbindung. Die Kontaktdaten nden Sie im
Anhang der Anleitung.
10
Coffee Maker
Dear Customer,
Before using the appliance, please read the
following instructions carefully and keep this
manual for future reference. The appliance
must only be used by persons familiar with
these instructions.
Connection to the mains supply
The appliance should only be connected to
an earthed socket installed in accordance
with the regulations.
Make sure that the supply voltage
corresponds with the voltage marked on the
rating label. This product complies with all
binding CE labelling directives.
Familiarisation
1. Power cord with plug
2. On/Off button ( )I/0
3. Timer programming button ( )PROG
4. Main indicator light
5. Indicator lamp AUTO
6. LCD display
7. Minute set button ( )M
8. Hour set button ( ) H
9. Heat-retaining carafe
10. Drip-through lid
11. Swing-out lter with removable lter
insert
12. Water level indicator
13. Water container
14. Lid for water container
Important safety instructions
In order to avoid hazards, and to
comply with safety requirements,
repairs to this electrical appliance or
its power cord must be carried out by
our customer service. If repairs are
needed, please send the appliance
to our customer service department
(see appendix).
Before cleaning the appliance,
ensure it is disconnected from the
power supply and has cooled down
completely. For detailed information
on cleaning the appliance, please
refer to the section Cleaning and
care.
To avoid the risk of electric shock, do
not clean the appliance with liquids
or immerse it.
Caution: Any misuse can cause
severe personal injury.
Caution: The accessible surfaces
heat up during operation and will
remain hot for some time afterwards.
This appliance is intended for
domestic or similar applications, such
as
-
staff kitchens in shops, of ces and
other similar working environments,
-in agricultural working
environments,
-by customers in hotels, motels etc.
GB
11
and similar establishments,
-in bed-and breakfast type
environments.
This appliance may be used by
children (at least 8 years of age) and
by persons with reduced physical,
sensory or mental capabilities, or
lacking experience and knowledge,
provided they have been given
supervision or instruction concerning
the use of the appliance and fully
understand all dangers and safety
precautions involved.
Children must not be permitted to
play with the appliance.
Children must not be permitted
to carry out any cleaning or
maintenance work on the appliance
unless they are supervised and at
least 8 years of age.
The appliance and its power cord
must be kept well away from children
under 8 at all times.
Caution: Keep any packaging materials
well away from children – these are
a potential source of danger, e.g. of
suffocation.
Every time the appliance is used, the
main body including the power cord as
well as any attachment tted should
be checked thoroughly for any defects.
Should the appliance, for instance, have
been dropped onto a hard surface, or if
excessive force has been used to pull the
power cord, it must no longer be used:
even invisible damage may have adverse
effects on the operational safety of the
appliance.
During operation, the coffee maker must
be placed on a level, non-slip surface,
impervious to splashes and stains.
Do not allow the appliance or its power
cord to touch hot surfaces or to come into
contact with any heat sources.
To prevent the danger of hot water or
steam being emitted, always switch off
the coffee maker and allow suf cient
time for the appliance to cool down
before it is opened or any accessories or
attachments are removed.
Always switch off the appliance after use.
Remove the plug from the wall socket
-in case of any malfunction,
-during cleaning,
-if the appliance is not being used for
an extended period of time.
Each time the appliance is reconnected to
the mains power, the internal clock must
be re-set.
When removing the plug from the wall
socket, never pull on the power cord;
always grip the plug itself.
Do not allow the power cord to hang free;
the cord must be kept well away from hot
parts of the appliance.
No responsibility will be accepted if
damage results from improper use, or if
these instructions are not complied with.
Setting the time
Insert the plug into a suitable wall outlet.
None of the indicator lights will come on.
12
The coffee maker is switched off, the LCD
display showing 12:00.
To set the time, rst press the key.PROG
The internal clock uses a 24-hour display
format. The current time is set by using
the button for the hours, while the H M
button is used to set the minutes.
Example:
The current time is 15.30 (3 pm).
Press the key; the display shows PROG
CLOCK.
Press the button repeatedly (or keep it H
pressed for the necessary length of time)
until the LCD display shows .15:00
Press the button (or keep it pressed) M
until the LCD display shows .15:30
After around 15 seconds, CLOCK
disappears from the display and the
appliance is ready for use.
Timer
To start the brewing process with a
delayed timer setting, you must rst set
the timer to the desired time.
Press the
PROG button twice. The LCD
display shows and the time last TIMER
entered, or .12:00
Use the buttons und to set the H M
desired time. (If no input is made
within 15 seconds, the indicator TIMER
disappears.)
Press the On/Off button ( ) twice to turn I/0
the appliance on. The blue indicator light
AUTO comes on. At the pre-programmed
time, the coffee maker will automatically
switch on. The blue indicator light goes
out and the red light comes on.
On/Off button (I/0)
The On/Off button is used to switch between
the three settings - - :0 I AUTO
0 - The appliance is switched off.
No indicator light is on.
I - The appliance is switched on. The
red main indicator light comes on.
AUTO - The appliance automatically
switches on at the pre-
programmed time. The blue
indicator light comes on. AUTO
Automatic switch-off
To save energy, the appliance will switch
itself off automatically after the brewing cycle
is complete.
Aroma function
To obtain a stronger coffee avour, the
appliance is equipped with a special aroma
function. With this setting, the hot water
is released at intervals. This is especially
useful when preparing smaller quantities
of coffee. To select this function, press the
On/Off switch for about 2 seconds until the
indicator light begins to ash.
Note: This feature is not available when
using the timer function with a pre-selected
starting time.
Before using for the rst time
Before making coffee for the rst time,
let the appliance go through two or three
ltration cycles using the indicated maximum
amount of cold water, but without using
ground coffee. This should also be done
if the appliance has not been used for an
extended period of time, and after descaling.
General information
A measuring scale on the water container
facilitates lling the container with the
correct amount of clean water. With
13
a dual-scale, the left scale is used for
regular-sized cups of approx.125 ml, while
the right scale is used for smaller cups.
Make sure that the indicated maximum
amount of water is not exceeded.
Caution: Do not attempt to open the
swing-out lter while brewing is in
progress: there is a danger of scalding.
If several consecutive brewing cycles
are required, switch off the coffee maker
after each cycle and let the appliance cool
down for approx. 5 minutes.
Important note: When lling the
appliance with fresh water shortly after
a brewing cycle is completed, there is
a from hot water or danger of scalding
steam escaping through the water outlet.
Making coffee
Filling with water:
Open the water container lid, ll the
container with the desired quantity of water
and replace the lid.
Inserting the paper lter:
Open the swing-out
lter and
t the
lter
insert, folding down the handle so that it is
properly locked. Insert a paper size-4 lter,
rst folding down the perforated sides of
the lter.
Filling with ground coffee:
For each regular-sized cup (125 ml), a
measure of about 6 g (= 1½ - 2 teaspoons)
of medium or nely ground coffee will
be required. Close the swing-out lter
afterwards.
Preparing the carafe:
Fit the drip-through lid onto the carafe, and
then place the carafe into the appliance. If
correctly inserted, the lid will disable the drip-
stop mechanism in the lter holder during the
brewing cycle.
Starting the brewing cycle:
Press the On/Off button once to turn on
the coffee maker. The red indicator light
comes on.
If the brewing cycle is to be started with
a delayed timer setting, press the PROG
button twice to verify that the timer has been
set to the desired time. Now press the On/Off
button twice. The blue indicator light AUTO
comes on. The coffee maker automatically
switches on at the pre-programmed time.
Removing the carafe:
Wait until all the water has passed through
the lter before the carafe is removed from
the appliance.
Switching off the coffee maker:
Once the brewing cycle is complete, the
appliance switches off automatically:
however, it may be switched off during the
brewing cycle by pressing the On/Off button
twice. The red indicator lamp then goes
out.
Drip-through lid
During the ltering process and while
pouring the coffee out, the drip-through lid
does not need to be removed and should
remain on the carafe. Press the lid-opening
lever to pour the coffee.
Heat-retaining carafe
For technical reasons the lid does not
close hermetically. Therefore always hold
the carafe in an upright position when
lled with coffee.
Keeping the coffee hot: A heat-retaining
carafe accumulates heat energy.
Therefore the carafe should preferably be
lled to its maximum capacity. If it is only
partly lled, the temperature will not
be held as ef ciently. If you rinse out
14
the carafe with hot water before use, the
coffee will be kept warm for a longer time.
To prevent the risk of scalding, do
not leave the heat-retaining carafe
unattended near where children may
reach it.
Therefore, do not drink out of the carafe
and do not put your hand into it.
Always close the carafe with its lid.
The coffee can be poured out easily by
pressing the lid-opening lever.
Do not wash the heat-retaining carafe
in a dishwasher and do not put it in a
microwave oven.
Descaling
Depending on the water quality (lime
content) in your area as well as the
frequency of use, all thermal household
appliances using hot water need
descaling (i.e. removal of lime deposits)
on a regular basis to warrant proper
functioning.
Any warranty claim will be null and
void if the appliance malfunctions
because of insuf cient descaling.
A lengthening of the brewing time and
increased noise during brewing indicate
that descaling of the coffee maker has
become necessary.
An excessive build-up of lime deposits is
very dif cult to remove, even when strong
descaling agents are used. It may also
cause the brewing system to leak. We
therefore strongly recommend descaling
the appliance after each thirty to forty
brewing cycles. For descaling, a vinegar
solution may be used as follows:
Mix 80 ml of vinegar essence with the
indicated maximum amount of water.cold
Pour the descaling solution into the water
container, insert a paper lter into the
lter holder
without adding any ground
coffee as described in section Making
coffee, and let the appliance run through
one
ltration
cycle. Repeat the procedure
if necessary. During descaling, ensure
suf cient ventilation and do not inhale any
vinegar vapours.
To clean the appliance after descaling, let
it run through 2-3 ltration cycles using
clean water only.
Do not pour descalers down enamel
sinks.
Cleaning and care
Before cleaning the appliance, ensure it is
disconnected from the power supply and
has cooled down completely.
To avoid the risk of electric shock, do not
clean the appliance with water and do not
immerse it in water. The appliance may be
cleaned with a slightly damp cloth, using
a mild detergent. Wipe dry afterwards.
Do not use abrasives or harsh cleaning
solutions.
To remove the used ground coffee, open
the swing-out lter and lift out the lter
insert by its handle. Dispose of the ground
coffee (as a natural substance, it may
be composted). Rinse out the lter and
replace it, folding down the handle and
locking it. Close the swing-out lter.
Do not dismantle the carafe, do not wash
in a dishwasher and do not immerse it in
water.
Rinse the inside of the heat-retaining
carafe with water and wipe the outside
with a clean damp cloth after use.
To remove any coffee deposits from
the inside of the heat-retaining carafe,
ll it with hot water and add a teaspoon
15
of dishwasher detergent. Close with
the lid and leave it standing for some
hours. Rinse out thoroughly with water
afterwards.
To clean the drip-through lid, turn it anti-
clockwise to unlock, take it off and clean
it with hot soapy water; rinse thoroughly
with fresh water afterwards.
Disposal
Devices marked with this symbol
must be disposed of separately
from your household waste, as
they contain valuable materials
which can be recycled. Proper disposal
protects the environment and human health.
Your local authority or retailer can provide
information on the matter.
Guarantee
This product is guaranteed against defects
in materials and workmanship for a period
of two years from the date of purchase.
Under this guarantee the manufacturer
undertakes to repair or replace any parts
found to be defective, providing the product
is returned to one of our authorised service
centres. This guarantee is only valid if the
appliance has been used in accordance with
the instructions, and provided that it has not
been modi ed, repaired or interfered with
by any unauthorised person, or damaged
through misuse.
This guarantee naturally does not cover
wear and tear, nor breakables such as
glass and ceramic items, bulbs etc. This
guarantee does not affect your statutory
rights, nor any legal rights you may have
as a consumer under applicable national
legislation governing the purchase of goods.
If the product fails to operate and needs
to be returned, pack it carefully, enclosing
your name and address and the reason for
return. If within the guarantee period, please
also provide the guarantee card and proof
of purchase.
16
Cafetière
Chère cliente, Cher client,
Avant d’utiliser cet appareil, veuillez lire
soigneusement les instructions suivantes et
conserver ce manuel pour future référence.
L’appareil doit être utilisé exclusivement
par des personnes familiarisées avec les
présentes instructions.
Branchement au secteur
Cet appareil doit être branché sur une prise
de courant avec terre installée selon les
normes en vigueur.
Assurez-vous que la tension d’alimentation
correspond à la tension indiquée sur la
plaque signalétique. Ce produit est conforme
à toutes les directives relatives au marquage
“CE”.
Familiarisez-vous avec votre appareil
1. Cordon d’alimentation avec che
2. Commutateur Marche/Arrêt ( )I/0
3. Touche de programmation de la
minuterie ( )PROG
4. Voyant principal
5. Témoin lumineux AUTO
6. Écran LCD
7. Touche de réglage des minutes ( )M
8. Touche de réglage des heures ( ) H
9. Verseuse isotherme
10. Couvercle perméable
11. Porte- ltre pivotant avec ltre plastique
amovible
12. Indicateur du niveau d’eau
13. Réservoir d’eau
14. Couvercle du réservoir d’eau
Consignes de sécurité
A
et pour rester en conformité avec
les exigences de sécurité, les
réparations de cet appareil électrique
ou de son cordon d’alimentation
doivent être effectuées par notre
service clientèle. Si des réparations
sont nécessaires, veuillez envoyer
l’appareil à notre service après-vente
(voir appendice).
Avant de nettoyer l’appareil,
débranchez toujours la che de la
prise de courant et laissez l’appareil
refroidir suf samment. Pour des
informations détaillées concernant le
nettoyage de l’appareil, veuillez vous
référer au paragraphe Entretien et
nettoyage.
Pour éviter le risque de chocs
électriques, ne pas nettoyer l’appareil
avec du liquide et ne pas le plonger
dans du liquide.
Attention : Une mauvaise utilisation
peut provoquer des blessures
corporelles graves.
Attention : Les surfaces
accessibles chauffent pendant le
fonctionnement et restent ensuite
chaudes pendant quelques temps.
Cet appareil est destiné à une
utilisation domestique ou similaire,
FR
17
telle que
-dans les cuisines pour personnel,
dans des bureaux et autres locaux
commerciaux,
-dans des organisations agricoles,
-par la clientèle dans les hôtels,
motels et établissements similaires,
-et dans des maisons d’hôtes.
Cet appareil peut être utilisé par des
enfants (à partir de 8 ans) et par des
personnes souffrant de dé ciences
physiques, sensorielles ou mentales,
ou manquant d’expérience ou de
connaissances, s’ils ont été formés
à l’utilisation de l’appareil et ont été
supervisés, et s’ils en comprennent
les dangers et les précautions de
sécurité à prendre.
Les enfants ne sont pas autorisés à
jouer avec l’appareil.
Les enfants ne doivent pas être
autorisés à nettoyer ou entretenir
l’appareil à moins d’être supervisés
et d’avoir plus de 8 ans.
L’appareil et son cordon
d’alimentation doivent être, à tout
moment, tenus hors de portée des
enfants de moins de 8 ans.
Attention : Tenez les enfants à l’écart
des emballages, qui représentent
un risque potentiel, par exemple, de
suffocation.
Avant toute utilisation, véri ez
soigneusement que l’appareil, son cordon
d’alimentation et ses accessoires ne
présentent aucun signe de détérioration
qui pourrait avoir un effet néfaste sur la
sécurité de fonctionnement de l’appareil.
Au cas où l’appareil, par exemple, serait
tombé sur une surface dure, ou si une
force excessive aurait été employée pour
tirer sur le cordon d’alimentation, il ne doit
plus être utilisé.
Pendant l’utilisation, la cafetière doit
être placée sur une surface plane,
antidérapante et imperméable aux
éclaboussures et taches.
Ne laissez jamais l’appareil ou le cordon
d’alimentation toucher une surface
chaude ou entrer en contact avec une
source de chaleur.
Pour éviter tout risque de dégagement
d’eau chaude ou de vapeur, éteignez
toujours la cafetière et laissez-la refroidir
avant de l’ouvrir ou d’en retirer les
accessoires.
Éteignez toujours l’appareil après
utilisation.
Retirez la che de la prise murale
-en cas de fonctionnement anormal,
-avant de nettoyer l’appareil,
-si l’appareil reste longtemps sans
être utilisé.
L’horloge interne doit être re-programmée
à chaque remise sous tension.
Ne débranchez pas l’appareil en tirant sur
le cordon ; tirez toujours sur la che.
Ne laissez pas le cordon d’alimentation
pendre librement ; le cordon doit toujours
être tenu à l’écart des surfaces chaudes
de l’appareil.


Produkt Specifikationer

Mærke: Severin
Kategori: Kaffemaskine
Model: KA 4141
Produktfarve: Black,Stainless steel
Indbygget skærm: Ingen
Produkttype: Dråbe kaffemaskine
Strøm: 1000 W
Placering af apparat: Bordplade
Kaffetype: Malet kaffe
Kaffemaskine type: Semi-auto
Indbygget kværn: Ingen
Kaffebrygning: Ja
Volumen i kopper: 8 kopper
Flere drikkevarer: Ingen

Har du brug for hjælp?

Hvis du har brug for hjælp til Severin KA 4141 stil et spørgsmål nedenfor, og andre brugere vil svare dig