Shuttle H-RS232 Manual


Læs gratis den danske manual til Shuttle H-RS232 (2 sider) i kategorien Kabler til computere og periferiudstyr. Denne vejledning er vurderet som hjælpsom af 4 personer og har en gennemsnitlig bedømmelse på 4.9 stjerner ud af 2.5 anmeldelser. Har du et spørgsmål om Shuttle H-RS232, eller vil du spørge andre brugere om produktet?

Side 1/2
www.shuttle.eu
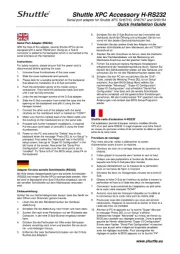
Shuttle XPC Accessory H-RS232
Serial port adapter for Shuttle XPC SH67H3, SH67H7 and SH61R4
Quick Installation Guide
With the help of this adapter, several Shuttle XPCs can be
equipped with a serial RS232 port. Doing so, a Sub-D
connector is added to the backpanel which is connected to the
serial interface on the mainboard.
Instructions:
For safety reasons, please ensure that the power cord is
disconnected before opening the case.
1. Unscrew three thumbscrews of the case cover.
2. Slide the cover backwards and upwards.
3. Please look for a suitable perforation on the backpanel
that allows for installation of a D-Sub connector.
4. Push the perforation gently to the inside using a
screwdriver. Then bend the perforation back and forth
until it can be fully removed.
5. Undo the two hexagon screws of the D-Sub adapter.
6. Slide the D-Sub connector from inside the case into the
opening on the backpanel and ax it using the two
hexagon screws.
7. Connect the other end of the adapter with the serial
interface on the mainboard which is marked as "COM1".
8. Make sure that the marked lead of the ribbon cable and
the marking on the mainboard are on the same side.
9. Proceed with further hardware installations, if required.
Put the case cover back on and affix it using the three
thumbscrews.
10. Power on the PC and press the "Delete" key on the
keyboard when the message "Press DEL to run Setup" is
prompted. First select the "Advanced" tab in the BIOS
setup screen, then go to "Super IO Configuration" in the
left frame of the screen. Now enter the "Serial Port
Configuration" and make sure the serial port is set to
"enabled". To "Save & Exit" the BIOS setup, press F4 on
the keyboard.
Adapter für eine serielle Schnittstelle (RS232)
Mit Hilfe dieses Adapterkabels kann die serielle Schnittstelle
(RS232) bei einigen Shuttle XPCs nachgerüstet werden. Hier-
bei wird im Backpanel eine Sub-D-Buchse eingebaut, die mit
der seriellen Schnittstelle auf dem Mainboards verbunden
wird.
Einbauanleitung:
Achten Sie aus Sicherheitsgründen darauf, dass das Gerät vor
dem Öffnen vom Stromnetz getrennt wurde.
1. Lösen Sie die drei Rändelschrauben der Gehäuse-
abdeckung.
2. Schieben Sie die Abdeckung nach hinten und nach oben.
3. Suchen Sie nach einer Perforation auf der Rückseite des
Computer, in der eine D-Sub-Buchse eingebaut werden
kann.
4. Drücken Sie die Perforation mit Hilfe eines Schrauben-
drehers vorsichtig nach innen und brechen Sie sie durch
hin- und herbiegen heraus.
5. Entfernen Sie zwei Sechskantschrauben von der D-Sub-
Buchse des Adapters.
6. Schieben Sie die D-Sub-Buchse von der Innenseite des
Gehäuses durch die Öffnung und schrauben Sie sie von
vorne mit den beiden Sechskantschrauben fest.
7. Verbinden Sie das andere Ende des Adapter mit der
seriellen Schnittstelle auf dem Mainboard, die mit "COM1"
bezeichnet ist.
8. Stecken Sie den Anschluss so herum, dass die markierte
Ader des Flachbandkabels und die Markierung am
Mainboard-Anschluss auf der gleichen Seite liegen.
9. Führen Sie eventuell weitere Hardware-Installationen
entsprechend der Installationsanleitung durch. Setzen Sie
danach den Gehäusedeckel wieder auf das Gehäuse und
schrauben Sie ihn mit drei Rändelschrauben wieder fest.
10. Schalten Sie den PC ein und drücken Sie die "Entf"-
Taste, sobald die Meldung "Press DEL to run Setup"
erscheint. Aus dem BIOS-Setup-Menü wählen Sie
nacheinander "Advanced", "Super IO Configuration",
"Super IO Configuration" und schließlich "Serial Port
Configuration". Hier lässt sich die serielle Schnittstelle
aktivieren (enabled) und die gewünschten Einstellungen
vornehmen. Mit der Funktionstaste "F4" speichert man die
Änderungen und verlässt das BIOS-Setup-Programm
wieder.
Shuttle carte d'extension H-RS232
Cet adaptateur permet déquiper certains modèles Shuttle
XPC dun port série RS232. Il sagit dajouter une fiche Sub-D
au niveau du panneau arrière et de connecter le câble au port
série de la carte mère.
Procédure de montage:
Pour votre sécurité, veillez à débrancher le cordon
d'alimentation avant d'ouvrir la machine.
1. Dévissez les trois vis à serrage manuel du couvercle du
châssis.
2. Faites glisser le couvercle vers larrière et vers le haut.
3. Utilisez une des perforations à larrière du Shuttle dans
laquelle une fiche D-Sub peut être montée.
4. Appuyez délicatement sur le masque de la perforation
avec un tournevis de façon à lextraire.
5. Dévissez les deux vis hexagonales creuses de la fiche D-
Sub.
6. Glissez la fiche D-Sub de lintérieur du boîtier à travers la
perforation et fixez la à laide des deux vis hexagonales.
7. Connectez lautre extrémité de ladaptateur au port série
de la carte mère marquée "COM1".
8. Assurez vous que les marques indiquées sur le câble et
le connecteur de la carte mère sont du même côté.
9. Poursuivez avec des installations qui vous sont encore
nécessaires. Replacez le couvercle du boîtier et fixez le à
laide des trois vis.moletées.
10. Allumez le PC et appuyez sur la touche Supprs que
le message "Press DEL to run Setup" saffiche.
Sélectionnez l'onglet "Advanced" au niveau de l'écran du
BIOS pour accéder aux réglages avancés. Dans la partie
gauche de l'écran sélectionnez "Super IO Conguration".
Entrez dans l'option "Serial Port Configuration" et assurez
vous que le port série intégré est disponible (enabled)
avec les réglages souhaités. Pour sauvegarder les
réglages et quitter le BIOS appuyez sur la touche "F4".
www.shuttle.eu
Shuttle XPC Accessory H-RS232
Serial port adapter for Shuttle XPC SH67H3, SH67H7 and SH61R4
Quick Installation Guide
1
2
3
4
5
6
7
8
10


Produkt Specifikationer

Mærke: Shuttle
Kategori: Kabler til computere og periferiudstyr
Model: H-RS232
Produktfarve: Black, Grey
Kabellængde: 0.32 m
Harmoniseret systemkode (HS): 84733080
Kompatible produkter: SH510R4, SH570R6 (Plus), SH570R8, SW580R8, SH370R6 (Plus), SH370R6V2 (Plus), SH370R8, SA76R4, SH67H3, SH67H7, SH61R4, SZ68R5, SZ77R5, SX79R5, SH81R4, SH87R6, SZ87R6, SH97R6, SH110R4, SH170R6 (Plus), SZ170R8, SZ170R8V2, SZ270R8, SZ270R9, SH310R4, SH310R4V2
Stik 1: 9-p Sub-D M
Stik 2: 10-p RS-232 F
Stik 1 køn: Hanstik
Stik 2 køn: Hunstik

Har du brug for hjælp?

Hvis du har brug for hjælp til Shuttle H-RS232 stil et spørgsmål nedenfor, og andre brugere vil svare dig


Kabler til computere og periferiudstyr Shuttle Manualer
Shuttle

Shuttle H-RS232 Manual

26 Juni 2025

Kabler til computere og periferiudstyr Manualer

Nyeste Kabler til computere og periferiudstyr Manualer