www.silverstonetek.com
User manual
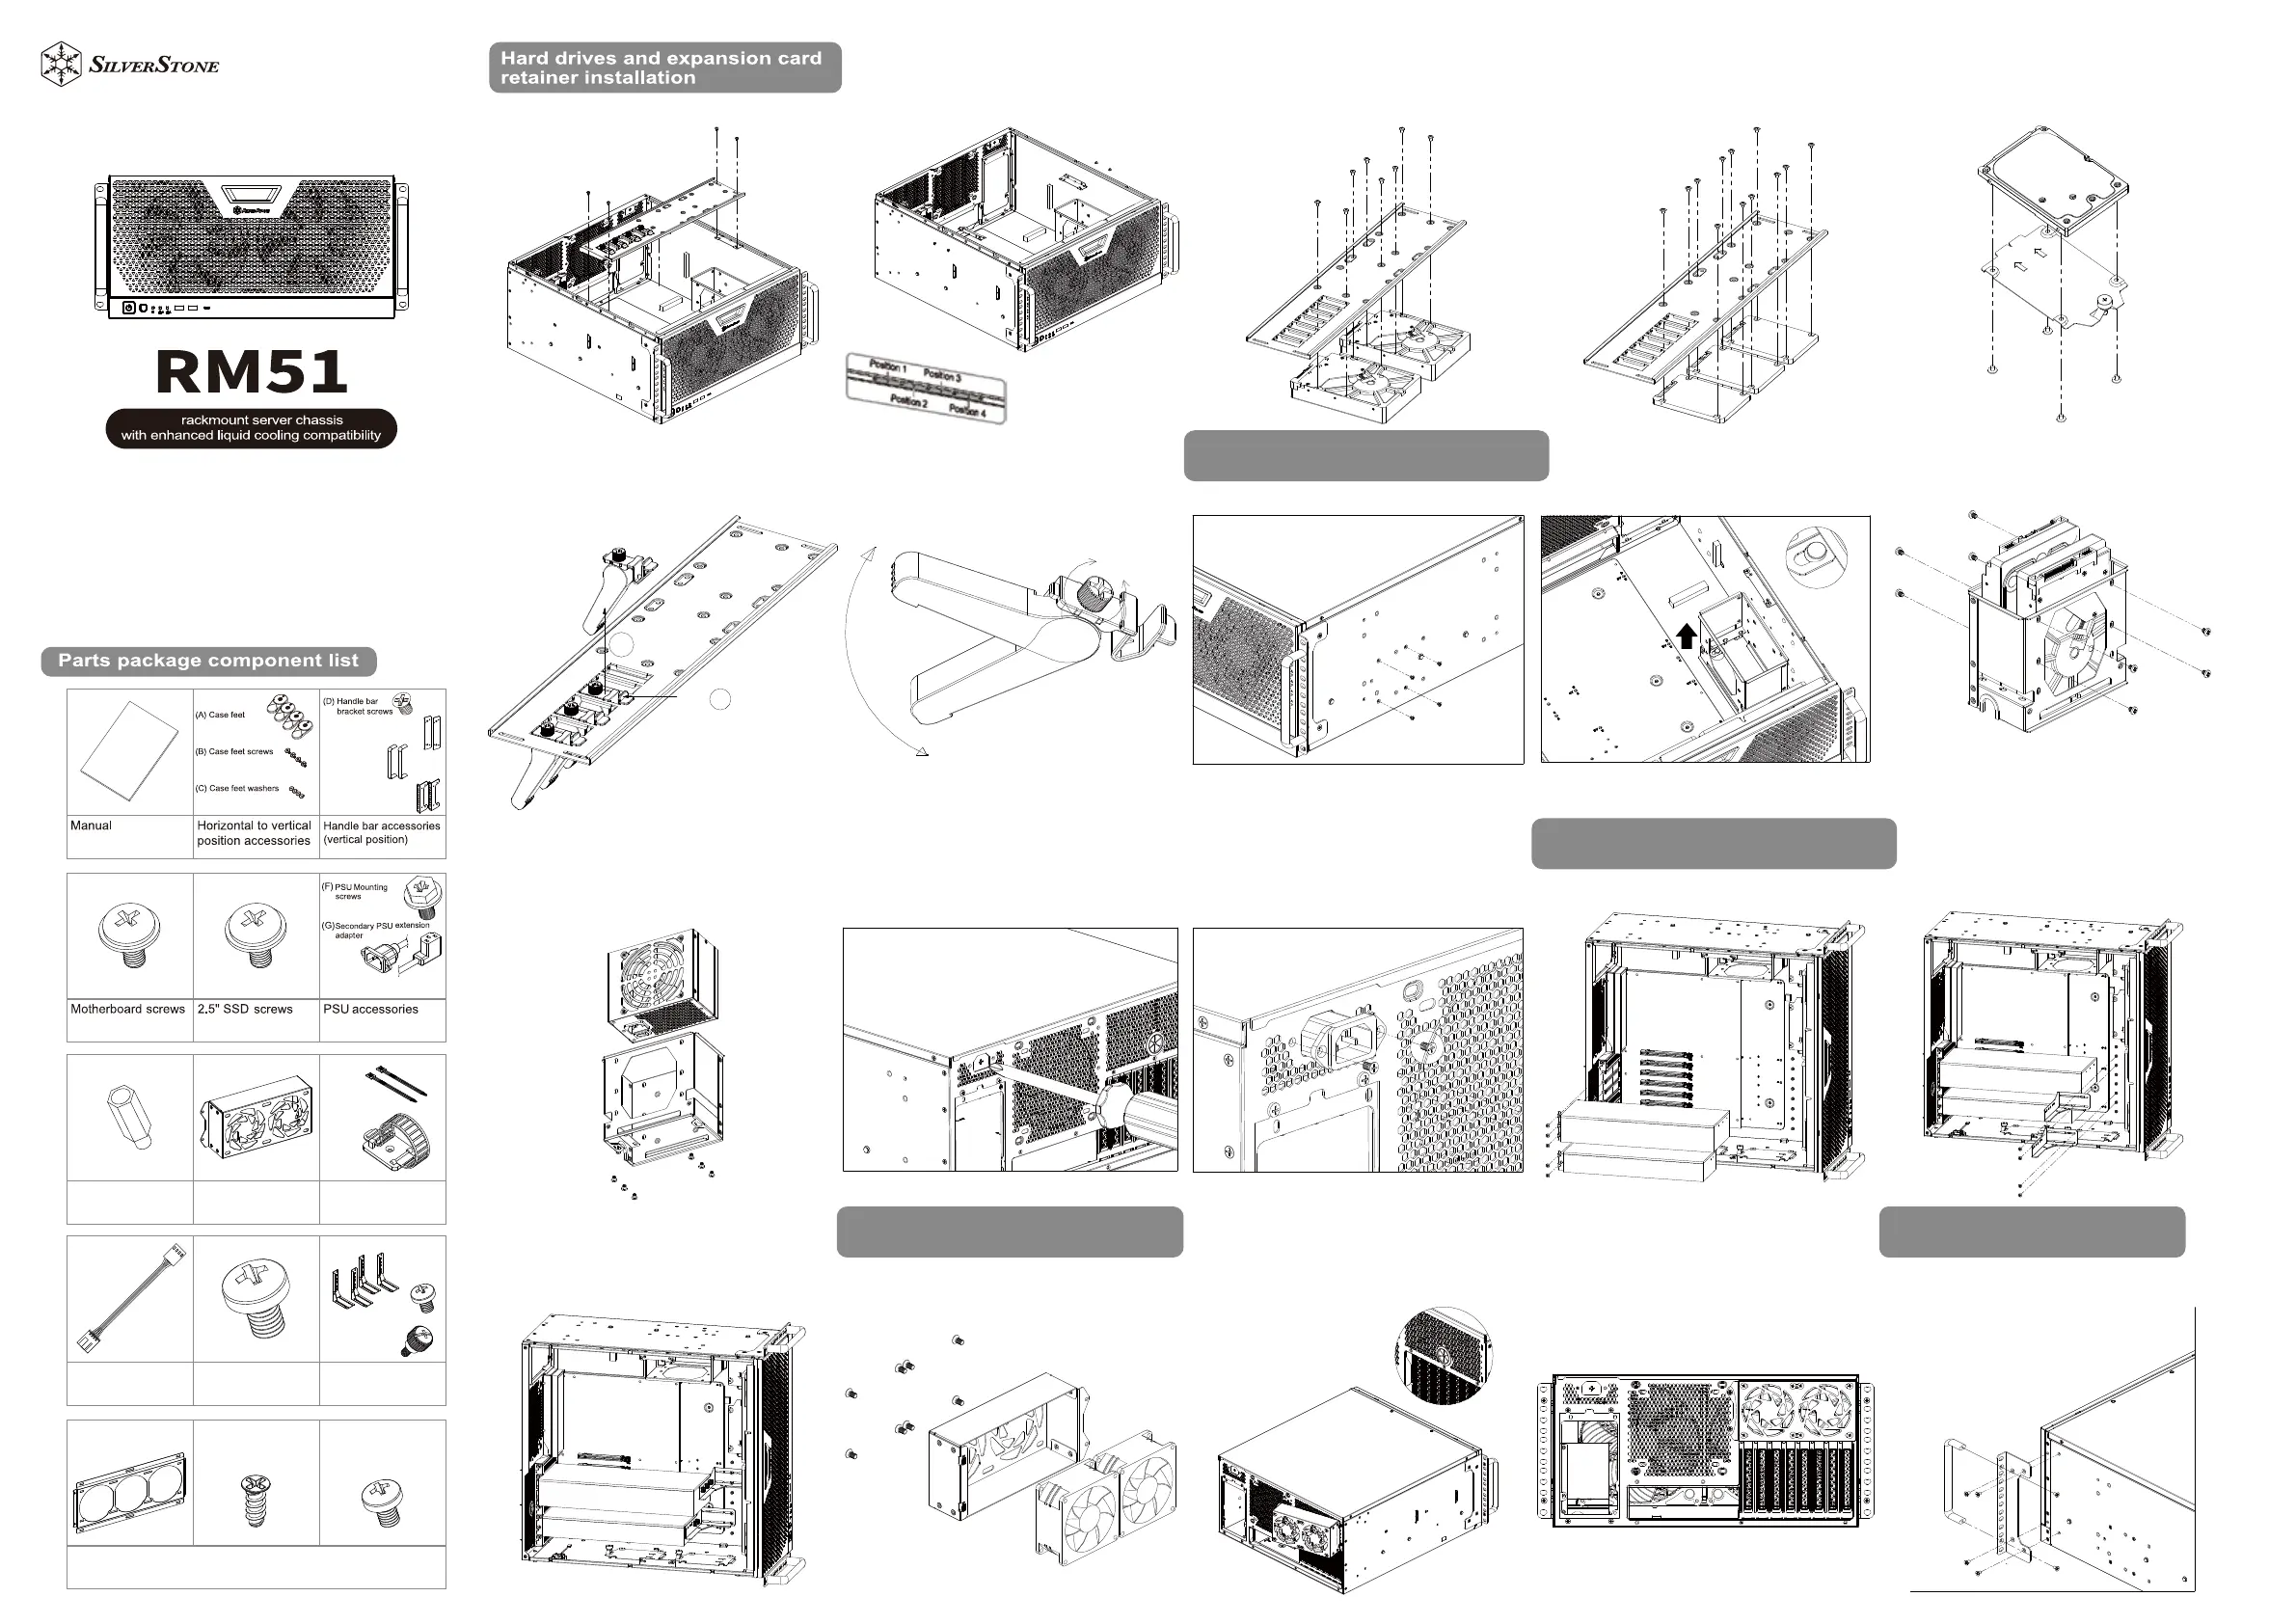
1. Remove 4 screws from expansion card retainer 2. Expansion card retainer position shift 3. Install 2 x 3.5" HDD on the expansion card retainer 4. Install 3 x 2.5" SSD on the expansion card retainer 5. Install 2.5" SSD on to 2.5" SSD trays
6. Remove expansion card buckle
2. Shift the cage off the buckle then remove the cage 3. Insert 3.5” HDD into the cage, then secure with screws
7. Adjust position of the expansion card retainer according to the
required height of the expansion card, then tighten the screws
1. Remove the side mounting screws
4. Insert SFX PSU into the cage, then secure with screws
(Note: To install both primary and secondary PSUs, it’s
recommended to purchase PP10 cables to operate both PSUs
on a single motherboard)
5. To install the SFX PSU, first remove the plate that sits on
the PSU extension adapter pass-through hole with a Phillips
screwdriver
6. Insert the extension adapter cable through the rear of the
pass-through hole, then fasten the screws
1. Install Nvidia 30 series graphics card 2. Install Nvidia 30 series graphics card bracket (slightly tighten
the screws, and reserve space for the bracket to slide left and right
3. Once the graphics card bracket is pushed into position, tighten
the thumb screw then the graphics card screw
Note: Nvidia 30 series graphics card bracket supports graphics
card length of 285mm~344mm (the total length of the graphics
card must exceed the edge of the motherboard)
1. Install 80mm fans into the cage then secure with screws
SFX PSU or 3.5” HDD installation guide
80mm external fan cage installation
Nvidia 30 series graphics car brackets
installation
Clip
1
2
loosen
tighten
A
2. Mount the external fan cage to the rear of the chassis
(Please run the cable through the pass-through hole first)
3. Secure with screws 1. Assemble the handle bars with the L-shaped bracket, then
secure the assembly on both sides of the chassis
Vertical orientation installation
X2
Motherboard standoff
Fan extension cable 3.5” HDD screws
Nvidia 30 series graphics
card accessories
(H) Cable ties
( I ) Cable management buckle
( I )
(H)
(J) Bracket
(K) Screws
(L) Captive thumbscrew
Radiator adapter bracket accessories
M) Radiator adapter bracket N) Radiator adapter bracket
mounting screws
O) Radiator adapter bracket /
80mm external fan cage
mounting screws
80mm external fan
cage
(P) Handle bars
(Q) L-shaped brackets
(E) Handle brackets
5U