Sony cdx-m800 Manual

Sony Bilradio cdx-m800

Læs nedenfor 📖 manual på dansk for Sony cdx-m800 (164 sider) i kategorien Bilradio. Denne guide var nyttig for 21 personer og blev bedømt med 4.4 stjerner i gennemsnit af 11 brugere

Side 1/164
Operating Instructions
Bedienungsanleitung
Mode d’emploi
Istruzioni per l’uso
Gebruiksaanwijzing
Wichtig!
Bitte nehmen Sie sich etwas Zeit, um den Geräte-Pass vollständig
auszufüllen. Dieser befindet sich auf der hinteren Umschlagseite dieser
Bedienungsanleitung.
Si dichiara che l’apparecchio è stato fabbricato in conformità all’art. 2, Comma 1 del D.M. 28.08.
1995 n. 548.
NL
IT
FR
DE
GB
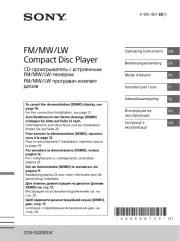
FM/MW/LW Compact Disc Player
CDX-M800
For installation and connections, see the supplied installation/connections manual.
Zur Installation und zum Anschluss siehe die mitgelieferte Installations-/Anschlussanleitung.
En ce qui concerne l’installation et les connexions, consulter le manuel d’installation/
raccordement fourni.
Per l’installazione e i collegamenti, fare riferimento al manuale di istruzioni per
l’installazione e i collegamenti in dotazione.
Zie voor het monteren en aansluiten van het apparaat de bijgeleverde handleiding “Installatie
en aansluitingen”.
© 2003 Sony Corporation
3-251-123-21 (2)
FM
/
MW
/
LW
Compact Disc Player
2
Welcome !
Thank you for purchasing this Sony Compact
Disc Player. You can enjoy its various features
even more with:
Optional CD/MD units (both changers and
players)*1.
CD TEXT information (displayed when a CD
TEXT disc*2 is played).
Supplied controller accessory
Card remote commander RM-X111
Optional controller accessories
Wireless rotary commander RM-X6S
Wired rotary commander RM-X4S
*1 This unit works with Sony products only.
*2 A CD TEXT disc is an audio CD that includes
information such as the disc name, artist name,
and track names. This information is recorded on
the disc.
This label is located on the bottom of the
chassis.
CAUTION INVISIBLE
DO NOT STARE INTO BEAM OR
VIEW DIRECTLY WITH OPTICAL INSTRUMENTS
LASER RADIATION WHEN OPEN
This label is located on the drive unit’s internal
chassis.
3
Table of Contents
Location of controls. . . . . . . . . . . . . . . . . . . . 4
Precautions . . . . . . . . . . . . . . . . . . . . . . . . . . 6
Notes on discs . . . . . . . . . . . . . . . . . . . . . . . . 7
Getting Started
Resetting the unit. . . . . . . . . . . . . . . . . . . . . . 8
Setting the clock . . . . . . . . . . . . . . . . . . . . . . 8
CD Player
CD/MD Unit (optional)
Playing a disc. . . . . . . . . . . . . . . . . . . . . . . . . 9
Display items. . . . . . . . . . . . . . . . . . . . . . . . 10
Playing tracks repeatedly
— Repeat Play . . . . . . . . . . . . . . . . . . . . 11
Playing tracks in random order
— Shuffle Play . . . . . . . . . . . . . . . . . . . . 11
Labelling a CD
— Disc Memo*. . . . . . . . . . . . . . . . . . . . 12
Locating a disc by name
— List-up* . . . . . . . . . . . . . . . . . . . . . . . 13
*Functions available with optional CD/MD unit
Radio
Storing stations automatically
— Best Tuning Memory (BTM). . . . . . . 13
Receiving the stored stations. . . . . . . . . . . . 14
Storing only the desired stations . . . . . . . . . 14
Tuning in a station through a list
— List-up . . . . . . . . . . . . . . . . . . . . . . . . 15
RDS
Overview of RDS . . . . . . . . . . . . . . . . . . . . 15
Automatic retuning for best reception results
— AF function . . . . . . . . . . . . . . . . . . . . 16
Receiving traffic announcements
— TA/TP . . . . . . . . . . . . . . . . . . . . . . . . 17
Presetting RDS stations with AF and TA
setting. . . . . . . . . . . . . . . . . . . . . . . . . . . 17
Tuning in stations by programme type
— PTY . . . . . . . . . . . . . . . . . . . . . . . . . . 18
Setting the clock automatically
— CT . . . . . . . . . . . . . . . . . . . . . . . . . . . 19
Other Functions
Using the rotary commander. . . . . . . . . . . . 19
Adjusting the sound characteristics . . . . . . 21
Quickly attenuating the sound . . . . . . . . . . 21
Changing the sound and display settings
— Menu . . . . . . . . . . . . . . . . . . . . . . . . . 21
Setting the equalizer (EQ7). . . . . . . . . . . . . 22
Setting the Dynamic Soundstage Organizer
(DSO). . . . . . . . . . . . . . . . . . . . . . . . . . . 23
Selecting the display mode and display
image . . . . . . . . . . . . . . . . . . . . . . . . . . . 24
Connecting auxiliary audio equipment. . . . 25
Setting the security code. . . . . . . . . . . . . . . 25
Additional Information
Maintenance . . . . . . . . . . . . . . . . . . . . . . . . 26
Removing the unit. . . . . . . . . . . . . . . . . . . . 27
Specifications . . . . . . . . . . . . . . . . . . . . . . . 28
Troubleshooting . . . . . . . . . . . . . . . . . . . . . 29
Error displays/Messages. . . . . . . . . . . . . . . 30
4
Location of controls
Refer to the pages listed for details.
aSCRL (scroll) button 10
bDSPL/PTY (display mode change/
programme type) button 10, 12, 15, 18
cNumber buttons
(1) REP 11
(2) SHUF 11
To store stations/receive stored stations.
dEQ7 button 22
eMENU button
To display the menus.
fSOURCE (Power on/Radio/CD/MD*1/
AUX*2) button
To select the source.
gSEEK (</,) buttons
To skip tracks/fast-forward, reverse a track/
tune in stations automatically, find a station
manually/select a setting.
hSOUND button 21
iOFF (Stop/Power off) button
6
,
9, 22,
25
jVOL (+/–) buttons
To turn up or down the volume.
kOPEN/CLOSE button 9
lAF button 16, 17
mTA button 17
nMODE button
To change the operation.
oDSO button 23
pLIST button 12, 13, 15
qDISC (M/m) buttons
To receive preset stations/change the disc*3,
skip albums*4/select a menu.
rENTER button
To enter a setting.
sATT button 21
*1 When an optional MD unit is connected.
*2 Available only when an optional Sony portable
device is connected to BUS AUDIO IN of the unit.
You cannot connect any optional CD/MD units at
the same time.
*3 When an optional CD/MD unit is connected.
*4 Available only when an optional CD unit with the
MP3 file control function is connected, and an MP3
file is played.
Card remote commander RM-X111
DISC
ATTOFF
SCRL
DSPL
1
4
AF
MODE
2
5
TA
3
6
SOURCE
DISC
+
SEEK
+
SEEK
SOUND
ENTER
MENU
LIST
EQ7 DSO
VOL
+
OPEN/CLOSE
PTY
REP SHUF
DISC
SOURCE
DISC
+
SEEK
+
SEEK
(SEEK) (<):
to select
leftwards
(DISC) (M):
to select upwards
In menu mode, the currently selectable button(s) of
these four are indicated with av” in the display.
(DISC) (m):
to select downwards
(SEEK) (,):
to select
rightwards
Note
If the display disappears by pressing (OFF), it cannot
be operated with the card remote commander unless
(SOURCE) on the unit is pressed, or a disc is inserted
to activate the unit first.
Tip
Refer to “Replacing the lithium battery” for details on
how to replace the batteries (page 27).
5
The buttons on the unit share the same
functions as those on the card remote
commander.
aOPEN button 8, 9
bMain display window
cIMAGE button 24
dqf Receptor for the card remote
commander
eqs RESET button 8
fOFF (Stop/Power off) button*
gSCRL (scroll) button
hDSPL/PTY (display mode change/
programme type) button
iSub display window
jSEEK/AMS (.m/M>) button
kMENU button
mLIST button
oTA button
pCLOSE (front panel close) button
qSOURCE button
rMODE button
sVOL (–/+) button
tDSO button
uEQ7 button
vSOUND button
wDISC (+/–) buttons
xENTER button
yZ (eject) button 9
Main display side
Operation side
CDX-M800
continue to next page t
7
Notes on discs
To keep the disc clean, do not touch the surface.
Handle the disc by its edge.
Keep your discs in their cases or disc
magazines when not in use.
Do not subject the discs to heat/high
temperature. Avoid leaving them in parked cars
or on dashboards/rear trays.
Do not attach labels, or use discs with sticky
ink/residue. Such discs may stop spinning
when used, causing a malfunction, or may ruin
the disc.
Do not use any discs with labels or stickers
attached.
The following malfunctions may result from
using such discs:
– Inability to eject a disc (due to a label or
sticker peeling off and jamming the eject
mechanism).
– Inability to read audio data correctly (e.g.,
playback skipping, or no playback) due to
heat shrinking of a sticker or label causing a
disc to warp.
Discs with non-standard shapes (e.g., heart,
square, star) cannot be played on this unit.
Attempting to do so may damage the unit. Do
not use such discs.
You cannot play 8 cm CDs.
Before playing, clean the discs with a
commercially available cleaning cloth. Wipe
each disc from the centre out. Do not use
solvents such as benzine, thinner, commercially
available cleaners, or antistatic spray intended
for analogue discs.
Notes on CD-R/CD-RW discs
You can play CD-Rs (recordable CDs)/CD-
RWs (rewritable CDs) designed for audio use
on this unit.
Look for these marks to distinguish CD-Rs/
CD-RWs for audio use.
These marks denote that a disc is not for audio
use.
Some CD-Rs/CD-RWs (depending on the
equipment used for its recording or the
condition of the disc) may not play on this unit.
You cannot play a CD-R/a CD-RW that is not
finalized*.
*A process necessary for a recorded CD-R/CD-RW
disc to be played on the audio CD player.
9
CD Player
CD/MD Unit (optional)
In addition to playing a CD with this unit, you
can also control external CD (MP3 playable CD)/
MD units. If you connect optional MP3 playable
CD units (eg., MP3 CD changer), you can play
MP3 files; compressed audio files (tracks) with
quality of sound.
Note
If you connect an optional CD (MP3 playable CD) unit
with the CD TEXT function, the CD TEXT information
will appear in the display when you play a CD TEXT
disc.
Playing a disc
(With this unit)
1Press (OPEN/CLOSE) or (OPEN) on the
unit and insert the disc (labelled side
up).
Playback starts automatically.
2Press (OPEN/CLOSE) or (CLOSE) on
the unit to close the front panel.
If a disc is already inserted, press (SOURCE)
repeatedly until “CD” appears to start playback.
Notes
While the first/last track on the disc is playing, if
< or , is pressed, playback skips to the last/first
track of the disc.
When the last track on the disc is over, playback
restarts from the first track of the disc.
With an optional unit connected, playback of the
same source will continue on to the optional CD/MD
unit.
(With optional unit)
1Press (SOURCE) repeatedly to select
“CD” or “MD (MS*1).
2Press (MODE) repeatedly until the
desired unit appears.
Playback starts.
*1 MS: MG Memory Stick System-up Player MGS-X1
*2 Available only when an MP3 file is played. Albums
are folders of a CD containing MP3 files.
Cautions when connecting MGS-X1 and MD unit(s)
This unit recognizes MGS-X1 as an MD unit.
When you want to play MGS-X1, press (SOURCE) to
select “MS” or “MD.” If “MS” appears in the source
display, MGS-X1 starts to play. If “MD” appears in
the source display, press (MODE) to select “MS,to
start playback.
When you want to play an MD unit, press (SOURCE)
to select “MD” or “MS. If your desired MD unit
appears in the source display, it starts to play. If “MS”
or another MD unit appears in the source display,
press (MODE) to select your desired MD unit, to
start playback.
Notes when connecting MP3 playable CD unit(s)
If a disc with no MP3 files (tracks) is inserted, “NO
Music” appears in the display and playback of the
next disc starts.
Before playing a track, this unit reads all track and
album information on the disc. Depending on the
track structure, it may take more than a minute
before playback begins. During this time, “Read” is
displayed. Please wait for play to start automatically
when the reading is complete.
To Press
Stop playback (OFF)
Eject the disc (OPEN/CLOSE) or
(OPEN) then Z on the unit
Skip tracks
Automatic
Music Sensor
(SEEK) (</,)
[once for each track]
Fast-forward/
reverse
Manual Search
(SEEK) (</,)
[hold to desired point]
To Press
Skip discs
Disc selection (DISC) (M/m)
Skip albums*2
Album selection (DISC) (M/m) during
playback of a CD containing
MP3 files
[hold to desired point]
10
Display items
When the disc/album/track changes, any
prerecorded title*1 of the new disc/album/track is
automatically displayed (if the Auto Scroll
function is set to “on,” names exceeding 12
characters will be scrolled (page 21)).
*1 When pressing (DSPL/PTY), “NO Disc Name”, “NO
Album Name”, or “NO Track Name” indicates that
there is no disc name, album name, or track name
and “NO ID3 Tag” indicates that there is no ID3 tag.
*2 “MP3”/“MDLP” appears in the display (below the
clock), depending on the REP, SHUF setting.
*3 Available only when an optional MD unit with the
MDLP function is connected, and an MDLP disc is
played.
*4 When pressing (DSPL/PTY), “NO Disc Name” or
“NO Track Name” indicates that there is no Disc
Memo (page 12) or prerecorded name to display.
*5 If the disc has been labelled by this unit using the
CUSTOM FILE function, Disc Memo is displayed
preferentially.
*6 Only for CD TEXT discs with the artist name.
*7 Available only when an MP3 file is played.
Notes
Some characters cannot be displayed. Characters
and signs which cannot be displayed appear as “ x.”
For some CD TEXT discs or ID3 tags with very
many characters, information may not scroll.
This unit cannot display the artist name for each
track of a CD TEXT disc or an album.
Tip
When A.Scroll (Auto Scroll) is set to off, and the disc/
track/album is changed, the disc/track/album name or
ID3 tag does not scroll.
To Press
Switch display
item (DSPL/PTY)
Scroll display item (SCRL)
Track
number Elapsed
playing time
Displayable
items
Disc number
•Album
number*7
MP3*2/MDLP display*2*3
MP3: MP3 playback
LP2: LP2 playback
LP4: LP4 playback
Clock
Music source
Displayable items
Disc name*4*5/artist name*6
Album name*1*7
Track name*1
ID3 tag*1*7
11
Playing tracks repeatedly
— Repeat Play
You can select:
REP-Track — to repeat the current track.
•REP-Album*
1 — to repeat the tracks in the
current album.
•REP-Disc*
2 — to repeat the tracks in the
current disc.
*1 Available only when an MP3 file is played.
*2 Available only when one or more optional CD/MD
units are connected.
During playback, press (1) (REP)
repeatedly until the desired setting
appears in the display.
Repeat Play starts.
To return to normal play mode, select “REP-off.
Playing tracks in random
order
— Shuffle Play
You can select:
• SHUF-Album*1 — to play the albums in the
current optional CD unit with the MP3 file
control function in random order.
SHUF-Disc — to play the tracks on the current
disc in random order.
• SHUF-Changer*2 — to play the tracks in the
current optional CD (MD) unit in random
order.
• SHUF-All*3 — to play all the tracks in all the
connected CD (MD) units (including this unit)
in random order.
*1 Available only when an MP3 file is played.
*2 Available only when one or more optional CD (MD)
units are connected.
*3 Available only when one or more optional CD units,
or two or more optional MD units are connected.
During playback, press (2) (SHUF)
repeatedly until the desired setting
appears in the display.
Shuffle Play starts.
To return to normal play mode, select “SHUF-
off.
Note
“SHUF-All” will not shuffle tracks between CD units
and MD units.
12
Labelling a CD
— Disc Memo (For a CD unit with the
CUSTOM FILE function)
You can label each disc with a custom name
(Disc Memo). You can enter up to 8 characters
for a disc. If you label a CD, you can locate the
disc by name (page 13).
1Play the disc you want to label in a CD
unit with the CUSTOM FILE function.
2Press (MENU), then press M or m
repeatedly until “Name Edit” appears.
3Press (ENTER).
The unit will repeat the disc during the
labelling procedure.
4Enter the characters.
1Press M*1 repeatedly to select the
desired character.
A t B t C ... t 0 t 1 t 2 ... t +
t t * ... t *
2 t A
*1 For reverse order, press m.
*2 (blank space)
2Press , after locating the desired
character.
If you press <, you can move back to the
left.
3Repeat steps 1 and 2 to enter the
entire name.
5To return to normal play mode, press
(ENTER).
Tips
Simply overwrite or enter ” to correct or erase a
name.
There is another way to start labelling a CD: Press
(LIST) for 2 seconds instead of performing steps 2
and 3. You can also complete the operation by
pressing (LIST) for 2 seconds instead of step 5.
You can label CDs on a unit without the CUSTOM
FILE function if that unit is connected along with a
CD unit that has the function. The Disc Memo will be
stored in the memory of the CD unit with the
CUSTOM FILE function.
Note
Repeat/shuffle play is suspended until the Name Edit
is complete.
Viewing the Disc Memo
As a display item, the Disc Memo always takes
priority over any original CD TEXT information.
Tip
To find out about other items that can be displayed,
see page 10.
Erasing the Disc Memo
1Press (SOURCE) repeatedly to select
“CD.
2Press (MODE) repeatedly to select the
CD unit storing the Disc Memo.
3Press (MENU), then press M or m
repeatedly until “Name Del” appears.
4Press (ENTER).
The stored names will appear.
5Press M or m repeatedly to select the
disc name you want to erase.
6Press (ENTER) for 2 seconds.
The name is erased.
Repeat steps 5 and 6 if you want to erase
other names.
7Press (MENU) twice.
The unit returns to normal play mode.
Notes
When the Disc Memo for a CD TEXT disc is erased,
the original CD TEXT information is displayed.
If you cannot find the Disc Memo you want to erase,
try selecting a different CD unit in step 2.
If you have already erased all of the Disc Memo, the
unit returns to normal play mode in step 4.
To Press
View (DSPL/PTY) during CD/CD
TEXT disc playback
13
Locating a disc by name
— List-up (For a CD unit with the CD TEXT/
CUSTOM FILE function, or an MD unit)
You can use this function for discs that have been
assigned custom names*1 or for CD TEXT
discs*2.
*1 Locating a disc by its custom name: when you
assign a name for a CD (page 12) or an MD.
*2 Locating discs by the CD TEXT information: when
you play a CD TEXT disc on a CD unit with the CD
TEXT function.
1Press (LIST).
The name assigned to the current disc appears
in the display.
2Press M or m repeatedly until you find
the desired disc.
3Press (ENTER) to play the disc.
Note
Some letters cannot be displayed (exception: the
letters stored by Disc Memo).
Radio
The unit can store up to 6 stations per band
(FM1, FM2, FM3, MW, and LW).
Caution
When tuning in stations while driving, use Best
Tuning Memory to prevent accidents.
Storing stations
automatically
— Best Tuning Memory (BTM)
The unit selects the stations with the strongest
signals within the selected band, and stores them
in the order of their frequency.
1Press (SOURCE) repeatedly to select
the radio.
2Press (MODE) repeatedly to select the
band.
3Press (MENU), then press M or m
repeatedly until “BTM” appears.
4Press (ENTER).
A beep sounds when the setting is stored.
Notes
If only a few stations can be received due to weak
signals, some number buttons will retain their former
settings.
When a number is indicated in the display, the unit
starts storing stations from the one currently
displayed.
14
Receiving the stored stations
1Press (SOURCE) repeatedly to select
the radio.
2Press (MODE) repeatedly to select the
band.
3Press the number button ((1) to (6))
on which the desired station is stored.
Tip
Press M or m to receive the stations in the order they
are stored in the memory (Preset Search function).
If preset tuning does not work
Press (SEEK) (<) or (SEEK) (,) to
search for the station (automatic
tuning).
Scanning stops when the unit receives a
station. Repeat until the desired station is
received.
Tips
If automatic tuning stops too frequently, turn on the
Local Seek to limit seek to stations with stronger
signals. See “Changing the sound and display
settings” on page 21.
If you know the frequency of the station you want to
listen to, press and hold < or , to locate the
approximate frequency, then press < or ,
repeatedly to fine adjust to the desired frequency
(manual tuning).
If FM stereo reception is poor
Select monaural reception mode
See “Changing the sound and display
settings” on page 21.
The sound improves, but becomes monaural
(“ST” disappears).
Tip
If FM broadcasts are difficult to hear, set DSO to off
(page 23).
Storing only the desired
stations
You can manually preset the desired stations on
any chosen number button.
1Press (SOURCE) repeatedly to select
the radio.
2Press (MODE) repeatedly to select the
band.
3Press (SEEK) (<) or (SEEK) (,) to
tune in the station that you want to
store.
4Press the desired number button ((1)
to (6)) for 2 seconds until “MEM”
appears.
The number button indication appears in the
display.
Note
If you try to store another station on the same number
button, the previously stored station will be erased.
15
Tuning in a station through a
list
— List-up
1During radio reception, press (LIST)
momentarily.
The frequency or the name assigned to the
current station appears in the display.
2Press M or m repeatedly until you find
the desired station.
If no name is assigned to the selected station,
the frequency appears in the display.
3Press (ENTER) to tune in the desired
station.
RDS
Overview of RDS
FM stations with Radio Data System (RDS)
service send inaudible digital information along
with the regular radio programme signal. For
example, one of the following will be displayed
upon receiving a station with RDS capability.
*See “Tuning in stations by programme type” on page
18.
RDS services
RDS data offers you other conveniences, such as:
Automatic retuning of a programme, helpful
during long-distance drives. — AF t page 16
Receiving traffic announcements, even
when enjoying another programme/source.
— TA t page 17
Selecting stations by the type of
programme. — PTY t page 18
Automatic clock time setting. — CT
t page 19
Notes
Depending on the country or region, not all of the
RDS functions are available.
RDS may not work properly if the signal strength is
weak or if the station you are tuned to is not
transmitting RDS data.
To Press
Switch display
item (DSPL/PTY)
Preset
number Frequency
Displayable items*
Station name
Programme type
Radio band Clock
16
Automatic retuning for best
reception results
— AF function
The alternative frequencies (AF) function allows
the radio to always tune into the area’s strongest
signal for the station you are listening to.
1Select an FM station (page 13).
2Press (AF) repeatedly until “AF on”
appears.
The unit starts searching for an alternative
frequency with a stronger signal in the same
network.
If “NO AF” flashes, the currently tuned into
station does not have an alternative frequency.
Note
When there is no alternative frequency in the area or
when you do not need to search for one, turn the AF
function off by selecting “AF off.
For stations without alternative
frequencies
Press (SEEK) (<) or (SEEK) (,)
while the station name is flashing
(within 8 seconds).
The unit starts searching for another
frequency with the same PI (Programme
Identification) data (“PI Seek” appears).
If the unit cannot find the same PI, the unit
returns to the previously selected frequency.
Staying with one regional programme
When AF function is on: this unit’s factory-set
setting restricts reception to a specific region, so
you won’t be switched to another regional station
with a stronger frequency.
If you leave this regional programme’s reception
area or would like to take advantage of the whole
AF function, select “Regional off” from the
Menu (page 22).
Note
This function does not work in the United Kingdom
and in some other areas.
Local Link function
(United Kingdom only)
This function enables you to select other local
stations in the area, even if they are not stored on
your number buttons.
1Press a number button ((1) to (6))
that has a local station stored on it.
2Within 5 seconds, press the number
button of the local station again.
3Repeat this procedure until the
desired local station is received.
Frequencies change automatically.
98.5 MHz
Station
102.5 MHz
96.0 MHz
17
Receiving traffic
announcements
— TA/TP
By activating the Traffic Announcement (TA)
and Traffic Programme (TP), you can
automatically tune in an FM station broadcasting
traffic announcements. These settings function
regardless of the current FM programme/source
(e.g., CD/MD/AUX). The unit switches back to
the original source when the bulletin is over.
Press (TA) repeatedly until “TA on”
appears.
The unit starts searching for traffic
information stations.
“TP” indicates reception of such stations, and
“TA” flashes during an actual traffic
announcement. The unit will continue
searching for stations available with TP if
“NO TP” is indicated.
To cancel all traffic announcements, select
“TA off.
Tip
You can also cancel the current announcement by
pressing (SOURCE) or (MODE).
Presetting the volume of traffic
announcements
You can preset the volume level of the traffic
announcements so you won’t miss hearing them.
1Press (VOL) (+) or (VOL) (–) to adjust
the desired volume level.
2Press (TA) for 2 seconds.
“TA” appears and the setting is stored.
Receiving emergency announcements
If either AF or TA is on, the unit will switch to
emergency announcements, if one comes in
while listening to an FM station or CD/MD/
AUX.
Presetting RDS stations with
AF and TA setting
When you preset RDS stations, the unit stores
each station’s AF/TA setting (on/off) as well as
its frequency. You can select a different setting
(for AF, TA, or both) for individual preset
stations, or the same setting for all preset
stations. If you preset stations with “AF on,” the
unit automatically stores stations with the
strongest radio signal.
Presetting the same setting for all
preset stations
1Select an FM band (page 13).
2Press (AF) and/or (TA) to select
“AF on” and/or “TA on.
Note that selecting “AF off” and “TA off”
applies to non-RDS stations as well as RDS
stations.
3Press (MENU), then press M or m
repeatedly until “BTM” appears.
4Press (ENTER).
BTM flashes.
Presetting different settings for each
preset station
1Select an FM band, and tune in the
desired station (page 14).
2Press (AF) and/or (TA) to select
“AF on” and/or “TA on.
3Press the desired number button ((1)
to (6)) for 2 seconds until “MEM”
appears.
Repeat from step 1 to preset other stations.
To Press
Cancel current
announcement (TA)
19
Setting the clock
automatically
— CT
The CT (Clock Time) data from the RDS
transmission sets the clock automatically.
1During radio reception, press (MENU),
then press M or m repeatedly until “CT
off” appears.
2Press , repeatedly until “CT on”
appears.
The clock is set.
3Press (ENTER) to return to the normal
display.
To cancel the CT function, select “CT off” in step
2.
Notes
The CT function may not work even though an RDS
station is being received.
There might be a difference between the time set by
the CT function and the actual time.
Other Functions
You can also control the unit (and optional CD/
MD units) with a rotary commander (optional).
Using the rotary commander
First, attach the appropriate label depending on
how you want to mount the rotary commander.
The rotary commander works by pressing
buttons and/or rotating controls.
By pressing buttons
Press To
(SOURCE) Change source
(radio/CD/MD*1/AUX*2)/
Power on
(MODE) Change operation
(radio band/CD unit/MD*1
unit)
(ATT) Attenuate sound
(OFF)*3Stop playback or radio
reception/Power off
(SOUND) Adjust the sound menu
(DSPL) Change the display item
continue to next page t
SOUND
DSPL
MODE
SOUND
DSPL
MODE
OFF
Rotate the VOL control
to adjust the volume.
(SOURCE)
(SOUND)
(ATT)
(DSPL) (OFF)
(MODE)
20
By rotating the control
Rotate and release to:
– Skip tracks.
– Tune in stations automatically.
Rotate, hold, and release to:
– Fast-forward/reverse a track.
– Find a station manually.
By pushing in and rotating the control
Push in and rotate the control to:
– Receive preset stations.
– Change discs during CD (MD) playback*1.
During playback of a CD containing MP3 files*4
Push in and repeat rotating quickly to:
– Change discs one by one.
Push in, then rotate and hold to:
– Change albums.
*1 Only if the corresponding optional equipment is
connected.
*2 Available only when an optional Sony portable
device is connected to BUS AUDIO IN of the unit.
You cannot connect any optional CD/MD units at
the same time.
*3 If your car has no ACC (accessory) position on the
ignition key switch, be sure to press and hold
(OFF) until the display disappears.
*4 Available only when an optional CD unit with the
MP3 file control function is connected.
Changing the operative direction
The operative direction of controls is factory-set
as shown below.
If you need to mount the rotary commander on
the right hand side of the steering column, you
can reverse the operative direction.
Press (SOUND) for 2 seconds while
pushing the VOL control.
SEEK/AMS
control
PRESET/DISC
control
To increase
To decrease
21
Adjusting the sound
characteristics
You can adjust the bass, treble, balance, fader,
and subwoofer volume.
1Press (SOUND) repeatedly to select
the desired item.
Each time you press (SOUND), the item
changes as follows:
BASS (bass) t TREBLE (treble)
t BALANCE (left-right)
t FADER (front-rear)
t SUB (subwoofer volume)
2Adjust the level of a selected item by
pressing < or ,.
When adjusting with the rotary commander,
press (SOUND) and rotate the VOL control.
After 3 seconds, the display returns to the
normal play mode.
Note
Adjust within 3 seconds after selecting the item.
Quickly attenuating the
sound
(With the rotary commander or the card
remote commander)
Press (ATT).
ATT on” appears in the display momentarily.
To restore the previous volume level, press
(ATT) again.
Tip
When the interface cable of a car telephone is
connected to the ATT lead, the unit decreases the
volume automatically when a telephone call comes in
(Telephone ATT function).
Changing the sound and
display settings
— Menu
The following items can be set:
Set up
Clock Adjust (page 8)
CT (Clock Time) (page 19)
Beep — to turn the beeps on or off.
AUX-A (page 25) — to turn the AUX source
display on or off.
Display
Clock (Clock Information) — to display the
clock and the play mode at the same time (on).
A.IMG (Auto Image) (page 24) — to step
through the display images of one or all display
modes.
Demo (Demonstration) — to turn the
Demonstration mode on or off.
– Select “on” to activate Demo display.
– Select “off” to deactivate the Demonstration
mode.
Info (Display Information) — to display the
display items (depending on the source, etc.) at
the bottom of the display while a display image
is displayed:
– Select “on” to display the display items, and
by pressing (DSPL/PTY), the display item
will change.
– Select “off” to not display any display items.
Dimmer — to change the brightness of the
display.
– Select “Auto” to dim the display only when
you turn the lights on.
– Select “on” to dim the display.
– Select “off” to deactivate the Dimmer.
Contrast* — to adjust the contrast if the
indications on the display are not recognizable
because of the unit’s installation position.
BlackOut — to blacken the display, while the
operation mode is on.
– Select “on” to black out the indications.
The indications will disappear, but the unit
will react if you press any button.
– Select “off” to brighten the display.
A.Scroll (Auto Scroll)
– Select “on” to scroll all automatically
displayed names exceeding 12 characters.
– When Auto scroll is set to off and the disc/
track/album is changed, the disc/track/album
name or ID3 tag does not scroll.
*“Contrast” appears only in the sub display window.
You can adjust the contrast of the sub display
window only.
continue to next page t
22
Sound
HPF (High pass filter)
– to select the cut-off frequency to “78Hz,
125Hz,” oroff.”
LPF (Low pass filter)
– to select the cut-off frequency to “78Hz,
125Hz,” oroff.”
Loud (Loudness)
– to enjoy bass and treble even at low volumes.
The bass and treble will be reinforced.
AUX Level (page 25)
– to adjust the volume level of connected
auxiliary equipment.
Play Mode
AF on/off (Alternative frequences) (page 16)
Local on/off (Local seek mode) (page 14)
– Select “on” to only tune into stations with
stronger signals.
Mono on/off (Monaural mode) (page 14)
– Select “on” to hear FM stereo broadcast in
monaural. Select “off” to return to normal
mode.
Regional on/off (page 16)
1Press (MENU).
To set Demo, press (OFF), then press
(MENU).
To set A.Scroll, press (MENU) during CD/
MD playback.
2Press M or m repeatedly until the
desired item appears.
3Press < or , to select the desired
setting (Example: “on” or “off”).
4Press (ENTER).
After the mode setting is completed, the
display returns to normal play mode.
Note
The displayed item will differ depending on the source.
Tip
You can easily switch among categories by pressing M
or m for 2 seconds.
Setting the equalizer (EQ7)
You can select an equalizer curve for 7 music
types (Xplod, VOCAL, CLUB, JAZZ, NEW
AGE, ROCK, CUSTOM), and OFF (equalizer
off).
You can store and adjust the equalizer settings
for frequency and level.
You can store the EQ7 setting for each source.
Selecting the equalizer curve
1Press (SOURCE) to select a desired
source.
2Press (EQ7) repeatedly until the
desired equalizer curve.
Each time you press (EQ7), the item
changes.
To cancel the equalizing effect, select “OFF.
After 3 seconds, the display returns to the
normal play mode.
23
Adjusting the equalizer curve
1Press (MENU).
2Press M or m repeatedly until “EQ7
Tune” appears, then press (ENTER).
3Press < or , to select the desired
equalizer curve, then press (ENTER).
Each time you press < or ,, the item
changes.
4Select the desired frequency and level.
1Press < or , to select the desired
frequency.
Each time you press < or ,, the
frequency changes as follows:
62Hz y 157Hz y 396Hz y 1.0kHz
y 2.5kHz y 6.3kHz y 16kHz
2Press M or m to adjust the desired
volume level.
The volume level is adjustable by 1dB
steps from –10 dB to +10 dB.
To restore the factory-set equalizer curve,
press (ENTER) for 2 seconds.
5Press (ENTER).
After the effect setting is complete, the
display returns to the normal play mode.
Setting the Dynamic
Soundstage Organizer (DSO)
If your speakers are installed into the lower part
of the doors, the sound will come from below
and may not be clear.
The DSO (Dynamic Soundstage Organizer)
function creates a more ambient sound as if there
were speakers in the dashboard (virtual
speakers).
You can store the DSO setting for each source.
1Press (SOURCE) to select a desired
source.
2Press (DSO) to select “1, 2, 3” or
“OFF”.
To cancel the DSO mode, select “DSO OFF.
After 3 seconds, the display returns to the
normal play mode.
Notes
Depending on the type of car interior or type of
music, DSO may not have a desirable affect.
If FM broadcasts are difficult to hear, set DSO to off.
25
Connecting auxiliary audio
equipment
The units AUX IN (external audio input)
terminal on this unit is also used as the BUS
AUDIO IN (audio input) terminal.
You can listen to the sound from your car
speakers by connecting optional Sony portable
devices.
Note
If you connect an optional Sony CD/MD unit, you
cannot connect any portable devices and “AUX” will
not appear in the display as a source.
Selecting auxiliary equipment
Press (SOURCE) repeatedly to select
“AUX.
Adjusting the volume level
You can adjust the volume for each connected
audio equipment.
1Press (MENU).
2Press M or m repeatedly to select
“AUX Level.
3Press (ENTER).
4Press M or m repeatedly to select a
desired volume level.
The volume level is adjustable in 1 dB steps
from –6 dB to +6 dB.
5Press (ENTER).
To deactivate auxiliary equipment in
the music source display
1Press (OFF).
CD playback or radio reception stops.
2Press (MENU).
3Press M or m repeatedly until “AUX-A
on” appears.
4Press , to select “AUX-A off.
5Press (MENU).
To restore the indication, select “AUX-A on.
Setting the security code
This unit has a security function to discourage
theft. Input a 4 digit number as your security
code.
If you set it, you need to input the stored code to
turn on the unit should you re-install the unit in
another car or after changing the battery.
1Press (SOURCE).
2Press (MENU).
3Press M or m repeatedly to select
“Security.
4Press (ENTER).
Code Set display is displayed.
1Press M or m repeatedly to enter the
first digit (0-9).
2Press , to move the cursor to the
2nd digit, then press M or m
repeatedly to enter the 2nd digit.
Each time you press M, a digit goes
up and each time you press m, a
digit falls.
3Repeat step 2 to enter the 3rd digit
and the 4th digit.
5Press (ENTER).
Check Code display appears.
6Press M or m repeatedly to select
“YES.
7Press (ENTER).
The display returns to the normal display.
Notes
The security code cannot be entered by the number
buttons (1-6).
Make sure not to forget your security code.
If you select “NO” in step 6 and press (ENTER), the
display returns to the Code Set display in step 4.
continue to next page t
26
After the security code setup is
completed
Should you re-install the unit in another car or
change the battery, the Check Code display
appears after turning on the unit. Enter your
stored 4-digit code with the cursor buttons
(M/m/,), and press (ENTER).
Code Input display
OK: returns to the clock display.
NG: “Code Error” message appears.
Input the correct code using the cursor buttons.
Cancelling the security code
Repeat step 1 to 4 in “Setting the security code
(Code Del display appears). Enter your stored
code with the cursor buttons (M/m/,), and
press (ENTER).
Code Del display
OK: returns to a normal display.
NG: the “Code Error” message appears.
Input the correct code using the cursor buttons.
Note
You cannot change the security code unless you
delete your stored code.
Tip
If the security code is not stored, the Code Del display
does not appear.
Additional Information
Maintenance
Fuse replacement
When replacing the fuse, be sure to use one
matching the amperage rating stated on the
original fuse. If the fuse blows, check the power
connection and replace the fuse. If the fuse blows
again after replacement, there may be an internal
malfunction. In such a case, consult your nearest
Sony dealer.
Warning
Never use a fuse with an amperage rating
exceeding the one supplied with the unit as this
could damage the unit.
Fuse (10 A)
28
Specifications
CD Player section
Signal-to-noise ratio 90 dB
Frequency response 10 – 20,000 Hz
Wow and flutter Below measurable limit
Tuner section
FM
Tuning range 87.5 – 108.0 MHz
Aerial terminal External aerial connector
Intermediate frequency 10.7 MHz/450 kHz
Usable sensitivity 9 dBf
Selectivity 75 dB at 400 kHz
Signal-to-noise ratio 67 dB (stereo),
69 dB (mono)
Harmonic distortion at 1 kHz
0.5 % (stereo),
0.3 % (mono)
Separation 35 dB at 1 kHz
Frequency response 30 – 15,000 Hz
MW/LW
Tuning range MW: 531 – 1,602 kHz
LW: 153 – 279 kHz
Aerial terminal External aerial connector
Intermediate frequency 10.7 MHz/450 kHz
Sensitivity MW: 30 µV
LW: 40 µV
Power amplifier section
Outputs Speaker outputs
(sure seal connectors)
Speaker impedance 4 – 8 ohms
Maximum power output 52 W × 4 (at 4 ohms)
General
Outputs Audio outputs (front/rear)
Subwoofer output (mono)
Power aerial relay control
terminal
Power amplifier control
terminal
Inputs Telephone ATT control
terminal
Illumination control
terminal
BUS control input terminal
BUS audio input or AUX IN
terminal
Remote controller input
terminal
Aerial input terminal
Tone controls Bass ±8 dB at 100 Hz
Treble ±8 dB at 10 kHz
Loudness +8 dB at 100 Hz
+2 dB at 10 kHz
Power requirements 12 V DC car battery
(negative earth)
Dimensions Approx. 178 × 50 × 186
mm (w/h/d)
Mounting dimensions Approx. 182 × 53 × 163
mm (w/h/d)
Mass Approx. 1.5 kg
Supplied accessories Parts for installation and
connections (1 set)
Card remote commander
RM-X111
Optional accessories Wireless rotary commander
RM-X6S
Wired rotary commander
RM-X4S
BUS cable (supplied with
an RCA pin cord)
RC-61 (1 m), RC-62 (2 m)
Optional equipment CD changer (6 discs)
CDX-T70MX, CDX-T69
MD changer (6 discs)
MDX-66XLP
MG-MS System-up Player
MGS-X1
Source selector
XA-C30
AUX-IN Selector
XA-300
Note
This unit cannot be connected to a digital preamplifier
or an equalizer which is Sony BUS system compatible.
Design and specifications are subject to change
without notice.
30
Error displays/Messages
*1 When the CD/MD changer is connected to the unit,
the disc number of the CD or MD appears in the
display.
*2 The disc number of the disc causing the error
appears in the display.
If these solutions do not help improve the
situation, consult your nearest Sony dealer.
The “ST” indication flashes.
Tune in the frequency accurately.
The broadcast signal is too weak.
tSet to the monaural reception mode (page
22).
A programme broadcast in stereo is heard
in monaural.
The unit is in monaural reception mode.
tCancel monaural reception mode (page
22).
RDS
The Seek starts after a few seconds of
listening.
The station is non-TP or has weak signal.
tPress (AF) or (TA) repeatedly until “AF
off” or “TA off” appears.
No traffic announcements.
Activate “TA.
The station does not broadcast any traffic
announcements despite being TP.
tTune in another station.
PTY displays “--------.
The current station is not an RDS station.
RDS data has not been received.
The station does not specify the programme
type.
Error displays
(For this unit and optional CD/MD changers)
The following indications will flash for about 5
seconds, and an alarm sound will be heard.
Blank*1
No tracks have been recorded on an MD*2.
tPlay an MD with recorded tracks on it.
Error*1
A CD is dirty or inserted upside down*2.
tClean or insert the CD correctly.
A CD/MD cannot play because of some
problem*2.
tInsert another CD/MD.
Failure
The connection of speakers/amplifiers is
incorrect.
tSee the installation guide manual of this
model to check the connection.
High Temp
The ambient temperature is more than 50°C.
tWait until the temperature goes down
below 50°C.
NO Disc*1
No disc is inserted in the CD/MD unit.
tInsert discs in the CD/MD unit.
NO Magazine
The disc magazine is not inserted in the CD/
MD unit.
tInsert the magazine in the CD/MD unit.
NO Music*2
A CD which is not a music file is inserted in
the MP3 playable CD unit.
tInsert a music CD in the MP3 playable CD
unit.
Offset
There may be an internal malfunction.
tCheck the connection. If the error
indication remains on in the display,
consult your nearest Sony dealer.
Push Reset
The CD/MD unit cannot be operated because
of some problem.
tPress the RESET button on the unit.
31
Messages
Local Seek +/–
The Local Seek mode is on during automatic
tuning (page 14).
NO AF
There is no alternative frequency for the
current station.
“” or “”
You have reached the beginning or the end of
the disc and you cannot go any further.
2
Willkommen!
Danke, dass Sie sich für diesen CD-Player von
Sony entschieden haben. Sie haben folgende
zusätzliche Möglichkeiten, um die vielfältigen
Funktionen des Geräts noch besser nutzen zu
können:
Gesondert erhältliche CD/MD-Geräte
(Wechsler und Player)*1.
CD TEXT-Informationen (werden bei der
Wiedergabe einer CD mit CD TEXT*2
angezeigt).
Mitgeliefertes Bedienungszubehör
Kartenfernbedienung RM-X111
Gesondert erhältliches
Bedienungszubehör
Drahtloser Joystick RM-X6S
Kabel-Joystick RM-X4S
*1 Dieses Gerät arbeitet nur zusammen mit Sony-
Produkten.
*2 Eine CD mit CD TEXT ist eine Audio-CD, die
Informationen wie den Namen der CD, den Namen
des Interpreten und die Namen der Titel enthält.
Diese Daten sind auf der CD aufgezeichnet.
Dieses Etikett befindet sich an der Unterseite
des Gehäuses.
CAUTION INVISIBLE
DO NOT STARE INTO BEAM OR
VIEW DIRECTLY WITH OPTICAL INSTRUMENTS
LASER RADIATION WHEN OPEN
Dieses Etikett befindet sich am internen
Chassis der Laufwerkseinheit.
3
Inhalt
Lage und Funktion der Teile und
Bedienelemente. . . . . . . . . . . . . . . . . . . . . 4
Sicherheitsmaßnahmen . . . . . . . . . . . . . . . . . 6
Hinweise zu CDs. . . . . . . . . . . . . . . . . . . . . . 7
Vorbereitungen
Zurücksetzen des Geräts . . . . . . . . . . . . . . . . 8
Einstellen der Uhr . . . . . . . . . . . . . . . . . . . . . 8
CD-Player
CD/MD-Gerät (gesondert erhältlich)
Wiedergeben einer CD/MD. . . . . . . . . . . . . . 9
Informationen im Display . . . . . . . . . . . . . . 10
Wiederholtes Wiedergeben von Titeln
— Repeat Play . . . . . . . . . . . . . . . . . . . . 11
Wiedergeben von Titeln in willkürlicher
Reihenfolge
— Shuffle Play . . . . . . . . . . . . . . . . . . . . 12
Benennen einer CD
— Disc Memo*. . . . . . . . . . . . . . . . . . . . 12
Ansteuern einer CD/MD anhand des Namens
— List-up* . . . . . . . . . . . . . . . . . . . . . . . 14
*Funktionen, wenn ein zusätzlich erhältliches CD/
MD-Gerät angeschlossen ist
Radio
Automatisches Speichern von Radiosendern
— BTM (Best Tuning Memory). . . . . . . 14
Einstellen gespeicherter Sender. . . . . . . . . . 15
Speichern bestimmter Radiosender . . . . . . . 15
Einstellen eines Senders anhand einer Liste
— List-up . . . . . . . . . . . . . . . . . . . . . . . . 16
RDS
Übersicht über RDS . . . . . . . . . . . . . . . . . . 16
Automatisches Neueinstellen von Sendern für
optimale Empfangsqualität
— AF-Funktion . . . . . . . . . . . . . . . . . . . 17
Empfangen von Verkehrsdurchsagen
— TA/TP . . . . . . . . . . . . . . . . . . . . . . . . 18
Speichern von RDS-Sendern zusammen mit
der AF- und TA-Einstellung . . . . . . . . . 19
Einstellen von Sendern nach Programmtyp
— PTY . . . . . . . . . . . . . . . . . . . . . . . . . . 19
Automatisches Einstellen der Uhr
— CT . . . . . . . . . . . . . . . . . . . . . . . . . . . 20
Weitere Funktionen
Der Joystick . . . . . . . . . . . . . . . . . . . . . . . . 21
Einstellen der Klangeigenschaften . . . . . . . 22
Schnelles Dämpfen des Tons . . . . . . . . . . . 22
Wechseln der Klang- und
Anzeigeeinstellungen
— Menü . . . . . . . . . . . . . . . . . . . . . . . . . 23
Einstellen des Equalizers (EQ7) . . . . . . . . . 24
Einstellen der DSO-Funktion
(Dynamic Soundstage Organizer) . . . . . 25
Auswählen des Anzeigemodus und des
Anzeigebildes. . . . . . . . . . . . . . . . . . . . . 26
Anschließen zusätzlicher Audiogeräte . . . . 27
Einstellen des Sicherheitscodes . . . . . . . . . 28
Weitere Informationen
Wartung . . . . . . . . . . . . . . . . . . . . . . . . . . . 29
Ausbauen des Geräts. . . . . . . . . . . . . . . . . . 30
Technische Daten . . . . . . . . . . . . . . . . . . . . 31
Störungsbehebung. . . . . . . . . . . . . . . . . . . . 32
Fehleranzeigen/Meldungen. . . . . . . . . . . . . 33
5
*1 Wenn ein gesondert erhältliches MD-Gerät
angeschlossen ist.
*2 Steht nur zur Verfügung, wenn ein gesondert
erhältliches, tragbares Gerät von Sony an BUS
AUDIO IN des Geräts angeschlossen ist. Sie
können gleichzeitig keine gesondert erhältlichen
CD/MD-Geräte anschließen.
*3 Wenn ein gesondert erhältliches CD/MD-Gerät
angeschlossen ist.
*4 Steht nur zur Verfügung, wenn ein gesondert
erhältliches CD-Gerät mit Steuerfunktionen für
MP3-Dateien angeschlossen ist und eine MP3-
Datei wiedergegeben wird.
Haupt-Display
Bedienfeld
Fortsetzung auf der nächsten Seite t
CDX-M800
7
Hinweise zu CDs
Berühren Sie nicht die Oberfläche von CDs,
damit diese nicht verschmutzt werden. Fassen
Sie CDs nur am Rand an.
Bewahren Sie CDs in ihrer Hülle oder in den
CD-Magazinen auf, wenn sie nicht abgespielt
werden.
Schützen Sie CDs vor Hitze bzw. hohen
Temperaturen. Lassen Sie sie nicht in
geparkten Autos, auf dem Armaturenbrett oder
auf der Hutablage liegen.
Bringen Sie keine Aufkleber auf CDs an und
verwenden Sie keine CDs mit Rückständen von
Tinte oder Klebstoffen. Solche CDs drehen sich
beim Betrieb möglicherweise nicht mehr und
führen zu einer Fehlfunktion oder können
beschädigt werden.
Verwenden Sie keine CDs, an denen Etiketten
oder Aufkleber angebracht sind.
Bei Verwendung solcher CDs kann es zu
folgenden Fehlfunktionen kommen:
– Die CD lässt sich nicht auswerfen, weil sich
ein Etikett oder Aufkleber gelöst hat und den
Auswurfmechanismus blockiert.
– Die Audiodaten werden nicht korrekt gelesen
(z. B. Tonsprünge bei der Wiedergabe, keine
Wiedergabe), weil ein Etikett oder Aufkleber
durch Wärmeeinwirkung geschrumpft ist und
die CD sich verzogen hat.
CDs mit außergewöhnlichen Formen (z. B.
herzförmige, quadratische oder sternförmige
CDs) können mit diesem Gerät nicht
wiedergegeben werden. Falls Sie es doch
versuchen, kann das Gerät beschädigt werden.
Verwenden Sie solche CDs nicht.
Single-CDs (8-cm-CDs) können ebenfalls nicht
verwendet werden.
Reinigen Sie CDs vor dem Abspielen mit
einem handelsüblichen Reinigungstuch.
Wischen Sie dabei von der Mitte nach außen.
Verwenden Sie keine Lösungsmittel wie
Benzin oder Verdünner und keine
handelsüblichen Reinigungsmittel oder
Antistatik-Sprays für Schallplatten.
Hinweise zu CD-Rs/CD-RWs
Mit diesem Gerät können Sie CD-Rs
(beschreibbare CDs) sowie CD-RWs
(wiederbeschreibbare CDs), die als Audio-CDs
konzipiert sind, wiedergeben lassen.
An folgenden Markierungen können Sie CD-
Rs bzw. CD-RWs, die als Audio-CDs
konzipiert sind, erkennen.
Folgende Markierungen kennzeichnen
Datenträger, die nicht für die Audiowiedergabe
geeignet sind.
Je nach dem Gerät, mit dem die CD-R/CD-RW
bespielt wurde, oder dem Zustand der CD-R/
CD-RW selbst ist eine Wiedergabe mit diesem
Gerät nicht in jedem Fall möglich.
Eine noch nicht abgeschlossene* CD-R/CD-
RW kann nicht wiedergegeben werden.
*Dieser Vorgang ist notwendig, damit eine bespielte
CD-R/CD-RW auf einem Audio-CD-Player
abgespielt werden kann.
8
Vorbereitungen
Zurücksetzen des Geräts
Bevor Sie das Gerät zum ersten Mal benutzen
oder wenn Sie die Autobatterie ausgetauscht
haben oder die Verbindungen wechseln, müssen
Sie das Gerät zurücksetzen.
Drücken Sie die Taste RESET mit einem spitzen
Gegenstand wie z. B. einem Kugelschreiber.
Zurücksetzen des Geräts in der Zusatz-
Display-Position
Hinweise
Wenn die Frontplatte beim Zurücksetzen des Geräts
geschlossen war, müssen Sie einmal (OPEN) am
Gerät drücken, bevor Sie das Gerät wieder bedienen
können. Wenn sich eine CD im Gerät befindet, wird
diese automatisch ausgeworfen. Legen Sie die CD
erneut ein.
Wenn Sie die Taste RESET drücken, werden die
eingestellte Uhrzeit und einige weitere gespeicherte
Einstellungen gelöscht.
Einstellen der Uhr
Die Uhr zeigt die Uhrzeit im 24-Stunden-Format
digital an.
Beispiel: Einstellen der Uhr auf 10:08
1Drücken Sie (MENU) und drücken Sie
anschließend M oder m so oft, bis
„Clock Adjust“ erscheint.
1Drücken Sie (ENTER).
Die Stundenanzeige blinkt.
2Stellen Sie mit M oder m die
Stunden ein.
3Drücken Sie ,.
Die Minutenanzeige blinkt.
4Stellen Sie mit M oder m die Minuten
ein.
2Drücken Sie (ENTER).
Die Uhr beginnt zu laufen. Wenn Sie die
Uhreinstellung vorgenommen haben,
erscheint im Display wieder die Anzeige für
den normalen Wiedergabemodus.
Tipps
Mithilfe der RDS-Funktion können Sie die Uhr auch
automatisch einstellen lassen (Seite 20).
Wenn der Uhrzeitmodus aktiviert ist, wird die Uhrzeit
nur angezeigt, wenn der normale
Wiedergabemodus ausgewählt ist. Im Zusatz-
Display wird die Uhrzeit dagegen immer angezeigt
(Seite 23).
Taste RESET
Taste RESET
10
Vorsicht beim Anschließen von MGS-X1 und MD-
Geräten
Dieses Gerät erkennt den MGS-X1 als ein MD-Gerät.
Wenn die Wiedergabe über den MGS-X1 erfolgen
soll, wählen Sie mit (SOURCE) die Option „MS“ oder
„MD“ aus. Wenn „MS“ als Tonquelle angezeigt wird,
beginnt die Wiedergabe am MGS-X1. Wenn „MD“
als Tonquelle angezeigt wird, wählen Sie mit
(MODE) die Option „MS“, um die Wiedergabe zu
starten.
Wenn die Wiedergabe über ein MD-Gerät erfolgen
soll, wählen Sie mit (SOURCE) die Option „MD“ oder
„MS“ aus. Wenn das gewünschte MD-Gerät als
Tonquelle angezeigt wird, beginnt die Wiedergabe.
Wenn „MS“ oder ein anderes MD-Gerät als
Tonquelle angezeigt wird, wählen Sie mit (MODE)
das gewünschte MD-Gerät aus, um die Wiedergabe
zu starten.
Hinweise zum Anschließen von MP3-fähigen CD-
Geräten
Wenn Sie eine CD einlegen, die keine MP3-Dateien
(Titel) enthält, erscheint „NO Music“ im Display und
die Wiedergabe der nächsten CD beginnt.
Bevor ein Titel wiedergegeben werden kann, muss
dieses Gerät alle Titel- und Albuminformationen auf
der CD einlesen. Je nach Titelstruktur kann es
deshalb über eine Minute dauern, bis die
Wiedergabe beginnt. Während dieser Zeit wird
„Read“ angezeigt. Warten Sie bitte, bis die
Wiedergabe automatisch beginnt. Dies ist der Fall,
sobald das Einlesen abgeschlossen ist.
Informationen im Display
Wenn die CD/MD, das Album bzw. der Titel
wechselt, wird der gespeicherte Name*1, falls
vorhanden, der neuen CD/MD, des neuen
Albums bzw. des neuen Titels automatisch
angezeigt. Wenn die Funktion Auto Scroll auf
„on“ gesetzt ist, laufen Namen mit mehr als 12
Zeichen im Display durch und werden auf diese
Weise ganz angezeigt (Seite 23).
Funktion Drücken Sie
Wechseln der
angezeigten
Informationen
(DSPL/PTY)
Vollständiges
Anzeigen der
Informationen
(SCRL)
Titelnummer Verstrichene
Spieldauer
Anzeigbare
Informationen
• CD/MD-Nummer
• Albumnummer*7
MP3-*2/MDLP-Anzeige*2*3
MP3: MP3-Wiedergabe
LP2: LP2-Wiedergabe
LP4: LP4-Wiedergabe
Uhrzeit
Musikquelle
Anzeigbare Informationen
CD/MD-Name*4*5/
Interpretenname*6
Albumname*1*7
Name des Titels*1
ID3-Tag*1*7
11
*1 Wenn Sie (DSPL/PTY) drücken und „NO Disc
Name“, „NO Album Name“ oder „NO Track Name
erscheint, gibt es keinen CD/MD-, Album- bzw.
Titelnamen. Wenn „NO ID3 Tag“ erscheint, gibt es
kein ID3-Tag.
*2 Je nach der REP- bzw. SHUF-Einstellung
erscheint unterhalb der Uhrzeit „MP3“/„MDLP“ im
Display.
*3 Steht nur zur Verfügung, wenn ein gesondert
erhältliches MD-Gerät mit MDLP-Funktion
angeschlossen ist und eine MDLP wiedergegeben
wird.
*4 Wenn Sie (DSPL/PTY) drücken und „NO Disc
Name“ oder „NO Track Name“ erscheint, gibt es
kein Disc Memo (Seite 12) und keinen
gespeicherten Namen zum Anzeigen.
*5 Wenn die CD über dieses Gerät mit der CUSTOM
FILE-Funktion benannt wurde, wird das Disc
Memo angezeigt.
*6 Nur bei CDs, bei denen die CD TEXT-
Informationen den Namen des Interpreten
enthalten.
*7 Nur bei Wiedergabe einer MP3-Datei.
Hinweise
Einige Zeichen können nicht angezeigt werden.
Buchstaben und andere Zeichen, die nicht
angezeigt werden können, erscheinen als „x“.
Bei einigen CDs mit außergewöhnlich langem CD
TEXT oder langen ID3-Tags laufen die
Informationen unter Umständen nicht im Display
durch und werden daher nicht ganz angezeigt.
Mit diesem Gerät kann der Name des Interpreten
nicht einzeln für jeden Titel einer CD mit CD TEXT
oder eines Albums angezeigt werden.
Tipp
Wenn die Funktion A.Scroll (Auto Scroll) auf „off“
gesetzt ist und die CD/MD, der Titel bzw. das Album
wechselt, läuft der Name der CD/MD, des Titels oder
Albums bzw. das ID3-Tag nicht im Display durch und
wird daher nicht ganz angezeigt.
Wiederholtes Wiedergeben
von Titeln
— Repeat Play
Sie haben folgende Möglichkeiten:
REP-Track — zum wiederholten Wiedergeben
des aktuellen Titels.
• REP-Album*1 zum wiederholten
Wiedergeben der Titel im aktuellen Album.
•REP-Disc*
2 — zum wiederholten Wiedergeben
der Titel auf der aktuellen CD/MD.
*1 Nur bei Wiedergabe einer MP3-Datei.
*2 Nur verfügbar, wenn mindestens ein gesondert
erhältliches CD/MD-Gerät angeschlossen ist.
Drücken Sie während der Wiedergabe
(1) (REP) so oft, bis die gewünschte
Einstellung im Display erscheint.
Repeat Play beginnt.
Wenn Sie wieder in den normalen
Wiedergabemodus schalten möchten, wählen Sie
„REP-off“.
13
Tipps
Sie können einen Namen korrigieren oder löschen,
indem Sie ihn einfach überschreiben oder „
eingeben.
Es gibt noch eine andere Möglichkeit, mit dem
Benennen einer CD zu beginnen: Halten Sie (LIST)
2 Sekunden lang gedrückt, statt Schritt 2 und 3
auszuführen. Sie können das Benennen auch
abschließen, indem Sie (LIST) 2 Sekunden lang
gedrückt halten, statt Schritt 5 auszuführen.
Sie können CDs in einem Gerät ohne CUSTOM
FILE-Funktion benennen, wenn dieses in
Kombination mit einem CD-Gerät angeschlossen ist,
das über diese Funktion verfügt. Das Disc Memo
wird in diesem Fall in dem CD-Gerät mit CUSTOM
FILE-Funktion gespeichert.
Hinweis
Repeat bzw. Shuffle Play wird unterbrochen, bis das
Bearbeiten des Namens abgeschlossen ist.
Anzeigen des Disc Memo
Beim Anzeigen von Informationen hat das Disc
Memo immer Priorität vor einer ursprünglichen
CD TEXT-Information.
Tipp
Welche Informationen Sie noch anzeigen lassen
können, ist auf Seite 10 erläutert.
Löschen des Disc Memo
1Drücken Sie mehrmals (SOURCE), um
„CD“ auszuwählen.
2Drücken Sie mehrmals (MODE), um
das CD-Gerät auszuwählen, in dem
das Disc Memo gespeichert ist.
3Drücken Sie (MENU) und drücken Sie
anschließend M oder m so oft, bis
„Name Del“ erscheint.
4Drücken Sie (ENTER).
Die gespeicherten Namen werden angezeigt.
5Drücken Sie mehrmals M oder m und
wählen Sie den zu löschenden Namen
aus.
6Drücken Sie 2 Sekunden lang
(ENTER).
Der Name wird gelöscht.
Gehen Sie wie in Schritt 5 und 6 erläutert vor,
wenn Sie weitere Namen löschen wollen.
7Drücken Sie zweimal (MENU).
Das Gerät schaltet wieder in den normalen
Wiedergabemodus.
Hinweise
Wenn das Disc Memo einer CD mit CD TEXT
gelöscht wird, werden wieder die ursprünglichen CD
TEXT-Informationen angezeigt.
Wenn Sie das zu löschende Disc Memo nicht finden
können, wählen Sie in Schritt 2 ein anderes CD-
Gerät aus und versuchen es damit.
Wenn bereits das gesamte Disc Memo gelöscht
wurde, wechselt das Gerät in Schritt 4 wieder in den
normalen Wiedergabemodus.
Funktion Drücken Sie
Anzeigen (DSPL/PTY)hrend der
Wiedergabe einer CD bzw.
CD mit CD TEXT
18
Empfangen von
Verkehrsdurchsagen
— TA/TP
Wenn Sie die TA- (Traffic Announcement -
Verkehrsdurchsagen) und die TP-Funktion
(Traffic Programme - Verkehrsfunk) aktivieren,
können Sie automatisch einen UKW-Sender
einstellen, der Verkehrsdurchsagen ausstrahlt.
Dabei ist es unerheblich, welches UKW-
Programm bzw. welche Tonquelle (z. B. CD/
MD/AUX) Sie gerade hören. Das Gerät wechselt
nach der Durchsage zurück zur vorherigen
Tonquelle.
Drücken Sie (TA) so oft, bis „TA on“
angezeigt wird.
Das Gerät beginnt, nach Verkehrsfunksendern
zu suchen.
„TP“ zeigt an, dass ein solcher Sender
empfangen wird, und „TA“ blinkt während
einer Verkehrsdurchsage. Das Gerät setzt die
Suche nach Verkehrsfunksendern fort, wenn
„NO TP“ angezeigt wird.
Wenn Sie alle Verkehrsdurchsagen ausschalten
wollen, wählen Sie „TA off“.
Tipp
Eine laufende Verkehrsdurchsage können Sie auch
mit der Taste (SOURCE) oder (MODE) abbrechen.
Speichern der Lautstärke von
Verkehrsdurchsagen
Sie können die Lautstärke für die
Verkehrsdurchsagen voreinstellen, so dass Sie sie
nicht überhören.
1Stellen Sie mit (VOL) (+) oder
(VOL) (–) den gewünschten
Lautstärkepegel ein.
2Drücken Sie 2 Sekunden lang (TA).
„TA“ erscheint und die Einstellung wird
gespeichert.
Empfangen von
Katastrophenwarnungen
Wenn die AF- oder die TA-Funktion aktiviert ist
und während des Empfangs eines UKW-Senders
oder der Wiedergabe von CD/MD/AUX eine
Katastrophenwarnung ausgestrahlt wird,
wechselt das Gerät automatisch zur
Katastrophenwarnung.
Funktion Drücken Sie
Ausschalten der
aktuellen
Verkehrsdurchsage
(TA)
20
1Drücken Sie während des UKW-
Empfangs (DSPL/PTY), bis „PTY“
erscheint.
Der Name des aktuellen Programmtyps
erscheint, wenn der Sender PTY-Daten
ausstrahlt.
„--------“ erscheint, wenn der eingestellte
Sender kein RDS-Sender ist oder wenn keine
RDS-Daten empfangen werden.
2Drücken Sie M oder m so oft, bis der
gewünschte Programmtyp erscheint.
Die Programmtypen erscheinen in der
Reihenfolge, die in der Tabelle angegeben ist.
„NO DATA“ wird angezeigt, wenn der
Programmtyp in den RDS-Daten nicht
angegeben wird.
3Drücken Sie (ENTER).
Das Gerät beginnt, nach einem Sender zu
suchen, der den ausgewählten Programmtyp
ausstrahlt.
Automatisches Einstellen der
Uhr
— CT
Mit den CT-Daten (Clock Time), die von RDS-
Sendern ausgestrahlt werden, lässt sich die Uhr
automatisch einstellen.
1Drücken Sie während des
Radioempfangs (MENU) und drücken
Sie anschließend M oder m so oft, bis
„CT off“ erscheint.
2Drücken Sie , so oft, bis „CT on“
angezeigt wird.
Die Uhr wird eingestellt.
3Schalten Sie mit (ENTER) zur
normalen Anzeige zurück.
Wenn Sie die CT-Funktion deaktivieren wollen,
wählen Sie in Schritt 2 „CT off“.
Hinweise
Die CT-Funktion steht möglicherweise nicht zur
Verfügung, auch wenn ein RDS-Sender empfangen
wird.
Die mit der CT-Funktion eingestellte Uhrzeit ist nicht
immer korrekt.
21
Weitere Funktionen
Sie können das Gerät sowie gesondert erhältliche
CD/MD-Geräte mit einem Joystick (gesondert
erhältlich) steuern.
Der Joystick
Bringen Sie zunächst je nach der Montage des
Joysticks den entsprechenden Aufkleber an.
Der Joystick wird über Tasten und/oder
Drehregler bedient.
Drücken der Tasten
Drehen des Reglers
Wenn Sie den Regler drehen und
loslassen, können Sie:
– Titel überspringen.
– Sender automatisch einstellen.
Wenn Sie den Regler drehen, halten und
loslassen, können Sie:
– in einem Titel vorwärts-/rückwärtssuchen.
– einen Sender manuell einstellen.
Drücken und Drehen des Reglers
Wenn Sie den Regler gleichzeitig
drücken und drehen, können Sie:
– gespeicherte Sender einstellen.
– CDs/MDs während der CD/MD-
Wiedergabe wechseln*1.
Während der Wiedergabe einer CD mit MP3-
Dateien*4
Wenn Sie den Regler drücken und
wiederholt rasch drehen, können Sie:
– CDs nacheinander wechseln.
Wenn Sie den Regler drücken, drehen
und gedreht halten, können Sie:
– Alben wechseln.
*1 Nur wenn die entsprechenden gesondert
erhältlichen Geräte angeschlossen sind.
*2 Steht nur zur Verfügung, wenn ein gesondert
erhältliches, tragbares Gerät von Sony an BUS
AUDIO IN des Geräts angeschlossen ist. Sie
können gleichzeitig keine gesondert erhältlichen
CD/MD-Geräte anschließen.
*3 Wenn Ihr Fahrzeug nicht über ein Zündschloss mit
Zubehörposition (ACC oder I) verfügt, halten Sie,
nachdem Sie die Zündung ausgeschaltet haben,
unbedingt (OFF) gedrückt, bis die Anzeige
ausgeblendet wird.
*4 Nur verfügbar, wenn ein gesondert erhältliches
CD-Gerät mit Steuerfunktion für MP3-Dateien
angeschlossen ist.
Drücken Sie Funktion
(SOURCE) Wechseln der Tonquelle
(Radio/CD/MD*1/AUX*2)/
Einschalten
(MODE) Wechseln des Modus
(Radiofrequenzbereich/CD-
Gerät/MD*1-Gerät)
(ATT) Dämpfen des Tons
(OFF)*3Stoppen der Wiedergabe
bzw. des Radioempfangs/
Ausschalten
(SOUND) Einstellen des Klangmodus
(DSPL) Wechseln der angezeigten
Informationen
SOUND
DSPL
MODE
SOUND
DSPL
MODE
OFF
Stellen Sie durch
Drehen des Reglers VOL
die Lautstärke ein.
(SOURCE)
(SOUND)
(ATT)
(DSPL) (OFF)
(MODE)
Fortsetzung auf der nächsten Seite t
Regler
SEEK/AMS
Regler
PRESET/DISC


Produkt Specifikationer

Mærke: Sony
Kategori: Bilradio
Model: cdx-m800

Har du brug for hjælp?

Hvis du har brug for hjælp til Sony cdx-m800 stil et spørgsmål nedenfor, og andre brugere vil svare dig