Sportline Total Fitness 360 Manual

Sportline Skridttæller Total Fitness 360

Læs gratis den danske manual til Sportline Total Fitness 360 (3 sider) i kategorien Skridttæller. Denne vejledning er vurderet som hjælpsom af 43 personer og har en gennemsnitlig bedømmelse på 4.8 stjerner ud af 22 anmeldelser. Har du et spørgsmål om Sportline Total Fitness 360, eller vil du spørge andre brugere om produktet?

Side 1/3
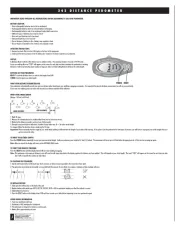
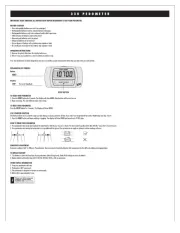
IMPORTANT: READ THROUGH ALL INSTRUCTIONS BEFORE BEGINNING TO USE YOUR PEDOMETER
BATTERY CAUTION:
Non-rechargeable batteries are not to be recharged
Rechargeable batteries must be removed before recharging
Rechargeable batteries only to be recharged under adult supervision
Different types of batteries must not be mixed
New and used batteries not to be mixed
Exhausted batteries to be removed
Do not dispose of battery in fire; battery may explode or leak
Do not dispose of product in fire; battery may explode or leak
BEFORE BEGINNING TO USE YOUR PEDOMETER
1. Please remove the plastic film from the display before use.
2. Before using your pedometer, remove the battery insulation strip.
Your new pedometer has been designed for your easy use and the accurate measurement of the distance you travel (travel distance records up to 7 days in memory), the steps you take, the calories "burned" while you walk or run, how long you
exercise, what speed you walk or run, conversion of distance measurement from mile (MIL) to kilometer (KM) or kilometer to mile, and auto power on/off. Also included is a convenient Time-of-Day clock with 12 hour or 24 hour format to tell you
what time it is. The unit will also measure your distance in miles/kilometers and fractions of miles/kilometers.
EXPLANATION OF SYMBOLS
BUTTONS:
Button A –
RESET, H (HR), (UP), KM/MIL
Button B
MIN (MINUTES) , (DOWN)
Button C
MODE
DISPLAY (upper window):
STEP – You are in modeSTEP
TIMER –
You are in Count Up modeTIMER
CAL –
You are in mode CALORIE
KM/H, MIL/H
You are in modeSPEED PER HOUR
STEP/M
You are in modeSTEP PER MINUTE
ODO
You are in total modeMILEAGE/KILOMETER
No MODE indication or P
You are in Time of Day with 12 hour or 24 hour format modeCLOCK
DISPLAY (lower window):
WALK
You are in modeWALK & RUN
RUN
You are in modeRUN/STRIDE MEASUREMENT
WALK & RUN
You are in setting modeWALK & RUN STRIDE
– Pedometer is counting successfully
– You are in auto power modeOFF
Numbers of distance traveled in MIL or KM (7 days records).
UNIQUE SCAN FEATURE
Your pedometer has a very unique scanning feature. After you turn on the pedometer the display will be in mode. Press ( ) button once or repeatedly to show or and STEP C TIMER, CAL, KM/H MIL/H, STEP/M TIME OF DAY modes. When you return
back to the mode, it will be "blinking". You are now in the mode. Now the display will automatically show the blinking words "STEP, TIMER, CAL, KM/H or MIL/H, STEP/M and Clock". The pedometer will now rotate through each STEP AUTO-SCAN
one of these displays for 4 seconds sequentially as long as the function is activated…or until you press the ( ) button once more for new data setting or viewing.AUTO-SCAN C
HOW TO OPERATE YOUR NEW PEDOMETER
You will need to give your pedometer some information for it to operate properly. In the sections below you will see how to enter your personal STRIDE LENGTH (for walking, hiking), your WEIGHT (for calories), and TIME OF DAY. Once this
information has been entered into the unit, you’re ready to go!
YOUR STRIDE LENGTH
Your Stride Length and How to Measure It
This pedometer automatically records your exercise distance based upon your walking or running or hiking movements. The maximum distance reading is 999.99 miles/kilometers. The numbers to the right of the decimal point are fractions of a mile
(just like your car’s odometer) right down to 1/100 of a mile or kilometer. It is important to walk or run or hike consistently. If you vary your walking pace, your stride length will vary and your distance traveled will be different.
INPUT YOUR STRIDE LENGTH (Range for mode 12-96 inches or 30-240 centimeters; the default values are 30 inches/75 centimeters):WALK
1. Walk 10 steps.
2. Measure the distance you have walked either from heel-to-heel or toe-to-toe.
3. Divide the distance covered by the number of steps.
4. Example: Distance covered in 10 steps = 360 inches. Divide the number of inches by the number of steps (360 inches divided by 10) = 36 inches.
FOR JOGGERS OR HIKERS LENGTH (Range for mode 12-96 inches or 30-240 centimeters; the default values are 42 inches/100 centimeters). Follow the directions above, except jog or hike for 10 steps.RUN
HOW TO ENTER YOUR "WALK" STRIDE LENGTH INTO THE PEDOMETER
1. Press the button ( ) on the display panel to mode. Hold for 2 seconds to get to the stride length setting mode. MODE C STEP MODE WALK
2. Only when flashing, press button ( ) or ( ) for setting your stride length information, every press of button ( ) will increase 1 inch or 1 cm. Every press of button ( ) will decrease 1 inch or 1 cm in the reverse order. A B WALK A B
3. WALK MIL After you set your stride length information, the numbers of the stride length on the display will blink for confirmation and go back to mode automatically after 7 seconds.
HOW TO ENTER YOUR "RUN" STRIDE LENGTH INTO THE PEDOMETER
1. Press the button ( ) on the display panel to MODE C STEP mode, and hold for 2 seconds to stride length setting mode, press button ( ) once again to get stride length setting mode. WALK MODE C RUN
2. Press button ( ) or ( ) for setting your stride length information (the same as above).A B RUN
HOW TO SET YOUR WALK, RUN OR WALK/RUN MODE
1. Press the button ( ) until you get to either mode.MODE C STEP
2. Press and HOLD button ( ) for 3 seconds. Your stride will blink on the bottom display.MODE C WALK
3. Press button ( ) again. Your stride will blink on the bottom display.MODE C RUN
4. Press button ( ) again. The words MODE C WALK, RUN, WALK/RUN will blink.
5. Press button ( ) until you get to the action of your choice (A WALK, RUN, WALK/RUN). The action will blink for 2 seconds, then stop, and you’ll be ready to go.
3 6 0 F I T N E S S P E D O M E T E R
360 FITNESS PEDOMETER Instructions Cont…
C A B
10
9
8
7
6
5
4
3
2 0
1
Step Distance
Ideal Distance
G U A R A N T E E C E R T I F I C A T E
HOW TO ENTER YOUR WEIGHT (Range 60 – 280 lbs. or 30 – 130 kg. The default values are 100lbs/45 kg):
In order for the calorie function to work properly you will need to enter your weight. Follow these steps to do so:
1. MODE C CALORIE Press the button ( ) and the display panel until you see mode.
2. MODE C WEIGHT Press button ( ) and hold for 2 seconds to get setting mode.
3. A B A BPress button ( ) or ( ) to set your weight information. Every press on button ( ) increases the weight by 10 LB (pounds) or 5 KG (kilograms). Every press of button ( ) decreases the weight by 10 LB (pounds) or 5 KG (kilograms).
4. CALORIE Once you set the proper weight, the display will blink for 7 seconds and then the display will skip back to mode.
HOW TO SET TIME OF DAY
1. MODE C CLOCK Press the button ( ) on the display panel repeatedly to reach mode.
2. CPress button ( ) once and hold for 2 seconds to get 12 or 24 hour time setting mode. Press either button ( ) or ( ) once to set 12-hour time format or 24 hour time format.A B
3. MODE C CLOCK Press button ( ) once to get into setting. Both numbers will blink. Press button ( ) for hour setting and ( ) button for minute setting. After completing the setting, display will automatically go back to mode after 7 seconds.A B CLOCK
TO START YOUR EXERCISE
1. C STEP Press ( ) until the upper display will show mode (maximum reading is 99,999 steps).
2. STEP The display will show 00000 in the mode in the upper display window (if numbers appear in either display, the display by pressing ( ) for 2 seconds), and 0.00 MIL or KM for distance on lower display window. RESET A
NOTE: Unit must be closed while operating to track measurements accurately.
TO RESET YOUR PEDOMETER
Press the button ( ) and hold for 2 seconds. The upper display and lower display will be reset to zero except the mode and the previous 7 days distance travel records. TO THE 7-DAY MEMORY, press and hold ( ) for 5 seconds. RESET A CLOCK RESET A
All the digits will show. Release ( ). The memory will clear. However, this will also change MIL to KM, or KM to MIL. Simply press and hold ( ) for 5 seconds again to change back to your preferred (KM or MIL) distance measurement.A A
MILE/KILOMETER CONVERSION
To change from MILE to KILOMETER, press and hold button (RESET A STRIDE ) for 5 seconds (shows all display functions). This will change setting measurement from inches to centimeters as well.
HOW TO USE THE TIMER COUNTER
This pedometer accurately measures the time you spend exercising. When you stop, the timer stops. When you exercise, the timer runs. Press button ( ) on the display panel until you get to the mode for viewing the record of your MODE C TIMER
exercise time.
DISTANCE COUNTER FUNCTION
This feature allows you to count the distance you travel during an exercise period or all day if you wish. Your target should be to walk or jog 4 miles each day. Try it.
1. MODE C STEP Press the button ( ) to get to mode.
2. RESET APress button ( ) and hold for 2 seconds and begin walking, running or hiking. The display will show 00000 and will begin to record your steps and distance.
DISTANCE WITH 7-DAY MEMORY & ODOMETER FUNCTION
This feature allows you to view the record of any day in miles or kilometers for 7 days. Starting from the 8th day, new data will automatically replace the memory of the 1st day recorded, and the 9th day will replace the 2nd day recorded…
and so forth. Press and release button ( ) to view each consecutive day’s memory, and press button ( ) to view each previous day’s memory and total distance traveled "ODO" (like your car’s odometer). A B
PLEASE NOTE: You can complete your viewing of the 7 days activities and total distance before you return to the main pedometer functions OR press ( ) once to return to the main pedometer functions.C
SPEED FUNCTION
This feature allows you to know what speed you walk or jog per hour (MPH) and how many steps per minute (STEPS/Min) you walk/jog over a certain period of time. The information is updated every 30 seconds automatically.
1. SPEED/HOUR: Press button ( ) repeatedly to locate mode to view speed function. The display will show (mile per hour) or (kilometer per hour).MODE C SPEED MIL/H KM/H
2. STEP/MINUTE: Press button ( ) once to advance to the next display (step/minute) mode to view step per minute function.MODE C STEP/M
AUTO POWER ON/OFF
To save battery power, this unit will automatically "go to sleep" when no activity has been detected, for four (4) minutes. The lower display will show whenever unit is not in use.
HOW TO WEAR YOUR PEDOMETER
1. Pedometer case MUST be closed in order to operate properly.
2. Clip the unit to your belt or to the top of your shorts or trousers as close as possible to the crease line of your pant.
3. The pedometer must always be horizontal and be parallel to the ground. Do not attach at an angle or sideways as false readings will result.
SENSITIVITY ADJUSTMENT
Everyone’s walking style is different. This pedometer has an automatic sensitivity adjuster that compensates for the different walking, running or jogging styles.
BATTERY REPLACEMENT
1. The battery hatch is at the bottom end of your pedometer. Slide open the battery door with your finger to access the battery.
2. Replace battery with CR2032 or equivalent type when display dims.
3. WEIGHT/STRIDE CLOCK Reset the pedometer and re-enter the length and information.
OTHER INFORMATION
1. Treat your pedometer with care.
2. Pedometer is NOT waterproof.
3 6 0 F I T N E S S P E D O M E T E R I n s t r u c t i o n s C o n t
Please note: Before using your
pedometer, remove battery
insulation strip. (Insulation strip
designed to preserve battery power)
360 FITNESS PEDOMETER Instructions Cont…


Produkt Specifikationer

Mærke: Sportline
Kategori: Skridttæller
Model: Total Fitness 360

Har du brug for hjælp?

Hvis du har brug for hjælp til Sportline Total Fitness 360 stil et spørgsmål nedenfor, og andre brugere vil svare dig


Skridttæller Sportline Manualer
Skridttæller Manualer

Nyeste Skridttæller Manualer

Irox

Irox PE-DRO Manual

9 Marts 2025
Timex

Timex W180-M621 Manual

13 Januar 2025
TFA

TFA 42.2003 Manual

5 September 2024
Silva

Silva ex connect Manual

27 August 2024
BandeeFit

BandeeFit BFX-4 Manual

25 August 2024
Dexford

Dexford PE 500 Manual

24 August 2024
Dexford

Dexford PE 200 Manual

24 August 2024
Dexford

Dexford PE 400 Manual

24 August 2024