SSV Works WP3-RZOA Manual


Læs gratis den danske manual til SSV Works WP3-RZOA (4 sider) i kategorien Ikke kategoriseret. Denne vejledning er vurderet som hjælpsom af 10 personer og har en gennemsnitlig bedømmelse på 4.9 stjerner ud af 5.5 anmeldelser. Har du et spørgsmål om SSV Works WP3-RZOA, eller vil du spørge andre brugere om produktet?

Side 1/4
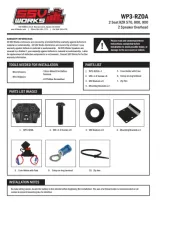
WP3-RZOA
2 Seat RZR 570, 800, 900
2 Speaker Overhead
SSV WORKS, 201 N. Rice Ave Unit A, Oxnard, CA 93030
www.SSVworks.com | Phone: 818-991-1778 | Fax: 866-293-6751
!
Please read and understand these
instructions completely before
installation to avoid possible injury, or
damage to the accessory or vehicle.
WARRANTY INFORMATION:
All SSV Works enclosures are covered by a limited lifetime warranty against defects in
material or workmanship. All SSV Works Electronics are covered by a limited 1 year
warranty against defects in material or workmanship. All SSV Works Speakers are
covered by a limited 1 year warranty against defects in material or workmanship. Labor
for replacement of defective components is not covered. Contact SSV Works for further
warranty information.
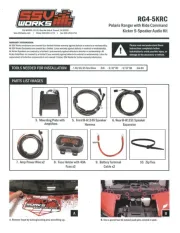
1. WP3-RZOA x 1
2. M6 x 1.0 Screws x 8
3. M6 Washers x 8
4. Mounting Brackets x 2
TOOLS NEEDED FOR INSTALLATION
INSTALLATION NOTES
PARTS LIST
PARTS LIST IMAGES
5. Fuse Holder with Fuse
6. Crimp on ring terminal
7. Zip Ties
To make wiring easier, locate the battery in the vehicle before beginning the installation. The use of a thread locker is recommended on all
screws to prevent loosening due to vibration.
2. M6 x 1.0 Screws x 8 3. M6 Washers x 8
5. Fuse Holder with Fuse
4. Mounting Brackets x 2
9. Crimp on ring terminal 10. Zip ties
1. WP3-RZOA
- Wire Crimpers
- Wire Strippers
- 13mm Wrench for Battery
Terminal
- #3 Phillips Screwdriver
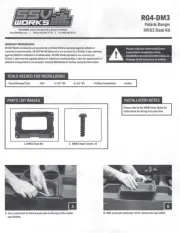
A. With one person on either side of the vehicle place the WP3-
RZOA into location from the underside of the cage
C. Once the enclosure is in position, press the bracket toward
the center of the vehicle and tighten the brackets using the #3
screwdriver. NOTE: After all brackets are tightened, it may be
necessary to go back and re-adjust the brackets to ensure the
enclosure is properly secured.
B. While holding the enclosure securely in place, loosely install the 2
brackets using the screws provided.
WP3-RZOA
A
C
B
D. Using the zip ties provided, route the Power/Ground loom to the battery location
away from any moving parts or sharp metal. NOTE: The 4 pin short cable is for
additional speakers (WP3-RZOA+2) and the 4 pin long cable is for adding an SSV
Works Powered Subwoofer (Part# WP-RZS10)
D D
A. Cut the power/ground cable to length; be sure to
leave enough wire at the battery location to wire to
the battery, strip back approximately 4 inches of the
black tubing to expose the red/black wires inside.
Strip back 1/4”-1/2” of wire to make your
connections.
B. Crimp the supplied
fuse holder onto the
end of the RED wire
and attach to the
battery “+” terminal.
C. Crimp the supplied
ring terminal to
the BLACK wire
and attach to the
battery “-” terminal.
WIRING INSTRUCTIONS
A
B C
© 2018 SSV Works, Oxnard, CA 93030 WP3-RZOA Rev. A 2-21-18


Produkt Specifikationer

Mærke: SSV Works
Kategori: Ikke kategoriseret
Model: WP3-RZOA

Har du brug for hjælp?

Hvis du har brug for hjælp til SSV Works WP3-RZOA stil et spørgsmål nedenfor, og andre brugere vil svare dig