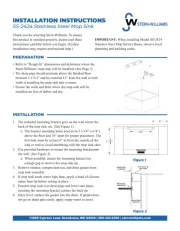
Stern-Williams SS-2424 Manual


Læs gratis den danske manual til Stern-Williams SS-2424 (2 sider) i kategorien Køkkenvask. Denne vejledning er vurderet som hjælpsom af 4 personer og har en gennemsnitlig bedømmelse på 4.9 stjerner ud af 2.5 anmeldelser. Har du et spørgsmål om Stern-Williams SS-2424, eller vil du spørge andre brugere om produktet?

Side 1/2
13920 Cypress Lane Grandview, MO 64030 | 800-323-2359 | sternwilliams.com
PREPARATION
INSTALLATION
Figure 1
Figure 2
INSTALLATION INSTRUCTIONS
SS-2424 Stainless Steel Mop Sink
Thank you for selecting Stern-Williams. To ensure
this product is installed properly, please read these
installations may require professional help.)
Refer to Rough-In dimensions and determine where the
Stern-Williams mop sink will be installed. (See Page 2)
The drain pipe should protrude above the nished oor
between 1-1/2-2 and be centered 12 from the wall or both
walls if installing the mop sink into a corner.
Ensure the walls and oor where the mop sink will be
installed are free of debris and dry.
1. The included mounting bracket goes on the wall where the
back of the mop sink sits. (See Figure 1).
a. The bracket mounting holes need to be 11-3/4 (±1/8)
above the oor and 10” apart for proper placement. The
rst hole must be at least 6” in from the outside of the
sink or wall to avoid interfering with the mop sink skirt.
2. Use provided hardware to mount the mounting bracketonto
the wall. (See Figure 2).
a. When installed, ensure the mounting bracket has
enough gap to receive the mop sink lip.
3. Remove strainer, compression nut, and drain gasket from
mop sink assembly.
4. If mop sink needs water tight base, apply a bead of silicone
under base lip before setting in place.
5. Position mop sink over drain pipe and lower into place,
ensuring the mounting bracket catches the back lip.
6. Once level, replace the gasket into the drain. If gasket does
not go on drain pipe easily, apply soapy water to assist.
IMPORTANT: When installing Model SS-2424
Stainless Steel Mop Service Basin, observe local
plumbing and building codes.
13920 Cypress Lane Grandview, MO 64030 | 800-323-2359 | sternwilliams.com
ROUGH-IN-DIMENSIONS
INSTALLATION INSTRUCTIONS
SS-2424 Stainless Steel Mop Sink
INSTALLATION
7. Use the compression nut to fully seat the gasket with
included plate tool and a at head screwdriver. (See
Figures 3 & 4). Compression nut should be recessed in the
drain and gasket should be compressed around the drain
pipe to ensure no water leaks. Remove plate tool while
leaving the compression ring in place.
8. Replace the included strainer onto the drain to nish the
drain installation.
9. Run water and check for any leaks.
10. Seal edges where the mop sink meets the wall with silicone
sealant.
NOTE: If using back panels, also silicone where they meet
the mop sink, and in corners.
Figure 3
Exploded Drain
Figure 4
Strainer Plate
Drain Key
Rubber Gasket
Drain Body
Rubber Washer
Fiber Washer
Locking Nut
Brass Compression
Nut


Produkt Specifikationer

Mærke: Stern-Williams
Kategori: Køkkenvask
Model: SS-2424

Har du brug for hjælp?

Hvis du har brug for hjælp til Stern-Williams SS-2424 stil et spørgsmål nedenfor, og andre brugere vil svare dig


Køkkenvask Stern-Williams Manualer
Køkkenvask Manualer

Nyeste Køkkenvask Manualer