Taylor 1513RMT Manual


Læs gratis den danske manual til Taylor 1513RMT (7 sider) i kategorien Vejrstation. Denne vejledning er vurderet som hjælpsom af 35 personer og har en gennemsnitlig bedømmelse på 4.8 stjerner ud af 18 anmeldelser. Har du et spørgsmål om Taylor 1513RMT, eller vil du spørge andre brugere om produktet?

Side 1/7
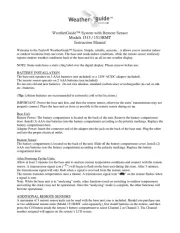
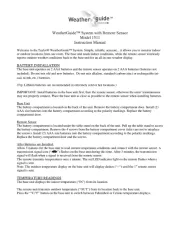
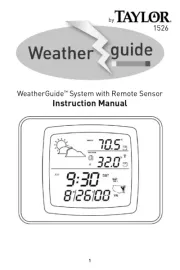
WeatherGuide™ System with Remote Sensor
Models 3 / 1513RMT 151
Instruction Manual
Welcome to the Taylor® WeatherGuide™ System. Simple, reliable, accurate…it allows you to monitor indoor
or outdoor locations from one room. The base unit reads indoor conditions, while the remote sensor wirelessly
reports outdoor weather conditions back to the base unit for an all- -one weather display. in
NOTE: Some units have a static cling label over the digital display. Please remove before use.
BATTERY INSTALLATION
The base unit operates on 3 AAA batteries (not included) or a 120V AC/DC ada er (included). pt
The remote sensor operates on 2 AAA batteries (not included).
Do not mix old and new batteries. Do not mix alkaline, standard (carbon-zinc) or rechargeable (ni-cad, ni-mh,
etc.) batteries.
( Lithium batteries are recommended in extremely cold or hot locations.) Tip:
IMPORTANT: Power the base unit first, and then the remote sensor, otherwise the units’ transmissions may not
properly connect. Place the base unit as close as possible to the remote sensor during set up.
Base Unit
Battery Power: The battery compartment is located on the back of the unit. Remove the battery compartment
door. Install (3) AAA size batteries into the battery compartment according to the polarity markings. Replace the
battery compartment door.
Adapter Power: Insert the connector end of the adapte into the jack on the back of the base unit. Plug the other r
end into the proper electrical outlet.
Remote Sensor
The battery compartment is located on the back of the unit. Slide othe battery compartment cover. Install (2)
AAA size batteries into the battery compartment according to the polarity markings. Replace the battery
compartment door.
After Powering Up the Units:
Allow at least 3 minutes for the base unit to analyze current temperature conditions and connect with the remote
sensor. A transmission signal icon will begin to flash on the base unit during this time. After 3 minutes, (“ ”)
the transmission signal will only flash when a signal is received from the remote sensor.
The remote transmits temperatures once a minute. A transmission signal icon on the remote flashes when
a signal is sent.
Note: While the base unit is in “analyzing” mode, other functions (such as switching to outdoor temperatures
and setting the clock) may not be operational. Once the “analyzing” mode is complete, the other functions will
become operational.
ADDITIONAL REMOTE SENSORS
A maximum of 3 remote sensor units can be used with the base unit; one is included. Should you purchase one
or two additional remote units (Model 1513RMT, sold separately), first install batteries in the remote, and then
press the CH button inside the remote’s battery compartment to select Channel 2 or Channel 3. The Channel
number assigned will appear on the remote’s LCD screen.
TEMPERATURE / HUMIDITY READINGS
The base unit displays the indoor temperature and humidity (“IN”) from its location.
The remote sensor transmits outdoor temperature and humidity (“OUT”) from its location back to the base unit.
To switch between indoor, outdoor, or auto scroll displays (channel) button on the back of the , press the “CH
base unit.
The IN” icon = indicates indoor readings are displayed.
A Channel icon ( , , or ) = indicates outdoor readings are displayed at that remote sensor’s location.
” icon = The indicates the auto scroll option is on. The base unit will automatically scroll between indoor
readings and remote sensor readings and display each for 10 seconds.
To switch between Fahrenheit and Celsius temperature displays:
Base unit - Press the “C/F” button on the back of the unit to change the temperature display on the base unit.
Remote sensor - Press the “C/F” button inside the battery compartment of the remote sensor to change the
temperature display on the remote sensor.
CLOCK FEATURES
A) Clock Setting
The Clock display is located under the Humidity display.
1. Press and hold the “SET” button on the back of the base unit for 2 seconds to enter Clock Setting mode. The
hour digit blinks.
2. Press the “ or “DOWN” button to change the hours. Press “SET” to confirm. The minute digits blink.UP
3. Press the “ “DOWN” button to change the minutes. Press “SET” to confirm. UP or The year digits blink.
4. Press the “UP” or “DOWN” button to change the . Press “SET” to confirm. (“D M”year The Day/Month ) or
Month/Day (“M D”) selection digits blink.
5. Press the “UP” or “DOWN” button to toggle between Day/Month and Month/Day format. Press “SET” to
confirm. The month digit blinks.
6. Press the “UP” or “DOWN” button to change the . Press “SET” to confirm. The month date digit blinks.
7. Press the “UP” or “DOWN” button to change the . Press “SET” to confirm. “12H” or “24H” blinksdate .
8. Press the “UP” or “DOWN” button to toggle between 12 and 24 hour clock mode. Press “SET” to confirm.
The hour and minute digits reappear. The clock is set.
Notes: If no buttons are pressed within 20 seconds, the unit will automatically exit Clock Setting mode.
Until a time has been set, the clock will count up the time since battery installation.
B) Alarm Setting
1. Press the “MODE” button on the back of the base unit. “ALM” appears near the hour digits.
2. Press and hold the “SET” button for 2 seconds to enter Alarm Setting mode. The alarm bell icon
(“ ”) appears and the hour digits blink.
3. Press the “UP” or “DOWN” button to change the hours. Press “SET” to confirm. The minute digits blink.
4. Press the “UP” or “DOWN” button to change the minutes. Press “SET” to confirm. The alarm is set.
5. When the alarm sounds:
To silence the alarm for 5 minutes, p ress the “LIGHT ● SNOOZE” button on top of the base unit.
The Snooze icon (“Zz”) blinks. The “Zzicon will continue to blink as long as the Snooze is active.
To stop the alarm for the day and deactivate the Snooze, press any button on the back of the base unit.
ctivate the alarm completely● To dea , press the “MODE” button until “ALM” appears, then press “SET”.
The alarm bell icon (“ ”) disappears. The alarm is deactivated.
Note: If no buttons are pressed within 20 seconds, the unit will automatically exit Alarm Setting mode.
C) Time Zone Adjustment
To adjust the clock to another time zone, press the “ZONE” or “ button on the back of the base unit.
● “ZONE +1” adds one hour to the current time.
“ZONE + ” adds 2 two hours to the current time.
“ZONE 1” - subtracts one hour from the current time.
● If there is no “ZONE” icon above the clock digits, the unit is displaying the current time.


Produkt Specifikationer

Mærke: Taylor
Kategori: Vejrstation
Model: 1513RMT

Har du brug for hjælp?

Hvis du har brug for hjælp til Taylor 1513RMT stil et spørgsmål nedenfor, og andre brugere vil svare dig


Vejrstation Taylor Manualer
Taylor

Taylor 5156 Manual

8 Januar 2025
Taylor

Taylor 5566 Manual

24 August 2024
Taylor

Taylor 5504 Manual

24 August 2024
Taylor

Taylor 5537 Manual

24 August 2024
Taylor

Taylor 5262313 Manual

24 August 2024
Taylor

Taylor 1383-21 Manual

23 August 2024
Taylor

Taylor 1511 Manual

23 August 2024
Taylor

Taylor 1512RMT Manual

23 August 2024
Taylor

Taylor 1381-21 Manual

23 August 2024
Taylor

Taylor 1512 Manual

23 August 2024

Vejrstation Manualer

Nyeste Vejrstation Manualer