Taylor 1511 Manual


Læs gratis den danske manual til Taylor 1511 (4 sider) i kategorien Vejrstation. Denne vejledning er vurderet som hjælpsom af 36 personer og har en gennemsnitlig bedømmelse på 4.9 stjerner ud af 18.5 anmeldelser. Har du et spørgsmål om Taylor 1511, eller vil du spørge andre brugere om produktet?

Side 1/4
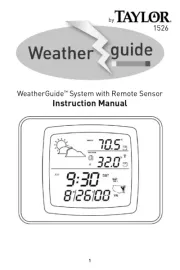
WeatherGuide™ System with Remote Sensor
Model 1511
Instruction Manual
Welcome to the Taylor® WeatherGuide™ System. Simple, reliable, accurate…it allows you to monitor indoor
or outdoor locations from one room. The base unit reads indoor conditions, while the remote sensor wirelessly
reports outdoor weather conditions back to the base unit for an all- -one weather display.in
BATTERY INSTALLATION
The base unit operates on 2 AAA batteries and the remote sensor operates on 2 AAA batteries (batteries not
included). Do not mix old and new batteries. Do not mix alkaline, standard (carbon-zinc) or rechargeable (ni-
cad, ni-mh, etc.) batteries.
(Tip: Lithium batteries are recommended in extremely cold or hot locations.)
IMPORTANT: Install batteries in the base unit first, then the remote sensor, otherwise the units’ transmissions
may not properly connect. Place the base unit as close as possible to the remote sensor when installing batteries.
Base Unit
The battery compartment is located on the back of the unit. Remove the battery compartment door. Install (2)
AAA size batteries into the battery compartment according to the polarity markings. Replace the battery
compartment door.
Remote Sensor
The battery compartment is located under the table stand on the back of the unit. Pull up the table stand to access
the battery compartment. Remove the 4 screws from the battery compartment cover (take care not to misplace
the screws). Install (2) AAA size batteries into the battery compartment according to the polarity markings.
Replace the battery compartment door and the screws.
After Batteries are Installed:
Allow 3 minutes for the base unit to read current temperature conditions and connect with the remote sensor. A
transmission signal icon on the base unit during this time. After 3 minutes, the transmission (“ ”) flashes
signal will flash when a signal is received from the remote sensor.
The remote transmits temperatures once a minute. The red LED indicator light on the remote flashes when a
signal is sent.
Note: The outdoor temperature display on the base unit will display dashes (“ “) until the 1-- st remote sensor
signal is sent.
TEMPERATURE READINGS
The base unit displays the indoor temperature (“IN”) from its location.
The remote unit transmits outdoor temperature (“OUT”) from its location back to the base unit.
Press the C“° /°F” button on the base unit to switch between Fahrenheit or Celsius temperature displays.
MAXIMUM/MINIMUM TEMPERATURE READINGS
Press the “MAX/MIN” button once to display the maximum indoor and outdoor temperature readings since
the unit was last reset. “MAX” will show on the LCD.
Press the “MAX/MIN” button a second time to display the minimum indoor and outdoor temperature readings
since the unit was last reset. “MIN” will show on the LCD.
Press the “MAX/MIN” button a third time to see current indoor and outdoor temperatures.
To clear the maximum and minimum readings: In either MAX or MIN mode, press and hold the “MAX/MIN”
button for 2 seconds to clear both memories. The temperature displays show dashes “ ” and the -- unit will begin
to track new MAX and MIN readings. The memories will also reset when the base units batteries are removed.
CLOCK SETTING
The Clock display is located to the right of the Indoor Temperature display.
1. Press and hold the “SET” button for 2 seconds to enter Clock Setting Mode. The hour digit blinks.
2. Press the “+” button to change the hours. Press “SET” to confirm. The minute digits blink.
3. Press the “+” button to change the minutes. Press “SET” to confirm. “12” or “24” blinks in place of the
minute digits.
4. Press “+” to toggle between 12 or 24 hour clock mode. Press “SET” to confirm. The hour and minute digits
reappear. The clock is set.
Notes: If no buttons are pressed within 30 seconds, the unit will automatically exit Clock Setting mode.
Until a time has been set, the clock will count up the time since battery installation.
DISPLAYING YOUR WEATHERGUIDE
Base unit
Pull the bottom of the Table Stand located on the back of the base unit to set it on a flat surface.
Place the base unit indoors in a well-ventilated location away from direct sunlight.
Remote sensor
Pull the bottom of the Table Stand located on the back of the remote sensor to set it on a flat surface, or use the
recessed keyhole on the back of the remote to hang on a wall using a nail or screw (not included).
The transmission range of the remote sensor is 100 feet. The effective transmission range is vastly affected by
obstacles such as walls, sheds, trees, etc. Try various set ups for the best results. Shorten the distance between
the base and remote units when necessary.
To get the most accurate readings and to prolong the life of your sensor, we recommend that you mount it out of
direct sunlight and rain. Direct sunlight will heat the casing and inflate temperatures readings. Place the sensor
in a dry, shaded area. Fog and mist will not affect the sensor, but large volumes of soaking rain may. To guard
against this, we recommend that you mount it under the eve of your house, your garage or any other suitable
place that will keep it out of direct sun and rain.
Important: Though the remote unit is weather proof, it should be placed away from direct sunlight, rain, snow
and should never be submerged in water.
LOW BATTERY
Remote sensor: r appears on the base unit. eplace the batteries when “
Base unit: replace the batteries if readings grow dim or irregular.
Always replace all batteries in each unit at the same time; do not mix old and new batteries. Do not mix
alkaline, standard (carbon-zinc) or rechargeable (ni-cad, ni-mh, etc.) batteries.
NOTE: Please recycle or dispose of batteries per local regulations.
WARNING: Batteries may pose a choking hazard. As with all small items, do not let children handle batteries.
If swallowed, seek medical attention immediately.
PRECAUTION: Do not dispose of batteries in fire. Batteries may explode or leak. Remove the batteries if the
units will not be used for a long period of time.


Produkt Specifikationer

Mærke: Taylor
Kategori: Vejrstation
Model: 1511

Har du brug for hjælp?

Hvis du har brug for hjælp til Taylor 1511 stil et spørgsmål nedenfor, og andre brugere vil svare dig