1
RAMSES 850 top3 OT
8509200
309953 00
22 February 2023
Digital
clock thermostat
EN
1. General information
•
Digital clock thermostat for wall mounting or mounting
on ush-mounted box
•
The clock thermostat conforms with EN 60730-2-9 if
correctly installed
•
Communication with heating and power supply via Open-
Therm bus
•
OpenTherm heating control
•
External input to connect an external temperature
sensor, oor sensor etc.
•
The RAMSES top3 app (for Android, iOS) allows settings
via mobile devices
•
Direct Bluetooth Low Energy (BLE) connection between
app and RAMSES top3 devices
•
Optional accessories: Floor sensor (9070321),
contact temperature sensor (9070371), temperature
sensor (9070459), immersion sensor (9070379)
2. Safety
Assembly and installation should only be carried
out by a qualied electrician, somebody who has
completed appropriate professional training and
has the knowledge and experience necessary to be
able to recognise and avoid the potential dangers
posed by electricity.
Disconnect the supply voltage before installation/
removal.
Prior to commissioning and using the product, read
and observe all the operating instructions.
3. Proper Use
•
Digital clock thermostat for time-dependent monitoring
and control of the room temperature (heating control) in
single-family houses, ofces, etc.
•
Only operate the devices in dry indoor rooms (no bath-
rooms, etc.)
•
Suitable for modulating gas condensing boiler systems
and modulating heating systems with OpenTherm
interface
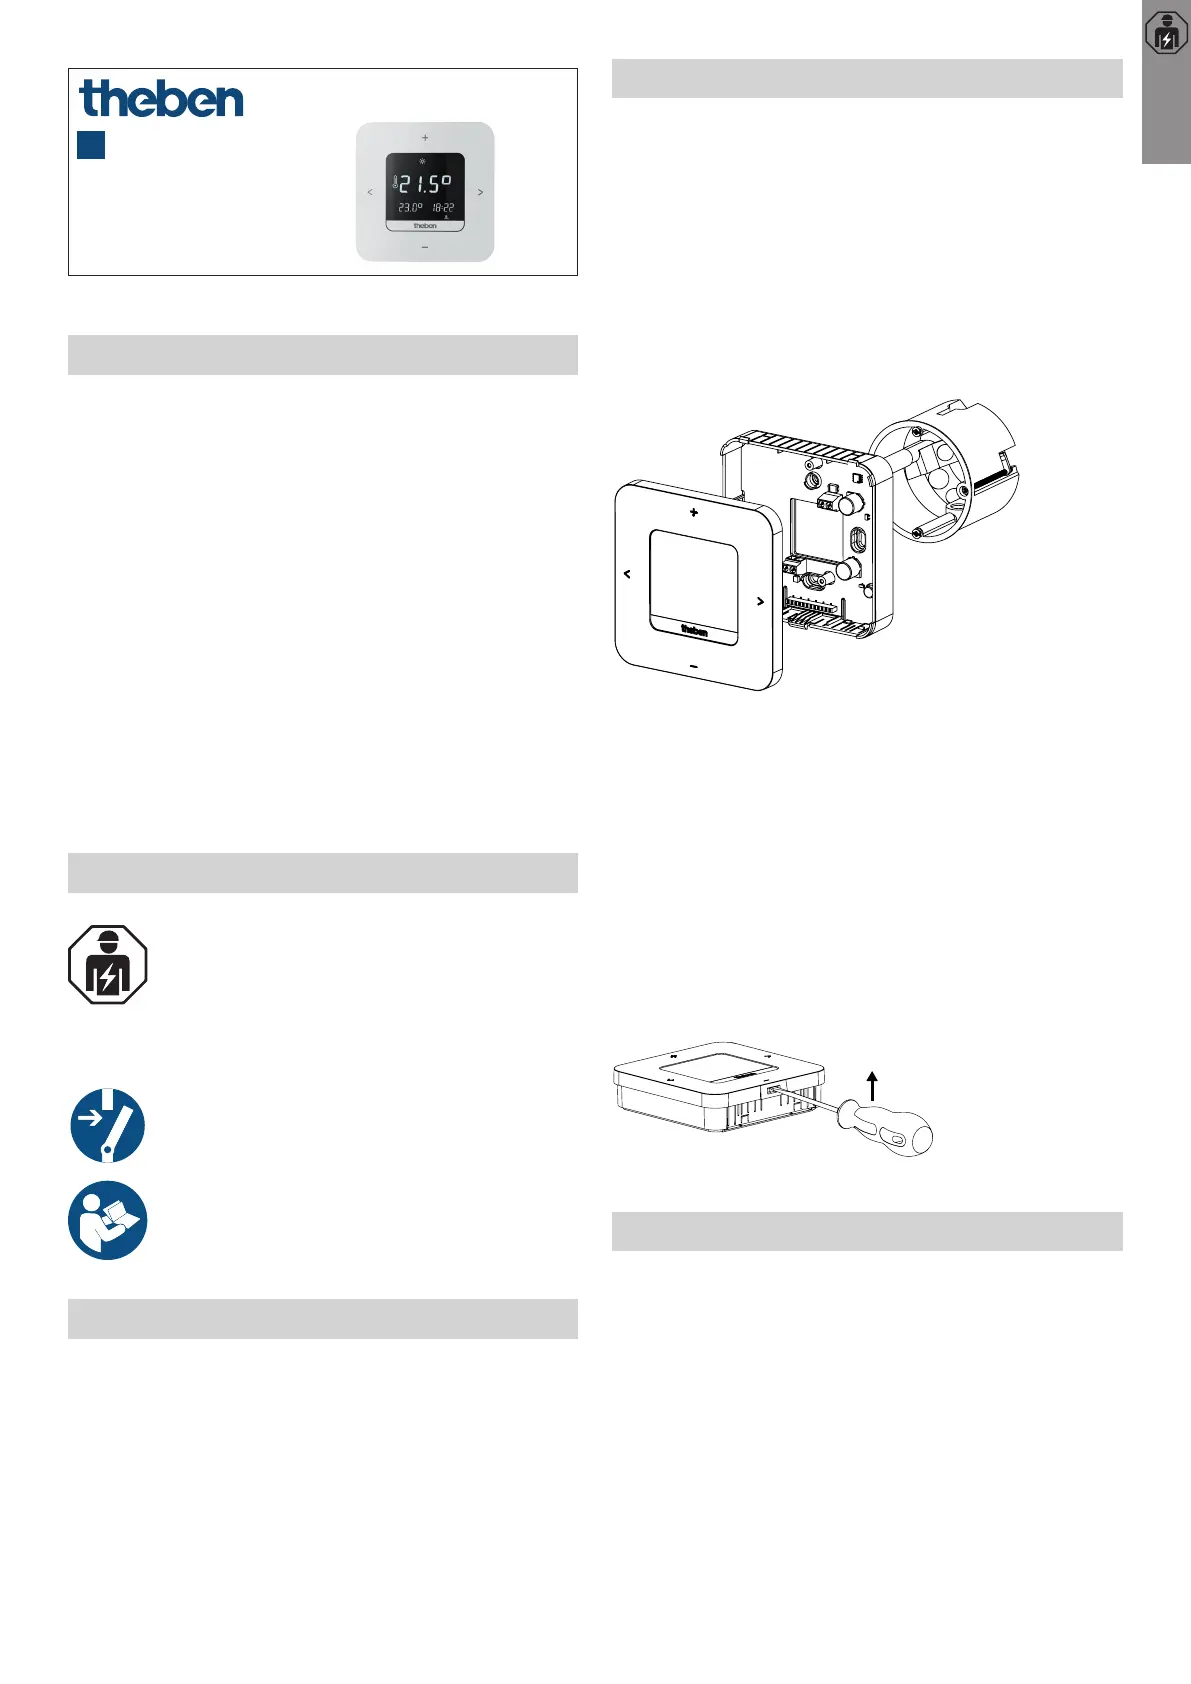
4. Installation
You can mount the clock thermostat either on the wall or on a
ush-mounted box.
Mounting the clock thermostat
!
Protect the clock thermostat from moisture, dust, direct
sunlight, thermal radiation and draughts.
Position the clock thermostat on an interior wall, at about
eye level (approx. 1.50-1.60 m).
Fix the mounting plate directly to the wall or to a ush-
mounted box using the holes.
Assign and wire the conductors.
Tighten the screws.
Put on the clock thermostat.
Dismounting the clock thermostat
!
When dismounting, open the device according to the
illustration, as it could be destroyed if not done so.
Insert the screwdriver into the opening and push up slightly
to open the device.
5. Connection
•
The power supply of the clock thermostat to the boiler is
provided via OpenTherm.
•
The two-wire connection (OpenTherm) is not polarised,
i.e. the wires can be connected to the boiler as required.
!
Do not feed the thermostat cable through the same cable
duct as the 230 V mains cable.
!
Do not lay the thermostat cable parallel to the power
cable.
!
The external input is active, therefore do not use external
voltage. The connected contact or Theben sensors must
be oating.
Electrician