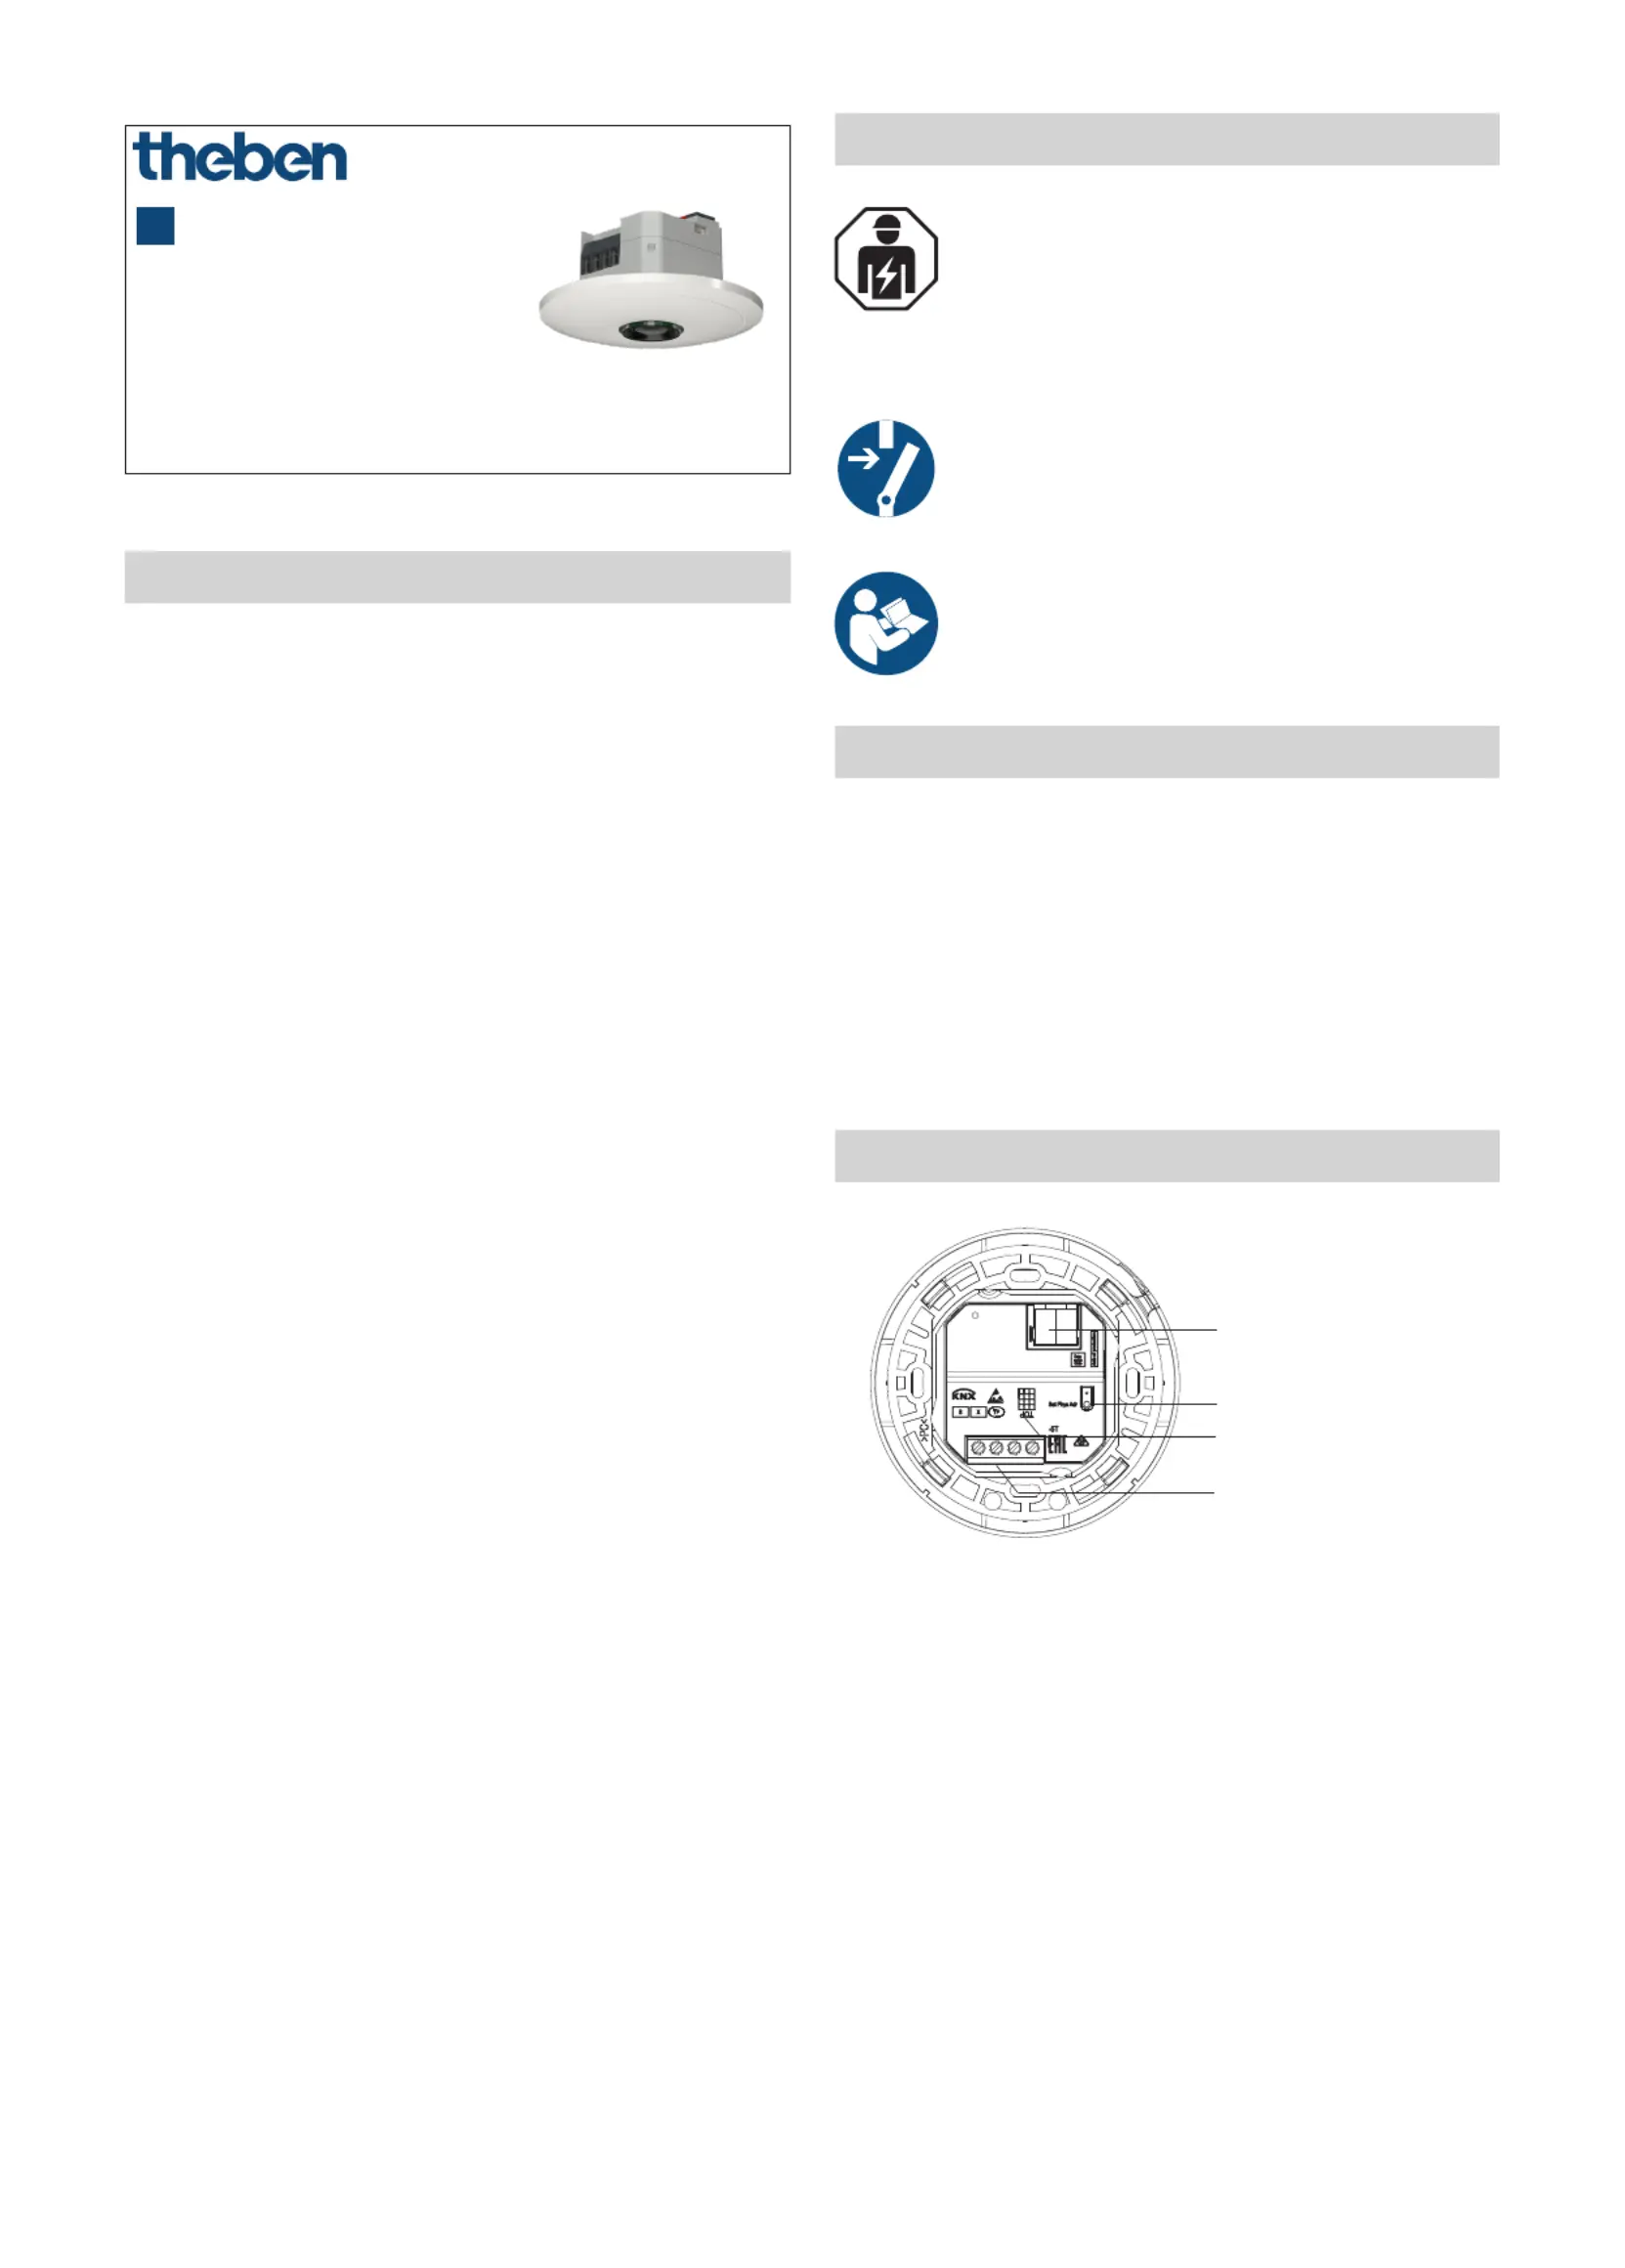
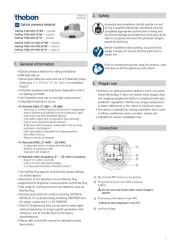
Theben thePixa P360 KNX UP Manual

Theben Detektor thePixa P360 KNX UP

Læs gratis den danske manual til Theben thePixa P360 KNX UP (10 sider) i kategorien Detektor. Denne vejledning er vurderet som hjælpsom af 3 personer og har en gennemsnitlig bedømmelse på 4.8 stjerner ud af 2 anmeldelser. Har du et spørgsmål om Theben thePixa P360 KNX UP, eller vil du spørge andre brugere om produktet?

Side 1/10
1
thePixa P360 KNX UP WH 2269200
thePixa P360 KNX UP BK 2269202
thePixa P360 KNX UP SF 2269203
thePixa P360 24V KNX UP WH 2269210
thePixa P360 24V KNX UP BK 2269212
thePixa P360 24V KNX UP SF 2269213
307581 03
Optical presence detector
EN
1. General information
Optical presence detector for ceiling installation
KNX Data Secure
Rectangular detection area with up to 6 detection zones
(Total area 11 x 15.5 m I 171 m
2
; at 4.5 m installation
height)
Automatic presence and brightness-dependent control
for lighting and HVAC
Each detection zone has its own light measurement
Integrated temperature sensor
6 channels light, Z1 light – Z6 light:
Switching or constant lighting control with 6 independent
control systems and standby function (orientation light)
Switching mode with dimmable lighting
Free switch object with conguration type switching
Fully or semi-automatic device function
Brightness switching value congurable in lux by using
parameters and telegram
Light time delay congurable by using parameters
Aura effect function
Manual override by telegram
6 channels HVAC, Z1 HVAC – Z6 HVAC:
Congurable switch-on delay and time delay
Sending of operating mode
Separate block telegram
6 channels room occupancy, Z1 – Z6 room occupancy:
Output of number of persons
Control of a fan with various stages
3 congurable thresholds (threshold switch)
The thePixa Plug app (for Android, iOS) allows settings
via mobile devices
Restriction of the detection area via thePixa Plug
Adjustment of brightness measurements via thePixa Plug
Test mode for checking function and detection area via
thePixa Plug
Optional accessories for surface mounting (9070816,
9070443), for recessed ceiling mounting (9070992) and
the power supply unit 24 V DC (909330)
The ETS (Engineering Tool) can be used to select appli-
cation programmes, to assign specic parameters and
addresses, and to transfer them to the device
www.theben.de
Please refer to the KNX manual for detailed function
descriptions.
2. Safety
Assembly and installation should only be carried
out by a qualied electrician, somebody who has
completed appropriate professional training and
has the knowledge and experience necessary to be
able to recognise and avoid the potential dangers
posed by electricity.
Before installation/disassembly, disconnect the
supply voltage and ensure that the parts are no
longer live.
Prior to commissioning and using the product, read
and observe all the operating instructions.
3. Proper use
thePixa is an optical presence detector, which uses pixel-
based technology. It does not resolve sharp images, does
not recognize people and works in compliance with data
protection regulations. thePixa uses image comparisons
to detect differences in the status of monitored rooms.
The device is intended for ceiling installation and is used
in ofces, conference rooms, corridors, schools, etc.
Intended for interior installation only
4. Connection
Bus terminal KNX: Ensure correct polarity.
Programming button and LED for physical
address
!
Do not press the button when mains voltage is
applied.
Positioning of the detector (see TOP)
Auxiliary voltage
LObserve zone alignment in the ETS.
2
Connecting the presence detector
Connection (230 V AC)
N
L
KNX
KNX
!
Secure device with an upstream type B or type C circuit
breaker (EN 60898-1) with a maximum of 16 A.
!
Risk of electric shock!
The device does not have basic insulation around the
terminals!
Protect against accidental contact during installation.
Maintain a minimum distance of 3 mm from live parts or
use additional insulation, e.g. separating strips/walls.
!
Do not connect mains voltage (230 V) or other external
voltages to the extension inputs!
Failure to comply with this instruction may result in
death or serious injury!
!
During installation, ensure there is adequate insulation
between mains voltage (230 V) and bus or extensions
(min. 5.5 mm).
Disconnect power source.
Connection (24 V DC/KNX auxiliary voltage)
KNX
KNX
+
24 V DC
+ +
!
Risk of electric shock!
The device does not have basic insulation around the
terminals!
!
The additional supply voltage can only be carried in the
KNX bus cable when using the safety extra-low voltage
SELV (e.g. KNX auxiliary voltage).
Disconnect power source.
5. Installation and detection area
There are 3 ways to mount the presence detector at the
ceiling:
Flush mounting
Ceiling installation
Surface mounting
LObserve the recommended installation height of
2.5 m – 4.5 m!
LWhen installing several devices, keep a minimum distance
of 2 m!
2 m
LEnsure a sufciently large eld of vision so that motion
and the presence of people will be correctly detected.
LAvoid suspended lamps or partition walls, etc.
Flush-mounted installation
with a standard ush-mounting box, size 1 (installation ope-
ning Ø 60 mm, max. installation depth 37.5 mm)
TOP
zone 1–6
Lock


Produkt Specifikationer

Mærke: Theben
Kategori: Detektor
Model: thePixa P360 KNX UP

Har du brug for hjælp?

Hvis du har brug for hjælp til Theben thePixa P360 KNX UP stil et spørgsmål nedenfor, og andre brugere vil svare dig


Detektor Theben Manualer

Detektor Manualer

Nyeste Detektor Manualer

ORNO

ORNO OR-DC-638 Manual

12 August 2025
ORNO

ORNO OR-DC-641 Manual

12 August 2025
ORNO

ORNO OR-DC-639 Manual

12 August 2025
AccuBANKER

AccuBANKER D450 Manual

12 August 2025
Optex

Optex CX-702 MKII Manual

10 August 2025
Optex

Optex OVS-02GT Manual

10 August 2025
Velleman

Velleman DEM600 Manual

10 August 2025
Multimetrix

Multimetrix D45 Manual

9 August 2025
Basetech

Basetech OG-430 Manual

7 August 2025