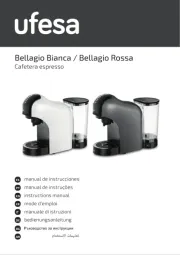
Lea con atención las ins-
truccionesantesdeusarla
cafetera por primera vez.
Guárdelasparafuturascon-
•Conéctese únicamente a
la tensión indicada en la
placadecaracterísticas.
•Es recomendable un en-
chufecontomadetierra.
•Esteaparatohasidodise-
ñadoexclusivamentepara
•No emplee ese aparato
para usos diferentes de
losdescritosenestema-
•Tanto al introducir como
al sacar la clavija del
enchufe,elselectordebe
estar en la posición de
•Coloque siempre el apa-
rato sobre una superficie
•Evitemover elaparatodu-
•No coloque el aparato
•Nointroduzcalacafetera
enaguayotroslíquidos.
•Nomanipuleelaparatocon
•Nohagafuncionarelapara-
toconelcableenrollado.
•No toque las partes cali
entes. Manipule la cafe
tera por las asas e inter
•No deje la cafetera des-
en funcionamiento, ni en
•Esteaparatopueden utili-
zarloniñosconedadde8
añosysuperior,ypersonas
con capacidades físicas,
sensorialeso mentalesre-
ducidas o falta de expe-
rienciayconocimiento, si
se les ha dado la super-
visión o instrucción apro-
piadasrespectoalusodel
aparato de una manera
segura y comprenden los
•Losniñosnodebenjugar
conelaparato.Lalimpie-
za y el mantenimiento a
realizarpor elusuario no
debenserrealizadospor
yoresde8añosybajosu-
•Mantener el aparato y su
cablefueradelalcancede
•Desenchufe de la toma
•No desconecte tirando
del cable. No deje la
•Nodejeelaparatocerca
deunafuentedecalorni
permitaqueelcabletoque
•No haga funcionar la
•Asegúresedequelatapa
deldepósitoestácerrada
antesdeponerlacafetera
•Antesdesulimpiezacom-
pruebequeelaparatose
•No ponga en marcha la
cafetera con el cable o
el enchufe dañados, si
osi ha sufridodaños de
•Las reparaciones y cam-
bios de cable deber ser
realizadasexclusivamente
por un Servicio Técnico
Antes del primer uso lave todos lo
accesoriosy hágala funcionar unavez
Preparacióndecaféexprés
1.Conecte el aparato a la red y
compruebeque el selector estáen
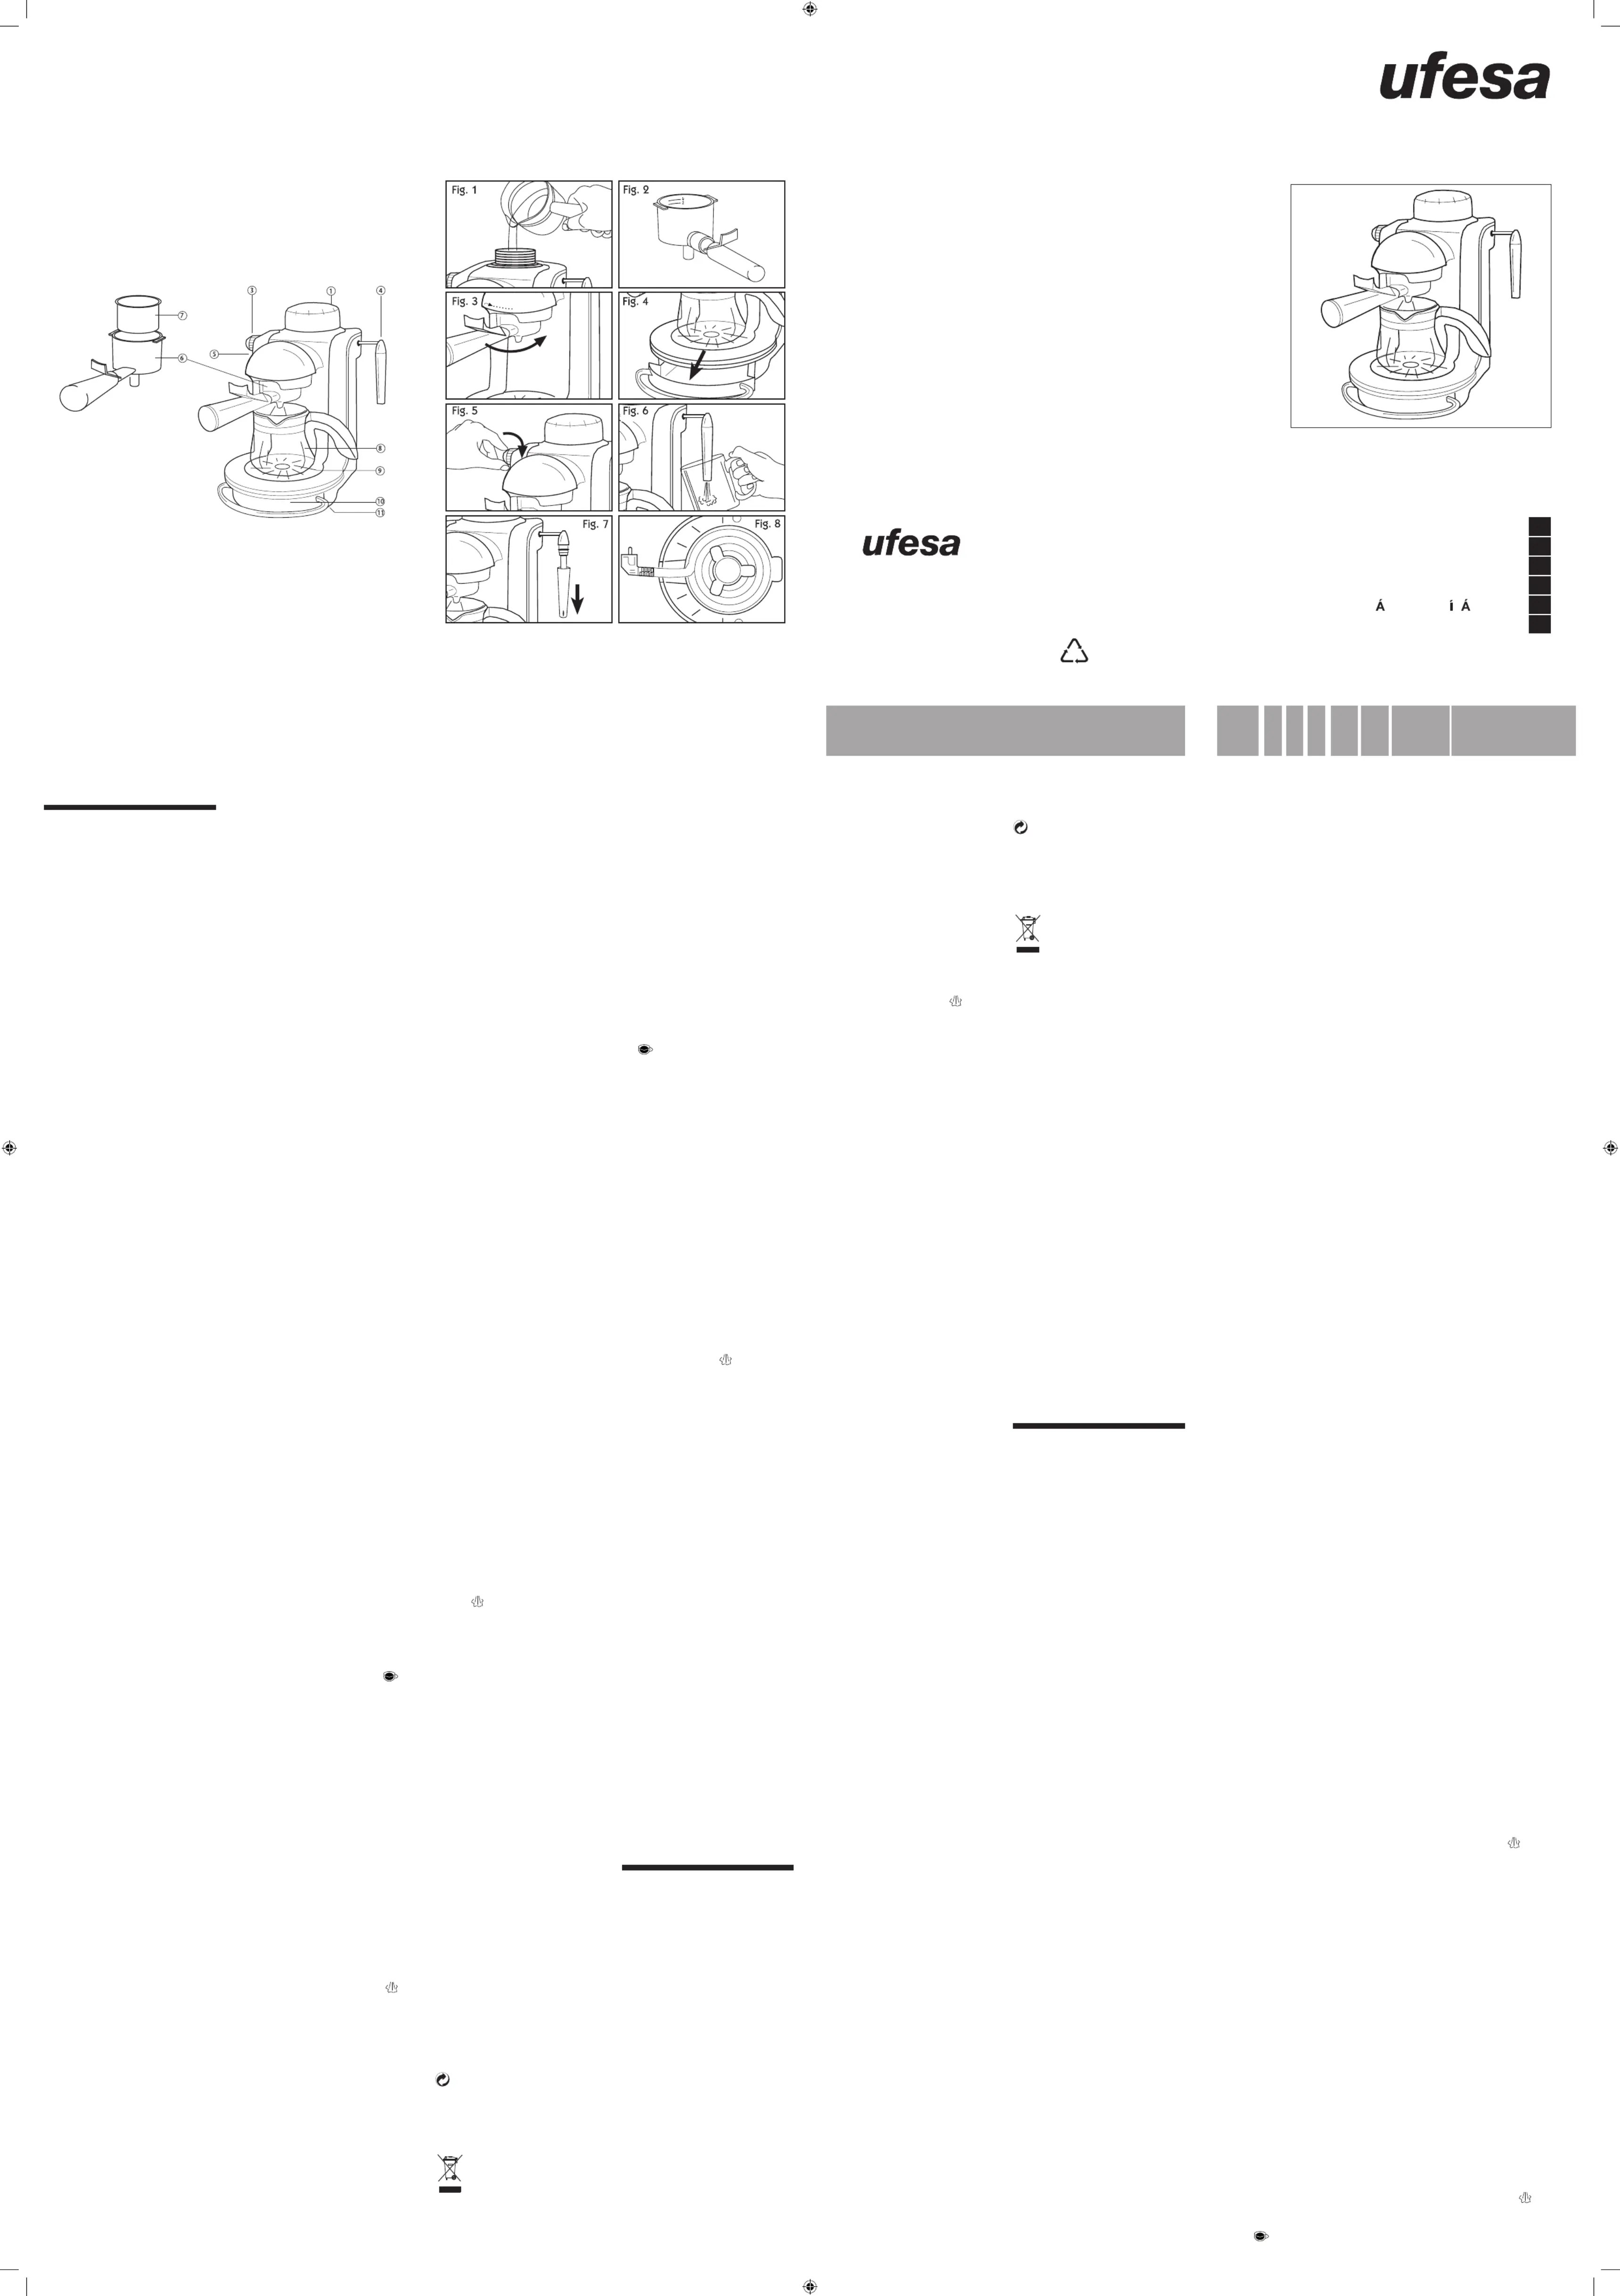
2.Desenrosqueeltapóndeldepósito
yviertalacantidaddeaguadeseada.
Lajarraindica lacantidad necesaria
paradosocuatrotazas.Gireeltapón
3.Coloqueelfiltroenelportafiltros.Para
ponerelcaféguíeseporlasmarcas
de dos y cuatro tazas del filtro.
Limpieelcaféquepuedaquedaren
elbordedelportafiltros.Importante:
Para obtener un resultado óptimo
con su cafetera de hidropresión ,
utiliceuncaféconunmolidogrueso,
tipo cafetera italiana. No prense el
4.Coloque el portafiltros. Coloque
la jarra de manera que la abertura
coincidaconlasalidadecafé.
5.Gireelselectorhastalaposicióncafé
».Elpilotoseiluminará.Alcabo
deunosminutoselaguahierveycae
a través del café molido a la jarra.
Cuandoelcaféterminedesalirvuelva
aponer el interruptor en la posición
Despuésdeprepararcafé,elporta-
filtros debe dejarse enfriar durante
dosminutosantesderetirarlodela
Preparación de cafe capuccino
1.Siga las instrucciones para hacer
café.Elindicadordeniveldelajarra
marca la cantidad que se precisa
para preparar dos tazas de café y
la espuma de leche. Para preparar
cuatro tazas, llene la jarra hasta la
parteinferiordelabandametálica.
2.Cuandoobtengalacantidaddesea-
dadecafé,pongaelselectorenla
posición de apagado «O». Ponga
una jarra con leche fría bajo la sa-
lidade vaporysitúe elselector en
3.Para obtener espuma coloque el
tubo de vaporización justo en la
superficie de la leche y mueva la
jarra en sentido circular. Una vez
preparada la espuma suba y baje
ligeramente la jarra para calentar la
leche.Vuelvaasituarelselectoren
4.Viertalalecheconespumaenelcafé.
Silodeseapuedeespolvorearlocon
canelaochocolatemolidodecorarlo
Esteaparatotieneunaválvuladeseguri-
dad.Conpresiónenelinteriordelaca-
fetera,laválvuladeseguridadbloquea
latapaeimpidequeelusuariolaabra.
Sólocuandosehaaliviadolapresión,
laválvuladeseguridadpermitelaaper-
Unavezpreparadoelcafé,descargue
lapresióncolocandounajarradebajo
delaboquilladevaporygireelselec-
toralaposicióndevapor«
dodejedesalirvapor,vuelvaacolocar
elselectorenlaposicióndeapagado
Antes de proceder a la limpieza
desconecteelaparatodelared.Lave
las partes móviles con agua y jabón.
Paseun pañohúmedo para limpiarel
La bandeja y la rejilla recogegotas
puedeserdesmontadaparafacilitarsu
Para limpiar la boquilla, desmonte la
capucha plástica como muestra la
figura6.Lleneeldepósitocomopara
un taza y accione el vaporizador sin
leche. Cierre el vaporizador y frote
inmediatamente la boquilla con un
paño húmedo. Tenga cuidado al
realizar esta operación, pues podría
Despuésdecadauso,vacíeeldepósito.
No guarde el portafiltros colocado.
Elcable puede recogerse debajodel
Lacafeteradebeserregularmentedes-
calcificada. Vierta en el depósito una
disoluciónde dos tazas de agua con
unatazadevinagreyhagafuncionarel
aparatosincaféveces,incluidoeltubo
devapor.Paraeliminarlosrestosdevi-
nagre,hágalofuncionarsólocon agua
Para su transporte, nuestras mer-
cancíascuentanconunembalaje
optimizado. Este consiste –por prin-
cipioen materialesno contaminantes
que deberían ser entregados como
materiaprimasecundariaalserviciolo-
caldeeliminacióndebasuras.
Este producto cumple la
DirectivadelaUE2002/85/CE.
El símbolo del cubo de ba-
sura tachado sobre el aparato
indica que el producto, cuando -
nalicesu vidaútil, deberá desecharse
separadodelosresiduosdomésticos,
llevándoloauncentrodedesechode
residuosseparadoparaaparatoseléc-
tricos o electrónicos o devolviéndolo
asudistribuidorcuandocompreotro
aparatosimilar.Elusuarioeselrespon-
sablede llevarel aparatoa uncentro
dedesechoderesiduosespecialesal
nalizar su vida útil. De lo contrario,
podrásersancionadoenvirtuddelos
reglamentos de desecho de residuos
vigentes. Si el aparato inutilizado es
recogidocorrectamentecomoresiduo
separado,podráserreciclado,tratado
ydesechadodeformaecológica;esto
evitaunimpactonegativosobreelme-
dioambienteylasalud,ycontribuyeal
reciclajedelosmaterialesdelproduc-
to.Paraobtenermásinformaciónsobre
los servicios de desecho de residuos
disponibles, contacte con su agencia
dedesechoderesiduoslocaloconla
tiendadonde compró el aparato. Los
fabricantes e importadores se hacen
responsablesdelreciclaje,tratamiento
ydesechoecológico,seadirectamente
oatravésdeunsistemapúblico.
Su Ayuntamiento o Municipio le in-
formará sobre posibilidades de de-
posición/eliminaciónparalosaparatos
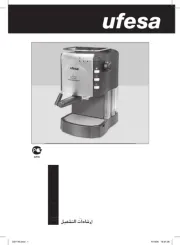
Read through the instruc-
tionscarefullybeforeusing
thecoffeemakerforthefirst
time.Safeguardthemforfu-
•Connect it only to the
voltage stated on the
•The use of an earthed
•This appliance has been
•Donotusetheappliance
for uses other thanthose
•TheOn/Offswitchshould
be in the Off position
when plugging it in or
•Alwaysplacetheapplian-
ceonaflat,levelsurface.
•Avoidmovingtheapplian-
cewhileitisoperating.
•Donotplacetheapplian-
cenearbaths,showersor
•Do not immerse the co-
ffeemakerinwaterorany
•Donothandletheapplian-
•Do not operate the ap
pliancewiththecablestill
•Donottouchthehotsur-
faces. Handle the coffee
maker by its handles or
•Do not leave the coffee
makerunattendedwhenit
isinuse,norwhenthere
•This appliance can be
used by children aged
from 8 years and abo-
ve and persons with re-
duced physical, sensory
or mental capabilities or
lack of experience and
knowledge if they have
beengivensupervisionor
instructionconcerninguse
oftheapplianceinasafe
way and understand the
•Children shall not play
with the appliance. Cle-
aningandusermaintenan-
ceshallnot bemadeby
children unless they are
olderthan8andsupervi-
•Keep the appliance and
its cord out of reach of
childrenlessthan8years.
•Unplug it from themains
whenitisnotinuseand
•Neverunplugitbytugging
on the mains cable. Do
notleavetheplughanging
•Donotleavetheappliance
closetoheatsourcesnor
allow the cable tocome
into contact with hot
•Donotoperatethecoffee
•Makesurethatthelidon
thetank isclosed before
switchingthecoffeemaker
•Before cleaning it, make
surethattheapplianceis
•Donotswitchthecoffee
makeronifeitherthecable
orplugaredamaged,ifit
canbedetectedthatitis
notoperatingcorrectly,or
ifithassufferedanytype
•Cable repairs and repla-
cements must be carried
outexclusivelybyanAu-
thorisedTechnicalService
Beforeusingitforthefirsttimewashall
oftheaccessoriesandoperateitonce
PreparingEspressoCoffee
1.Plug the appliance into the mains
and check that the switch is in the
2.Unscrewthelidonthetankandpour
inthedesiredamountofwater.The
jugshowstheamountsrequiredfor
twoorfourcups.Screwthelidback
onandtightenitsecurely.
3.Placethefilterinto thefilterholder.
Usethefilter’stwoorfourcuplevel
markstogaugetheamountofcoffee
needed. Clean off any coffee that
maybeleftaroundtheedgeofthe
filter holder. Important: To get the
best results out of your espresso
coffeemaker,useacoarselyground
coffee,Italianespressotype.Donot
4.Put the filter holder into position.
Place the jug so that the opening
linesupwiththecoffeeoutlet.
5.Turntheselectortothecoffee«
position. The pilot lamp will come
on. After a few minutes the water
will boil, filter through the coffee
and flow down into the jug. When
thecoffeestopscomingoutturnthe
switchtotheOFF«O»position.
Aftermakingthecoffee,thefilterholder
shouldbelefttocooldownforafew
minutes before removing it from the
1.Follow the instructions for making
coffee. The level mark on the jug
showstheamountofwaterneeded
to make two cups of coffee with
frothymilk.Ifyouwanttomakefour
cups, fill the jug to just below the
2.When you have made the desired
amountofcoffeeturntheswitchto
theOFF«O»position.Placeajugof
coldmilkunderthesteamoutletand
thenswitchtheselectortothe«
steam position. The pilot lamp will
3.To produce froth, place the steam
pipejustonthesurface ofthemilk
and move the jug with a circular
motion. Once the froth is ready,
movethejugup anddownslightly
toheatupthemilk.Turntheselector
backtotheOFF«O»position.
4.Pour the frothedup milk onto the
coffee.Ifyouwishyoucansprinkle
itwithpoweredcinnamonorgrated
chocolateanddecoratewithastick
This appliance has one safety valve.
Whenthereispressureinsidethecoffee
maker,thesafetyvalvewillblockthelid,
notallowingtotheusertoopenit.Only
when all the pressure is released, the
safetyvalvewillallowtoopenthelid.
Whenthefunctionhasfinishedrelease
thepressurebyplacingajugbelowthe
steamnozzle and turning theselector
»steamposition.Whenthe
steamstopscomingoutturntheselec-
torbacktotheOFF«O»position.
Unplug the appliance from the mains
beforeproceedingtocleanit.Washthe
moving parts with soapy water. Wipe
down the body of the coffee maker
Thedriptrayandgrillecanberemoved
Tocleanthesteamnozzle,removethe
plastichood,asshowninfigure6.Fill
the tank with enough water for one
cup and operate the steam function
withoutusingmilk.Switchoffthesteam
andrubthenozzledownwithadamp
clothimmediatelyafterwards.Takecare
whendoingthisasitmaystillbevery
Emptyout any water thatmay be left
overaftereachuse.Donotstoreitaway
withthefilter holderfitted. Thecable
canbecoiledundertheappliance.
Thecoffeemakershouldbedescaled
regularly.Pouramixofonecupvine-
gar/two cups water into the tank and
operatetheappliancetwice,including
thesteampipe,butwithoutanycoffee.
Toflushoutanyvinegarremainsrunit
throughtwicemoreusingjustwater.
Our goods come in optimised
packaging. This basically consists
in using noncontaminating materials
which should be handed over to the
localwastedisposalserviceassecond-
ThisproductcomplieswithEU
Directive 2002/85/CE. The cro
ssedwheeliebinsymbolshown
ontheapplianceindicatesthat
when it comes to dispose of the
product it must not be included in
withhouseholdrefuse.Itmustbetaken
toaspecialrefusecollectionpointfor
electric and electronic appliances or
returned to the distributor when
purchasing a similar appliance. Under
current refuse disposal regulations,
users who fail to take discarded
appliancestospecialrefusecollection
points may be penalised. Correct
disposal of discarded appliances
means that they can be recycled and
processed ecologically, helping the
environment and allowing materials
usedintheproducttobereused.For
more information on available waste
disposal schemes contact your local
refuse service or the shop where the
productwaspurchased.Manufacturers
and importers are responsible for
ecological recycling, processing and
disposalofproducts,whetherdirectly
Your local town council can provide
you with information about how to
disposeofobsoleteappliances.
Avantlapremièreutilisation
de l’appareil, veuillez lire
attentivement cette notice.
Conservezlapourdefutu-
•Branchez l’appareil à la
tension indiquée sur la
plaque des caractéristi-
•Il est recommandé d’uti
liseruneprisedeterre.
•Cet appareil a étéconçu
pour une utilisation do-
•Ne pas employer cette
cafetièreàdesfinsautres
quecellesindiquéesdans
•Pourbrancheret débran-
cherlacafetière,lebouton
doitsetrouversurlaposi-
•L’appareil doit toujours
êtreposésurunesurface
•Évitezdedéplacerlacafe-
tière durant le fonctionne-
•Ne pas placer l’appareil
prèsd’unebaignoire,do-
•Nejamaisintroduire l’ap
pareil dans l’eau ni dans
•Ne pas toucher l’appareil
aveclesmainsmouillées.
•Ne pas faire fonctionner
l’appareil avec lecordon
•Netouchezpaslesparties
chaudes de la cafetière,
servezvous des boutons
•Ne pas faire fonctionner
l’appareil sans surveillan-
ce,cettesurveillancesera
renforcée surtouten pré-
•Cetappareilpeutêtreutili-
sépardesenfantsdeplus
de8ansetdespersonnes
ayant un handicap phy-
sique, sensoriel ou men-
tal, ou bien un manque
d’expérience et de con-
naissances, s’ils ont reçu
des explications ou des
instructions sur la façon
d’utiliserl’appareildema-
nièresécuriséeetqu’ilsen
comprennent les risques
•Lesenfantsnedoiventpas
jouer avec l’appareil. Le
nettoyageetl’entretienne
doiventpasêtreeffectués
par des enfants à moins
qu’ilssoientâgésdeplus
•Tenir l’appareil et son
cordon hors de portée
•Débranchez la cafetière
sivousnel’utilisezpaset
aussiavantdelanettoyer.
•Ne pas débrancher en
tirant ducordon. Ne pas
laisserpendrelecordon.
•La cafetière et le cordon
doiventêtresuffisamment
écartés de toute source
•Nepasfairefonctionnerla
•Avant de mettre en mar-
che l’appareil, vérifiez si
le couvercle du réservoir
•Avant de nettoyer l’ap
pareil,vérifiezs’ilestbien
•Nejamaisfairefonctionner
la cafetière si le cordon
ou la fiche sont abîmés,
si vous remarquez que
l’appareil ne fonctionne
BSH Electrodomésticos España, S.A.
C/ Itaroa, n° 1, 31.620 HUARTE (Navarra)
pas correctement ou s’il
•SeulunServiceTechnique
Agrééesthabilitéàeffec-
tuerlesréparationsetles
Avant la première utilisation de la
cafetière,laveztouslesaccessoireset
faiteslafonctionnersanscafé.
Préparationd’unexpresso
1.Connectezl’appareiletvérifiezsile
boutonsetrouvebiensurlaposition
2.Dévissezlebouchonduréservoiret
versez l’eau nécessaire. La verseuse
indique la quantité requise pour
deuxoupourquatretasses.Tournez
3.Placez le filtre dans le portefiltre.
Pourverserladosedecafésuivezles
marquesindiquéessurlefiltrepour
deuxoupourquatretasses.Enlevez
les restes de café susceptibles de
s’êtredéposés sur le bord du por-
tefiltre. Remarque importante: Pour
de meilleurs résultats, il est conseillé
d’utiliserdanscettecafetièreàhydro-
pression, un café moulu gros, type
pour cafetière italienne. Ne tassez
4.Placez le portefiltres, puis la ver-
seusedefaçonàcequel’ouverture
coïncideaveclasortieducafé.
5.Tournez le bouton vers la position
».Levoyants’allumera.Dans
lesminutesquisuivent,l’eaucommen-
ceàbouilliretcouledanslaverseuse
àtraverslecafémoulu.Quandlecafé
s’arrêtedecouler,placezànouveaule
boutonsurlaposition«O».
Remarque importante: Après avoir
préparé le café, laissez refroidir deux
minutes le filtre avant de l’enlever de la
Préparation du cappuccino
1.Suivre les instructions indiquées pour
la préparation du café. L’indicateur
de niveau de la verseuse signale la
quantité d’eau requise pour préparer
deuxtassesdecaféetlacrèmedelait.
Pourpréparerquatretasses,remplirla
verseusejusqu’àlapartieinférieurede
2.Après avoir obtenu la quantité
vouluedecafé,placezleboutonsur
laposition«O».Placezunrécipient
contenant du lait froid sous la sortie
delavapeuretplacezleboutonsur
3.Pourobtenirdelacrème,placezla
buse vapeur juste sur la surface du
laitetfairetournerlerécipient.Une
foislacrèmeobtenue,baissezetle-
vezunpeulerécipientpourchauffer
lelait.Placezànouveauleboutonsur
4.Versez le lait avec la crème sur le
café. Vous pouvez également sau-
poudrerdecannelleoudechocolat
râpéetdécoreravecunbrindecan-
SYSTÈME DE SÉCURITÉ ISP :
Cet appareil dispose d’une soupape
de sécurité. Quand la cafetière contient
dela pression, la soupapede sécuri-
té bloque le couvercle et empêche
l’ouvertureparl’utilisateur.Lasoupape
de sécurité ne permet l’ouverture du
couvercle,ques’iln’yaplusdepres-
Aprèsavoirpréparélecafé,évacuerla
pressionenplaçantuneverseusesous
labasedelavapeurettournerlebouton
sur la position vapeur «
il ne sortira plus de vapeur, replacer
le bouton sur la position d’extinction