EN
Daily Reference Guide
1
THANK YOU FOR BUYING AWHIRLPOOL PRODUCT.
In order to receive amore complete assistance, please
register your appliance on: www.whirlpool.eu/register
PLEASE SCAN THE
QR CODE ON YOUR
APPLIANCE IN
ORDER TO HAVE
MORE DETAILED
INFORMATION
Before using the appliance carefully read Safety and Installation Instructions.
After installation, please remember to remove all transport protection parts from
the dishwasher.
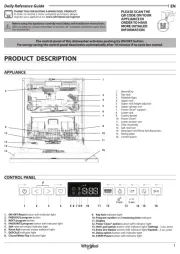
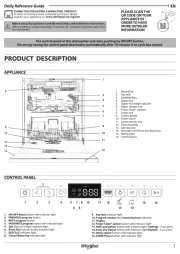
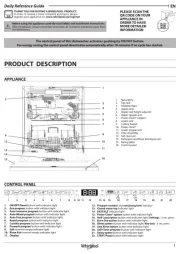
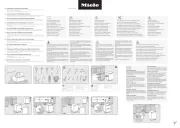
APPLIANCE
PRODUCT DESCRIPTION
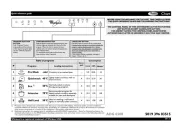
CONTROL PANEL
4 5 6 7 8 9 10 13 14 1511 12 16 17 18 191 2 3 20 21 22
1. ON-OFF/Reset button with indicator light
2. Eco program button with indicator light
3. Auto Intensive program button with indicator light
4. Auto Mixed program button with indicator light
5. Auto Fast program button with indicator light
6. Rapid program button with indicator light
7. Crystals program button with indicator light/ Self-Clean program -
3sec. press
8. Prewash program button with indicator light
9. Salt reservoir empty indicator light
10. Rinse Aid reservoir empty indicator light
11. Display
12. Program number and remaining time indicator
13. Closed water tap indicator light
14. DESCALE indicator light
15. Power Clean® option button with indicator light
16. Half Load option button with indicator light
17. Extra Dry option button with indicator light/ Settings - 3 sec. press
18. Silent option button with indicator light
19. Sani Rinse option button with indicator light
20. Turbo option button with indicator light
21. Delay option button with indicator light
22. START/Pause button with indicator light
The control panel of this dishwasher activates pushing by ON/OFF button.
For energy saving the control panel deactivates automatically after 10 minutes if no cycle has started.
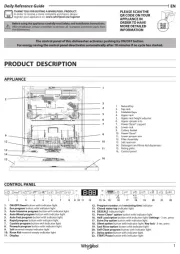
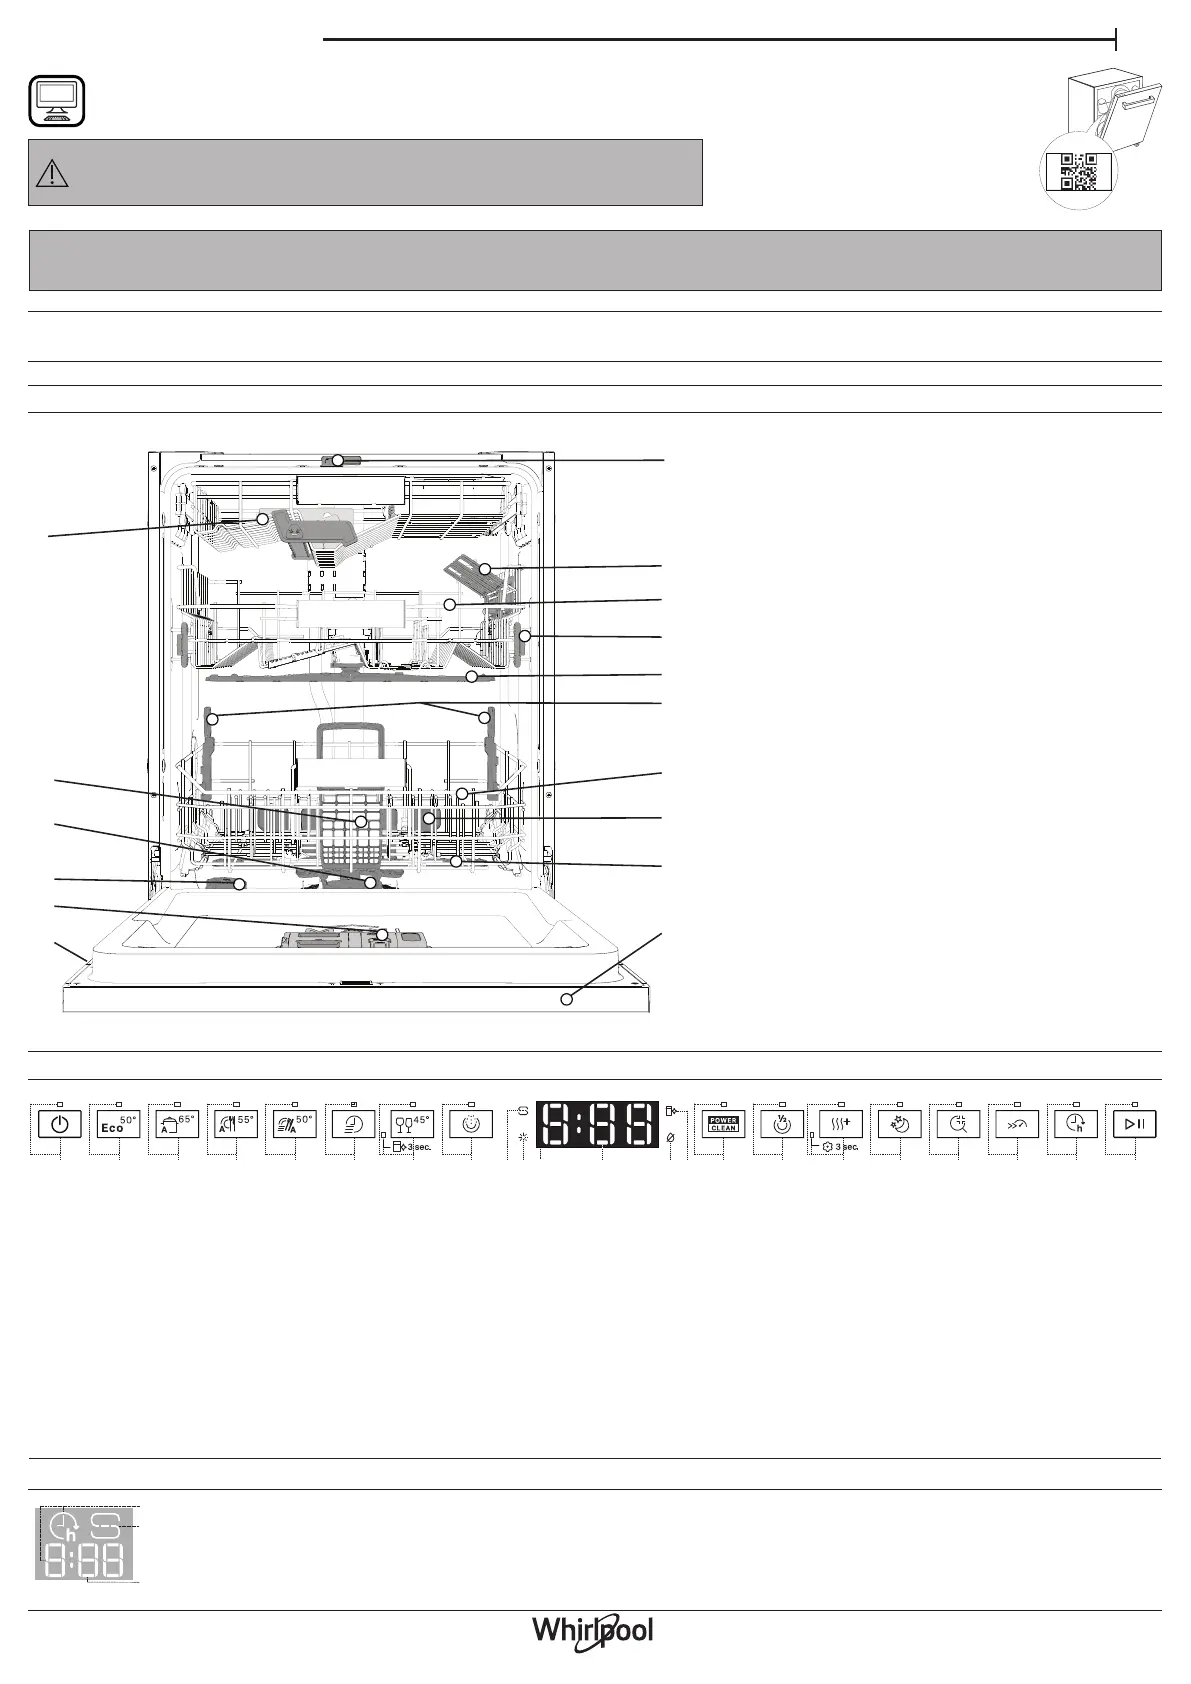
2
1. Delay Time on the oor - indicator of the time left to the start of the cycle, when the Delay option is set
2. Salt reservoir empty - indicator light on the oor
3. Remaining Time on the oor - indicator of the time left to the end of the cycle
DISPLAY ON THE FLOOR
1. NaturalDry
2. Top rack
3. Foldable aps
4. Upper rack
5. Upper rack height adjuster
6. Upper sprayer arm
7. Power Clean® support
8. Lower rack
9. Cutlery basket
10. Power Clean®
11. Lower sprayer arm
12. Filter Assembly
13. Salt reservoir
14. Detergent and Rinse Aid dispensers
15. Rating plate
16. Control panel
1
3
4
5
6
7
8
2
9