Whirlwind PL-PM1RJK1 Manual


Læs gratis den danske manual til Whirlwind PL-PM1RJK1 (4 sider) i kategorien Ikke kategoriseret. Denne vejledning er vurderet som hjælpsom af 3 personer og har en gennemsnitlig bedømmelse på 4.0 stjerner ud af 2 anmeldelser. Har du et spørgsmål om Whirlwind PL-PM1RJK1, eller vil du spørge andre brugere om produktet?

Side 1/4
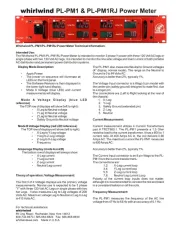
Whirlwind PL-PM1/PL-PM1RJ Power Meter Technical Information.
Intended Use:
The Whirlwind PL-PM1/PL-PM1RJ Power Meter is intended to monitor 3 phase Y power with three 120 Volt AC legs or
single phase with two 120 Volt AC legs. It is intended to monitor the line side voltage and load current of both portable
AC distribution and permanent power distribution systems.
whirlwind PL-PM1 & PL-PM1RJ Power Meter
Display Mode Description:
Ÿ Apply Power.
Ÿ The power on sequence will illuminate all
LEDs on the front panel.
Ÿ The Software Revision is then displayed in
the lower right hand display.
Ÿ Mode A Voltage (blue LED) and current
measurements will display.
M o d e A Vo l t a g e D i s p l a y ( b l u e L E D
reference)
The TOP row of displays will show (left to right):
Ÿ X Leg to Neutral voltage
Ÿ Y Leg to Neutral voltage
Ÿ Z Leg to Neutral voltage
Ÿ Safety Ground to Neutral voltage
Mode B Voltage Display (red LED reference)
The TOP row of displays will show (left to right):
Ÿ X-Leg to Y-Leg voltage
Ÿ Y-leg to Z-Leg voltage
Ÿ Z-Leg to X-Leg voltage
Ÿ Frequency
Amperage Display (mode A and B)
The bottom row of displays will always show:
Ÿ X-Leg current
Ÿ Y-Leg current
Ÿ Z-Leg current
Ÿ Neutral Leg current
Theory of operation: Voltage Measurement:
The first 3 of 4 Voltage displays are the primary voltage
measurements. Normal use is expected to be 3 phase
“Y” with three 120 Volt AC Legs or single phase with two
hot Legs. It also measures Leg to Leg voltages of 208
Volts AC. Maximum voltage Leg to Neutral or Leg to Leg
is 415 Volts AC.
The PL-PM1 also measures Neutral to Ground voltages
th
(4 display, normal mode). The range on the Neutral to
Ground is 0 to 99 Volts AC.
Accuracy is better than 2%, typically 1%.
The Voltage Input connector is a Wago 5 pin model with
the center pin (safety ground) designed to mate first, due
to a longer pin.
The connections are (Left to Right looking at the rear of
the chassis)
1. X- Leg
2. Y-Leg
3. Safety Ground (extended pin)
4. Z- Leg
5. Neutral
Current Measurement:
Current measurement utilizes 4 Current Transformers
part # TRCT600:1. The PL-PM1 presents a 1.5 Ohm
resistive load to the current transformer. It has a 600 to 1
current ratio. At 400 Amps AC in, the coil delivers 0.66
Amps AC. The maximum current the PL-PM1 measures
is 400 Amps AC.
Accuracy is better than 2%, typically 1%.
The Current Input connector is an 8 pin Wago to the PL-
PM1 from the current transformers.
The connections are:
1,2: X-Leg current loop
3,4: Y Leg current loop
5,6: Z-Leg current loop
7,8: Neutral Leg current Loop
Polarity of the current loop inputs does not matter,
although it is recommended to connect the red and black
in a consistent fashion on all the coils.
Frequency Measurement:
The PL-PM1 measures the frequency of the AC line
voltage from 47 Hz to 63 Hz with an accuracy of 0.1 Hz.
For technical assistance:
whirlwind
99 Ling Road - Rochester, New York 14612
800-733-9473 / 585-663-8820 Fax: 585-865-8930
whirlwindusa.com Made in U.S.A.
Changing the PL-PM1RJ IP address
There are two methods of accessing the PL-PM1RJ to change the IP address.
1) Use a router to establish a small temporary network at 192.168.1.1.
2) Use a cross wired cable or two straight cables with a switch to directly connect a computer to the meter's network
connection jack.
Using a Router to set IP address
With the computer connected to the router, access the setup for the router.
Set the router to have an IP address 0f 192.168.1.1 and subnet mask of 255.255.255.0.
Connect the PL-PM1RJ to the router.
Type the IP address into a browser on the computer to connect to the meter. Note that the PL-PM1RJ http://192.168.1.200
also responds to ping commands.
When the browser window with the meter display opens, click on the Setup button in the lower right corner. To change the
IP address, simply type the new IP address and Subnet Mask in the boxes, check for accuracy, and click Apply. The unit
can also be given an identifying name in this screen as well. Once set internally, the system will try to contact the unit at the
new address.
To confirm the IP address, press and hold the mode button for more than 3 seconds, and, the IP address will appear in the
top row of LED number displays and the subnet mask will appear in the lower row of numbers. Press the mode button
again to exit this mode.
Note that for subsequent IP changes you must connect to the meter using its current address and the router must be set
correspondingly. The router IP right set of digits should always be lower than the computer and the meter settings.
Using a cross wired cable or Ethernet switch to change IP address
Using a cross wired Ethernet cable, connect a computer to the PL-PM1RJ. Using a web browser, type the IP address PL-
PM1RJ into address bar of the browser. The default address for the meter is 192.168.1.200. Allow time for the computer to
find the unit and open it in the browser window. This method also applies to using a switch with two standard Ethernet
cables to connect to the PL-PM1RJ.
When the browser window with the meter display opens, click on the Setup button in the lower right corner. To change the
IP address, simply type the new IP address and Subnet Mask in the boxes, check for accuracy, and click Apply. The unit
can also be given an identifying name in this screen as well. Once set internally, the system will try to contact the unit at the
new address.
Supported Web Browsers
Google Chrome No known issues
with recent versions.
Mozilla Firefox® (v34) sometimes
requires multiple refreshes at
startup. Pop-up lists do not appear in
correct spot. It is a zoom issue.
Microsoft Internet Explorer No
known issues with v11. Possible
issues with v10. Previous versions
do not work.
Apple Safari No known issues.
Tests were conducted with:
Apple iPad 2
Apple iPhone 4s
Windows IE 11
Windows Chrome 38.
Windows Firefox 33
Apple Safari 7.1
Apple Chrome 38.0.2125.104
Apple Firefox 32.03
(Standard Android browsers are
not supported. Readings may be
inaccurate)
The display below shows the
compact display view with the
setup page activated.
Personalizing Display Features
The PL-PM1RJ has a Display
Parameters menu that allows for
display color changes and the setting
of alerts to indicate out of range
voltage readings. The meter reading
refresh rate can also be changed on
this screen. These settings are stored
as cookies in the web browser, so they
are specific to the individual
computers accessing the PL-PM1RJ.
MODEL NUMBERS
PL-PM1RJ with network
interface
PL-PM1 without network
interface
whirlwind PL-PM1RJ Power Meter
whirlwind
whirlwindusa.com


Produkt Specifikationer

Mærke: Whirlwind
Kategori: Ikke kategoriseret
Model: PL-PM1RJK1

Har du brug for hjælp?

Hvis du har brug for hjælp til Whirlwind PL-PM1RJK1 stil et spørgsmål nedenfor, og andre brugere vil svare dig


Ikke kategoriseret Whirlwind Manualer
Whirlwind

Whirlwind WFF8X2.5 Manual

8 Oktober 2025
Whirlwind

Whirlwind HATTXL Manual

29 September 2025
Whirlwind

Whirlwind HAUC Manual

29 September 2025
Whirlwind

Whirlwind HATT-AES Manual

29 September 2025
Whirlwind

Whirlwind SPLIT 6 Manual

29 September 2025
Whirlwind

Whirlwind HATT4 Manual

29 September 2025
Whirlwind

Whirlwind HAUCXL Manual

28 September 2025

Ikke kategoriseret Manualer

Nyeste Ikke kategoriseret Manualer