Usage of DIY Stickers: Tear apart the film. Apply the patterned side to the
desired position and use wet tissues or a piece of damp cloth to gently tap the
sticker. 5 to 10 seconds later, peel up one corner of the sticker to see if the
pattern has been printed. If so, rip the whole piece of the sticker.
DRONE applies 2.4G remote control system to allow for multiple players
compete without interference and functions such as forward and backward,
left and right, left sideward and right sideward, left rotation and right rotation,
and 360 degree flips and rolls etc.
When installing or dismantling the propeller, please do not force on the
propeller to avoid distortion.
Please replace with new propellers once the
propellers are damaged due to crashes or
collisions. Each propeller is marked with A or B.
When installing, make sure that A corresponds
to A and B to B, otherwise the drone cannot
perform functions such as takeoff, rotation or
3.Prop Guard Installation
When installing or dismantling the propeller, please do not force on the
propeller to avoid distortion.
Propellers vary from one to another!
②Install the propellers in
guard to the three holes.
A.Remove the battery from
B.Connect USB charger with
the battery. (Do not charge
the battery until the water
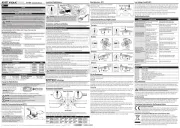
4.Battery Charging for Drone
The LED light turns on during charging and turns off when the charging
completes. It takes about 65 minutes to fully charge and gives about 5-6
minutes of running time when fully charged.
There is a certain risk when using battery. It may cause fire, body injury or
property loss. Users must be aware of the risks and take full responsibility of
using battery improperly.
If battery leakage occurs, please avoid contacting your eyes or skin with
electrolyte. Once it happens, please wash your eyes with clean water and
seek medical care immediately.
Please remove the plug immediately if you sense any peculiar smell, noise
Please use the original charger to ensure safe use.
Do not charge dilatant or outworn battery.
Do not over charge battery. Please unplug the charger once fully charged.
Do not charge the battery next to inflammables, such as carpet, timber floor
or wood furniture or on the surface of electro-conductive objects. Please
always keep an eye on the battery when charging.
Do not charge battery which not cool down yet.
The charging temperature should be between 0 to 40 .℃ ℃
Do not dispose the battery as daily rubbish. Please familiarize yourself with
the local garbage disposal method and dispose it according to the special
The flight mode will be turned on by default at startup. The light turns red on
flight mode, turns green when you switch it to ground mode and turns blue
when you switch it to water mode.
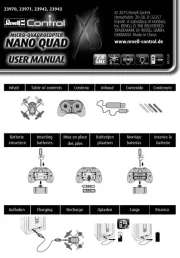
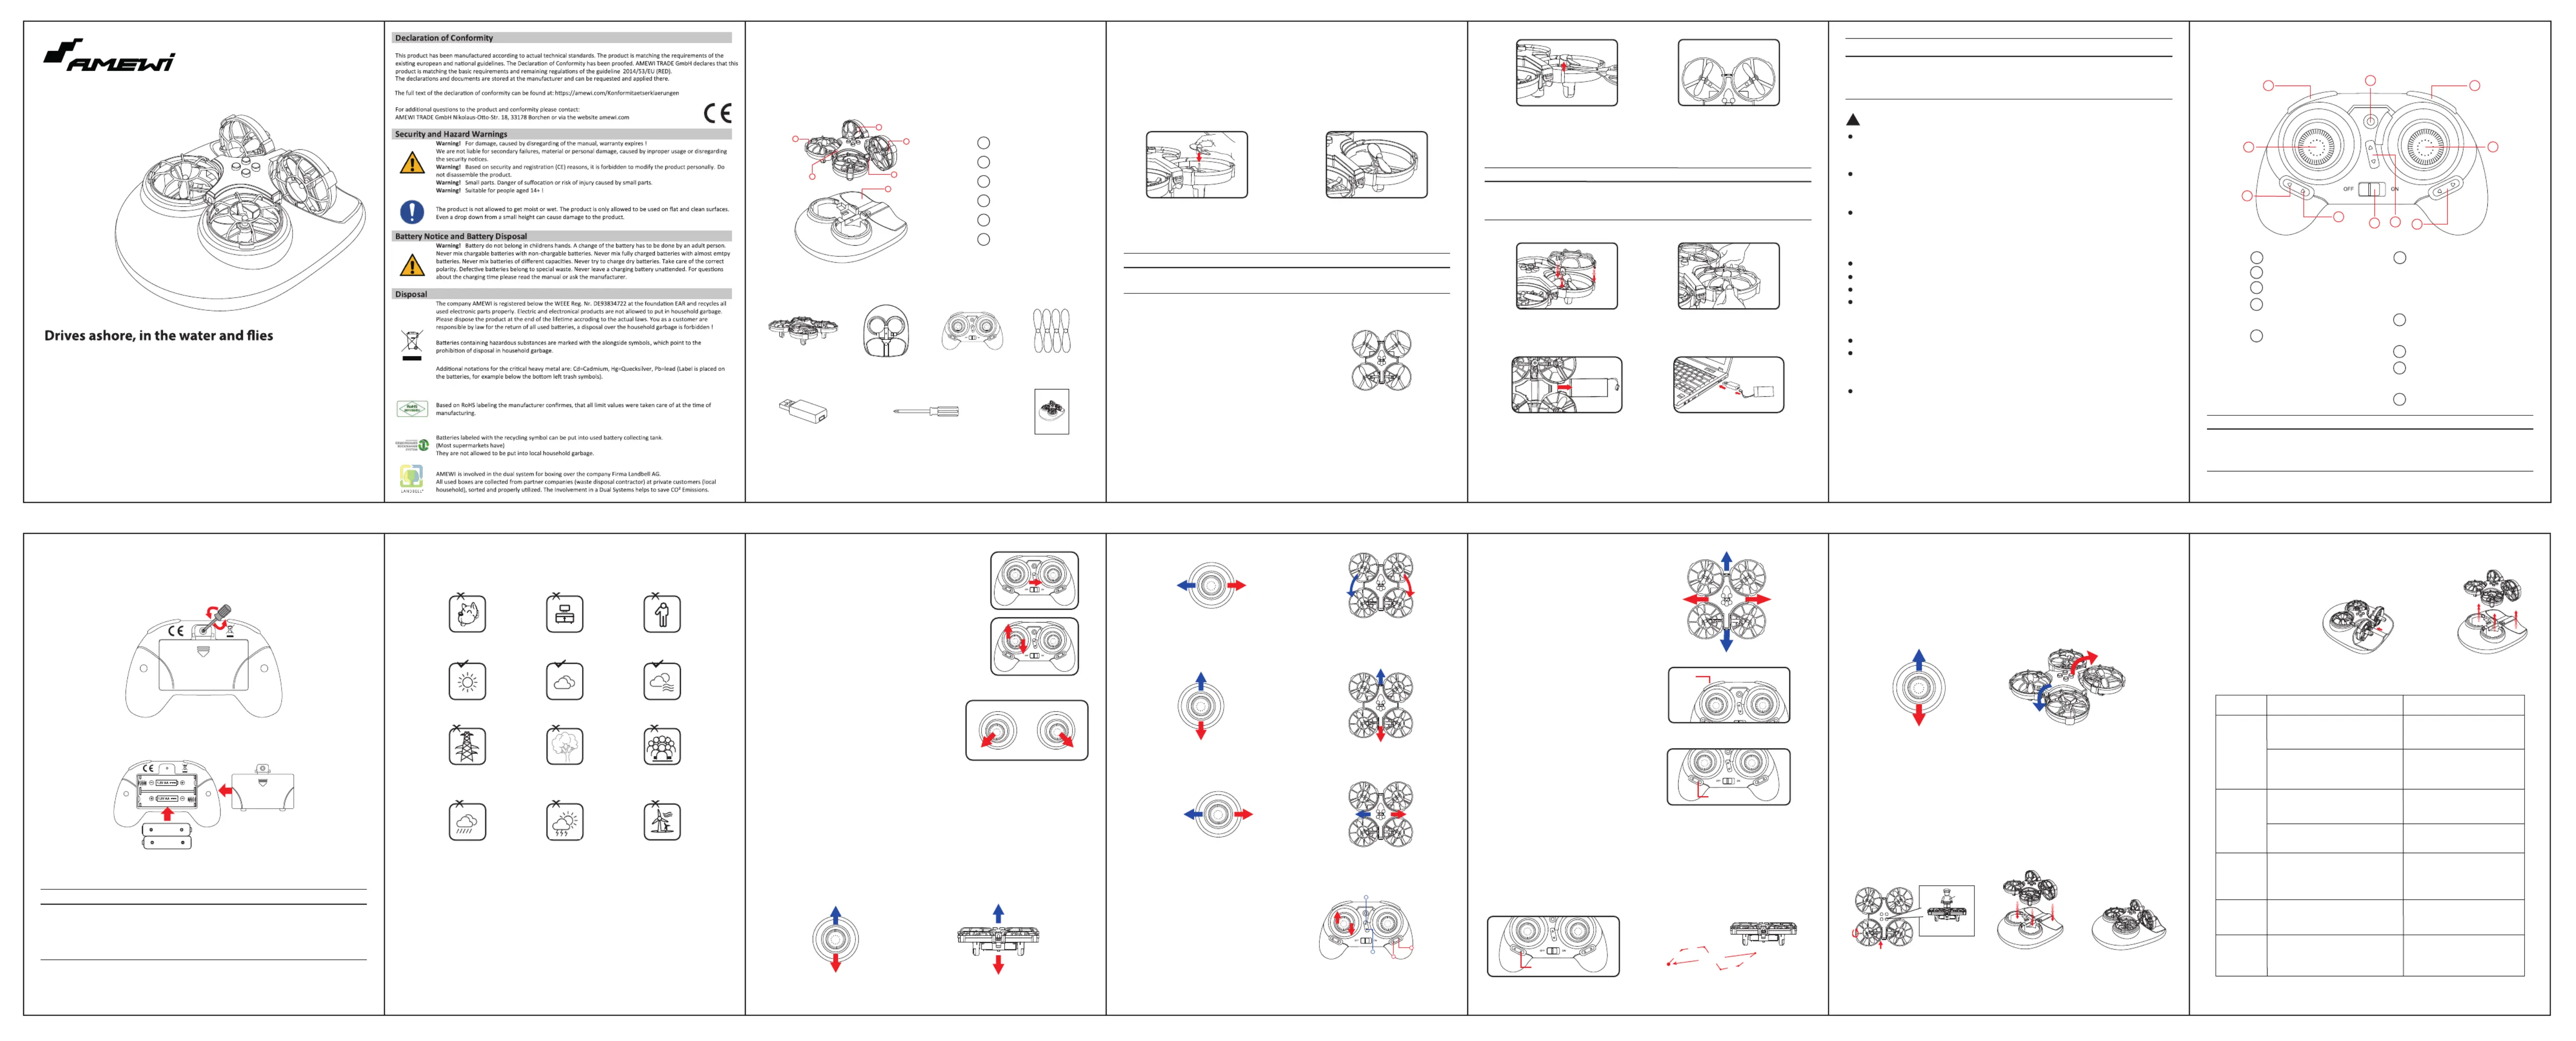
1.Protective Guard the Parts Name of the Remote Control
Open the battery compartment cover, insert two AA batteries (not included) with
the two poles aligned correctly.
Open the battery compartment cover with a philips screwdriver.
2.Remote Control Battery Installation
①Open the Remote Control Battery Cover
1. Ensure the polarity symbols on the batteries match the symbols inside the
2. Do not mix new and old batteries.
3. Do not mix different types of batteries.
Please keep the drone in sight during the flight and keep it away from barriers,
high-tension cables, trees and crowds.
Do not fly in extreme environment, such as hotness, coldness, strong wind or
Indoor: Spacious spaces away from barriers, crowds or pets are preferred.
Outdoor: Sunny, windless and breezy weathers are preferred.
3.Pairing Remote Control with Drone
①Turn on the power of the drone; put the drone on
plain ground; check whether the indicator lights of
remote control and LED lights of drone flash.
②Push the throttle joystick to the top and then pull
back to the bottom. After the sounds of beep, the
flash of indicator lights of remote control and LED
lights of drone will turn to constant lights, which
means the pairing completes.
Please Check the Followings Before Flying:
①If the drone and the remote controller are fully charged.
②If the propellers have been correctly installed and in good condition.
③If the propellers work well after startup.
④If the surrounding conditions are ideal for a safe flight.
If the drone fails to ascend vertically, please
proceed to the calibration process. Toggle the
throttle joystick and the rudder stick towards
toe-out at the same time. When the drone’s
indicator light turns from quick blinking to solid
light, the process of calibration completes.
Please calibrate the drone on a level surface
as to ensure the calibration can be successful.
The left joystick is used to control flying height and left and right turning, while
the right joystick is used to control forward, backward and sideward flights.
③Left Sideward Fine-tuning
④Right Sideward Fine-tuning
Gradually push the throttle joystick to make
the drone ascend. Fine-tune the direction
when the drone rolls or yaws.
If you want to control the speed of the
drone, press the Speed Mode button “”
to control it to fly at the speed of 30%,
60% and 100% out of the full speed.
Put the drone with its front being your
front. Pair the drone with the remote
controller before its takeoff. Then short
press the Headless Mode button to “”
let it enter the headless mode. To exit,
press the Headless Mode button again.“”
Long press the One-key Return button to return the drone automatically. After “”
the drone has returned to home point, toggle the front joystick or press the
“”One-key Return button to exit the auto return mode. The drone’s light will then
Till the drone ascends to the altitude of 3 meters, press the button of flips and
rolls and move the right joystick to certain direction to finalize flips and rolls.
Rotate the accessory part (close to the projections on the tail) on the drone’s
back as shown in figure , and install the drone onto the bottom base as ①
shown in figure . It has been completely set up and ready for takeoff or ②
cruising as shown in figure . (Please wipe off the drone with a piece of dry ③
Place a doll (not included)
8.Separation of the Drone and the Bottom Base
Put your hands at the tail of the drone and push it forward to
take it apart from the bottom base.
PROBLEMS CAUSES SOLUTIONS
Not connect with the drone battery.
Connect the drone battery in
The wind can affect the drone’s
flight. Therefore, do not fly it in
The rotation speed of main blades
The battery of the drone is not fully
Push up the throttle joystick.
Please fully charge the battery.
The throttle joystick is pulled down
Pull down the throttle joystick
slowly to perform a smooth
Beyond the effective controlling
Ensure that the flying distance
Dust or other objects has been
other objects on or around
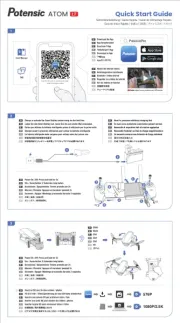
Bottom Base x1 Propeller x4
USB Charger x1 User Manual x1
VIHICLE X DRONE X HOVERCRAFT 3 IN 1
*Please read this manual carefully before operation and keep it properly for
MAXIMUM TRANSMITTING POWER
Operation frequency: 2.405 ~ 2.476 MHz
Maximum Radio frequency power: maximum peak power: 2 dBm