Atdec TH-2050-UFL Manual


Læs gratis den danske manual til Atdec TH-2050-UFL (3 sider) i kategorien Ikke kategoriseret. Denne vejledning er vurderet som hjælpsom af 10 personer og har en gennemsnitlig bedømmelse på 3.6 stjerner ud af 5.5 anmeldelser. Har du et spørgsmål om Atdec TH-2050-UFL, eller vil du spørge andre brugere om produktet?

Side 1/3
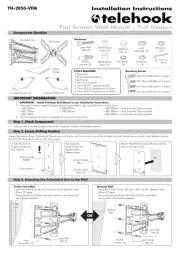
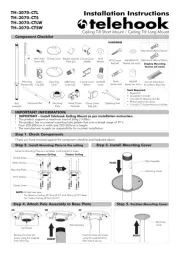
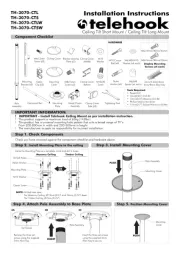
Component Checklist
Coach Screw (x3)
Nylon Anchor (x3)
Washer (x3)
4mm
Allen Key
M4x16mm
M5x16mm
M6x16mm/25mm
M8x16mm/25mm
TH-2050-UFL
Small-Medium TV Articulated Arm
IMPORTANT INFORMATION:
Step 1. Check Components
Check you have received all parts against the Component Checklist and Hardware above.
! IMPORTANT - Install 2050 Small-Medium TV Articulated Arm per Installation Instructions.
! This product supports a maximum load of 25kg (55lbs).
! This product supports VESA mounting hole configurations 200mm wide x100mm high to 400mm wide x 400mm high.
! The manufacturer accepts no responsibility for incorrect installation.
Display Mounting
Screws (x4 each)
Hardware
Tools Required:
Power drill
4.5mm (0.18”) drill bit
10.5mm (0.41”) masonry drill bit
Phillips head screw driver
10mm (0.39”) socket wrench or shifter
Step 2. Install Arm/Wall Mount to the Wall
Step 3. Attach Top Caps to the installed Arm/Wall Mount
Top Cap (x2)
Arm/Wall Mount
Mounting Bracket (x2)
Multiwasher (x4)
Timber Stud Wall
Masonry Wall
- Drill three 10.5mm (0.41”) diameter holes,
58mm (2.3”) deep.
- Secure the mounting plate to the wall using the Coach
Screws and Nylon Anchors supplied.
- Drill three 4.5mm (0.18”) diameter holes, 58mm (2.3”) deep.
- Secure the mounting plate to the wall using the Coach
Screws supplied.
NOTE: Use a stud finder to accurately locate the centre
of the stud. Ensure that all screws fix securely into stud.
OR
SLIDE
End Cap (x2)
Locking Block (x2)
End Cap Screw (x4)
Coach Screw
Washer
End Cap
Screw
Nylon Anchor
Drilled Hole
End Cap
Coach Screw
Washer
End Cap
Screw
Drilled Hole
End Cap
SLIDE
SLIDE
Top Cap
13mm (0.5”) socket wrench or shifter
Installation Instructions
Step 4. Attaching Mounting Brackets to Display
TOP
Back of Display
Display Mounting Screw
Multiwasher
Mounting Bracket
Step 6. Attach Locking Blocks to fully secure the Display
WALL
Pull down both Spring Lock
Ties to open catch.
Hook the Display
to the Arm/Wall
Mount.
The mounting brackets support
hole configurations from
200x100mm to 400x400mm.
1 HOOK
3 PUSH
DOWN
1 HOOK
2 LOCK 4
2 PULL
DOWN
3 PUSH
DOWN
Push down Display into catch. Release Spring Lock Ties
to secure Display.
NOTE: Ensure that Spring
Lock is fully engaged.
RELEASE 4
Step 5. Attaching/Detaching Display to the installed Arm (2 people required)
Back of Display
Locking Blocks


Produkt Specifikationer

Mærke: Atdec
Kategori: Ikke kategoriseret
Model: TH-2050-UFL

Har du brug for hjælp?

Hvis du har brug for hjælp til Atdec TH-2050-UFL stil et spørgsmål nedenfor, og andre brugere vil svare dig


Ikke kategoriseret Atdec Manualer
Atdec

Atdec AW-FB Manual

30 Januar 2025
Atdec

Atdec AWM-AHX-S Manual

28 December 2024
Atdec

Atdec AWM-HN Manual

7 December 2024
Atdec

Atdec AD-TVAC-CM-B Manual

7 December 2024
Atdec

Atdec AD-TVAC-CM-W Manual

7 December 2024
Atdec

Atdec AWMS-NDB Manual

31 August 2024
Atdec

Atdec AF-AN-P Manual

21 August 2024
Atdec

Atdec AF-WD-P Manual

21 August 2024
Atdec

Atdec TH-VWP-160 Manual

21 August 2024
Atdec

Atdec AWM-HS Manual

21 August 2024

Ikke kategoriseret Manualer

Nyeste Ikke kategoriseret Manualer