AXDSPX-A2B1
INSTALLATION INSTRUCTIONS
AxxessInterfaces.com  © COPYRIGHT 2024 METRA ELECTRONICS CORPORATION  REV. 2/13/24 INSTAXDSPX-A2B1
INTERFACE FEATURES
INTERFACE COMPONENTS
TOOLS REQUIRED
• Crimping tool and connectors, or solder gun, 
  solder, and heat shrink • Tape • Wire cutter
• Zip ties
TABLE OF CONTENTS
Connections ........................................................ 2-3
Installation .............................................................4
LED Feedback .........................................................6
A2B Data Interface with Amplifier
 Bypass 
Harness & DSP
•  Designed for Sony A2B amplifiers
•  A2B data interface with AXDSP-X (digital signal processor) built-in
•  Includes an amplifier bypass harness
•  Retains factory chimes including parking sensor chimes
•  Retains SYNC voice prompts
•  All chimes/voice prompts go through the aftermarket amplifier 
and/or cluster
•  Adjustable chime level
•  Micro-B USB updatable
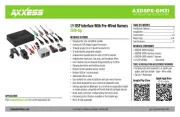
• AXDSPX-A2B1 interface
• AXDSPX-A2B1 harness
  • AXDSPX-A2B1 interface harness (male connectors: 12-pin, 16-pin)
  • Amplifier bypass harness (female connectors: 16-pin, 16-pin)
• Radio T-harness
• AXBK-1
Google Play Store
Apple App Store
iOS 12.1 or higher
ATTENTION: With the key out of the ignition, 
disconnect the negative battery terminal before 
installing this product. Ensure that all installation 
connections, especially the air bag indicator lights, 
are plugged in before reconnecting the battery or 
cycling the ignition to test this product.
NOTE: Refer also to the instructions included with 
the aftermarket radio.
Metraonline.com
For Dash Disassembly Instructions, refer to Metraonline.com. Enter the year, make, and model of the vehicle in the Vehicle Fit Guide for Radio Install kits.
Visit Axxessinterfaces.com for current application list. 
Visit MetraOnline.com and Axxessinterfaces.com for harness and interface options.