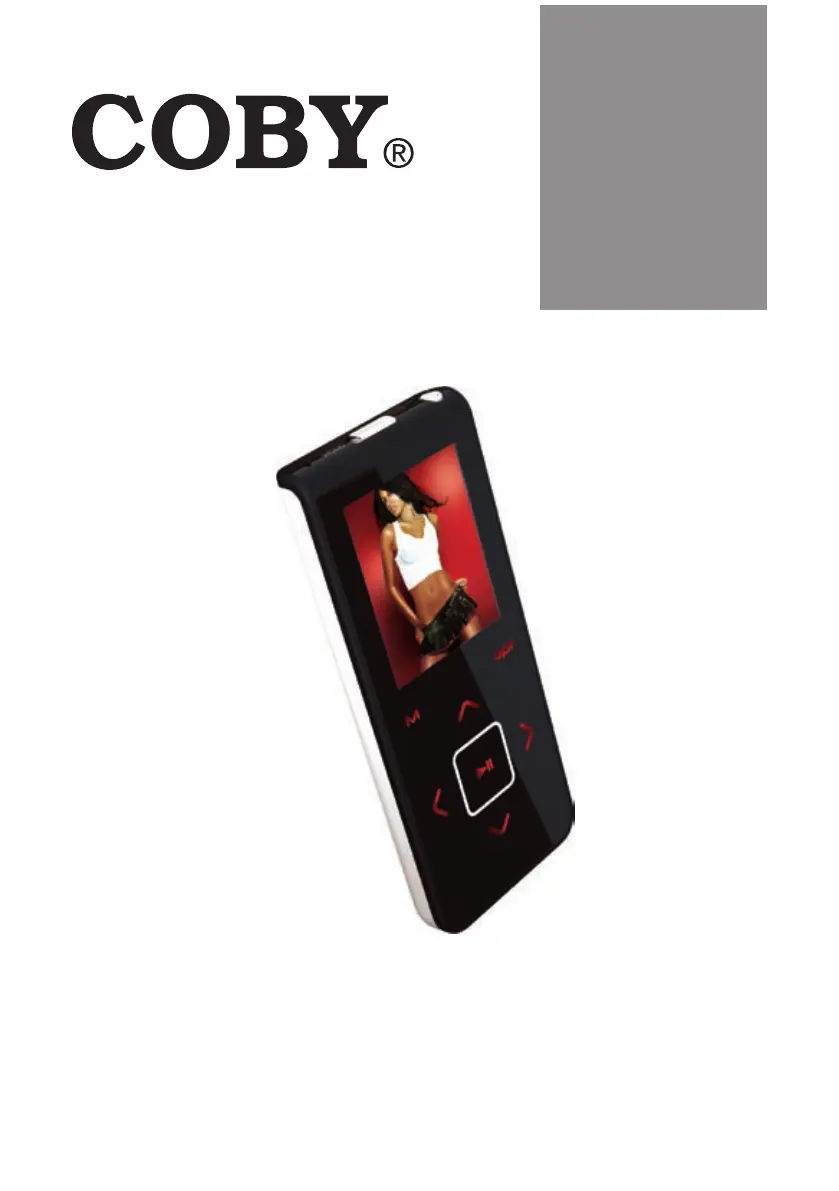
Coby MP-C7085 Manual
Coby
Mp3-afspiller
MP-C7085
Læs gratis den danske manual til Coby MP-C7085 (47 sider) i kategorien Mp3-afspiller. Denne vejledning er vurderet som hjælpsom af 14 personer og har en gennemsnitlig bedømmelse på 4.4 stjerner ud af 7.5 anmeldelser. Har du et spørgsmål om Coby MP-C7085, eller vil du spørge andre brugere om produktet?
Side 1/47

Instruction Manual
Please read this manual carefully before operation
MP-C7055
MP-C7085
MP-C7095
MP-C7405
Super-Slim MP3 and Video Player
with Touchpad Control

2
Page 2 Coby Electronics Corporation
For Customer Use:
Enter below the serial number that is located on the
rear of the unit. Retain this information for future ref-
erence.
Model No.
Serial No.
The lightning ash with arrowhead symbol within an equilateral triangle is
intended to alert the user to the presence of uninsulated “dangerous voltage”
within the product’s enclosure that may be of sufcient magnitude to constitute
a risk of electric shock.
The exclamation point within an equilateral triangle is intended to alert the
user to the presence of important operation and servicing instructions in the
literature accompanying the appliance.
WARNING: To prevent re or shock hazard, do not expose this device to rain or moisture.
Dangerous high voltage is present inside the enclosure. Do not open the cabinet.
CAUTION: To prevent electric shock, match wide blade of plug to wide slot of outlet and fully
insert.
WARNING: Handling the cords on this product will expose you to lead, a chemical known to
the State of California to cause cancer, and birth defects or other reproductive harm. Wash
hands after handling.
NOTICE:
This product is protected by certain intellectual property rights of Microsoft. Use or distribution
of such technology outside of this product is prohibited without a license from Microsoft.
Content owners use Windows Media digital rights management technology (WMDRM) to
protect their intellectual property, including copyrights. This device uses WMDRM software
to access WMDRM-protected content. If the WMDRM software fails to protect the content,
content owners may ask Microsoft to revoke the software’s ability to use WMDRM to play or
copy protected content. Revocation does not affect unprotected content. When you download
licenses for protected content, you agree that Microsoft may include a revocation list with the
licenses. Content owners may require you to upgrade WMDRM to access their content. If you
decline an upgrade, you will not be able to access content that requires the upgrade.
PRECAUTIONS

www.cobyusa.com Page 3
PRECAUTIONS
Protect your hearing: Hearing experts advise against the constant use of personal stereos
played at high volume. Constant exposure to high volumes can lead to hearing loss. If you
should experience ringing in the ears or hearing loss, discontinue use and seek medical
advice.
Note: If the product suddenly has no response or powers off, an electrostatic discharge may be
the cause. In this circumstance, please follow the procedures below for recovery:
Turn off the unit by pushing and holding the slide button at the right (Power off position) for
15 seconds.
Turn on the unit again
For recycling or disposal information about this product, please
contact your local authorities or the Electronics Industries Alliance:
www.eiae.org.
•
•

4
Page 4 Coby Electronics Corporation
PRECAUTIONS
FCC Statement:
This device complies with Part 15 of the FCC Rules. Operation is subject to the following two
conditions:
(1) This device may not cause harmful interference, and
(2) This device must accept any interference received, including interference that may cause
undesired operation.
Note:
This equipment has been tested and found to comply with the limits for Class B digital devices,
pursuant to Part 15 of the FCC rules. These limits are designed to provide reasonable
protection against harmful interference in a residential installation. This equipment generates,
uses and can radiate radio frequency energy and, if not installed and used in accordance with
the instructions, may cause harmful interference to radio communications. However, there is
no guarantee that interference will not occur in a particular installation. If this equipment does
cause harmful interference to radio or television reception, which can be determined by turning
the equipment off and on, the user is encouraged to try to correct the interference by one or
more of the following measures:
- Reorient or relocate the receiving antenna.
- Increase the separation between the equipment and receiver.
- Connect the equipment into an outlet on a circuit different from that to which the receiver
is connected.
- Consult the dealer or an experienced radio/TV technician for help
Use of shielded cable is required to comply with Class B limits in Subpart B of Part 15 of the
FCC rules.
Do not make any changes or modications to the equipment unless otherwise specied in
the manual. If such changes or modications should be made, you could be required to stop
operation of the equipment.

www.cobyusa.com Page 5
IMPORTANT SAFETY INSTRUCTIONS
Read Instructions: All the safety and operating instructions should be read
before the product is operated.
Retain Instructions: The safety and operating instructions should be re-
tained for future reference.
Heed Warnings: All warnings on the product and in the operating instruc-
tions should be adhered to.
Follow Instructions: All operating and usage instructions should be fol -
lowed.
Cleaning: Unplug this product from the wall outlet before cleaning. Do not
use liquid cleaners or aerosol cleaners. Use a damp cloth
for cleaning.
Attachments: Use only attachments recommended by
the manufacturer. Use of other attachments may be haz-
ardous.
Water and Moisture: Do not use this product near water
(e.g., near a bath tub, washbowl, kitchen sink, laundry tub, in w e t
basements, or near a swimming pool and the like).
Accessories: Do not place this product on an unstable cart, stand, tripod,
bracket, or table. Use only with carts, stands, tripods, brackets, or tables
recommended by the manufacturer or sold with the product. Any mounting
of the product should follow the manufacturer’s instructions and should use
a mounting accessory recommended by the manufacturer.
A product and cart combination should be moved with care. Quick stops,
excessive force, and uneven surfaces may cause the product and cart
combination to overturn.
Ventilation: Slots and openings in the cabinet are provided for ventilation to
ensure reliable operation of the product and to protect it from overheating.
These openings should never be blocked by placing the product on a bed,
sofa, rug, or other similar surface. This product should not be placed in a
built-in installation such as a bookcase or rack unless proper ventilation is
provided or the manufacturer instructions have been adhered to.
Power Sources: This product should be operated only from the type of
power source indicated on the rating label. If you are not sure of the type
1.
2.
3.
4.
5.
6.
7.
8.
9.
10.
11.

6
Page 6 Coby Electronics Corporation
of power supply to your home, consult your product dealer or local power
company. For products intended to operate from battery power or other
sources, refer to the operating instructions.
Grounding or Polarization: This product may be equipped with a polarized
alternating-current line plug that has one blade wider than the other. This
plug will only t into the power outlet in one direction. This is a safety fea-
ture. If you are unable to insert the plug fully into the outlet, try reversing the
direction of the plug. If the plug should still fail to t, contact an electrician to
replace the obsolete outlet. Do not defeat the safety purpose of the polar-
ized plug.
Power-Cord Protection: Power supply cords should be routed so that they
are not likely to be walked on or pinched by items placed upon or against
them, paying particular attention to cords at plugs, convenience recep-
tacles, and at the point which they exit from the product.
Protective Attachment Plug: The product may be equipped with an at-
tachment plug with overload protection. This is a safety feature. See the
operating instructions for replacement or directions to reset the protective
device. If replacement of the plug is required, be sure the service technician
has used a replacement plug that has the same overload protection as the
original plug as specied by the manufacturer.
12.
13.
14.
IMPORTANT SAFETY INSTRUCTIONS

www.cobyusa.com Page 7
Outdoor Antenna Grounding: If an outside antenna is connected to the
product, be sure the antenna system is grounded so as to provide some
protection against voltage surges and built-up static charges. Article 810 of
the National Electrical Code, ANS/NFPA 70 provides information with re-
gard to proper grounding of the mast and supporting structure, grounding of
the lead-in wire to an antenna-discharge unit, size of grounding conductors,
location of antenna-discharge unit, connection to grounding electrodes,
and requirements for the grounding electrode (see gure).
Lightning: For added protection for this product, unplug it from the wall out-
let and disconnect the antenna or cable system during a lightning storm
or when it is left unattended and unused for long periods of time. This will
prevent damage to the product due to lightning or power-line surges.
Power Lines: An outside antenna system should not be located in the vi-
cinity of overhead power lines or other electric light or power circuits, or
where it can fall into such power lines or circuits. When installing an outside
antenna system, extreme care should be taken to keep from touching such
power lines or circuits, as contact with them might be fatal.
Overloading: Do not overload wall outlets, extension cords, or integral con-
venience receptacles as this can result in a risk of re or electric shock.
Object and Liquid Entry: Never push objects of any kind into this product
through openings as they may touch dangerous voltage points or shout-out
parts that could result in a re or electric shock. Never spill liquid of any kind
on the product.
Servicing: Do not attempt to service this product yourself as opening or
removing covers may expose you to dangerous voltage or other hazards.
Refer all servicing to qualied service personnel.
Damage Requiring Service: Unplug this product from the wall outlet and
refer servicing to qualied service personnel under the following conditions:
a) when the power-supply or plug is damaged; b) if liquid has been spilled
or if objects have fallen into the product; c) if the product has been exposed
to rain or water; d) if the product does not operate normally by following the
operating instructions. Adjust only those controls that are covered by the
operating instructions as improper adjustment of other controls may result
in damage and will often require extensive work by a qualied technician
to restore the product to its normal operation; e) if the product has been
dropped or damaged in any way; f) when the product exhibits a distinct
15.
16.
17.
18.
19.
20.
21.
IMPORTANT SAFETY INSTRUCTIONS

www.cobyusa.com Page 9
BROWSER MODE ...........................................................................................24
Smart Menu Options ................................................................................ 24
Delete Controls .................................................................................. 24
Power ....................................................................................................... 25
Power Off .......................................................................................... 25
Sleep ................................................................................................. 25
Language ................................................................................................. 25
Display ..................................................................................................... 26
Brightness ......................................................................................... 26
Backlight ............................................................................................ 26
Sys Tools ................................................................................................. 26
Format ............................................................................................... 26
Reset ................................................................................................. 27
Sys Info .............................................................................................. 27
Time ......................................................................................................... 27
USB Mode................................................................................................ 27
USB CONNECTIONS ......................................................................................29
USB Driver Installation (Required for Windows 98 SE Only) ................... 29
Connecting to a Computer ....................................................................... 30
Transferring Files ..................................................................................... 30
Microsoft Windows .............................................................................31
Macintosh OS X..................................................................................31
Disconnecting from a Computer ..............................................................32
Microsoft Windows ............................................................................ 32
Macintosh OS X................................................................................. 32
VIDEO CONVERSION ....................................................................................33
System Requirements .............................................................................. 34
Installation ................................................................................................ 34
Video Converter at a Glance ................................................................... 35
Converting Video ............................................................................... 36
WINDOWS MEDIA PLAYER ............................................................................37
Windows Media Player 10 (WMP10) ........................................................37
Music File Transfers ...........................................................................37
Creating Playlists ............................................................................... 39
TROUBLESHOOTING ......................................................................................41
SPECIFICATIONS ............................................................................................44
TABLE OF CONTENTS

www.cobyusa.com Page 11
FEATURES
Integrated 2GB Flash Memory
Touchpad control with LED backlight
1.66” TFT LCD Full-color display
Plays Music, Video, Photos and Text
Plays Digital Music from most online stores and subscription services*
ID3 and LRC Support for song and synchronized lyric information display
Integrated FM Radio
USB 2.0 high-speed transfers
•
•
•
•
•
•
•
•

12
Page 12 Coby Electronics Corporation
POWERING YOUR PLAYER
Charging the Battery
Your player has an integrated rechargeable battery. Typical music playtime is up
to 8 hours (when playing an MP3 encoded at 128 kbps and the battery is fully
charged)
Uponinitialuse,thebatterymustrstbechargedfully(12hours)
toensureoptimalperformanceandbatterylife.
To charge your player:
USB Charge: Your player can be
charged through a PC USB con-
nection.
Plug one end of the USB cable
into the player’s USB port and
plug the other end into the USB
port of a powered-on computer.
When connected to a USB hub, the hub must be self-powered to
charge the player’s battery.
File transfers will extend the charging time.
Thebatteryusedinthisdevicemaypresentareorchemical
burnifmistreated.Donotdisassemble,incinerate,orheatthe
battery.
Donotconnecttheplayertoapowersourceotherthanthat
whichisindicatedhereoronthelabelasthismayresultinthe
riskofreorelectricshock.
Donothandlethepowerplugwithwethands.Doingsomay
causeelectricshock.
•
•
•
USB Port
USB Port
Computer

www.cobyusa.com Page 13
Turning Your Player On/Off
To turn the player on, press and hold the POWER but-
ton until you see the “Initializing” screen.
To turn the player off, press and hold the POWER but-
ton until you see “Good Bye!”.
Locking/Unlocking Your Player’s Keys (Hold)
When engaged, the Key Lock feature disables your player’s
controls to prevent accidental key presses when it is in your
pocket or bag.
To lock the player, slide the HOLD switch to right. The
Lock icon will appear on-screen.
To unlock the player, slide the HOLD switch to the left from the Lock posi-
tion.
Resetting Your Player
Reset your player if it should freeze and not respond or otherwise malfunction.
Disconnect your player if it is connected to a computer.
Use a pin to gently press the Reset button located on the rear of the player.
•
•
•
•
1.
2.
POWERING YOUR PLAYER
PO WER Bu tt on
TOP VIEW
HOLD Sw itc h
TOP VIEW

14
Page 14 Coby Electronics Corporation
LOCATION OF CONTROLS
Top
Front
Bottom
Back
1
2
3
4
5
6
7
8
9
10 11
12
HOLD Switch
Power On/Off
MENU
UP / Volume up
Left / Previous
DOWN / Volume down
Option
Play / Pause
Right / Previous
1.
2.
3.
4.
5.
6.
7.
8.
9.
USB Port
Headphone Jack
Reset
10.
11.
12.

www.cobyusa.com Page 15
DISPLAY OVERVIEW
Plays Status
Current track/
Total track
Time
Elapsed
Time Clock
Play Mode
Time
Remaining
Music Playing Mode
Battery Level
Lock icon
Equalizer
Song name

16
Page 16 Coby Electronics Corporation
BASIC OPERATIONS
Using the Touchpad Controls
Your player comes equipped with a touch-sensitive control pad. To use the
controls, touch the arrow keys on the front of the player lightly just as you would
a button and the controls will light up. If you touch and hold a key, it will register
as a continuous button press.
Using the Controls to Navigate
To navigate through the different menu options and les on your player:
Touch the Arrow keys to move the selection in the direction of the arrow.
Moves the selection up.
Moves the selection down.
Select the next selection.
Select the previous selection.
•
•
•
•
•
Music
Photo
Movie
FM Radio
E-Book
Record
Browser
Setup

www.cobyusa.com Page 17
MUSIC MODE
Enter Music mode to play your MP3, WMA, or WAV audio les.
To enter MUSIC mode, select and conrm from the Main Menu.
Upon entering Music mode, you will see a list of all available musics that located
on your player.
Music Playback Controls
Select a track and touch to start playback.
While the track is playing:
Touch to play the next track.
Touch to play the previous track.
Touch and hold to fast forward through the track.
Touch and hold to reverse through the track.
Touch pause playback. Touch again to resume playback to
Touch or to adjust the volume level.
Smart Menu Options
The Smart Menu gives you quick access to your player’s option settings. To
access the Smart Menu, touch .
The Smart Menu options are Repeat, Equalizer, Speed and Browsing.
Touch or to select an option.
Touch when you are nished to save.
Touch to return to the Music mode without saving.
Repeat
Adjust the Repeat settings to change the order in which tracks are played. The
Repeat options are: No Repeat, One, All, Random All, DirRepOne, DirRep and
DirRanAll.
•
•
•
•
•
•
•
•
•

18
Page 18 Coby Electronics Corporation
No Repeat Play tracks once in sequential order.
One Play the current track repeatedly.
All Play all tracks repeatedly.
Random All Play all tracks in random order.
DirRepOne Repeat all tracks in the current folder.
DirRep Repeat all tracks in all folder.
DirRanAll Play folders in random order.
Equalizer
The Equalizer option optimizes the way your player processes audio signals.
Select the option which best suits the music you are listening to. The options
are Normal, Pop, Rock, Classic, Jazz and Bass.
Speed
Use the Speed function to adjust playback tempo. The Play options are: 70%
(Slowest), 80%, 100% (Normal), 120% and 130% (Fastest).
Browsing
This option allows you to browse your music library to select another track during
music playback.
Touch to move the selection up;
Touch to move the selection down;
Touch to play a selection;
Touch to return to the Music mode.
•
•
•
•
MUSIC MODE

www.cobyusa.com Page 19
PHOTO MODE
Enter Photo mode to display your JPEG photo les.
To enter Photo mode, select and conrm PHOTO in the Main menu.
Photo Controls
Upon entering Photo mode, you will see a list of all photos that located on your
player.
Touch or to move the selection up or down.
Touch to conrm and display a selection.
While a photo is displayed:
Touch to display the next photo in the list.
Touch to display the previous photo in the list.
Touch to return to the photo list.
•
•
•
•
•
•

20
Page 20 Coby Electronics Corporation
VIDEO MODE
Enter Video mode to play your MTV video les.
To enter Video mode, select and conrm VIDEO in the Main menu.
ThisCobyplayersupportsplaybackofMTVles.Pleasesee
the Video Conversion section for details on how to create
videolesthatarecompatiblewithyourplayer.
Video Controls
Upon entering Video mode, you will see a list of all videos that located on your
player.
Touch or to move the selection up or down.
Touch to conrm or play a selection.
While a video is playing:
Touch to pause playback and display the elapsed time, total time, cur-
rent track and total tracks. Press again to resume playback.
Touch to play the next track.
Touch to play the previous track.
Touch and hold to fast forward through the track.
Touch and hold to reverse through the track.
Touch to decrease the volume level.
Touch to increase the volume level.
To return to the video list, press .
•
•
•
•
•
•
•
•
•
•

www.cobyusa.com Page 21
FM RADIO MODE
Enter FM Radio Mode to listen the FM Radio broadcasts.
To enter FM Radio Mode, select and conrm FM Radio from the Main Menu.
Upon entering FM Radio mode, you can tune into stations manually (Normal) or
by using preset stations (Preset).
Touch to toggle between these Normal and Preset tuning modes.
Touch or to decrease or increase volume level.
Youmusthaveapairofheadphonesconnectedtothehead-
phonejacktoreceiveFMbroadcasts;yourplayerwillutilize
theheadphonecordasanantenna.
Normal (Manual Tuning)
The Normal mode allows you to manually scan and tune to all radio frequen-
cies.
Touch to increase the station frequency.
Touch to decrease the station frequency.
Preset (Preset Tuning)
Preset mode allows you to tune to your preset stations.
Touch to tune to the next preset station.
Touch to tune to the previous preset station.
Auto-Save Preset Stations
Scan for all stations in broadcast reception range and automatically save them
as Preset stations. This will overwrite all previously saved Preset stations.
Set the tuning mode to Normal.
Touch and hold . The player will automatically scan and store available
Preset stations.
•
•
•
•
•
•
•
•

22
Page 22 Coby Electronics Corporation
Smart Menu Option (Preset Actions)
The Smart Menu gives you quick access to your player’s option settings. To
access the Smart Menu, touch .
The Smart Menu options are: Del/Add Preset.
Add Preset (Manual)
Manually save the current station as a Preset station.
MakesuretheplayerisinNormaltuningmode.
Tune to the station you want to store and then touch to access the
Smart Menu.
Touch or to select “Add Preset”, and touch to conrm.
“Preset conrm Save” will appear on screen.
Touch to conrm and save.
Del Preset
Delete a Preset station.
MakesuretheplayerisinPresettuningmode.
Tune to a Preset station that you want to delete and then touch to ac-
cess the Smart Menu.
Touch or to select “Del Preset”, and touch to conrm.
“Preset conrm Delete” will appear on screen.
Touch to conrm and delete.
1.
2.
•
3.
1.
2.
•
3.
FM RADIO MODE

www.cobyusa.com Page 23
E-BOOK MODE
Enter E-BOOK mode to read TXT E-book les.
To enter E-BOOK mode, select and conrm E-BOOK from the Main Menu.
Upon entering E-BOOK mode, you will see a list of all text les that located on
your player.
Touch or to move the selection up or down.
Touch to conrm and play a selection.
While a text le is displayed:
Touch to skip backward one page; touch to skip forward one
page.
Touch to return to the E-BOOK le list.
•
•
•
•
•

www.cobyusa.com Page 25
SETTING MODE
Enter the Setting mode to set your player’s system options.
To enter Setting mode, select and conrm SETTING in the Main menu.
Upon entering Setting mode, you will have the following options: Power, Lan-
guage, Display, Sys Tools, Time, and USB Mode.
Touch or to select a setting and then press to conrm. Press to
return to a previous menu screen.
Power
This setting contains two options: Power Off and Sleep.
Power Off
Set the duration of time (in minutes) until the player turns off automatically. A
setting of “Off” will disable this power-saving feature.
Touch or to adjust the Power Off option.
Touch when you are nished to save.
Touch to return to the Setting menu without saving.
Sleep
Set the duration of time (in minutes) that your player will shut off after the preset
time is due. A setting of “off” will disable this power-saving feature.
Touch or to adjust the Sleep option.
Touch when you are nished to save.
Touch to return to the Setting menu without saving.
Language
Set the language that the menus appear in. The language options are: CHI
(Trad), CHI(Simp), English, German, Spanish, Portuguese and French.
Touch or to select a Language option.
Touch when you are nished to save.
Touch to return to the Setting menu without saving.
•
•
•
•
•
•
•
•
•

26
Page 26 Coby Electronics Corporation
Display
Set the Brightness and Backlight.
Brightness
Set the Brightness (Contrast) level of the display.
Touch or to adjust the Brightness level.
Touch when you are nished to save.
Touch to return to the Display menu without saving.
Backlight
Set the duration of time until the LCD screen turns off when your player is idle.
The options are: 1s, 2s, 3s, 4s, 5s, 6s, 7s, 8s, 9s and On. A setting of “On” will
disable this power-saving feature.
Touch or to adjust the Screen option.
Touch when you are nished to save.
Touch to return to the Display menu without saving.
Sys Tools
There are 3 options in Sys Tools setting: Format, Reset and Sys Info.
Format
It may become necessary to format your player if data or les become corrupt.
You have two types to format your player: Quick and Complete. Quick format-
ting will take up less time than Complete formatting.
Formattingwilldestroyallthedataonyourplayerpermanently!
Makesuretobackupyourdatabeforeformattingtheplayer.
•
•
•
•
•
•
SETTING MODE

www.cobyusa.com Page 27
SETTING MODE
Touch or to select a Format option and touch to conrm.
Touch or to select “Yes” or “No” and touch to conrm and for-
mat your player.
Touch to return to the Sys Tools menu without formatting.
Reset
Return all of your player’s internal options to their factory-default settings.
Touch or to select “Yes” or “No” and then touch to conrm.
Touch to return to the Sys Tools menu without saving.
Sys Info
View the Firmware, date, and memory information of your player.
Time
Set the internal clock of your player.
Touch or to select eld to adjust.
The clock elds (from left to right) are Hour, Minutes, Seconds, and
AM/PM.
Touch or to adjust the value of the selected eld.
Touch or when you are nished to save.
USB Mode
Set the USB Mode to MSC or MTP that when you connect your player to a
computer.
MSC. The player will connect as a USB-MSC device. This setting enables
the widest compatibility with all systems, and allows the player to be used
as a removable storage device.
MTP: The player will connect as a USB-MTP device. This setting enables
advanced synchronization features if you are using Windows Media Player
10 (WMP10) or newer.
•
•
•
•
•
•
•
•
•
•
•

28
Page 28 Coby Electronics Corporation
To set the USB mode of your player:
Touch or to select MSC mode or MTP mode.
Touch when you are nished to save.
Touch to return to the Setting menu without saving.
•
•
•
SETTING MODE

www.cobyusa.com Page 29
Connect the Coby player to a computer with the USB 2.0 cable provided to:
Transfer les to and from your player
Perform basic le management functions.
USB Driver Installation (Required for Windows 98 SE Only)
It is not necessary to install the USB driver if your computer is running Microsoft
Windows ME/2000/XP or newer, or Macintosh OS X. Computers running these
operating systems will recognize your player automatically when connected.
If your computer is running Windows 98 SE:
Insert the Installation CD into your computer’s CD or DVD drive. Make
sure to place the mini-CD in the center, recessed well of the drive tray.
Navigate to MY COMPUTER and double-click on the CD/DVD drive icon
(usually “D:”).
Double-click on the folder “Win98 USB Drivers” to open it.
Find out and double-click on the SETUP icon (Win98Driver.EXE) to start
the USB driver installation program.
Follow the on-screen instructions to complete the installation and then
restart your computer.
Mini-CDsshouldonlybeusedinnormaltray-loadingCD/DVD
drives.Mini-CDsmaybeusedinslot-loadingdriveswiththe
properadapter;pleasecontactyourcomputerordrivemanu-
facturerformoreinformation.
•
•
1.
2.
3.
4.
5.
USB CONNECTIONS

30
Page 30 Coby Electronics Corporation
USB CONNECTIONS
Connecting to a Computer
Connect the player to your computer
with the supplied USB cable. Upon
connection:
Your computer will automatically
recognize the player as an MTP
Device. An icon representing your
player will appear under “Audio Devices” when you open “My Computer”.
It may take Windows several minutes to recognize and set up the device
the rst time it is connected depending on your hardware conguration.
For more information and support regarding music transfer
andsynchronizewithWindowsMediaPlayer(WMP),please
see the help section including wiht WMP (Click Help >
SynchronizingContenttoDevices).
Transferring Files
The USB 2.0 Hi-Speed connection makes it easy to transfer music, video, pho-
to, and text les (or any other data) quickly between the player and your com-
puter. Simply use the player as you would a oppy disk using basic operating
system commands.
If you need further assistance with transferring les, please refer to your operat-
ing system’s instruction manual or on-screen help. If you are using media man-
agement software such as iTunes, Winamp, or Windows Media Player, please
refer to their documentation for support.
Do not disconnect or otherwise interrupt the player during
transmission-thiscoulddamageorcorrupttheplayer’srm-
wareoryourles.Iftheplayerisaccidentallydisconnected
andisnotworkingproperly,resetyourplayer(seethePower-
ingYourPlayersectionfordetails).
•
•
USB Port
USB Port
Computer

www.cobyusa.com Page 31
Microsoft Windows
Double-click the “My Computer” icon on your desktop and then double-
click the icon that represents your Coby player (e.g., MP-C7095) (MTP
Multimedia Player).
Your player contains two folders: Data and Media.
Drag your media les to the Media folder (e.g., MP3, WMA les).
Drag all other types of les to the Data folder for storage. Data les
are only visible from a computer; these les will not be available from
within the player itself.
Macintosh OS X
Open a nder window. Located the les you would like to transfer from
your computer. Select the les/folders with the mouse and press APPLE-
C (copy) on the keyboard.
Click on the Removable Disk icon located on the left side of the nder
window. The computer will display all les and folders currently stored in
the player.
Press APPLE-V (paste) on the keyboard to transfer the les you selected
in Step 1 to the player.
1.
2.
•
•
1.
2.
3.
USB CONNECTIONS

32
Page 32 Coby Electronics Corporation
Disconnecting from a Computer
Disconnect your player as instructed below to detect data loss or le/rmware
corruption.
Microsoft Windows
Double-click the green arrow in the taskbar
located on the lower-right side of the computer
screen (Safely Remove Hardware).
Safely Remove Hardware:
Select “USB Mass Storage Device” from
the list that appears and then click on
“Stop”.
Stop a Hardware Device: Select “USB
Mass Storage Device” from the list that
appears and then click on “OK”.
When the “Safe to Remove Hardware”
window appears, click the OK button and disconnect the USB cable from
the player and your computer.
Macintosh OS X
On the left side of the Finder Window, identify the
appropriate Removable Disk icon.
Click on the “Eject” arrow on the right of the Remov-
able Disk icon.
Disconnect the USB cable from the player and your computer.
1.
2.
3.
1.
2.
3.
USB CONNECTIONS

www.cobyusa.com Page 33
Use the video conversion software utility included on the Installation CD to cre-
ate video les that are suitable for playback on your Coby MP3 player.
Your player supports MTV les with the following specica-
tions:
160 x 128 resolution at 15 frames per second (fps)
Fordetailedinstructionsandinformationaboutthevideocon-
versionsoftware,pleaserefertothemanualincludedonthe
installationCD.
Note:
The video conversion software is included for your convenience and is com-
patible with Microsoft Windows operating systems only. There are many other
video conversion utilities available for download or purchase on the internet.
Because theprogramislicensedfreeof charge,there is nowarranty for the
program, to the extent permitted by applicable law. Except when otherwise
statedinwritingthecopyrightholdersand/orotherpartiesprovidetheprogram
“asis”withoutwarrantyofanykind,eitherexpressedorimplied,including,but
notlimitedto,theimpliedwarrantiesofmerchantabilityandtnessforaparticu-
larpurpose.Theentireriskastothequalityandperformanceoftheprogram
iswithyou.Shouldtheprogramprovedefective,youassumethecostofall
necessaryservicing,repairorcorrection.
Innoeventunlessrequiredbyapplicablelaworagreedto inwriting will any
copyrightholder,oranyotherpartywhomaymodifyand/orredistributethepro-
gramaspermittedabove,beliabletoyoufordamages,includinganygeneral,
special,incidentalorconsequentialdamagesarisingoutoftheuseorinability
tousetheprogram(includingbutnotlimitedtolossofdataordatabeingren-
deredinaccurateorlossessustainedbyyouorthirdpartiesorafailureofthe
programtooperatewithanyotherprograms),evenifsuchholderorotherparty
hasbeenadvisedofthepossibilityofsuchdamages.
VIDEO CONVERSION

34
Page 34 Coby Electronics Corporation
System Requirements
OS Support: Microsoft Vista, XP, 2K, Me, 98
Memory (RAM): 50MB
Free HD Space: 100MB
CPU: Pentium class equivalent or better
Video: Adapter capable of 24-bit color for QuickTime sup-
port
Sound: DirectX 7-compatible sound card supporting 2 au-
dio channels (stereo) sampled at 16-bit/44.1Khz or
better
DirectX: DirectX 9.0
QuickTime: QuickTime 7.0
WMP: Windows Media Player 9 or better
Installation
Copy the folder “MTV Video Converter” to your computer.
To start the software, double-click the le “VideoConvert.exe”.
1.
2.
VIDEO CONVERSION

www.cobyusa.com Page 35
Video Converter at a Glance
1
5
6
2
3
4
Seek Bar for preview and time
selection.
Starting and Ending time-point
selection.
Select the video le to convert.
Select the size of the converted
video (ensure that this is set to
160X128).
1.
2.
3.
4.
Video preview window.
Select the destination folder of
the converted video le.
5.
6.
VIDEO CONVERSION

36
Page 36 Coby Electronics Corporation
VIDEO CONVERSION
Converting Video
Start the Video Conversion program.
Select the source video le to convert. The source le must be one of the
following video types: AVI (*.avi), WMV (*.wmv, *.asf), MPEG-1 (*.mpg),
QuickTime (*.mov, *.qt), MPEG-2 (*.vob), RealMedia (*.rm, *.rmvb), MPEG-
4, or 3GP (*.3gp).
DirectX 9.0, Windows Media Player 9.0, and other codecs
mustbeinstalledtosupportallmediatypes.
Select the destination folder that the converted le will be saved to.
Ensure that the Output Frame Size is set to “96X64”.
Click “Start Conversion” to start the conversion process.
When the conversion is complete, copy the converted les to your player
for playback.
1.
2.
3.
4.
5.
6.

www.cobyusa.com Page 37
Windows Media Player 10 (WMP10)
You can use Windows Media Player 10 (WMP10) and a USB-MTP connection
to manage your music media library with Microsoft Windows XP or newer.
Music File Transfers
To transfer les using WMP10:
Run Window Media Player 10
Connect your player to the computer. A “Device Setup” window will ap-
pear.
In the ‘Device Setup” window, choose “Synchronize this device with this
library for this session only” and click “Finish”.
Select “Sync”. There are 2 ways to sync your les with your player:
Drag your songs, photos, or converted video les to the sync
list on the left hand side. Click “Start Sync” to start transferring the
selected les.
1.
2.
3.
4.
•
WINDOWS MEDIA PLAYER
Produkt Specifikationer
Mærke: | Coby |
Kategori: | Mp3-afspiller |
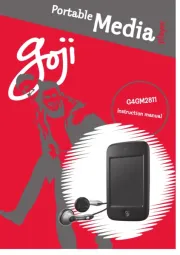
Model: | MP-C7085 |
Har du brug for hjælp?
Hvis du har brug for hjælp til Coby MP-C7085 stil et spørgsmål nedenfor, og andre brugere vil svare dig
Mp3-afspiller Coby Manualer
29 August 2024
29 August 2024
29 August 2024
29 August 2024
29 August 2024
29 August 2024
29 August 2024
29 August 2024
29 August 2024
29 August 2024
Mp3-afspiller Manualer
- Roadstar
- Olympus
- OneConcept
- Thomson
- Verbatim
- Yarvik
- Sitecom
- Sytech
- Jobo
- TakeMS
- Woxter
- Emtec
- Philips
- Sandisk
- Zipy
Nyeste Mp3-afspiller Manualer
18 Juni 2025
17 Juni 2025
17 Juni 2025
17 Juni 2025
17 Juni 2025
17 Juni 2025
17 Juni 2025
17 Juni 2025
17 Juni 2025
17 Juni 2025