For your safety and continued enjoyment of this product,
always read the instruction book carefully before using.
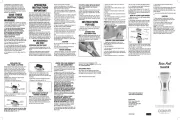
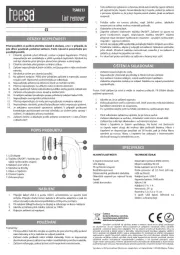
Congratulations on the purchase of your
new twin-foil wet/dry shaver for women.
For maximum satisfaction when using this
quality product, please take a minute to read
the following operating and care instructions.
Thank you for choosing Conair, the #1 brand in
personal care appliances.
1. Women whose skin is sensitive to cosmetics
or easily irritated by shaving, or who suffer from
a skin allergy, should test one section of the
leg or arm before using the shaver.
2. The foils are thin and precisely finished
pieces. Do not press hard against the
foils or drop foils. A warped or distorted
foil will produce poor shaving results.
Also, a damaged foil may cause skin
injury. A damaged foil should be
3. When cleaning, use cold or warm water.
Do not use hot water, seawater, or cleaners, as
they can cause damage to the waterproof seals.
4. Do not leave the entire unit submerged in
water for a long period of time.
5. To prevent possible damage to the foils and
the cutter, women who use underarm deodorant
must thoroughly clean and air-dry the foils and
cutter after each use. Failure to do this may
result in corrosion of the inner blades.
6. This appliance is not a toy. Keep away from
This shaver has been engineered to give you a
clean, close, smooth shave. It requires 2 AAA
batteries (not included). We recommend using
longer lasting alkaline batteries in your shaver.
If you are not going to use your shaver for a
long period of time or if the batteries are dead,
remove or replace the batteries from the unit.
Use your shaver exclusively for three to four
weeks so that your legs and underarms adjust
to the shaver. At first, your shave might not be
as close as you expect. However, this is normal.
It takes time for your skin and hair to adjust to
the new procedure and for you to learn how to
effectively use the shaver.
Caution: Most blade users will push too hard
and therefore not get a satisfactory shave. You
must press gently so the hair can get into the
holes of the foils. Pressing too hard makes the
hair flat. Please be patient; use your shaver 10
to 12 times before you judge its performance.
1. Remove the battery compartment cover by
pushing in and down toward the bottom of the
2. Align the 2 AAA batteries with the positive
and negative positions indicated inside the
battery compartment. Being careful not to bend
the clips, insert the negative end of each battery
first so it will slip easily into place.
3. Return the battery cover to its original
position by pushing it in and up until you hear a
small click as it locks into place.
4. To use your shaver, remove the transparent
cover and push ON/OFF switch upwards to the
5. After you finish using your shaver, push down
on the ON/OFF switch to turn the shaver off.
6. Ensure the batteries are installed correctly
with regard to polarity (+ and -).
7. Remove the batteries if they are no longer
functional or if the shaver is left unused for an
8. Clean the battery contacts and also those of
the device prior to battery installation.
9. Remove used batteries promptly.
10. Always purchase the correct size and grade
of battery most suitable for the intended use.
11. Replace all batteries of a set at the same
12. Do not mix old and new batteries. Do
not mix alkaline, standard (carbon-zinc), or
rechargeable (nickel cadmium or nickel metal
Do not immerse any part of the unit in water or
The outer foils and cutters are delicate and
must be handled very carefully.
1. Before wet shaving, you may wish to prepare
your legs and underarms with shaving cream
or soap. If a soapy lather is applied to the skin,
the shaver will glide smoothly over the skin and
clean away oil residue, while at the same time
removing hair. Caution: Do not use shaving
gels, as these products can clog your
2. When dry shaving, be certain that your skin
is clean. If you have sensitive skin, you may
want to apply talcum powder before and after
3. Clean your shaver after each use. This will
ensure the best performance. (Please refer to
“How to Clean Your Shaver” section for further
1. Slide the main switch up to the ON position.
2. After each shave, switch the unit off and
NOTE: Pushing the shaver against the skin too
hard will not allow the hairs to enter the foils
and be cut. Experience will help you determine
just the right pressure to use to maximize
1. Prepare your legs for wet or dry shaving.
3. Shave with smooth, steady strokes up and
4. Keep the full shaving head in contact with
5. For best results, shave against the direction
6. The shaver also has a bikini pop-up trimmer
for your complete shaving needs.
7. When you finish shaving, turn the shaver off.
Important: After several uses, you will be able
to determine the optimum shaving method for
your legs and bikini area.
1. Prepare your underarms for wet or dry
shaving. (Be sure that your skin is clean and
3. Lift your arm until the skin under the arm
4. Use the trimmer portion first to remove any
long hair, stroking trimmer against the direction
5. Hold the shaver so that it is in full contact
with your skin, and shave with gentle strokes.
6. It is important to press lightly. Pressing too
hard may lead to skin irritation.
7. When finished shaving, turn the shaver off.
Important: After several uses, you will be able
to determine the optimum shaving method for
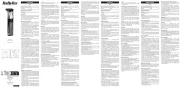
1. Make sure unit is in the OFF position before
2. Hold shaver head and lift up from the back,
then press foil frame release buttons on each
side and lift up (the cutter is now in view).
Be careful not to push on the foils. They are
delicate and can easily be damaged. (FIG.1)
3. Rinse the shaver cutter and foil frame under
running water or in a sink. Do not use hot water.
Use only warm or cold water.
4. After rinsing, allow the foil frame and cutters to
air-dry before closing foil frame and shaver head.
Replace shaver head back onto the shaver until
it clicks into place. Wipe the surface of the main
unit with a dry towel. Do not dry the foil area. Let
the shaving head air-dry.
5. The cutters can also be cleaned with a
6. If the body of the shaver becomes dirty, wipe
off with a damp cloth and mild detergent or
soap. Never use thinners, other solvents, or any
7. Once dried, carefully place the protective cap
1. When shaking off excess water, hold the
main unit firmly to prevent releasing the head
assembly or dropping the unit.
2. Do not use a dryer or heater to dry the
shaver. This may result in malfunction or
NOTE: At the end of the batteries useful life,
under various state and local laws, it may be
illegal to dispose of these batteries into the
municipal waste stream. Check with your local
solid waste officials for details on recycling
options or proper disposal in your area.
Replace the foil frame when you find you have
to push harder on the shaver to get a close
shave, or if you have to go over your leg area
more often to get a smooth result. It is also
time to replace the foils if you experience skin
irritation. Replacement time will depend on how
often you use your shaver and how quickly your
Caution: Never replace the cutters without
replacing the foils as well.
1. Remove the foil frame (see FIG. 2).
2. Push one side of the inner blade to unlock it
and take out (see FIG. 3).
Caution: Make sure you do not lose the little
spring under the cutter, as it will be needed
for the new cutter (see FIG. 4).
3. Hold the new inner blades firmly on the
sides and guide them gently into the inner
blade mount, one side at a time, until they lock
4. Press firmly until the unit snaps into place.
5. Replace the foil frame (see FIG. 5).
Note: We do not recommend replacing the
trimmer assembly yourself. Take or send the
shaver to a Conair Service Center, because this
requires a special tool for replacement. For
most users, these trimmers will stay sharp for
as long as you own your shaver.
LIMITED TWO-YEAR WARRANTY
Conair will repair or replace (at our option) your
unit free of charge for 24 months from the date
of purchase if the appliance is defective in work-
To obtain service under this warranty, return
the defective product to the service center listed
on back, together with your purchase receipt.
California residents need only provide proof of
purchase and should call 1-800-3-CONAIR for
shipping instructions. In the absence of a pur-
chase receipt, the warranty period shall be 24
months from the date of manufacture.
ANY IMPLIED WARRANTIES, OBLIGATIONS,
OR LIABILITIES, INCLUDING BUT NOT
LIMITED TO THE IMPLIED WARRANTY OF
MERCHANTABILITY AND FITNESS FOR A
PARTICULAR PURPOSE, SHALL BE LIMITED IN
DURATION TO THE 24-MONTH DURATION OF
THIS WRITTEN, LIMITED WARRANTY. Some
states do not allow limitations on how long an
implied warranty lasts, so the above limitations
IN NO EVENT SHALL CONAIR BE LIABLE
FOR ANY SPECIAL, INCIDENTAL, OR
CONSEQUENTIAL DAMAGES FOR BREACH OF
THIS OR ANY OTHER WARRANTY, EXPRESS
OR IMPLIED, WHATSOEVER. Some states do
not allow the exclusion or limitation of special,
incidental, or consequential damages, so the
above limitation may not apply to you.
This warranty gives you specific legal rights, and
you may also have other rights, which vary from
For shaving tips and information on Conair
appliances, call or visit us on the 1-800-3-CONAIR
This shaver uses the following replacement
parts, which can be ordered directly from Conair
by calling customer service at 1-800-3-CONAIR.
CSP21 Replacement Foil and Cutter
Please register this product at
www.conair.com/registration
7475 North Glen Harbor Blvd.