Cotech E0139ST2 Manual
Cotech
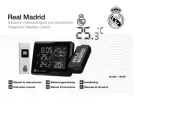
Termometer
E0139ST2

| Mærke: | Cotech |
| Kategori: | Termometer |
| Model: | E0139ST2 |
Har du brug for hjælp?
Hvis du har brug for hjælp til Cotech E0139ST2 stil et spørgsmål nedenfor, og andre brugere vil svare dig
Termometer Cotech Manualer

10 August 2024

1 August 2024

22 Februar 2023
Termometer Manualer
- SOENS
- Medicinalis
- Emerio
- FIAP
- Kienzle
- Auriol
- Fysic
- Elta
- Joy-It
- A&D Medical
- Arendo
- Salva Tec
- Bioland
- Thomson
- Inventum
Nyeste Termometer Manualer

7 December 2025

26 November 2025

23 November 2025
15 November 2025
14 November 2025
13 November 2025
11 November 2025
11 November 2025

10 November 2025
9 November 2025