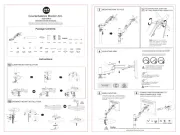
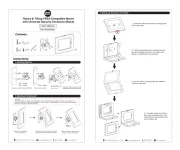
CTA Digital ADD-MEDARM Manual


Læs gratis den danske manual til CTA Digital ADD-MEDARM (2 sider) i kategorien Vægophæng. Denne vejledning er vurderet som hjælpsom af 11 personer og har en gennemsnitlig bedømmelse på 4.0 stjerner ud af 6 anmeldelser. Har du et spørgsmål om CTA Digital ADD-MEDARM, eller vil du spørge andre brugere om produktet?

Side 1/2
Anti-Microbial
Medical VESA Arm Wall Mount
ADD-MEDARM
INSTRUCTION - MANUAL
CONTENTS:
INSTALLATION:
888-733-4448
1A. Place the canopy (component A) of the medical arm to the desired
location on the wall. Using a screwdriver (not included), and compo-
nents P, Q, and R - set up the canopy to the wall until securely
tightened. Place endcap (component J) on, after everything has been
securely tightened for a clean finish.
1. Setting up Mounting Canopy to Wall
ABC
x1 x1 x1
x1
DE
x1
F
x1
G
H
x1
x1
I
x1
J
x2
K
x4
L
x6
M N
x1x1 x2
O P
x2
QRST
x2 x1 x1
P
J
x2
Q
R
**Screwdriver shown for
example and NOT included
2. Assembling the Arm to the Canopy
D
H
G
F
E
I
M
M
2A. Insert medical arm (component B) into the
wall canopy with the plastic washer (component
F) as shown.
2B. Using the combination of components E, D,
H, G and I, assemble the arm and rotate in
screw (component I) with provided tool
(component M) until securely tightened.
B
888-733-4448
3. Assembling the VESA Plate to a VESA Compatible Item
K
**Screwdriver shown for
example and NOT included
3A. Align the VESA holes of the VESA plate to the
VESA compatible item as shown. Only VESA hole
configurations are 75x75mm or 100x100mm are
possible.
3B. Using a screwdriver (not included), rotate in (4)
screws (component K) from behind of the VESA
plate (component C - shown to the left) until
securely tightened.
C
**Monitor shown for
example and NOT included
4. Inserting VESA Plate attatched to VESA Compatible Item into the arm
N
4A. Take your VESA Plate (component C) attached
with the VESA compatible item and insert and
connect the female to male components as shown
to the right.
4B. Using the provided allen key tool (component
N), tighten the pieces together at the integral piece
shown to the right until securely fastened.
C
5. Setting up Cable Routing / Cable Management
(TOP VIEW) (FRONT ANGLE VIEW)
S
TL
5A. Locate the holes in the medical arm to understand the pathing a little bit from
right next to VESA plate (component C), all the way to the canopy (component A)
5B. Plug one end of the cable into your device and fish the wire underneath the
arms as shown while putting on the arm caps (component T and S) by rotating in
screws (component L) until securely fastened. Plug other end of cable into outlet or
desired power source as required.
**Monitor shown for
example and NOT included
**Monitor shown for
example and NOT included
***Loading: Approximately 1-3 KG
Adjusting Tilt Angles
Using the provided tool (component M), tighten and
loosen the joint behind the VESA plate (component C)
to adjust different angles and also set it in place once
desired angles has been found as shown


Produkt Specifikationer

Mærke: CTA Digital
Kategori: Vægophæng
Model: ADD-MEDARM
Bredde: 114.3 mm
Højde: 482.6 mm
Vægt: 1615 g
Antal pr. pakke: 1 stk
Brugervejledning: Ja
Produktfarve: Hvid
Produkttype: Monteringsarm til fladpanel
Panel montering grænseflade: 75 x 75, 100 x 100 mm
Markedspositionering: Medicinsk
Husmateriale: Metal
Monteringstype: Væg
Skruer inkluderet: Ja
Antal understøttede skærme: 1
Justerbar dybde: Ja

Har du brug for hjælp?

Hvis du har brug for hjælp til CTA Digital ADD-MEDARM stil et spørgsmål nedenfor, og andre brugere vil svare dig


Vægophæng CTA Digital Manualer
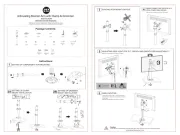
Vægophæng Manualer

Nyeste Vægophæng Manualer