Ditek DTK-VM12RM Manual
Ditek
Netværkskort/adapter
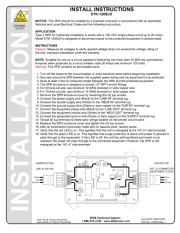
DTK-VM12RM

| Mærke: | Ditek |
| Kategori: | Netværkskort/adapter |
| Model: | DTK-VM12RM |
Har du brug for hjælp?
Hvis du har brug for hjælp til Ditek DTK-VM12RM stil et spørgsmål nedenfor, og andre brugere vil svare dig
Netværkskort/adapter Ditek Manualer
28 September 2025

30 Januar 2025

30 Januar 2025

30 Januar 2025

30 Januar 2025
Netværkskort/adapter Manualer
- Ernitec
- Cisco
- British Telecom
- NEC
- Panamax
- SMK-Link
- Altronix
- Microchip
- Trust
- Allied Telesis
- Mercusys
- Vivolink
- Televés
- Hama
- Asustor
Nyeste Netværkskort/adapter Manualer

18 December 2025

17 December 2025

7 December 2025

29 November 2025

29 November 2025

28 November 2025

28 November 2025

28 November 2025

28 November 2025

27 November 2025