EasyMaxx 15642 Manual


Læs gratis den danske manual til EasyMaxx 15642 (6 sider) i kategorien Ikke kategoriseret. Denne vejledning er vurderet som hjælpsom af 3 personer og har en gennemsnitlig bedømmelse på 4.6 stjerner ud af 2 anmeldelser. Har du et spørgsmål om EasyMaxx 15642, eller vil du spørge andre brugere om produktet?

Side 1/6
DE
Montageanleitung
EN
Assembly Instructions
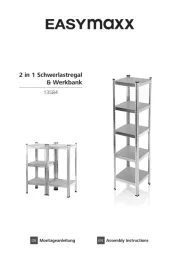
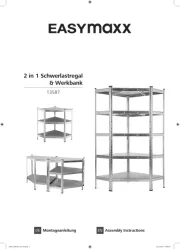
2 in 1 Schwerlastregal
& Werkbank
11768 / 13580 / 15642
11768_13580_15642_DE-EN_A4_V5.1.indd 111768_13580_15642_DE-EN_A4_V5.1.indd 1 17.12.2024 16:02:4317.12.2024 16:02:43
2
Sehr geehrte Kundin,
sehr geehrter Kunde,
Lesen Sie diese Montageanleitung sorgfältig durch.
Hersteller und Importeur übernehmen keine Haftung,
wenn die Angaben in dieser Montage anleitung nicht
beachtet werden. Sollten Sie Fragen zum Produkt
haben, wenden Sie sich an den Kundenservice über
unsere Web site: www.ds-group.de/kundenservice
BESTIMMUNGSGEMÄßER
GEBRAUCH
Dieses Produkt ist zur Verwendung als Lager-
regal oder Werkbank mit max. 175 kg Tragkraft
pro Ebene bestimmt.
Das Produkt ist nur für den privaten Gebrauch,
nicht für eine gewerbliche Nutzung bestimmt.
Das Produkt nur für den angegebenen Zweck
und nur wie in der Montage anleitung beschrie-
ben nutzen. Jede weitere Verwendung gilt als
bestimmungswidrig. Falsche Benutzung kann
zu schweren Verletzungen führen.
SICHERHEITSHINWEISE
Junge Kinder beaufsichtigen, um sicherzustellen,
dass sie nicht an dem Produkt hochklettern oder
sich an das Produkt hängen. Verletzungsgefahr!
Vorsicht im Umgang mit den Einzel teilen des
Produktes. Verletzungs gefahr durch scharfe
Kanten.
Keine Veränderungen am Produkt vornehmen.
Nur Original-Zubehör teile des Herstellers
verwenden.
Vor dem Beladen des Produktes sicher stellen,
dass es korrekt zusammen gebaut und sicher
aufgestellt wurde.
Möglichst gleichmäßig
beladen. Schwere Gegenstände weiter unten
platzieren. Die Fächer nicht überladen. Nur im
unbeladenen Zustand auf- / abbauen.
Keine ätzenden oder scheuernden Reinigungs-
mittel verwenden! Bei Bedarf abstauben oder
mit einem feuchten Tuch reinigen, danach
trockenwischen.
Das Produkt schützen vor Feuer, lang anhalten-
der Feuchtigkeit und Stößen.
MONTAGE
BEACHTEN!
Auf ausreichend Platz für die Montage achten.
Ggf. eine Unterlage verwenden, um das
Produkt/ empfindliche Böden vor Kratzern
zuschützen.
Beim Zusammenbau keine Gewalt anwenden.
Das Produkt auf einem waagerechten, stabilen
und ebenen Unter grund aufstellen und mit ge-
eignetem Befestigungsmaterial an einer Wand
befestigen. Bei Unsicherheit im Fachhandel
beraten lassen.
Nur in trockenen Innenräumen
aufstellen.
Vor dem Bohren sicherstellen, dass hinter der
beabsichtigten Bohrstelle keine Rohre oder
Stromleitungen verlaufen.
Montagewerkzeuge sind nicht im Lieferum-
fang enthalten.
Den Lieferumfang (BildA) auf Vollständigkeit
und Transportschäden überprüfen. Bei Schäden
nicht verwenden, sondern den Kundenservice
kontaktieren.
Eventuelle Folien, Aufkleber oder Transport-
schutz entfernen.
Aufbau-Varianten:
Ein Regal (Höhe: ca. 180 cm)
Zwei Regale / eine Werkbank (Höhe: ca. 90 cm)
Alle Schritte der Montage sind auf den Bildern C – I
abgebildet. Dabei folgende Hinweise beachten:
Den obersten und untersten Schlitz je
Winkelprofil(1) für die Schutzkappen(6) bzw.
Verbinder(7) freilassen.
Beim Zusammenbau als ein hohes Regal
werden die zwei kleinen Regale mit den Ver-
bindern(7) zusammengesteckt (Bild E).
Die Verbinder werden bei der Aufbau-Variante
als zwei Einzelregale nicht benötigt.
PRODUKTDATEN
Artikel nummer: 11768, 13580, 15642
Modell nummer: JHK-15822
Maße (H/B/T): ca. 180 x 90 x 40 cm oder
zweimal 90 x 90 x 40 cm
Gewicht: ca. 10,2 kg
Beladung: max. 175 kg pro Ebene
ENTSORGUNG
Das Verpackungsmaterial umweltgerecht
entsorgen und der Wertstoffsammlung
zuführen. Auch das Produkt umweltge-
recht entsorgen.
Die Abfallvermeidung leistet einen noch wert-
volleren Beitrag zum Umweltschutz. Sofern
möglich, ist daher neben einer weiteren eige-
nen Nutzung oder Reparatur auch die Abgabe
an Zweitnutzer eine ökologisch wertvolle
Alternative zur Entsorgung.
Alle Rechte vorbehalten.
Dear Customer,
Please read through these assembly instructions
carefully. The manufacturer and importer do not
accept any liability if the information in these
assembly instructions is not complied with. If you
have any questions about the product, please
contact the customer service department via our
website: www.ds-group.de/kundenservice
INTENDED USE
This product is intended to be used as
storage shelving or a workbench with a max.
load-bearing capacity of 175 kg on each level.
The product is for personal use only and is not
intended for commercial applications.
Use the product only for the specified purpose
and as described in the assembly instructions.
Any other use is deemed to be improper. Incor-
rect use may lead to serious injuries.
SAFETY NOTICES
Supervise young children to ensure that they
do not climb up on the product or hang on the
product. Danger of injury!
Be careful when handling the individual parts
of the product. Danger of injury due to sharp
edges.
Do not make any modifications to the product.
Use only original accessories from the manu-
facturer.
Before you load the product, ensure that it has
been assembled correctly and set up safely.
Load
the product as evenly as possible. Place heavy
objects nearer the bottom. Do not overload
the levels. Only assemble/disassemble when
unloaded.
Do not use any corrosive or abrasive cleaning
agents! Dust or clean with a damp cloth if
necessary, then wipe dry.
Protect the product from flames, persistent
moisture and impacts.
ASSEMBLY
PLEASE NOTE!
Make sure there is sucient space for assembly
and if necessary use a mat to protect the prod-
uct or delicate floors from being scratched.
Do not use any force during assembly.
Place the product on a horizontal, stable and
flat surface and fix it to a wall using suitable
fixings. If unsure, seek advice from a specialist
stockist. Only set up in dry indoor areas.
Before drilling, ensure that there are no pipes
or power cables behind the intended drilling
point.
Assembly tools are not supplied.
Check the items supplied (PictureA) for
completeness and transport damage. If you
find any damage, do not use the product but
contact our customer service department.
Remove any possible films, stickers or trans-
port protection.
Assembly variants:
One shelf (height: approx. 180 cm)
Two shelves / one workbench
(height: approx. 90 cm)
All the assembly steps are shown in pictures C – I.
Observe the following notices:
Leave the top and bottom slots of each angled
profile(1) free for the protective caps(6) or
connectors(7).
For assembly as a tall shelf, the two small
shelves are plugged together with the connec-
tors (7) (Picture E).
The connectors are not required for the version
in which the product is set up as two individual
shelves.
PRODUCT DATA
Article number: 11768, 13580, 15642
Model number: JHK-15822
Dimensions (H/W/D): approx. 180 x 90 x 40 cm or
two lots of 90 x 90 x 40 cm
Weight: approx. 10.2 kg
Load: max. 175 kg per level
DISPOSAL
Dispose of the packaging material in an
environmentally friendly manner so that it
can be recycled. Dispose of the product in
an environmentally friendly manner as well.
Waste prevention makes an even more valua-
ble contribution to protecting the environment.
This means if possible, as well as continuing to
use or repair a product yourself, passing it on
to another user also represents an ecologically
beneficial alternative to disposal.
All rights reserved.
DE
EN
11768_13580_15642_DE-EN_A4_V5.1.indd 211768_13580_15642_DE-EN_A4_V5.1.indd 2 17.12.2024 16:02:4317.12.2024 16:02:43


Produkt Specifikationer

Mærke: EasyMaxx
Kategori: Ikke kategoriseret
Model: 15642

Har du brug for hjælp?

Hvis du har brug for hjælp til EasyMaxx 15642 stil et spørgsmål nedenfor, og andre brugere vil svare dig


Ikke kategoriseret EasyMaxx Manualer
EasyMaxx

EasyMaxx 00632 Manual

3 Oktober 2025
EasyMaxx

EasyMaxx 12803 Manual

3 Oktober 2025
EasyMaxx

EasyMaxx 01950 Manual

3 Oktober 2025
EasyMaxx

EasyMaxx 00629 Manual

3 Oktober 2025
EasyMaxx

EasyMaxx 15642 Manual

3 Oktober 2025
EasyMaxx

EasyMaxx 01949 Manual

3 Oktober 2025
EasyMaxx

EasyMaxx 16458 Manual

3 Oktober 2025
EasyMaxx

EasyMaxx 15666 Manual

30 September 2025
EasyMaxx

EasyMaxx 16411 Manual

29 September 2025
EasyMaxx

EasyMaxx 16410 Manual

29 September 2025

Ikke kategoriseret Manualer

Nyeste Ikke kategoriseret Manualer

Sony

Sony ODBK-201 Manual

3 Oktober 2025
Sony

Sony CCMC-SA10 Manual

3 Oktober 2025
Sony

Sony BKM-200M Manual

3 Oktober 2025
Sony

Sony BKM-FW32 Manual

3 Oktober 2025
Sony

Sony CFV-E30D Manual

3 Oktober 2025
GYS

GYS WF 51 Manual

3 Oktober 2025
GYS

GYS WF 20 Manual

3 Oktober 2025