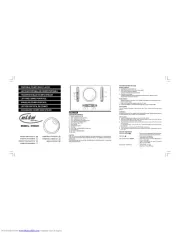
Elta 5786 Manual


Læs gratis den danske manual til Elta 5786 (22 sider) i kategorien CD-afspiller. Denne vejledning er vurderet som hjælpsom af 50 personer og har en gennemsnitlig bedømmelse på 3.6 stjerner ud af 25.5 anmeldelser. Har du et spørgsmål om Elta 5786, eller vil du spørge andre brugere om produktet?

Side 1/22
2
PREPARATIONS BEFORE USING
Battery Installation
1. Open Battery Compartment cover.
2. Insert 2 batteries (LR6, “AA” size, or equivalent)
in the correct polarity as indicated.
(Heavy duty batteries are recommended.)
3. Close the cover properly.
*Inorder to operate the player on batteries the optional AC/DC adaptor must be
disconnected from the DC 4.5V jack.
AC/DC Adaptor
*Before connection, make sure the AC voltage of the adaptor must correspond to your
local AC outlet voltage.
1. Plug the DC output of the adaptor to the DC 4.5V Jack.
2. Connect the adaptor (4.5V/600mA with polarity ) to a power outlet.
DISC PLAYING
This CD player is designed to play the 8cm and 12cm compact disc without using
adaptor.
Hold Switch
Set the HOLD button to “ON” position, all the buttons will be locked. Before operation, be sure
to set the switch to “OFF” position, for normal operation.
Getting Start
1. Insert the headphone/earphone plug to PHONE JACK.
2. Push the OPEN switch to right side, and then the door open, put a disc into the
CD compartment with label side upward.
3. Push the disc gently around the centre area until it clicks so that the disc fits
into the pivot.
(To remove the disc : Pick up the disc, holding the edge, while pressing the
pivot gently.)
4. Close the door and press the PLAY/PAUSE button once.
5. The Display will show the total number of tracks of the disc, then begin to play the
first track.
General Operation
Play/Pause Buttons Press once to start playback in the original order.
Press again to stop the disc play temporarily.
Stop Button Press once to stop playback.
Press again to turn off power
Skip / Search Buttons Press once to skip to next track or back to
previous track .
Press continuously to search forward
or backward .
Directory UP / ASP Button ASP ON/OFF (For CD)
Directory UP (For MP3 Disc).
1 2 3 4 5 6
7
8
9
10
12
13
11
ENGLISH
LOCATION OF CONTROLS
1. PROG / MODE BUTTON
2. SKIP / SEARCH DOWN BUTTON
3. SKIP / SEARCH UP BUTTON
4. PLAY / PAUSE BUTTON (POWER ON)
5. STOP BUTTON (POWER OFF)
6. DIR. UP / ASP BUTTON
7. OPEN KNOB
8. HEADPHONE JACK
9. VOLUME
10. B.B.S. SWITCH (BASS BOOST SWITCH)
11. HOLD SWITCH
12. BATTERY COMPARTMENT
13. DC JACK
1
CAUTION
USE OF CONTROLS OR ADJUSTMENTS OR PERFORMANCE OF PROCEDURES
OTHER THAN THOSE SPECIFIED HEREIN MAY RESULT IN HAZARDOUS RADIATION
EXPOSURE.
THIS SHOULD NOT BE ADJUSTED OR REPAIRED BY ANYONE EXCEPT QUALIFIED
SERVICE PERSONNEL.
MODEL : 5786CK
PORTABLE CD/MP3 DISC PLAYER
LECTEUR PORTABLE DE CD/MP3 PORTABLE
TRANSPORTABLER CD/MP3-SPIELER
LETTORE CD/MP3 PORTATILE
APARELHO CD/MP3 PORTATIL
LECTOR PORTÁTIL DE CD/MP3
DRAAGBARE CD/MP3 DISK SPELER
Downloaded from manuals search enginewww.Manualslib.com
DIGITAL ANTI-SHOCK OPERATION
The DIGITAL ANTI-SHOCK PROTECTION function uses semiconductor memory to prevent
the second from skipping when the unit is subjected to shocks and vibration during play.
When the PLAY/PAUSE button is pressed and the power turns on, the “ASPappear and the
digital Anti-Shock Protection function turns on automatically.
It will give approximately 40 seconds for CD and 120 seconds for MP3(128 Kbps bit rate) of
protection against interruption of sound output, if the player is subjected to shocks of more than
40 seconds duration, some interruption of sound output will occur, this is normal and to be
expected, the sound will resume once the player has stabilized from the shock.
To turn this function off, press the ASP/DIR UP button once, the ASP” indicator will disap-
pear, press again the “ASP” appear in the display.
COMPACT DISC CASSETTE ADAPTOR
The cassette adaptor allow you to use your portable CD player with your car stereo cassette
system or portable audio cassette system.
1. Place the cassette adaptor so the cord extends out from the cassette player when the cassette
is inserted. Insert the cassette adaptor in the same direction as you would insert an audio
cassette tape.
2. Insert the cassette adaptor stereo plug into the headphone jack of the CD player.
3. Turn on the cassette player. Press play on the cassette player
4. Press play on the CD player.
5. Set the volume of the CD player to a mid-level. Adjust the volume of the cassette player.
Notes
The cassette adaptor has the play head on one side only. If you insert the cassette an no sound
is heard, try turning the cassette over or pressing the reverse button of the cassette player to
— 5
change direction.
The car cassette adaptor may not be compatible with all makes and models of cassette
players.
DC cigarette lighter power adaptor
Use the DC cigarette lighter power adaptor to conserve battery life when using the CD player in
a car.
1. Plug the adaptor into the car cigarette lighter.
2. Plug the pin into the 4.5V DC jack of the unit
BBS (BASS BOOST SYSTEM) FUNCTION
Set the BBS switch to on position to enhance the bass effect.
LOW BATTERY ALERT
When the battery indicator appears on the display, please prepare for replace the new
batteries.
— 4
B. Intro Scan
During PLAY mode
Press the MODE/PROG button four times.
The INTRO indicator will appear in the display.
Press the PLAY button to play the first 10 seconds of each file on the disc.
NOTE - To cancel INTRO SCAN simply press the MODE/PROG button until the INTRO
indicator disappears.
C. Random Play
During PLAY mode
Press the MODE/PROG button five times.
The SHUF will appear in the display.
Press the PLAY button, all the files on a disc to be played in a random sequence and after
all files are played, system will stop automatically.
NOTE - To cancel RANDOM PLAY simply press the MODE/PROG button until the SHUF
display disappears.
PROGRAM PLAY (FOR CD )
1. In stop mode, press the MODE/PROG button to make program memory.
2. PGM 00 01” will be displayed, “00” means track number to memory and “01” means
program number.
3. Press or button to select the desired track.
4. Press the MODE/PROG button to enter the track into memory, the program numbers
which will be increment one step.
* The program no. “01” has become “02” on the display.
5. Repeat step 3 and 4 until memory is full. (64 tracks)
6. Press button to start the program play.
7. To stop the program play, press the STOP button.
8. For program play in step 7 ” , press the MODE/PROG button & button.
9. To check the program memory, in program play mode, press the or button.
10. To erase the program memory, open the door or turn off the power.
PROGRAM PLAY (FOR MP3 DISC)
1. In stop mode, press the MODE/PROG button to make program memory.
2. PGM 000 01 will be displayed. 000 means file number, “01means program number.
3. Press the DIR UP/ ASP button to select the desired directory, the display will become
00101 01 , 01 ” means directory number.
4. Press or button to select the desired file.
5. Press the MODE/PROG button to enter the directory and file into memory.
The program number which will be increment one step.
* The program no.“01” has become “02” on display.
6. Repeat step 3 to 5 until memory is full (64 files ).
7. Press button to start the program play.
8. To stop the program play, press the STOP button.
9. For program play in step 8 , press the MODE/PROG button & button.
10. To check the program memory, in program play mode, press the or button.
11. To erase the program memory, open the door or turn off the power .
* If you do not need to select directory, only select files, the above step 3 can pass.
— 3
Various Playing Modes
MODE/PROG Button There are 3 kind of function : (FOR CD)
A. Repeat Play
During PLAY mode
Press the MODE/PROG button once to play current track repeatedly.
The repeat indicator 1 will appear in the display.
During PLAY mode
Press the MODE/PROG button twice to play the entire disc repeatedly.
The repeat indicator ALL will appear in the display.
NOTE - To cancel REPEAT simply press the MODE/PROG button until the repeat indicator
disappears.
B. Intro Scan
DURING PLAY mode
Press the MODE/PROG button three times.
The INTRO indicator will appear in the display.
Press the PLAY button to play the first 10 seconds of each track on the disc.
NOTE - To cancel INTRO SCAN simply press the MODE/PROG button until the INTRO
indicator disappears.
C. Random Play
DURING PLAY mode
Press the MODE/PROG button four times.
The SHUF indicator will appear in the display.
Press the PLAY button, all tracks on the disc will be played in random sequence. After all
the tracks have been played the system will stop automatically.
NOTE - To cancel RANDOM PLAY simply press the MODE/PROG button until the SHUF
display indicator disappears.
MODE/PROG Button There are 3 kind of function : (FOR MP3 DISC)
A. Repeat Play
1. During PLAY mode
Press the MODE/PROG button once to play the current track repeatedly.
The repeat indicator 1 will appear in the display.
2. During PLAY mode
Press the MODE/PROG button twice to play the current DIRECTORY repeatedly.
The repeat indicator will appear in the display.
3. During PLAY mode
Press the MODE/PROG button three times to play the ENTIRE DISC repeatedly.
The repeat indicator ALL will appear in the display.
NOTE - To cancel REPEAT simply press the MODE/PROG button until the repeat indicator
disappears.
Downloaded from manuals search enginewww.Manualslib.com


Produkt Specifikationer

Mærke: Elta
Kategori: CD-afspiller
Model: 5786

Har du brug for hjælp?

Hvis du har brug for hjælp til Elta 5786 stil et spørgsmål nedenfor, og andre brugere vil svare dig


CD-afspiller Elta Manualer

Elta

Elta 5786 Manual

25 August 2024

CD-afspiller Manualer

Nyeste CD-afspiller Manualer

Curtis

Curtis CD150 Manual

18 Juni 2025
Curtis

Curtis CD185 Manual

17 Juni 2025
Curtis

Curtis CD360 Manual

17 Juni 2025
Curtis

Curtis CDMP366 Manual

17 Juni 2025
Curtis

Curtis CD266 Manual

17 Juni 2025
Curtis

Curtis CD256 Manual

17 Juni 2025
Curtis

Curtis CD156 Manual

17 Juni 2025
Curtis

Curtis CD084B Manual

17 Juni 2025
Curtis

Curtis CDMP454 Manual

17 Juni 2025
Curtis

Curtis CD290 Manual

17 Juni 2025