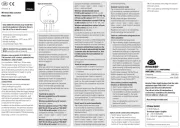
Socket universal dimmer switch
Universal dimmer switch, 300 W power
MOSFET. Automatic lamp detection. Only 0.7
watt standby loss. With adjustable minimum
With switching operation for children‘s
rooms and snooze function.
Encrypted wireless, bidirectional wireless
and repeater function are switchable.
Adapter for German fused safety socket.
With increased shock protection.
Supply and switching voltage 230 V.
Universal dimmer switch for lamps up to
300 W. Dimmable energy saving lamps ESL
and dimmable 230 V-LED lamps, dependent
on the lamps electronics.
Zero passage switching with soft ON and
soft OFF to protect lamps.
This dimmer switch is activated by wireless
pushbuttons FT and FFT, handheld wireless
transmitters FHS and FMH, and remote
The set brightness level is stored when
switched off (memory), but can be switched
In case of a power failure the switch
position and the brightness stage are
stored and may be switched on when the
power supply is restored.
Automatic electronic overload protection
and overtemperature switch-off.
Starting in production week 11/14, you can
teach in encrypted sensors. Bidirectional
wireless and/or a repeater function can be
Temperature at mounting location:
Storage temperature: -25°C up to +70°C.
annual average value <75%.
valid for devices from production week
11/14 (see bottom side of housing)
Every change in state and incoming central
command telegrams are then conrmed by
a wireless telegram.This wireless telegram
can be taught into other actuators, the soft-
ware GFVS, and universal displays FUA55.
The current dimming value is also displayed
in % in the software GFVS.
Up to 35 wireless pushbuttons are assigned
with the left button LRN, either as a univer-
sal pushbutton, direction push button or
It can be switched on and off manually with
The pushbuttons can be either taught-in
as direction pushbuttons or universal
As direction button 'switch on and dim up'
is on one side and 'switch off and dim down'
on the other side. A double-click on the
switch on side triggers the automatic dimming
A double-click on the switch off side
triggers the snooze function. The children‘s
room function is triggered on the switch on
side. As a universal push button the direction
change is made by briey releasing the
Central control pushbutton on:
Switching on with memory value when active.
Central control pushbutton off:
Switching operation for children‘s rooms
(universal switch or direction switch on the
switch-on side): If the light is switched on
by holding down the pushbutton, it starts at
the lowest brightness level after approx. 1
second and dims up slowly as long as the
pushbutton is held down. The last saved
brightness level is not modied.
Snooze function (universal switch or
direction switch on the switch-off side):
With a double impulse the lighting is dimmed
down from the current dimming position to
the minimum brightness level and switched
off. The current dimming position as well as
the adjustable minimum brightness level
determine the dimming time (max. = 60
minutes) which can be reduced as required.
It can be switched off at any time by short-
time control commands during the lighting
The LED performs during the teach-in pro-
cess according to the operation manual. It
shows wireless control commands by short
ickering during operation.
Incandescent and halogen lamps
Dimmable 230 V LEDs up to 300 W
Ambient temperature range 0-35°C
Standby loss (activ power) W0,7
Applies to lamps of max. 150 W.
Per dimmer it is only allowed to use max. 2 inductive (wound)
transformers of the same type, furthermore no-load operation
on the secondary part is not permitted. The dimmer might be de-
stroyed. Therefore do not permit load breaking on the seconda-
ry part. Operation in parallel of inductive (wound) and capacative
(electronic) transformers is not permitted!
When calculating the load a loss of 20 % for inductive (wound)
transformers and a loss of 5 % for capacitive (electronic)
transformers must be considered in addition to the lamp load.
Affects the max. switching capacity.
Usually applies for dimmable energy saving lamps and dimmab-
le 230 V LED lamps. Due to differences in the lamps electronics,
there may be limited dimming range, switch on and off problems
dependent on the manufacturer and a restriction on the maxi-
mum number of lamps; especially if the connected load is very
Teaching-in wireless sensors in wirel-
All sensors must be taught-in in the
actuators so that they can detect and
The teach-in memory is empty on delivery
from the factory. To ensure that a device
was not previously taught-in, clear the
Press the left button LRN/CLR for
approximately 3 seconds, the LED ashes
exitedly. Press the right button ON/OFF
approximately 5 seconds, the LED goes
out. All taught-in sensors are cleared,
the repeater and the conrmation tele-
Clear individual taught-in sensors:
Press the left button LRN/CLR for
approximately 3 seconds, the LED ashes
exitedly. Press the sensor which is to be
cleared, the LED goes out.
If all the functions of an encrypted sensor
are cleared, teach-in must be repeated as
described under Teach-in encrypted
Teach-in universal pushbutton and PC
with Eltako Wireless Building Visuali-
sation and Control Software GFVS:
Press and hold the left button LRN/CLR
for approx. 0.5 seconds and then
release. The LED lights up. Press the
right button ON/OFF briey once.
The LED ashes once as conrmation.
Operate the sensor to be cleared.
Teach in direction pushbutton:
Press and hold the left button LRN/CLR
for approx. 0.5 seconds and then
release. The LED lights up. Press the
right button ON/OFF briey twice. The
LED ashes twice as conrmation. Operate
the sensor to be cleared. The red LED
When you press a pushbutton, a rocker
is fully taught-in automatically. The side
where the pushbutton is rst pressed is
dened as switch-on and the other side
is then the switch-off side.
Teach in central control pushbutton 'ON':
Press and hold the left button LRN/CLR
for approx. 0.5 seconds and then
release. The LED lights up. Press the
right button ON/OFF briey three times.
The LED ashes three times as conr-
mation. Operate the sensor to be clea-
red. The red LED goes out.
Teach in central control pushbutton 'OFF':
Press and hold the left button LRN/CLR
for approx. 0.5 seconds and then
release. The LED lights up. Press the
right button ON/OFF briey four times.
The LED ashes four times as conrmation.
Operate the sensor to be cleared. The
Exit the learn and clear mode immediately
by briey pressing the LRN/CLR button.
The routine exits the learn and clear
mode automatically after 60 seconds.
To prevent unintentional teach-in, teach
in pushbuttons by „double-clicking“
