Emporia Euphoria Manual


Læs gratis den danske manual til Emporia Euphoria (5 sider) i kategorien Mobiltelefon. Denne vejledning er vurderet som hjælpsom af 61 personer og har en gennemsnitlig bedømmelse på 4.7 stjerner ud af 31 anmeldelser. Har du et spørgsmål om Emporia Euphoria, eller vil du spørge andre brugere om produktet?

Side 1/5
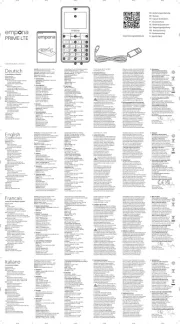
Fig. 1
Fig. 3
Fig. 2
Fig. 4 Fig.5
EMPORIA EMERGENCY CALL FUNCTION
You can save up to ve emergency numbers (family members,
friends and ocial institutions).
¡In an emergency press and hold the emergency button on the
back of the phone. (This works even when the keypad is locked.)
¡The ve preset numbers will be dialled automatically in the
order you have saved them.
If it is not possible to get through to anyone on the rst number,
the second number will automatically be dialled.
If it is not possible to get through to anyone on the second
number, the third number will automatically be dialled,
and so on. (The phone will go through a list of ve numbers a
maximum of three times.)
¡At the same time as each emergency call, a text message (SMS)
will be sent to the contact, saying: »You are about to receive an
emergency call. An audible warning signal will sound when
you answer the call. Please press the 0 key three times to
establish the connection.«
Note: The contact must press the 0 key within 60 seconds, or the
call will be disconnected (to prevent your emergency call going
through to a contact's mailbox).
¡From the moment you make an emergency call, your emporia
phone will automatically answer any incoming calls for one
hour. To disable this function, press and hold for 3 sec. or
turn your device ocompletely using and then turn it on
again.
¡To cancel the emergency call, press and hold .
¡During the emergency call, a warning tone will sound contin-
uously, to alert anyone nearby and the person being called.
¡If you do not have any emergency numbers saved, have no
credit on your prepaid phone card or are connected
to a foreign network without permission (e.g. roaming
is not activated), 112 will be dialled when you press the
emergency button.
Note: If you want to add the number of an official institution
such as the police or fire brigade as an emergency number,
you must check that this is okay with the respective institution
beforehand. We do not assume liability for any costs incurred
through you calling such an institution by mistake.
Adding/editing emergency numbers:
In the menu Settings _Emergency numbers
_Addemergencynumber
_Select an entry (e.g. EmNo.1) by pressing
_Select OK by pressing
_Select or Private Helporganisation
_Select a contact
Activating the emergency button:
In the menu Settings _Emergencybutton _On/O
Pre alarm:
The pre alarm is a warning tone that sounds for
ten seconds and alerts anyone nearby to the emergency.
After this, the emergency call sequence starts.
In the menu Settings _Emergencynumbers
_ _ Prealarm On/O
SETTINGS
In the menu Settings _
Sound&alerts:
You can personalise the settings for tones, signals and vibration
or select a set of predened settings (prole).
¡Menu items: , Ringtone Alarmmelody, Ringervolume, Silent/
Sleepmode, Meeting/Theatermode, , Maximum/Busmode
Increasingring, , , , Vibraforcall Vibraforalarm Keytones
Messagetone Vibraformessages, , Handsetvolume,
Handsfreevolume, Conrmationtone, Emergencytone
¡Silent/Sleepmode prole
Visual notications only (torch LED ashes, notications on the
display), no ringtone, no vibration function
¡Meeting/Theatermode prole
Visual notications (torch LED ashes, notications on the
display), device vibrates, no ringtone
¡Maximum/Busmode prole
Key tones, SMS tone and vibration function activated, ringtone
volume is set on maximum
Voicemailnumber:
Enter the number for your mailbox. You will nd this number in
the documents supplied by your network provider.
Securitysettings:
¡PIN: PIN request on/o, change PIN
¡Phonecode: on/o, change (factory preset code: 1234)
Masterreset:
You can restore all the factory settings on your phone (factory
preset code: 1234).
CAM ERA AND PHOTO ALBUM
Your phone has a camera. You will nd photos you have taken in
the menu under .Photoalbum
Taking a photo:
In standby mode, enable the camera by pressing .
_Press to take a photo.
Camera options:
If the camera is active press or
in the menu Settings _Camerasettings
_Selftimer, , , and .Eect Size Quality Nightmode
Photo album:
Your photos will be saved in the menu.Photoalbum
¡ and/or let you ick through the photo album.
¡Pressing opens Options for the selected picture.
Available options: View, , Send Wallpaper, , Contactphoto
Rename, , and Delete Deleteall Memory
Note: You can connect your phone to a PC using the USB data cable
and transfer your photos.
Note: Using a micro SD card will increase the storage capacity
of your phone. You can purchase these cards from electronics
stores.
TOOLS
In the Tools menu _
Alarmclock:
¡Settime: Enter the time and conrm. The alarm clock will now
go o at the time you have set every day.
¡O: Disable alarm clock
Switch o the ringing alarm clock by pressing .
Mute the alarm by pressing or
(it will ring again after ve minutes).
Birthday reminder:
Entering a birthday: Newbirthday
_Select or Fromcontacts EnterName
_Under , enter the birthday date and Setdate
_under , enter the time of day for the alarmRemindertime
Bluetooth:
This function allows you to use Bluetooth-enabled
handsfree kits wirelessly.
¡Bluetoothon/o:
Enable/disable Bluetooth
¡Connect _ : Searchfornewdevices
Search for devices you want to connect
_Select devices by pressing .
The next time you enable Bluetooth, devices that have
been connected before will be recognised and connected
automatically.
CHARGING UNIT
Charging the phone using the charging unit:
Plug the charging cable into the port on the back of the
charging unit, and slot the phone into the charging unit.
Note: When the phone is being charged by the charging unit, the
vibration function for incoming calls is automatically disabled.
This prevents the charging unit from moving without you
wanting it to because of the phone vibrating. The vibration
function is activated again when you remove the phone from
the charging unit.
Using the phone while it is on charge:
There are a number of ways to accept a call while your phone is
being charged by the charging unit:
¡Leave the phone in the charging unit and press the green
button. The call will be taken in hands-free mode.
¡Remove the phone from the charging unit. The call will be
accepted automatically when you do this.
¡If you put the phone on charge during a call, the connection will
be maintained and hands-free mode will be activated.
FREQUENTLY ASKED QUESTIONS
The display screen is just blank/black:
¡Energy-saving is activated:
Press any key.
¡The keypad is locked and energy-saving mode is activated:
Press or the green button.
¡The phone is switched o:
Press for two seconds to turn it on.
¡The battery is completely empty, the phone has switched itself
o: Charge the battery.
INSERTING A SIM CARD
Fig. 1: Remove the battery cover.
Fig. 2: Slide the SIM card into the SIM card holder
with the gold contacts facing down.
INSERTING AND CHARGING THE BATTERY
Fig. 3: Insert the battery, making sure that the battery contacts
touch the phone's gold contacts.
Fig. 4: Put the battery cover on the phone and press it down.
Fig. 5: Plug the charging cable into the USB port on the top of the
phone.
Attention: Charge the battery for at least four hours before using it
the first time. Only use batteries and chargers that are permitted
for use with this specific model.
ENGLISH
EUPHORIA
For information on simply making and receiving calls,
go to www.emporia.eu
PartNo: V50_ShortManual-V5_54299-ENG | 201610 | Subject to mistakes, printing errors and technical changes.
Arrow keys
¡Klick through and menuContacts
¡When the phone is on standby,
press to access Favourites.
¡When the phone is on standby,
press to access the .Contacts
Green button
¡Start or accept a call
¡In the menu: Conrm selection
¡On standby: Access Call info
1
key (mailbox)
Press and hold this key down
to listen to your voice mail
+
key
¡Press and hold: + (for country code,
e.g. +44 for the United Kingdom)
¡When writing: Symbol
(. , ? ! ' " ( ) @ \ / : _ ; + - * = % & < > £ $)
¡Short ashes: The battery is almost empty.
¡Even ashing: The battery is charging.
¡The light on constantly: The battery
has nished charging
Red button
¡When in a call: End call
¡When in the menu: One step back
¡When writing: Delete entry
menu
Menu key
Press this key once to call up the menu
camera key
Alarm clock button
Press this key once to access the alarm clock
On/O key
#
aA1!
key
¡When writing: Switch between upper case,
lower case and digits
¡Press and hold this key to
access Missed calls.
¡Flashes when there is a missed call
Goes out once the call history has been
accessed.
Opening
for removing the battery cover
Torch (LED)
Camera-lens
Torch button
When the phone is on,
the torch can be on continuously.
¡Press this button for two seconds
to turn the torch on.
¡To turn the torch o,
press the button briey
Keypad lock
Press this button for two seconds to lock
or unlock the keypad
Micro USB port
For charging the battery
Opening for wrist strap
Headset port
Attention: This is not a charger port!
Speaker
Micro USB port
For charging the battery
Volume buttons
¡Change the handset volume
¡Press to mute the phone when it is
ringing. (It will ring as normal next time
there is a call.)
Emergency button
Press this button for three seconds
in an emergency
GET TING STARTED
¡Pressing the key for at least two seconds
switches the phone on.
¡To turn the phone o, press the key
for two seconds again.
When using a new SIM card for the rst time:
Enter the four-digit PIN code (personal identication number)
_Press to conrm the code.
Note: The PIN code is a four-digit number that is intended to
prevent somebody else from being able to switch on your mobile
phone. You have a maximum of three attempts to enter the
correct number. If you enter the wrong number three times in a
row, you will only be able to unblock the SIM card with the PUK
code. You will find the PIN code and PUK code in the documents
supplied by your network operator.
_Select a Language by pressing and _
_ _Settime _Setdate _
_Select a Textsize by pressing and :
You can choose or Small Large _
Incoming call:
¡To answer: Accept the call by pressing .
¡To reject: Press .
¡To mute the ringtone temporarily:
Press the button (on the side of the phone).
To end a call: Press .
Dialling: Enter the number (incl. area code) you want to dial using
the keypad Start the call by pressing _.
Redialling:
Press to bring up the . callinfo
_Press and to select a number.
_Start the call by pressing .
Hands-free: Press during a call to open the and turn Options
the hands-free function on or o.
Standby mode:
In standby mode the phone is on, but is not
running any applications (calls, SMS messages, etc.).
Accessing the menu:
¡Press
menu
to open the menu.
¡Scrolling with and/or through the menu items:
Messages, , Photoalbum Tools, Contacts, , or Callinfo Settings
¡Press to select the option shown on the screen
(above the keys).
¡To return to standby mode, press several times.
Saving energy:
If a few seconds pass without the phone receiving any input
from you, the screen will go blank to save energy. In the event
of an incoming call or you pressing any key, the screen will
automatically light up again.
If the keypad is set to lock automatically,
the phone will only respond if the green button
or the key is pressed.
CONTAC TS
Always save names and numbers with the international dialling
code, e.g. +44 for the United Kingdom, +1 for the United States and
+61 for Australia).
Press
menu
to open the menu.
_Go to Contacts by pressing . _
_Menu items: , , , , Searchname Addcontact Editcontact Delete
SendcontactviaSMS, Copycontact, Mynumber, , Speeddialkeys
Emergencynumbers, and .Phonebooksettings SMSinPhoneBK
Adding a contact (name and number):
Open the menu with
menu
. Press to go to . _Contact
_Go to Addcontact by pressing . _
_Enter a name (see the section Writing a message
for text input information). _ Insert the number _
_ _Contactphoto Yes/No to save press
Searching for contacts:
Press to open Contacts _
¡Press and to ick through the entries
¡or enter the rst few letters of the entry you're looking for using the
keypad (and continue icking with if necessary). _
Once you've selected an entry, press to start a call.
Receiving a new contact via SMS:
In the menu Enable the function to Contacts _SMSincontacts
receive new entries via SMS.
Indicate whether you want to be able to receive new entries
from anyone (On) or only from contacts already saved on
the phone (OnlyfromPhoneBk). The phone number will
automatically be stored in your contacts when you receive an
SMS with the following content:
#Name#Number#, e.g.: #Martin#436641234567#
SMS MESSAGES
SMS (Short Message Service) messages are short written
messages.
Writing a message:
Open the menu by pressing
menu
. _Messages _
_Writemessage _. Enter text using the keypad.
¡Each key has several characters assigned to it,
which can be selected by pressing the respective key several
times. (E.g. 2x
4
ghi
, 1x
2
a b c
, 3x
, 3x
5j k l
and 3x
6
m n o
for ) Hallo
1
. , ! ? ‘ “ @ : 1
2
a b c
a b c 2 ä æ å à
3
d e f
d e f 3 è è ê
4
ghi
g h i 4 ì í î ï
5j k l
j k l 5 £
6
m n o
m n o 6 ö ø ó
7
pqrs
p q r s 7 ß $
8
t u v
t u v 8 ü ù ú
9
wxyz
w x y z 9 ý þ
0
Blank space; 0
+
Special characters: . , ? ! ' " ( )
@ \ / : _ ; + - * = % & < > ...
¡Press
#
aA1
!
to change the input method:
abc : Lower case only
ABC : Upper case only
Abc : Upper and lower case
123 : Digits
¡Delete all: press and hold .
Sending an SMS:
Select Sendto by pressing twice and then insert a number,
or press to search in contacts before pressing again to
send.
Receiving a message:
A short beep and a message on the display informs you of
new messages. Pressing allows you to read the message
immediately or view it in your received message list via the
Messages menu _Received.
Symbols on the display Network signal strength Battery indicator Missed call Prole: Silent/Sleep mode Prole: Meeting/
Theatermode Bluetooth activated Alarm clock on
Roaming (abroad) New message Call forwarding Prole: Maximum Headset connected Bluetooth connected Keypad locked


Produkt Specifikationer

Mærke: Emporia
Kategori: Mobiltelefon
Model: Euphoria
Type: Senior telefon
Bredde: 59 mm
Dybde: 12.5 mm
Højde: 120 mm
Vægt: 90 g
Brugervejledning: Ja
Produktfarve: Sort, sølv
Batterikapacitet: 1000 mAh
Skærmtype: TFT
Skærm diagonal: 2.3 "
Skærmopløsning: 240 x 320 pixel
Berøringsskærm: Ingen
Ekstern skærm: Ingen
Understøttelse af flashkort: Ja
Kompatible hukommelseskort: MicroSD (TransFlash)
Bagerste kamera: Ja
Front kamera: Ingen
SIM-korts kapacitet: Single SIM
Wi-Fi: Ingen
Datanetværk: GSM
2G-bånd (primær SIM): 900,1800 Mhz
Generering af mobilnetværk: 2G
Bluetooth: Ja
Indbygget lommelygte: Ja
USB-port: Ja
Tekstbeskeder (SMS): Ja
MMS (Multimedia Message Service): Ja
Videoopkald: Ingen
FM radio: Ja
Batteriteknologi: Lithium-Ion (Li-Ion)
Standbytid (2G): 300 t
Taletid (2G): 3.33 t
Placering af position: Ingen
Assisteret GPS (A-GPS): Ingen
Formfaktor: Menu
Personlig informationsstyring (PIM): Alarm clock, Calculator, Calendar, SOS
Kalender: Ja
Kabler inkluderet: Micro-USB
Bluetooth-version: 3.0
Bluetooth-profiler: HFP, HSP, OPP, PBAP
Højttalertelefon: Ja
Kapacitet for telefonbog: 300 entries
Typer af ringetoner: Polyfonisk
GPS (satellit): Ingen
Bagerste kamera opløsning (numerisk): 2 MP
Maksimal størrelse på hukommelseskort: 8 GB
Vibrationsalarm: Ja
SIM-korttype: MiniSIM
Abonnementstype: Ingen abonnement
USB-stik type: Micro-USB
Specifik absorbationshastighed (SAR) værdi (EU): 1.2 W/kg
Batterioplader inkluderet: Ja
Alarmfunktion: Ja
Regnemaskine: Ja
Tastatur: Ja
Tastaturopsætning: Alfanumerisk tastatur
Batteripakke: Ja
SMS-lagringskapacitet: 250

Jeg kan ik komme ind med puk koden på men emporia- alt godt john

  jihnrud - 25 Marts 2025

Har du brug for hjælp?

Hvis du har brug for hjælp til Emporia Euphoria stil et spørgsmål nedenfor, og andre brugere vil svare dig


Mobiltelefon Emporia Manualer
Mobiltelefon Manualer

Nyeste Mobiltelefon Manualer

AT&T

AT&T R225 Manual

2 April 2025
AT&T

AT&T F160 Manual

2 April 2025
Primo

Primo 401 Manual

9 Marts 2025
Leica

Leica LUX Grip Manual

20 Februar 2025
Lava

Lava Yuva 2 Pro Manual

20 Februar 2025
Lava

Lava Blaze 2 Manual

20 Februar 2025
Lava

Lava Blaze Manual

20 Februar 2025
Lava

Lava Blaze Pro Manual

20 Februar 2025