Epson AcuLaser CX11N Manual

Epson Printer AcuLaser CX11N

Læs gratis den danske manual til Epson AcuLaser CX11N (8 sider) i kategorien Printer. Denne vejledning er vurderet som hjælpsom af 22 personer og har en gennemsnitlig bedømmelse på 4.6 stjerner ud af 11.5 anmeldelser. Har du et spørgsmål om Epson AcuLaser CX11N, eller vil du spørge andre brugere om produktet?

Side 1/8
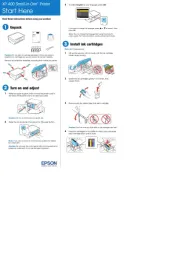
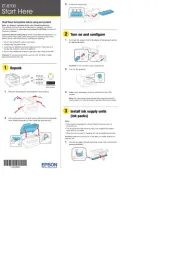
Start Here
Cover A
Epson AcuLaser® CX11N/CX11NF
Unpack
Note: The illustrations show the CX11NF, but the instructions apply to both the
CX11N and CX11NF unless otherwise noted.
1 Check that you have the following:
4 toner cartridges (Cyan, Magenta, Yellow, Black)
Photoconductor unit
USB cable
Power cord
Documentation: Basics Guide Fax Guide, (CX11NF only)
3 software CD-ROMs
2 Select a location for the CX11N. Make sure you allow enough space
around the product to ensure smooth operation.
a 36.2 in. (920 mm)
b 10.2 in. (258 mm)
c 34.2 in. (868 mm)
d 3.9 in. (100 mm)
e 11.8 in. (300 mm)
The optional 500-Sheet Paper Cassette Unit adds
5.1 in. (130 mm) to the bottom of the CX11N.
3 Remove all the packing tape from the outside of
the unit.
4 Raise the scanner unit, then open cover C
and pull out the insert.
5 Close cover C and lower the scanner unit.
6 Open cover A and remove the foam
insert. Then close the cover.
7 Open the document cover and remove
the insert. Then unlock the carriage lock.
8 Close the document cover.
Cover C
1
9 Connect the power cord to the
CX11N and to an AC outlet.
10 Push the power switch to .On
Install Toner Cartridges
Caution: Make sure the CX11N is turned on before installing the toner
cartridges. Do not install the photoconductor before installing the toner
cartridges.
1 Open cover A and remove the
tape and plastic insert.
2 In the LCD screen the message
Install [X] Toner Cartridge
appears, where is one of [X]
the following:
Y: Yellow
M: Magenta
C: Cyan
K: Black
3 Remove the toner cartridge from its
package and gently shake it.
Warning: Do not touch the toner. Keep
the toner away from your eyes. If toner
gets on your skin or clothes, wash it off
with soap and water immediately.
4 Hold the tag and gently pull the toner seal
until it comes completely out.
5 Slide the toner cartridge into the tracks inside the printer. Push evenly on
both sides until the cartridge stops securely in its slot.
If the cartridge doesn’t
seem to be installed fully,
remove it and reinstall it.
Caution: Don’t force the
cartridge into the printer
or force the lock lever
down, or you may damage
the printer.
6 Push down the lever to
lock the toner cartridge.
Note: The toner cartridge
is installed securely when
you cannot turn the lock
lever any further.
7 Close cover A and confirm the message in the LCD screen.
The LCD screen will display the next cartridge that needs to be
installed. Open cover A and repeat steps 3 to 7 for each of the
remaining toner cartridges.
Install Photoco
C
c
1
2
3
4
5
6
1
2
3
4
5
6
3
2


Produkt Specifikationer

Mærke: Epson
Kategori: Printer
Model: AcuLaser CX11N

Har du brug for hjælp?

Hvis du har brug for hjælp til Epson AcuLaser CX11N stil et spørgsmål nedenfor, og andre brugere vil svare dig