Festo DADM-EP-G6-10 Manual

Festo Ikke kategoriseret DADM-EP-G6-10

Læs gratis den danske manual til Festo DADM-EP-G6-10 (3 sider) i kategorien Ikke kategoriseret. Denne vejledning er vurderet som hjælpsom af 2 personer og har en gennemsnitlig bedømmelse på 4.5 stjerner ud af 1.5 anmeldelser. Har du et spørgsmål om Festo DADM-EP-G6-10, eller vil du spørge andre brugere om produktet?

Side 1/3
DADM-EP-G6
Intermediate-position module
Festo SE & Co. KG
Ruiter Straße 82
73734 Esslingen
Deutschland
+49 711 347-0
Operating instructions
8159559
2021-11d
[8159561]
Translation of the original instructions
© 2021 all rights reserved to Festo SE & Co. KG
1
Applicable Documents
All available documents for the product
è
www.festo.com/sp.
2 Safety
2.1 Safety instructions
Only use the product in its original condition without unauthorised modifica-
tions.
Take into account the ambient conditions at the location of use.
Observe the identifications on the product.
Only use the product if it is in perfect technical condition.
Store the product in a cool, dry environment protected from UV and corrosion.
Keep storage times short.
Before working on the product, switch off the compressed air supply and lock it
to prevent it from being switched on again.
Observe the tightening torques. Unless otherwise specified, the tolerance is
± 20%.
2.2 Intended use
The product is intended to be used as an external stop for a linear drive and
enables the slide to be placed in an intermediate position within the stroke range.
2.3 Foreseeable misuse
Operating the product without suitable cushioning will destroy it.
Use suitable cushioning components
è
www.festo.com/catalogue.
2.4
Training of qualified personnel
Work on the product may only be carried out by qualified personnel who can
evaluate the work and detect dangers. The qualified personnel have skills and
experience in dealing with electropneumatic (open-loop) control technology.
3 Additional information
Contact the regional Festo contact if you have technical problems
è
www.festo.com.
Accessories and spare parts
è
www.festo.com/catalogue.
4
Function
The stop lever of the intermediate-position module swivels in and out when
the pneumatic ports are pressurised. In the swivelled-out status, the cushioning
component in the shock absorber retainer advances to the stop lever. The slide of
the linear drive is therefore in an intermediate position. The position of the stop
lever can be queried by the proximity switch in the slots .
5 Product design
1
2
3
4
5
6
7
8
9
10
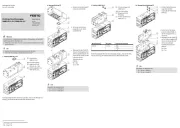
Fig. 1: Product design
1
Mounting interface
lateral (2x)
2
Sliding pad
3
Slot for proximity switch (2x)
4
Mounting interface
underneath (2x)
5
Linear drive
- DGSL
- DGST
6
Shock absorber retainer
- DADP-ES-G6 for DGSL
- DADP-ES-G8 for DGST
7
Intermediate-position module
DADM-EP-G6
8
Pneumatic port 1
9
Pneumatic port 2
10
Stop lever
6
Assembly
6.1
Mount the intermediate position module on the linear drive DGSL
1.
Fasten the intermediate-position module to the mounting surface with two
screws and the accompanying centring sleeves . Tightening torque
è
Tab. 1
Tightening torque for mounting the intermediate position module. The inter-
mediate position is fine-tuned during commissioning by screwing the cush-
ioning component in or out.
The following mounting interfaces are possible:
Mounting interface, lateral
Mounting interface, underneath
2.
Fasten the shock absorber retainer to the slide of the linear drive with two
screws . Tightening torque
è
Tab. 2 Tightening torque for mounting shock
absorber retainer on linear drive DGSL.
7
6
DADM-EP-G6 -10 -16
Centring sleeve ZBV-10-9 ZBH-12
Mounting interface, underneath
Screw M6 M8
Tightening torque [Nm] 10 10
Mounting interface, lateral
Screw M5 M6
Tightening torque [Nm] 6 10
Tab. 1:
Tightening torque for mounting the intermediate position module
DGSL -12 -16 -20 -25
Centring sleeve ZBV-12-7 ZBV-12-9
Screw M5 M6
Tightening torque [Nm] 6 10
Tab. 2:
Tightening torque for mounting shock absorber retainer on linear drive
DGSL
6.2 Mounting intermediate position module on linear drive DGST
1. Fasten the intermediate-position module to the mounting surface underneath
with two screws and the accompanying centring sleeves . Tightening torque
è
Tab. 1 Tightening torque for mounting the intermediate position module.
The intermediate position is fine-tuned during commissioning by screwing the
cushioning component in or out.
7
2. Fasten the shock absorber retainer to the slide of the linear drive with four
screws . Tightening torque
è
Tab. 3 Tightening torque for mounting shock
absorber retainer on linear drive DGST.
6
DGST -12 -16 -20 -25
Centring sleeve 5H7 12H7Æ Æ
Screw M4 M5 M6
Tightening torque [Nm] 2.9 5.2 8.4
Tab. 3: Tightening torque for mounting shock absorber retainer on linear drive
DGST
6.3 Required signal-to-noise ratio
Signal-to-noise ratio
When mounting the intermediate position module on the linear drive DGST, the
required signal-to-noise ratio must be observed
è
Tab. 4 Signal-to-noise ratio.
Fig. 2:
Signal-to-noise ratio
DGST -12 -16 -20 -25
Signal-to-noise ratio [mm] 10 15³ ³
Tab. 4:
Signal-to-noise ratio
7
Pneumatic installation
1. Connect pneumatic port 1 and pneumatic port 2 with tubing. Tightening
torque:
DADM-EP-G6-10: 0.5 Nm
DADM-EP-G6-16: 2 Nm
9
8
9
8
2.
Seal unused ports with blanking plugs.
Possible control of a DADM in connection with DGSL/DGST
Fig. 3: Control of DADM with DGSL/DGST
8 Electrical installation
For sensing the stop lever positions:
1.
Use suitable proximity switches with a longitudinal cable outlet
è
www.festo.com/catalogue.
2.
Place the proximity switches in the slots of the intermediate-position module.
3.
Mount the proximity switches in the corresponding end position. A minimum
distance of 10 mm from magnetic parts must be observed.
9 Commissioning
Malfunctions may occur if excessive loads are applied to the stop lever.
The following must be considered in this context:
The stop lever must be retracted and advanced at the correct time.
Briefly switch off pressure to the linear drive to retract the stop lever or
pressurise both sides.
1.
Push the slide of the linear drive manually to the end position from which it is
to approach the intermediate position.
2.
Pressurise the linear drive so the approached end position is retained.
3.
Pressurise pneumatic port 1 on the intermediate-position module.
If required: the stop lever can be pressurised via the sliding pad . The
sliding pad serves as a manual override.
Ä
The stop lever extends.
4.
Start a test run with low switching frequency and low impact speed. Linear
drive operating instructions
è
www.festo.com/sp.
5.
Slowly accelerate the payload on the linear drive. The slide of the linear drive
must not make a hard stop against the intermediate-position module.
6.
If necessary: adjust the intermediate position by screwing in or unscrewing
the cushioning component on the shock absorber retainer . Maintain the
screw-on length X and the tightening torque A of the lock nut .
7.
Terminate the test run.
Fig. 4:
Screw-in length X and tightening torque A DADP-ES-G6/DADP-ES-G8
DADP-ES-G6 -10 -16 -20 -25
Screw-on length X with
DGSL-…-PA/-P1A/-Y3A
1)
[mm] 0 … 25.5 0 … 39.5 0 … 49.5 0 … 49
Screw-on length X with
DGSL-…-EA
1)
[mm] 0 … 5.5
Tightening torque A [Nm] 3 5 8 20
1)
Maximum adjustable end-position range
Tab. 5: Screw-on length X and tightening torque
DADP-ES-G8 -12 -16 -20 -25
Screw-on length X with
DGST-…-Y12A
1)
[mm] 0 … 13.6 0 … 15.7 0 … 20
Screw-on length X with
DGST-…-PA/P1A
1)
[mm] 0 … 19 0 … 21.5 0 … 25 0 … 35
Screw-on length X with
DGST-…-EA
1)
[mm] 0 … 7.6 0 … 9.85 0 … 5.5 0 … 2
Tightening torque [Nm] 2 3 5 8
1)
Maximum adjustable end-position range
Tab. 6: Screw-on length X and tightening torque


Produkt Specifikationer

Mærke: Festo
Kategori: Ikke kategoriseret
Model: DADM-EP-G6-10

Har du brug for hjælp?

Hvis du har brug for hjælp til Festo DADM-EP-G6-10 stil et spørgsmål nedenfor, og andre brugere vil svare dig