Fetco CBS-2161XTS Manual
Fetco
Kaffemaskine
CBS-2161XTS
Læs nedenfor 📖 manual på dansk for Fetco CBS-2161XTS (36 sider) i kategorien Kaffemaskine. Denne guide var nyttig for 16 personer og blev bedømt med 4.5 stjerner i gennemsnit af 2 brugere
Side 1/36

Contact Information
FETCO ®
Food Equipment Technologies Company
600 Rose Road
Lake Zurich • IL USA • 60047-0429 •
Internet: www.fetco.com
©2013-2015 Food Equipment Technologies Company
PATENTS: WWW.fetco.com/patents
Phone: (800) 338-2699 (US & Canada)
(847) 719-3000
Fax: (847) 719-3001
Email: sales@fetco.com
techsupport@fetco.com
P141 REV:002 [1/16] ©December 2015
www.fetco.com
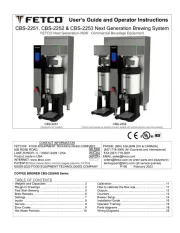
User’s Guide and Operator Instructions
Models: CBS-2161XTS CBS-2162XTS
Three gallon single and twin brewers.
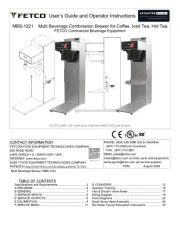
Shown with D012: 3.0 Gallon LUXUS® Thermal Dispenser (TPD-30), not included
Extractor Touch Screen Commercial Hot Beverage Equipment
Table of Contents
Specifications and Requirements...................................2
I
In
ns
st
tr
ru
uc
ct
ti
io
on
ns
s
f
fo
or
r
b
br
re
ew
w
o
op
pe
er
ra
at
ti
io
on
n-
-f
fa
as
st
t
b
br
re
ew
w .......................4
Service Menu: Access and XTS menu tree....................6
Menu Features: Batch Parameters.................................7
How to calibrate the flow rate .......................................11
Error Codes ..................................................................13
Operator Training..........................................................14
Service Guide to a Successful Installation ...................15
Installation Directions....................................................16
Cleaning & Maintenance...............................................20

Go to fetco.com for the latest version of all information 2 P141 REV:002 revised 1/2016 ©December 2015
Specifications and Requirements
Water Requirements: Coffee Filter Size:
CBS-2160XTS: 20-75 psig, (138-517kPa) 2 gpm (7.60 lpm) 20” X 8” – standard FETCO # F004
Cold Water Supply Only 18” X 7½” - optional half batch FETCO # F005
Water inlet fitting is a 3/8 inch male flare. Electrical: See electrical configuration chart.
Brew Volume: Temperature, as set by factory:
Full Batch 3 gal. (11.4 lit.) All batches are user configurable 200°F (93°C) inside water tank (at sea level)
Total Brew Cycle—Factory setting: CBS-2162XTS: 6 1/2 Minutes CBS-2161XTS 6 Minutes
Weights and Capacities
Brewer Model Weight
(empty)
Water tank
Capacity & Weight.
Weight
(filled)
*Dispenser
Weight, ea.
*Dispenser
Filled, ea.
*Total Weight Brewer
& Dispensers, Filled
CBS-2161XTS 88 lbs.
(40kg)
8.7 gal.
(33 l)
72 lbs.
(32.7kg)
160 lbs.
(72.5kg)
18 lbs
(8.2kg)
42.5 lbs
(19.3kg)
202.5 lbs.
(92kg)
CBS-2162XTS 130 lbs.
(59kg)
16.3 gal.
(62 l)
136 lbs.
(62.1kg)
266 lbs.
(120.7kg)
18 lbs.
(8.2kg)
42.5 lbs
(19.3kg)
349 lbs.
(158.3kg) (2 dispensers)
* Based on TPD-30 Series Dispensers
Measurements
Brewer Model Height Width Depth Empty weight Shipping weight
CBS-2161XTS 41 ¼ in. (1048mm) 17 in. (454mm) 22½ in. (57cm) 88 lbs. (40kg) 96 lbs. (44kg)
CBS-2162XTS 41 ¼ in. in. (1048mm) 32 (813mm) 22½ in. (57cm) 130 lbs. (59kg) 140 lbs. (63.6kg)
CBS-2160XTS—3-gallon version Dimensions & Utility Connections Rough-in Drawings
Rou
g
h-in CBS-2161XTS —Sin
g
le station version 3-
g
allon version Drawin
g
#1201.00025.00
Rough-in CBS-2162XTS—Dual station 3-gallon version Drawing#1201.00024.00

Go to fetco.com for the latest version of all information 3 P141 REV:002 revised 1/2016 ©December 2015
All brewers HARDWIRE to an internal TERMINAL BLOCK See wiring diagrams for connections
North America CBS-2161XTS—Single 3 gallon version Electrical Configurations
Configuration
Code
Heater
Configuration Voltage Phase Wires KW Amp Draw Gallon/[liter]Hour
(3 gallon per batch)
E216151 3 X 3.0 kW 200-240 3 3L+G 6.4-9.1 18.6-22.5 16.4-23.4 [62-88]
(*Optional) 2 X 3.0 kW 200-240 1 2L+G 4.6-6.1 21.2-25.8 11.8-15.7 [44-59]
E216152 3 X 4.0 kW 200-240 3 3L+G 8.4-12.1 24.7-28.9 21.6-30 [82-113]
(*Optional) 2 X 4.0 kW 200-240 1 2L+G 6.1-8.1 28.1-33.8 15.6-20.8 [59-79]
E216153 3 X 5.0 kW 200-240 3 3L+G 10.5-15.1 30.7-36.1 27-30 [102-113]
(*Optional) 2 X 5.0 kW 200-240 1 2L+G 7.6-10.1 35.1-42.2 19.6-26 [74-98]
*Sold as three phase, highest power version
E
q
ui
p
ment ma
y
be field confi
g
urable to sin
g
le
p
hase, lowe
r
-
p
ower, sin
g
le-
p
hase confi
g
uration usin
g
two heaters.
North America CBS-2162XTS—Twin 3 gallon version Electrical Configurations
Configuration
Code
Heater
Configuration Voltage Phase Wires KW Amp Draw Gallon/[liter]Hour
(3 gallon per batch)
E216251 3 X 3.0 kW 200-240 3 3L+G 6.4-9.1 18.6-22.5 16.4-23.4 [62-88]
E216252 6 X 3.0 kW 200-240 3 3L+G 12.6-18.1 36.4-43.7 32.4-46.5[123-176]
E216253 3 X 4.0 kW 200-240 3 3L+G 8.4-12.1 24.7-28.9 21.6-28.9 [82-113]
E216254 6 X 4.0 kW 200-240 3 3L+G 16.8-24.1 48.4-58.1 43.1-60 [163- 227]
E216272 6 X 3.0 kW 440-480 3 3L+G 13.6-18.1 19.4-22.2 33.2-44 [126-167]
E216271 6 X 4.0 kW 440-480 3 3L+G 20.3-24.1 26.6-29.4 52.2- 60 [197- 227]
International, North America and Japan CBS-2161XTS—Single 3 gallon version Electrical Configurations
Configuration
Code
Heater
Configuration Voltage Phase Wires KW Amp Draw Gallon/[liter]Hour
(3 gallon per batch)
E216151* 3 X 3.0 kW 200-240 3 3L+G 6.4-9.1 18.6-22.5 16.4-23.4 [62-88]
E216152* 3 X 4.0 kW 200-240 3 3L+G 8.4-12.1 24.7-28.9 21.6-28.9 [82-113]
E216153* 3 X 5.0 kW 200-240 3 3L+G 10.5-15.1 30.7-36.1 27-30 [102-113]
*Sold as three phase, highest power version
Equipment may be field configurable to single phase, lower-power, single-phase configuration using two heaters as in domestic version
International CBS-2161XTS—Single 3 gallon version Electrical Configurations
Configuration
Code
Heater
Configuration Voltage Phase Wires KW Amp Draw Gallon/[liter]Hour
(3 gallon per batch)
E216191 3 X 3.0 kW 220-240/380-415 3 3L,N+G 7.6-9.1 11.7-12.7 19.6-23.4 [74-88]
E216192 3 X 4.0 kW 220-240/380-415 3 3L,N+G 10.2-12.1 15.5-16.9 26.2-28.9 [99-113]
E216193 3 X 5.0 kW 220-240/380-415 3 3L,N+G 12.7-15.1 19.3-21.0 32.6-37.8 [116-125]
CE CBS-2161XTS—Single 3 gallon version Electrical Configurations
E216161 3 X 3.0 kW 230/400 3 3L, N+PE 8.6 12.4 22.2 [84]
E216162 3 X 4.0 kW 230/400 3 3L, N+PE 11.3 16.4 30 [114]
International, North America and Japan CBS-2162XTS—Twin 3 gallon version Electrical Configurations
Configuration
Code
Heater
Configuration Voltage Phase Wires KW Amp Draw Gallon/[liter]Hour
(3 gallon per batch)
E216252 6 X 3.0 kW 200-240 3 3L+G 12.6-18.1 36.4-43.7 32.4-46.5[123-176]
E216254 6 X 4.0 kW 200-240 3 3L+G 16.8-24.1 48.4-58.1 43.1-60 [163- 227]
E216291 3 X 5.0 kW 220-240/380-415 3 3L,N+G 12.7-15.1 19.3-21.0 32.6-37.8 [116-125]
E216292 6 X 3.0 kW 220-240/380-415 3 3L,N+G 15.1-18.1 22.9-25.0 38-44 [144-167]
CE CBS-2162XTS—Twin 3 gallon version Electrical Configurations
E216261 3 X 4.0 kW 230/400 3 3L, N+PE 11.3 16.4 30 [114]
E216262 3 X 5.0 kW 230/400 3 3L, N+PE 14.1 20.4 36.2 [137]

Go to fetco.com for the latest version of all information 4 P141 REV:002 revised 1/2016 ©December 2015
I
In
ns
st
tr
ru
uc
ct
ti
io
on
ns
s
f
fo
or
r
b
br
re
ew
w
o
op
pe
er
ra
at
ti
io
on
n-
-f
fa
as
st
t
b
br
re
ew
w
Setup is simple
1-Connect unit to water and electrical utilities
See instructions
2-Turn unit “ON” to fill and heat
The “READY” icon will display “Ready To Brew” with factory set defaults
3-Add paper and ground coffee to brewbasket
The Specialty Coffee Association of America® (SCAA) guidelines are 55grams per liter
4-Place appropriately sized, clean, empty and preheated dispenser under brewbasket.
5-Touch and briefly hold finger on screen as shown below to start brew
-Note: “READY” icon is satisfied
Brew operation is simple. The intuitive touch screen-STARTS THE BREW
CBS-2161XTSsingle side brewer is displayed. Screen shown approximately the same size as on equipment
Brew operation-intuitive touch screen-continued BREW IN PROCESS
When the brew is started the equipment will display the brew process graphically as shown
1)With ready icon displayed 2)Touch and hold to activate
brew menu
3)Touch and hold pennent to
start brew
4) Brew Started
Activated brew screen menu
status in box and displays time.
Drip delay icon
(brew basket locked)
Unit below set temperature
(single side brewer)
Unit below set temperature
(dual side brewer)
Regular 1
|■| 3:00
6:00
°F 200
INFO
START
(<)199°F
Unit is heating
and will start
when above
200° F
Regular 1
|■| 3:00
6:00
Regular 2
|■| 3:00
6:00
Decaf 1
|■| 3:00
6:00
Decaf 2
|■| 3:00
6:00
INFO
GENERAL
STOP
Heat
X
XT
TS
S™™
E
EX
XT
TR
RA
AC
CT
T
O
OR
R
T
T
O
OU
UC
CH
HS
SC
CR
RE
EE
EN
N
CBS_2160
■ Ready
Heating
Filling
Touch
screen
to unlock
Regular 1
|■| 3:00
6:00
°F 200
INFO
[_ _]
6
01:59
STOP
MENU Status Window
-Name of batch
-Brew size (1 gallon)
-Toatal Brew time
-Brew temperature
Regular 1
|■| 3:00
6:00
°F 200
INFO
╣║╠
▐▄▌
▐
05:30
Brew process
phase icon and
time-out
STOP
INFO icon is present
but inactive.
INFO is always
displayed in box to left.
X
XT
TS
S™™
E
EX
XT
TR
RA
AC
CT
TO
OR
R
T
TO
OU
UC
CH
HS
SC
CR
RE
EE
EN
N
CBS_2160
■ Ready
Heating
Filling
Touch
screen
to unlock
Regular 1
|■| 3:00
6:00
Regular 2
|■| 3:00
6:00
Decaf 1
|■| 3:00
6:00
Decaf 2
|■| 3:00
6:00
Regular 1
|■| 3:00
6:00
°F 200
INFO
╣║╠
▐▄▌
▐
05:30
STOP

Touch
screen
to unlock

Go to fetco.com for the latest version of all information 6 P141 REV:002 revised 1/2016 ©December 2015
Service Menu: Access and XTS menu tree
Menu adjustment and name selection, control parameter settings, programming, error codes, counters and reset
features are accessed by activating touch screens.
General Service Menu
PROGRAM, GENERAL, INPUTS, OUTPUTS, and OTHER Service Menu.
-Enter Service Menu by accessing the power switch on back of the panel
ÆSwitch power “OFF”with power switch located on rear of brewer
-After at least ten seconds: Turn power switch “ON”
-Quickly touch and hold the XTS screen to enter the programming screens as shownÆ.
-When entering The SERVICE MENU: the first screen is “PROGRAM”
-Use right and left arrow icons to scroll through the five main SERVICE menus.
-The DOWN icon will open the FEATURE icon below.
-Scroll through the Menu Item with the arrows, edit any if needed
-When finished editing press the up arrow to go back through the menu items to save changes and exit
-A Menu Tree is below to show the main categories of the five SERVICE menus
XTS Main Menu Menu tree-XTS
Å
Å
Å
ÅÅ
Æ
Æ
Æ
ÆÆ
Å
Å
Å
ÅÅ
Æ
Æ
Æ
ÆÆ
Å
Å
Å
ÅÅ
Æ
Æ
Æ
ÆÆ
Å
Å
Å
ÅÅ
Æ
Æ
Æ
ÆÆ
PROGRAM GENERAL INPUTS OUTPUTS OTHER
Batch 1 Right*
(Or) Batch 1 Left*
Tank Temp
Display
Inputs
Show
Summary
Error Codes
Batch 2 Right†
Or Batch 2 Left†
Brew at Temp
Calib Touch
Screen
Left Valve Copy Program
Batch 3 Right†
Or Batch 3 Left†
Units of
Measure.
L.Bypass Valve Upload LOGO
Batch 4 Right†
Or Batch 4 Left†
ECO Mode Right Valve Reset to
Factory
Batch 1 Right*
(Dual side brewer)
LOGO
Timeout
R.Bypass Valve Counters
Batch 2 Right† Brew B. Sensor Fill Valve Firmware
Batch 3 Right† Use Flojet® L.B.Basket Lock DEMO Mode
Batch 4 Right† LLC Sensitivity R.B.Basket
Lock
Batch Copy Heater
Screen
*Single side brewer only shows the four RIGHT menus—dual brewers show LEFT and then RIGHT
Batch 1—Right and Left are permanent-may not be deleted and are completely programmable
†Batch 2-4—Right and may be individually selected-or-entirely deleted Batch2-4—Left
X
XT
TS
S™
™
EEXXTTRRAACCTTOORR
T
TO
OU
UC
CH
HS
SC
CR
RE
EE
EN
N
CBS_2100XTS
■ Ready
Heating
Filling
Touch
screen
to unlock
< >PROGRAM
< >Batch 1 Left
« ▼
EXIT
»
< >GENERAL
< >Tank Temp
« ▼
EXIT
»
< INPUTS >
< >Display Inputs
« ▼
EXIT
»
< OUTPUTS >
<Show Summary>
« ▼
EXIT
»
< OTHER >
< >Error Codes
« ▼
EXIT
»

Go to fetco.com for the latest version of all information 7 P141 REV:002 revised 1/2016 ©December 2015
Menu Features: Batch Parameters
PROGRAM Programming Items Factory set Default Programming Range Notes
Batch 1 LEFT* • Batch Summary Display Summary
• Batch Name Regular 1(-16) Choose from list:
Regular1
(Regular 1-16)
-OR- Write: any name
- • Batch Volume 2liters to 3:10 gal
[ 0.50-3.10]
3.00 gal
|_________[]________|
0.50 3.10
Screen will display in
range and units selected
• Brew Time 4:00 or 4:30 mm:ss
[ 2:00-10.00]
4:00 mm:ss
|_____[]___________|
2:00 10:00
CBS-2161XTS 4:00 min
CBS-2162XTS 4:30 min
• Nr Of Pulses 8
8
|_____[]___________|
1 30
CBS-2160 has default
minimum 2 pulses
• Prewet Perc. 0%
0 %
|_[]_______________|
0 15
Pause after prewet
completes • Prewet Delay. 0%
0:00 mm:ss
|_[]_______________|
0:00 1:00
This feture appears
ONLY if Prewet >0:00
• Bypass Perc. 0%
0 %
|_[]_______________|
0 40
• Drip Delay 2:00 mm:ss
2:00 mm:ss
|_____[]___________|
1:00 5:00
Default is 2 minutes. Brew
basket remains locked
during drip-out
Batch 2 Left** **Batch 2-4—Right and Batch2-4—Left may be individually selected-or-entirely deleted
• Batch ON/OFF ON
ON
|_________[]________|
ON OFF
• Batch Summary Display Summary
• Batch Name Regular 1(-16) Choose from list:
Regular1
(Regular 1-16)
-OR- Write: any name
Model CBS-2160 • Batch Volume 2liters to 3:10 gal
[ 0.50-3.10]
3.00 gal
|_________[]________|
0.50 3.10
Screen will display in
range and units selected
• Brew Time 4:00 or 4:30 mm:ss
[ 2:00-10.00]
4:00 mm:ss
|_____[]___________|
2:00 10:00
CBS-2161XTS 4:00 min
CBS-2162XTS 4:30 min
• Nr Of Pulses 8
8
|_____[]___________|
1 30
CBS-2160 has default
minimum 2 pulses
Pause after prewet
completes • Prewet Perc. 0%
0 %
|_[]_______________|
0 15
• Prewet Delay. 0%
0:00 mm:ss
|_[]_______________|
0:00 1:00
This feture appears
ONLY if Prewet >0:00
• Bypass Perc. 0%
0 %
|_[]_______________|
0 40
Batch 3 Left ** (See Batch 2-Left)
Batch 4 Left ** (See Batch 2-Left)
Batch 1 Right * (See Batch 1-Left)
Batch 2 Right ** (See Batch 2-Left)
Batch 3 Right ** (See Batch 2-Left)
Batch 4 Right ** (See Batch 2-Left)
Batch Copy Copy From Batch L1 L1-L4;R1-R4
Copy To Batch L1 L1-L4;R1-R4
Copy? L1ÆL2?
(example)
NO
|_______________[]__|
YES NO
*Batch 1 cannot be disabled. (CBS-2101XTS)
*Batch 1&4 cannot be disabled. (CBS-2102XTS); **Batch can be disabled, and removed from display
Batch 1 Right …
Batch Name Regular 1
Batch Volume 3.00 gal
Brew Time 4 :00
Number of Pulses 8
Prewet Percent 0 %
Prewet Delay 0:00
Drip Delay 2:00
Touch to return
(Example screen for
Batch Summary display)

Go to fetco.com for the latest version of all information 9 P141 REV:002 revised 1/2016 ©December 2015
INPUTS Programming Items Factory set Default Programming Range (display) Notes
Display Inputs • Input Summery
R. Brew Basket Sens. [ single/dual]
L. Brew Basket Sens.
H. Liquid Level probe
H. Tank Temperature Probe
L. Tank Temperature Probe
SD Card Recognized
Tank Temp. 200
Cal. Touch Scr
Calibrate Calibrate
________________ ____ []
YES NO
If Yes:
Follow directions on the
touch screen
INPUT SUMMARY SCREEN
Display Inputs
(See “INPUTS”
Service Screen)
Brew Basket Sensor
High Liquid Level Probe
Low Liquid Level Probe
Tank Temp. Probe
SD Card present
Tank Temperature
205F
Use DISPLY INPUTS screen to assist in error code fault correction.
There are two liquid level probes shown as High and Low High is the
fill volume of the hot water tank Low probe is the level when the
heaters are sufficiently covered by water to start.

Go to fetco.com for the latest version of all information 10 P141 REV:002 revised 1/2016 ©December 2015
OUTPUTS Programming Items Factory set Default Programming Range (display) Notes
Show Summary • Output Summary
Left Brew FR
Left Bypass FR
Right Brew FR
Right Bypass FR
Screen Contrast
Screen Brightness
Touch To Return
3200
2400
3200
2400
8
8
FR=Flow Rate ml/min
Left Valve
Test OR Calibrate • Left Valve Test (Press to test)
TEST
Press To Test
Runs valve to verify
flow. Have container
under brewbasket!
’’ ’’ ’’ ’’ • L. Valve Calib Calibrate
*Flow Rate
3200 ml p m
|_________[]________|
2800 3800
Factory or service use
for flow rate
L. Bypass Valve
Test OR Calibrate
Not on CBS 2130XTS
• Left Bypass
Valve Test (Press to test)
TEST
Press To Test
Runs valve to verify
flow. Have container
under brewbasket!
’’ ’’ ’’ ’’ • L. Bypass Valve
Calib
Calibrate
*Flow Rate
2400 ml p m
|_________[]________|
2100 2800
Factory or service use
for flow rate
Left Valve display is only for CBS-2102XTS dual side brewer. CBS-2101XTS Single series displays RIGHT SIDE only
Right Valve
Test OR Calibrate • Right Valve Test (Press to test)
TEST
Press To Test
Runs Valve to verify flow.
Have container under
brewbasket!
’’ ’’ ’’ ’’ • R. Valve Calib Calibrate
*Flow Rate
3200 ml p m
|_________[]________|
2800 3800
Factory or service use
for flow rate
R. Bypass Valve
Test OR Calibrate
Not on CBS 2130XTS
• Right Bypass
Valve Test (Press to test)
TEST
Press To Test
Runs valve to verify
flow. Have container
under brewbasket!
’’ ’’ ’’ ’’ • R. Bypass
Valve Calib
Calibrate
*Flow Rate
2400 ml p m
|_________[]________|
2100 2800
Factory or service use
for flow rate
Fill Valve • Fill Valve Test (Press to test)
TEST
Press To Test
Operates fill valve.
Have container under
both brewbaskets!
Left Basket Lk.
Not on CBS 2130XTS
• Left brew basket
lock test (Press to test)
TEST
Press To Test
Energizes brew basket
lock. For factory or
service use
Right Basket Lk.
Not on CBS 2130XTS
• Right brew
basket lock test (Press to test)
TEST
Press To Test
Energizes brew basket
lock. For factory or
service use
Heater • Heater Test (Press to test)
TEST
Press To Test
Energizes Heater(s)
Use for servicing.
Screen
Brightness OR Contrast • Screen Contrast Contrast
8
|____________[]____|
1 10
• S. Brightness Brightness
8
|____________[]____|
1 10
TEST
TEST
TEST
TEST
TEST
TEST
TEST
TEST

Go to fetco.com for the latest version of all information 11 P141 REV:002 revised 1/2016 ©December 2015
How to calibrate the flow rate
Set the flow rates of components to adjust for taste profile and for over or under potting.
Built-in algorithms in Brewer controller software corrects brew parameter to customer preferences or to trim variations in flow control components
NOTICE: This operation requires operator hold finger on keypad position for one minute—without lifting it.
1) MEASURE THE FLOW RATE:
-Enter programming mode, scroll left to “OUTPUTS”
-Scroll down to “Left(or)Right Valve Test”
-Place 5 liter/2gal measuring container under empty brewbasket.
One good way to measure is to weigh the test water. Use a scale for at least 5 kg/12lb
-Press To Test the Brew Valve. Æ
Æ
Æ
ÆÆ! Keep finger on touchpad for one minute! !!DO NOT STOP!!
It is very important for this test to keep finger in place for the entire minute.
Measure the results of the flow in the 5-liter measuring container and hold the number.
2) AUTOMATIC Built-in CALIBRATE THE FLOW RATE
-Enter this number, in milliliters, into the calibration slider for the Valve tested in the OUTPUT MENU.
-Use milliliters. If measured in fluid ounces (fl.oz) multiply by 29.57 to convert to milliliters
-After entering the measured volume, exit PROGRAMMING and return to the normal screens
3) MANUAL METHOD Operator input: CALIBRATE THE FLOW RATE
Use the amount measured, in milliliters, divided by programmed value and multiply by the current setting
Actual Volume
3200 ml p m
|_________[]________|
2800 3800
Å Example of
CBS-2160 brew
valve slider Programmed Volume XCURRENT
SETTING = NEW
SETTING
Enter new setting on
the slider shown and
EXIT to save
Obtain programmed volume from “PROGRAM” Menu under “Batch Summary”.
Note—match correct batch number to correct side, if two sided.
By entering the new flow rate number into the brewer, the software automaticall
y
corrects the valve flow discrepanc
y
Default-factory set Flow Rates; Brew Valve and Bypass
See “OUTPUTS” right and left brew valve and bypass valve settings and calibration
CBS-2162 ml/min CBS-2161 ml/min
Left Brew FR 3200 Right Brew FR 3200
Left Bypass FR 2400 Right Bypass FR 2400
Right Brew FR 3200
Right Bypass FR 2400
CBS-2152 ml/min CBS-2151 ml/min
Left Brew FR 3200 Right Brew FR 3200
Left Bypass FR 2400 Right Bypass FR 2400
Right Brew FR 3200
Right Bypass FR 2400
CBS-2142 ml/min CBS-2141 ml/min
Left Brew FR 1540 Right Brew FR 1540
Left Bypass FR 2150 Right Bypass FR 2150
Right Brew FR 1540
Right Bypass FR 2150
CBS-2132 ml/min CBS-2131 ml/min
Left Brew FR 1540 Right Brew FR 1540
Right Brew FR 1540
CBS-2130XTS equipment do not have BYPASSS feature

Go to fetco.com for the latest version of all information 13 P141 REV:002 revised 1/2016 ©December 2015
Error Codes
Æ
Æ
Æ
ÆÆContact specialized personnel for error codes
Code Description Possible Cause Corrective Action How to Clear
Error Codes
001 Software error-error on start
up or corrupted software
Improper start-up
or shutdown
Restart , if still fault: reload
software
050 Shorted temperature probe Probe failure. Replace probe.
051 Open temperature probe.
Bad probe
connection, or
probe failure.
Check all connections.
Replace probe if necessary.
100
Initial Fill Error. Initial fill
time was more than 11
minutes after power up.
Water supply flow
rate is too low.
Watch for short potting
during brew cycle.
Investigate cause of low flow
rate. (Clogged water filter...)
101
Error on refill
Tank did not refill within 3
minutes.
Water supply flow
rate is too low.
Watch for short potting
during brew cycle.
Investigate cause of low flow
rate. (Clogged water filter…)
102 Unwanted fill;
Possible leak in
tank, fitting, or
valve.
Occurs during prefill, low
probe is uncovered
107 Fault
Lower liquid level probe Tank not filling
Occurs during prefill, low
probe is uncovered , or
wires are reversed low / high
probe
201
Heater open, high limit
thermostat, or Solid State
Relay (SSR) fault
Failure of: heating
element,SSR,high
Limit or low voltage
Check and replace heating
elements if necessary.
255 Touch pad error
Usually from longer
than 2 min contact.
Or faulty reassembly
after service
Restart , if still fault: reload
software. If mechanical:
reassemble correctly
INSERT
BREW
BASKET
Brewbasket must
be in place Insert brewbasket
TO CLEAR FAULT,
Make repairs as required
Below is the only way to
clear error codes
1) Enter
“PROGRAMMING”
2)Scroll left to “OTHER”
3)Scroll down to
“ERROR CODES”
4)Scroll down to “Display
Errors”
5)Scroll left to “Reset
Errors”
6)Scroll down to “Reset”
7)Follow directions
shown on screen.
Merely toggling ON/OFF
switch will not clear error
codes.
Error codes must be
cleared by entering
PROGRAMMING and
using the menus!
! Æ
Æ
Æ
ÆÆ Never attempt to defeat or override a brew basket-locking feature
Regular 1
3:00
06:30
Decaf 1
3:00
06:30
Decaf 2
3:00
06:30
Regular 2
3:00
06:30

Go to fetco.com for the latest version of all information 14 P141 REV:002 revised 1/2016 ©December 2015
Operator Training
Review the operating procedures with whoever will be using the brewer.
Pay particular attention to the following areas:
1. Always pre-heat the dispensers before the first use of each day by filling them half way with hot water, and letting
them stand for at least 5 minutes.
2. Do not remove the brew basket from a coffee brewer until it has stopped dripping.
3. Make sure the dispenser is empty before brewing into it.
4. Show how to attach covers, close, and or secure the dispensers for transporting.
5. Show the location and operation of the water shut off valve as well as the circuit breaker for the brewer.
6. Steam from the tank will form condensation in the vent tubes. This condensation will drip into and then out of the
brew baskets. Up to 1/4 cup/118cc discharging overnight is possible. Place an appropriate container under each
brew basket when not in use.
7. We recommend leaving the power to the brewer on overnight. The water tank is well insulated and very little
electricity is used to keep the tank hot. Leaving the brewer in the “ON” position will also avoid delays at the
beginning of shifts for the brewer to reach operating temperature.
Cleaning & Maintenance
After Each Brew:
1. Dispose of grounds and rinse brew basket.
2. Never strike a brewbasket or hit it against a hard surface.
This will damage the brew cone, and may damage the brewbasket support rails
3. Rinse dispensers before reuse.
Every Day:
1. Wash brew basket with hot sudsy water.
2. Pull CSD from the spray head, it is magnetically attached. Use gloves or a heavy towel. Æ
Æ
Æ
ÆÆ
Wash off any film and reattach. Use vinegar if limescale filming is present.
3. Clean dispensers with hot suds water and a brush, rinse and air dry.
4. Use only a soft cloth and hot suds on the outside to avoid scratches. Never use abrasives that
will scratch surface.
Weekly
1. Use a commercial coffee dispenser cleaner such as URNEX™, TABZ™, DIP-IT™ or Squeak 'n Clean™.
2. Carefully Follow the instructions supplied with the cleaning product
3. Never use spray cleaners, solvent, solvent based cleaner or petroleum based polish anywhere on dispensers
Warning
4. Turn off power before any cleaning procedure, including wiping the exterior for appearance reasons.
5. Dry the exterior, especially the face panel, before turning on power.
6. Do not apply any type of spray cleaner on the face panel of this equipment.
7. Never use solvent or solvent-based cleaner or petroleum based polish anywhere on this equipment.
8. Dry the face of the touch pad before turning on power
9. Do not electrically energize this equipment or attempt operation without all covers in place and all screws fastened.
10. Unplug machine before disassembly or servicing.
Saftey Notes
1. Professional installation is required. This appliance is manufactured only for commercial use
2. Operational requirements and maintenance for commercial cooking appliances differ from household appliances.
3. Operators must be trained for this equipment and must understand the use, maintenance and hazards.
4. Access to the service area is restricted to persons having safety/hygiene knowledge and practical experience of the
coffee brewer. This appliance must be installed in locations where it can be overseen by adult trained personnel.
5. Do not attempt to move hot beverage equipment once it is filled. Drain equipment before moving.
6. FETCO commercial coffee brewers prepare large amounts of coffee or tea in a single batch using very hot water
7. Commercial coffee brewers provides very hot water from the sprayhead, brewbasket and faucet when it is pulled.
8. Coffee brewers may continue to dispense very hot water from the mechanically operated faucet after the brewer is
completely disabled by turning off the power switch on the lower back of the unit, or unplugging the unit.
9. For safety, the brewer control locks the brew basket for 5.5 minutes after starting the brew.
10. Never attempt to defeat the factory set (default) time that the brew basket is locked for safety from start of brew.
Keep these instructions for training and future reference.

Go to fetco.com for the latest version of all information 15 P141 REV:002 revised 1/2016 ©December 2015
Service Guide to a Successful Installation
(For Qualified Service Technicians Only)
General
If not installed correctly by qualified personnel, the brewer will not operate properly and damage may result.
Damages resulting from improper installation are not covered by the warranty, and will void the warranty.
Here are the key points to consider before installation:
Electrical:
1. All CBS_Series brewers require an electrical ground wire. Installation without grounding is dangerous.
2. Note Equipotentiality Terminal, if present, (To identify the terminals which, when connected together, bring the
various parts of equipment or of a system to the same potential, not necessarily being the earth (ground) potential, e.g.
for local bonding.)
3. Verify voltages, polarity, circuits, and circuit breaker access before attaching equipment.
4. The electrical diagram is located in the Users Guide and online at www.fetco.com.
5. Make sure of the tight grounding of the equipment and use the external ground bolt.
6. The installation must comply with applicable federal, state, and local codes having jurisdiction at your
location. Check with your local inspectors to determine what codes will apply.
Plumbing:
1. North America: All installations must comply with applicable federal, state, or local plumbing codes.
2. All Others: The water and waste piping and connections shall comply with the International Plumbing Code
2003, International Code Council (ICC), or to the Uniform Plumbing Code 2003 (IAPMO).
3. Use an inline water filter for all beverage equipment.
Install the filter unit after a water shutoff valve and in a position to facilitate filter replacement.
4. The water line and newly installed filter cartage must be flushed thoroughly prior to connecting it to the
brewer to prevent debris from contaminating the machine.
5. Verify that the water line will provide a flow rate of at least 2 gpm (7.60 lpm) per minute and the water
pressure is between 20-75 psig (138-517kPa) before making any connections.
6. Install a backflow prevention device. Most municipalities require a recognized backflow preventer.
7. Usable on all hot beverage and cold beverage equipment is a WATTS® SD-2 or SD-3.
8. WATTS spring loaded double check valve models are accepted by most zoning authorities.
9. ÆThe check valve should be as close to the water supply inlet of the beverage equipment as possible.
General:
1. Install legs, they are shipped inside the brewbasket
2. FETCO CBS-2160XTS series equipment have user configurable dispenser locator-see diagram below.
3. Utilize only qualified beverage equipment service technicians for service and installation.
4. Always have an empty dispenser under sprayhead of all coffee brewing equipment-including when at idle
5. For CBS-2160 series brewers: adjust the dispenser User Configurable Locator Assembly—see below
WARNING
Leveling legs, if installed, are to be
adjusted for leveling the brewer only.
Do not use for height adjustment, or extend
them hi
g
her than necessar
y
.

Go to fetco.com for the latest version of all information 16
Brewer Setup Includes installation safety and hygiene directions-For International and CE equipment
1. Review the dimensions for the unit and verify that it will fit properly in the space intended for it. Verify that the
counter or table will support the total weight of the brewer and dispensers when filled (specifics-page 23).
2. Place the brewer on the counter or stand, install legs, set dispenser locater for airpot or gravity dispenser.
3. For terminal bock electrical connected units: remove the lower utility slide out at the back of the equipment to
access the electrical connections. The utility slide must remain close to the unit.
Note: Utility slide out panel cannot be completely detached from the brewer.
4. Access to the service area is restricted to persons having safety/hygiene knowledge and practical experience of
the coffee brewer.
5. This appliance must be installed in locations where it can be overseen by trained personnel
6. For proper operation, this appliance must be installed indoors where the temperature is between 10°C/50°F to
35°C/95°F. Drain and remove al liquid from equipment and lines if exposed to freezing temperatures
7. All commercial cooking equipment, including this unit, is not intended for use by children or persons with reduced
physical, sensory, or mental capabilities. Ensure proper supervision of children and keep them away from the
unit.
8. All commercial cooking equipment, including this unit, is not intended for use by children or persons with reduced
physical, sensory, or mental capabilities. Ensure proper supervision of children and keep them away from the
unit
9. This unit must be installed and serviced by qualified personnel only.
10. Installation must conform to all local electrical and plumbing codes. Installation by unqualified personnel will void
the unit warranty and may lead to electric shock or burn, as well as damage to unit and/or its surroundings.
11. Review the dimensions for the unit and verify that it will fit properly in the space intended for it. Verify that the
counter or table will support the total weight of the brewer and dispensers when filled (See: Technical Data).
12. Place the brewer on the counter or stand. When the brewer is in position, level it front to back as well as side-to-
side by adjusting the legs.
13. Do not tilt appliance more than 10° to insure safe operation.
14. Unit is for protected indoor use only. Do not steam clean or use excessive water on unit.
15. This unit is not “jet-proof” construction. Do not pressure wash or use jet spray to clean this unit.
16. The unit is not waterproof-do not submerge or saturate with water.
Do not operate if unit has been submerged or saturated with water.
Equipment exposed to flood and contaminated must never be used due to electrical and food safety.
Water Connection
1. This equipment is to be installed to comply with the applicable federal, state, or local plumbing codes.
2. Water supply inlet is a ⅜ inch male flare fitting
3. The brewer is to be connected to a cold water line.
4. Install a shut off water valve near the brewer to facilitate service.
5. An in-line water filter should used. Install filter unit after the water shut off valve and in a position to facilitate filter
replacement.
6. Flush the water supply line and filter before connecting it to the brewer.
7. Before making any connections: Verify that the water line will deliver at least 1½gpm/(5.7lpm) per minute and
water pressure is between 20-75 psig (138-517kPa).
8. Use a wrench on the factory fitting when connecting the incoming water line. This will reduce stress on the internal
connections and reduce the possibility of leaks developing after the install has been completed
Installation Directions For Qualified Service Technicians Only
Tank Drain
Utility slide
on back
of brewer
Power
Switch
Electrical
Connection
Water
Supply
Connection
Warning: To prevent
electrical shock, t his
unit must be properly
grounded.
Produkt Specifikationer
Mærke: | Fetco |
Kategori: | Kaffemaskine |
Model: | CBS-2161XTS |
Har du brug for hjælp?
Hvis du har brug for hjælp til Fetco CBS-2161XTS stil et spørgsmål nedenfor, og andre brugere vil svare dig
Kaffemaskine Fetco Manualer
23 August 2024

23 August 2024

23 August 2024

23 August 2024

23 August 2024

23 August 2024

19 August 2024

16 August 2024

16 August 2024

15 August 2024
Kaffemaskine Manualer
- Kaffemaskine DeLonghi
- Kaffemaskine Sinbo
- Kaffemaskine Ikea
- Kaffemaskine Bosch
- Kaffemaskine SilverCrest
- Kaffemaskine OBH Nordica
- Kaffemaskine Sencor
- Kaffemaskine Krups
- Kaffemaskine Siemens
- Kaffemaskine Wilfa
- Kaffemaskine GE
- Kaffemaskine Breville
- Kaffemaskine Zanussi
- Kaffemaskine Panasonic
- Kaffemaskine Fisher & Paykel
- Kaffemaskine Gorenje
- Kaffemaskine Miele
- Kaffemaskine Ninja
- Kaffemaskine Blomberg
- Kaffemaskine Philips
- Kaffemaskine Caso
- Kaffemaskine Gastroback
- Kaffemaskine Steba
- Kaffemaskine Teka
- Kaffemaskine Vitek
- Kaffemaskine Rommelsbacher
- Kaffemaskine OK
- Kaffemaskine AEG
- Kaffemaskine Electrolux
- Kaffemaskine Bauknecht
- Kaffemaskine Whirlpool
- Kaffemaskine Braun
- Kaffemaskine Sharp
- Kaffemaskine Magimix
- Kaffemaskine Hotpoint
- Kaffemaskine Atag
- Kaffemaskine Kenwood
- Kaffemaskine Sage
- Kaffemaskine Korona
- Kaffemaskine Arçelik
- Kaffemaskine JennAir
- Kaffemaskine Waeco
- Kaffemaskine Grundig
- Kaffemaskine Makita
- Kaffemaskine Presto
- Kaffemaskine De Dietrich
- Kaffemaskine Witt
- Kaffemaskine Indesit
- Kaffemaskine Ernesto
- Kaffemaskine Livoo
- Kaffemaskine Klarstein
- Kaffemaskine Bodum
- Kaffemaskine Etna
- Kaffemaskine Tefal
- Kaffemaskine Trisa
- Kaffemaskine Princess
- Kaffemaskine Matsui
- Kaffemaskine Biltema
- Kaffemaskine Nedis
- Kaffemaskine Emerio
- Kaffemaskine Severin
- Kaffemaskine Logik
- Kaffemaskine Butler
- Kaffemaskine Hendi
- Kaffemaskine Bartscher
- Kaffemaskine Moulinex
- Kaffemaskine Sunbeam
- Kaffemaskine Technivorm
- Kaffemaskine Westinghouse
- Kaffemaskine Hama
- Kaffemaskine Muse
- Kaffemaskine Ilve
- Kaffemaskine Proctor Silex
- Kaffemaskine Jura
- Kaffemaskine TriStar
- Kaffemaskine Clas Ohlson
- Kaffemaskine Brandt
- Kaffemaskine Animo
- Kaffemaskine Adler
- Kaffemaskine Black And Decker
- Kaffemaskine Camry
- Kaffemaskine Mestic
- Kaffemaskine Blaupunkt
- Kaffemaskine Tomado
- Kaffemaskine AEG-Electrolux
- Kaffemaskine Asko
- Kaffemaskine Becken
- Kaffemaskine BEKO
- Kaffemaskine Gaggenau
- Kaffemaskine Küppersbusch
- Kaffemaskine Neff
- Kaffemaskine Privileg
- Kaffemaskine Sandstrøm
- Kaffemaskine Smeg
- Kaffemaskine Alpina
- Kaffemaskine Champion
- Kaffemaskine Clatronic
- Kaffemaskine Quigg
- Kaffemaskine Buffalo
- Kaffemaskine Proficook
- Kaffemaskine Rowenta
- Kaffemaskine Dualit
- Kaffemaskine Exido
- Kaffemaskine Graef
- Kaffemaskine Melitta
- Kaffemaskine Nespresso
- Kaffemaskine Philips Saeco
- Kaffemaskine Saeco
- Kaffemaskine Medion
- Kaffemaskine Ariston Thermo
- Kaffemaskine Fagor
- Kaffemaskine König
- Kaffemaskine AFK
- Kaffemaskine Bifinett
- Kaffemaskine Bomann
- Kaffemaskine Cloer
- Kaffemaskine Morphy Richards
- Kaffemaskine Redmond
- Kaffemaskine Russell Hobbs
- Kaffemaskine WMF
- Kaffemaskine Ariete
- Kaffemaskine Innoliving
- Kaffemaskine KitchenAid
- Kaffemaskine Zelmer
- Kaffemaskine Boretti
- Kaffemaskine Vivax
- Kaffemaskine Alaska
- Kaffemaskine Galanz
- Kaffemaskine Lifetec
- Kaffemaskine Amica
- Kaffemaskine C3
- Kaffemaskine Gaggia
- Kaffemaskine Wolf
- Kaffemaskine Telefunken
- Kaffemaskine Micromaxx
- Kaffemaskine Bertazzoni
- Kaffemaskine Caple
- Kaffemaskine Arno
- Kaffemaskine Bellarom
- Kaffemaskine Bravilor
- Kaffemaskine Cuisinart
- Kaffemaskine Daalderop
- Kaffemaskine Moccamaster
- Kaffemaskine Nescafé
- Kaffemaskine Tiger
- Kaffemaskine Primo
- Kaffemaskine Orbegozo
- Kaffemaskine Jacob Jensen
- Kaffemaskine Malmbergs
- Kaffemaskine CaterChef
- Kaffemaskine Franke
- Kaffemaskine Optimum
- Kaffemaskine Koenig
- Kaffemaskine Tchibo
- Kaffemaskine Taurus
- Kaffemaskine Olympia
- Kaffemaskine Balay
- Kaffemaskine Exquisit
- Kaffemaskine Pelgrim
- Kaffemaskine Elba
- Kaffemaskine Schneider
- Kaffemaskine MPM
- Kaffemaskine Profilo
- Kaffemaskine NGS
- Kaffemaskine Hanseatic
- Kaffemaskine Ritter
- Kaffemaskine Nemox
- Kaffemaskine G3 Ferrari
- Kaffemaskine V-Zug
- Kaffemaskine Gourmetmaxx
- Kaffemaskine Domo
- Kaffemaskine Mellerware
- Kaffemaskine BEEM
- Kaffemaskine Saro
- Kaffemaskine Thomas
- Kaffemaskine Bravilor Bonamat
- Kaffemaskine Hamilton Beach
- Kaffemaskine Ambiano
- Kaffemaskine Unold
- Kaffemaskine Stelton
- Kaffemaskine Bellini
- Kaffemaskine Nevir
- Kaffemaskine Ursus Trotter
- Kaffemaskine Inventum
- Kaffemaskine Nivona
- Kaffemaskine Fakir
- Kaffemaskine Swan
- Kaffemaskine La Pavoni
- Kaffemaskine CDA
- Kaffemaskine Scott
- Kaffemaskine Frigidaire
- Kaffemaskine Sogo
- Kaffemaskine Koenic
- Kaffemaskine Scarlett
- Kaffemaskine Izzy
- Kaffemaskine Focus Electrics
- Kaffemaskine ECG
- Kaffemaskine Nova
- Kaffemaskine Solis
- Kaffemaskine Saturn
- Kaffemaskine Bialetti
- Kaffemaskine Trebs
- Kaffemaskine Prixton
- Kaffemaskine Fritel
- Kaffemaskine Renkforce
- Kaffemaskine Eldom
- Kaffemaskine Maxwell
- Kaffemaskine H.Koenig
- Kaffemaskine Proline
- Kaffemaskine Waves
- Kaffemaskine Termozeta
- Kaffemaskine OneConcept
- Kaffemaskine Polti
- Kaffemaskine Lentz
- Kaffemaskine Cremesso
- Kaffemaskine Caffe Borbone
- Kaffemaskine Eta
- Kaffemaskine Turmix
- Kaffemaskine Schaerer
- Kaffemaskine Egro
- Kaffemaskine Bella
- Kaffemaskine NutriBullet
- Kaffemaskine Rotel
- Kaffemaskine Kalorik
- Kaffemaskine ECM
- Kaffemaskine Cecotec
- Kaffemaskine Illy
- Kaffemaskine Rancilio
- Kaffemaskine Capresso
- Kaffemaskine Solac
- Kaffemaskine Royal Catering
- Kaffemaskine Douwe Egberts
- Kaffemaskine Efbe-Schott
- Kaffemaskine Baumatic
- Kaffemaskine Barazza
- Kaffemaskine Wittenborg
- Kaffemaskine Magefesa
- Kaffemaskine Chefman
- Kaffemaskine Caffitaly
- Kaffemaskine L'or
- Kaffemaskine Beper
- Kaffemaskine Nostalgia
- Kaffemaskine Francis Francis
- Kaffemaskine N8WERK
- Kaffemaskine Ascaso
- Kaffemaskine PowerXL
- Kaffemaskine Emeril Lagasse
- Kaffemaskine CRUX
- Kaffemaskine Tower
- Kaffemaskine Team
- Kaffemaskine OXO
- Kaffemaskine Hario
- Kaffemaskine Kenmore
- Kaffemaskine Brentwood
- Kaffemaskine Continental Edison
- Kaffemaskine Keurig
- Kaffemaskine Arendo
- Kaffemaskine Aurora
- Kaffemaskine Magic Chef
- Kaffemaskine Lamona
- Kaffemaskine Bestron
- Kaffemaskine Philco
- Kaffemaskine Lavazza
- Kaffemaskine Waring Commercial
- Kaffemaskine Bunn
- Kaffemaskine TurboTronic
- Kaffemaskine Kunft
- Kaffemaskine Arzum
- Kaffemaskine Kogan
- Kaffemaskine Healthy Choice
- Kaffemaskine DCG
- Kaffemaskine Conair
- Kaffemaskine Fulgor Milano
- Kaffemaskine Foster
- Kaffemaskine Oster
- Kaffemaskine Bourgini
- Kaffemaskine Signature
- Kaffemaskine Ufesa
- Kaffemaskine EMSA
- Kaffemaskine La Cimbali
- Kaffemaskine Orava
- Kaffemaskine Gastronoma
- Kaffemaskine Kaiser
- Kaffemaskine Maestro
- Kaffemaskine Haeger
- Kaffemaskine Create
- Kaffemaskine Nutrichef
- Kaffemaskine Flama
- Kaffemaskine Quintezz
- Kaffemaskine La Marzocco
- Kaffemaskine Sanremo
- Kaffemaskine AYA
- Kaffemaskine Aerobie
- Kaffemaskine Aroma
- Kaffemaskine Salton
- Kaffemaskine Bezzera
- Kaffemaskine Jata
- Kaffemaskine Profitec
- Kaffemaskine Teesa
- Kaffemaskine Heinner
- Kaffemaskine Lakeland
- Kaffemaskine Premium
- Kaffemaskine Blokker
- Kaffemaskine First Austria
- Kaffemaskine King
- Kaffemaskine Farberware
- Kaffemaskine Tesco
- Kaffemaskine Cilio
- Kaffemaskine Isomac
- Kaffemaskine Ices
- Kaffemaskine Petra
- Kaffemaskine Havsö
- Kaffemaskine Nuova Simonelli
- Kaffemaskine Xavax
- Kaffemaskine Café
- Kaffemaskine Varo
- Kaffemaskine Superior
- Kaffemaskine Bugatti
- Kaffemaskine Demoka
- Kaffemaskine Carimali
- Kaffemaskine Handpresso
- Kaffemaskine Didiesse
- Kaffemaskine Grunkel
- Kaffemaskine Nesco
- Kaffemaskine Coline
- Kaffemaskine Home Electric
- Kaffemaskine Elta
- Kaffemaskine Imarflex
- Kaffemaskine Wëasy
- Kaffemaskine Springlane
- Kaffemaskine AdHoc
- Kaffemaskine Zepter
- Kaffemaskine Siroca
- Kaffemaskine Instant
- Kaffemaskine Lelit
- Kaffemaskine Gutfels
- Kaffemaskine T-fal
- Kaffemaskine Girmi
- Kaffemaskine Prima Donna
- Kaffemaskine Mia
- Kaffemaskine Faema
- Kaffemaskine Amici
- Kaffemaskine Spidem
- Kaffemaskine Azkoyen
- Kaffemaskine Riviera And Bar
- Kaffemaskine SAB
- Kaffemaskine Italico
- Kaffemaskine Frieling
- Kaffemaskine Puc
- Kaffemaskine Micro Matic
- Kaffemaskine Walco
- Kaffemaskine UNIC
- Kaffemaskine Fine Dine
- Kaffemaskine Venga
- Kaffemaskine Kees Van Der Westen
- Kaffemaskine Rival
- Kaffemaskine Rosseto
- Kaffemaskine Innova
- Kaffemaskine K-fee
- Kaffemaskine QuickMill
- Kaffemaskine Wilbur Curtis
- Kaffemaskine Avantco
- Kaffemaskine Mystery
- Kaffemaskine Cecilware
- Kaffemaskine La San Marco
- Kaffemaskine Estella Caffe
- Kaffemaskine PowerTec Kitchen
- Kaffemaskine Koolatron
- Kaffemaskine Leopold Vienna
- Kaffemaskine Autobar
- Kaffemaskine Wacaco
- Kaffemaskine BCC
- Kaffemaskine Kitchen Originals
- Kaffemaskine Petra Electric
- Kaffemaskine Espressions
- Kaffemaskine Barista
- Kaffemaskine Veromatic
- Kaffemaskine Toddy
- Kaffemaskine KING Hoff
- Kaffemaskine WestBend
- Kaffemaskine Mr Coffee
- Kaffemaskine Newco
- Kaffemaskine Elektra
- Kaffemaskine Vibiemme
- Kaffemaskine Wega
- Kaffemaskine Casadio
- Kaffemaskine Bloomfield
- Kaffemaskine Giesen Coffee Roasters
- Kaffemaskine Bifinet
- Kaffemaskine Ceado
- Kaffemaskine Casselin
- Kaffemaskine Victoria Arduino
- Kaffemaskine Conti
- Kaffemaskine Astoria
- Kaffemaskine Inalsa
- Kaffemaskine HeyCafe
- Kaffemaskine Espressotoria
- Kaffemaskine Delizio
- Kaffemaskine Bonavita
- Kaffemaskine Beautiful
- Kaffemaskine Rhea
- Kaffemaskine Catler
- Kaffemaskine Ideen Welt
- Kaffemaskine Szarvasi
- Kaffemaskine Auspure
- Kaffemaskine Avoury
- Kaffemaskine Electroline
- Kaffemaskine The Little Guy
- Kaffemaskine Barista Mate
- Kaffemaskine Coffee Queen
- Kaffemaskine HomeCraft
- Kaffemaskine Flytek
- Kaffemaskine Tassimo
- Kaffemaskine Rocket Espresso
- Kaffemaskine Pyrex
- Kaffemaskine Total Chef
Nyeste Kaffemaskine Manualer

9 April 2025

9 April 2025

7 April 2025

6 April 2025

23 Marts 2025

23 Marts 2025

19 Marts 2025

17 Marts 2025

10 Marts 2025

27 Februar 2025