Forte Lighting 2738-03 Manual
Forte Lighting
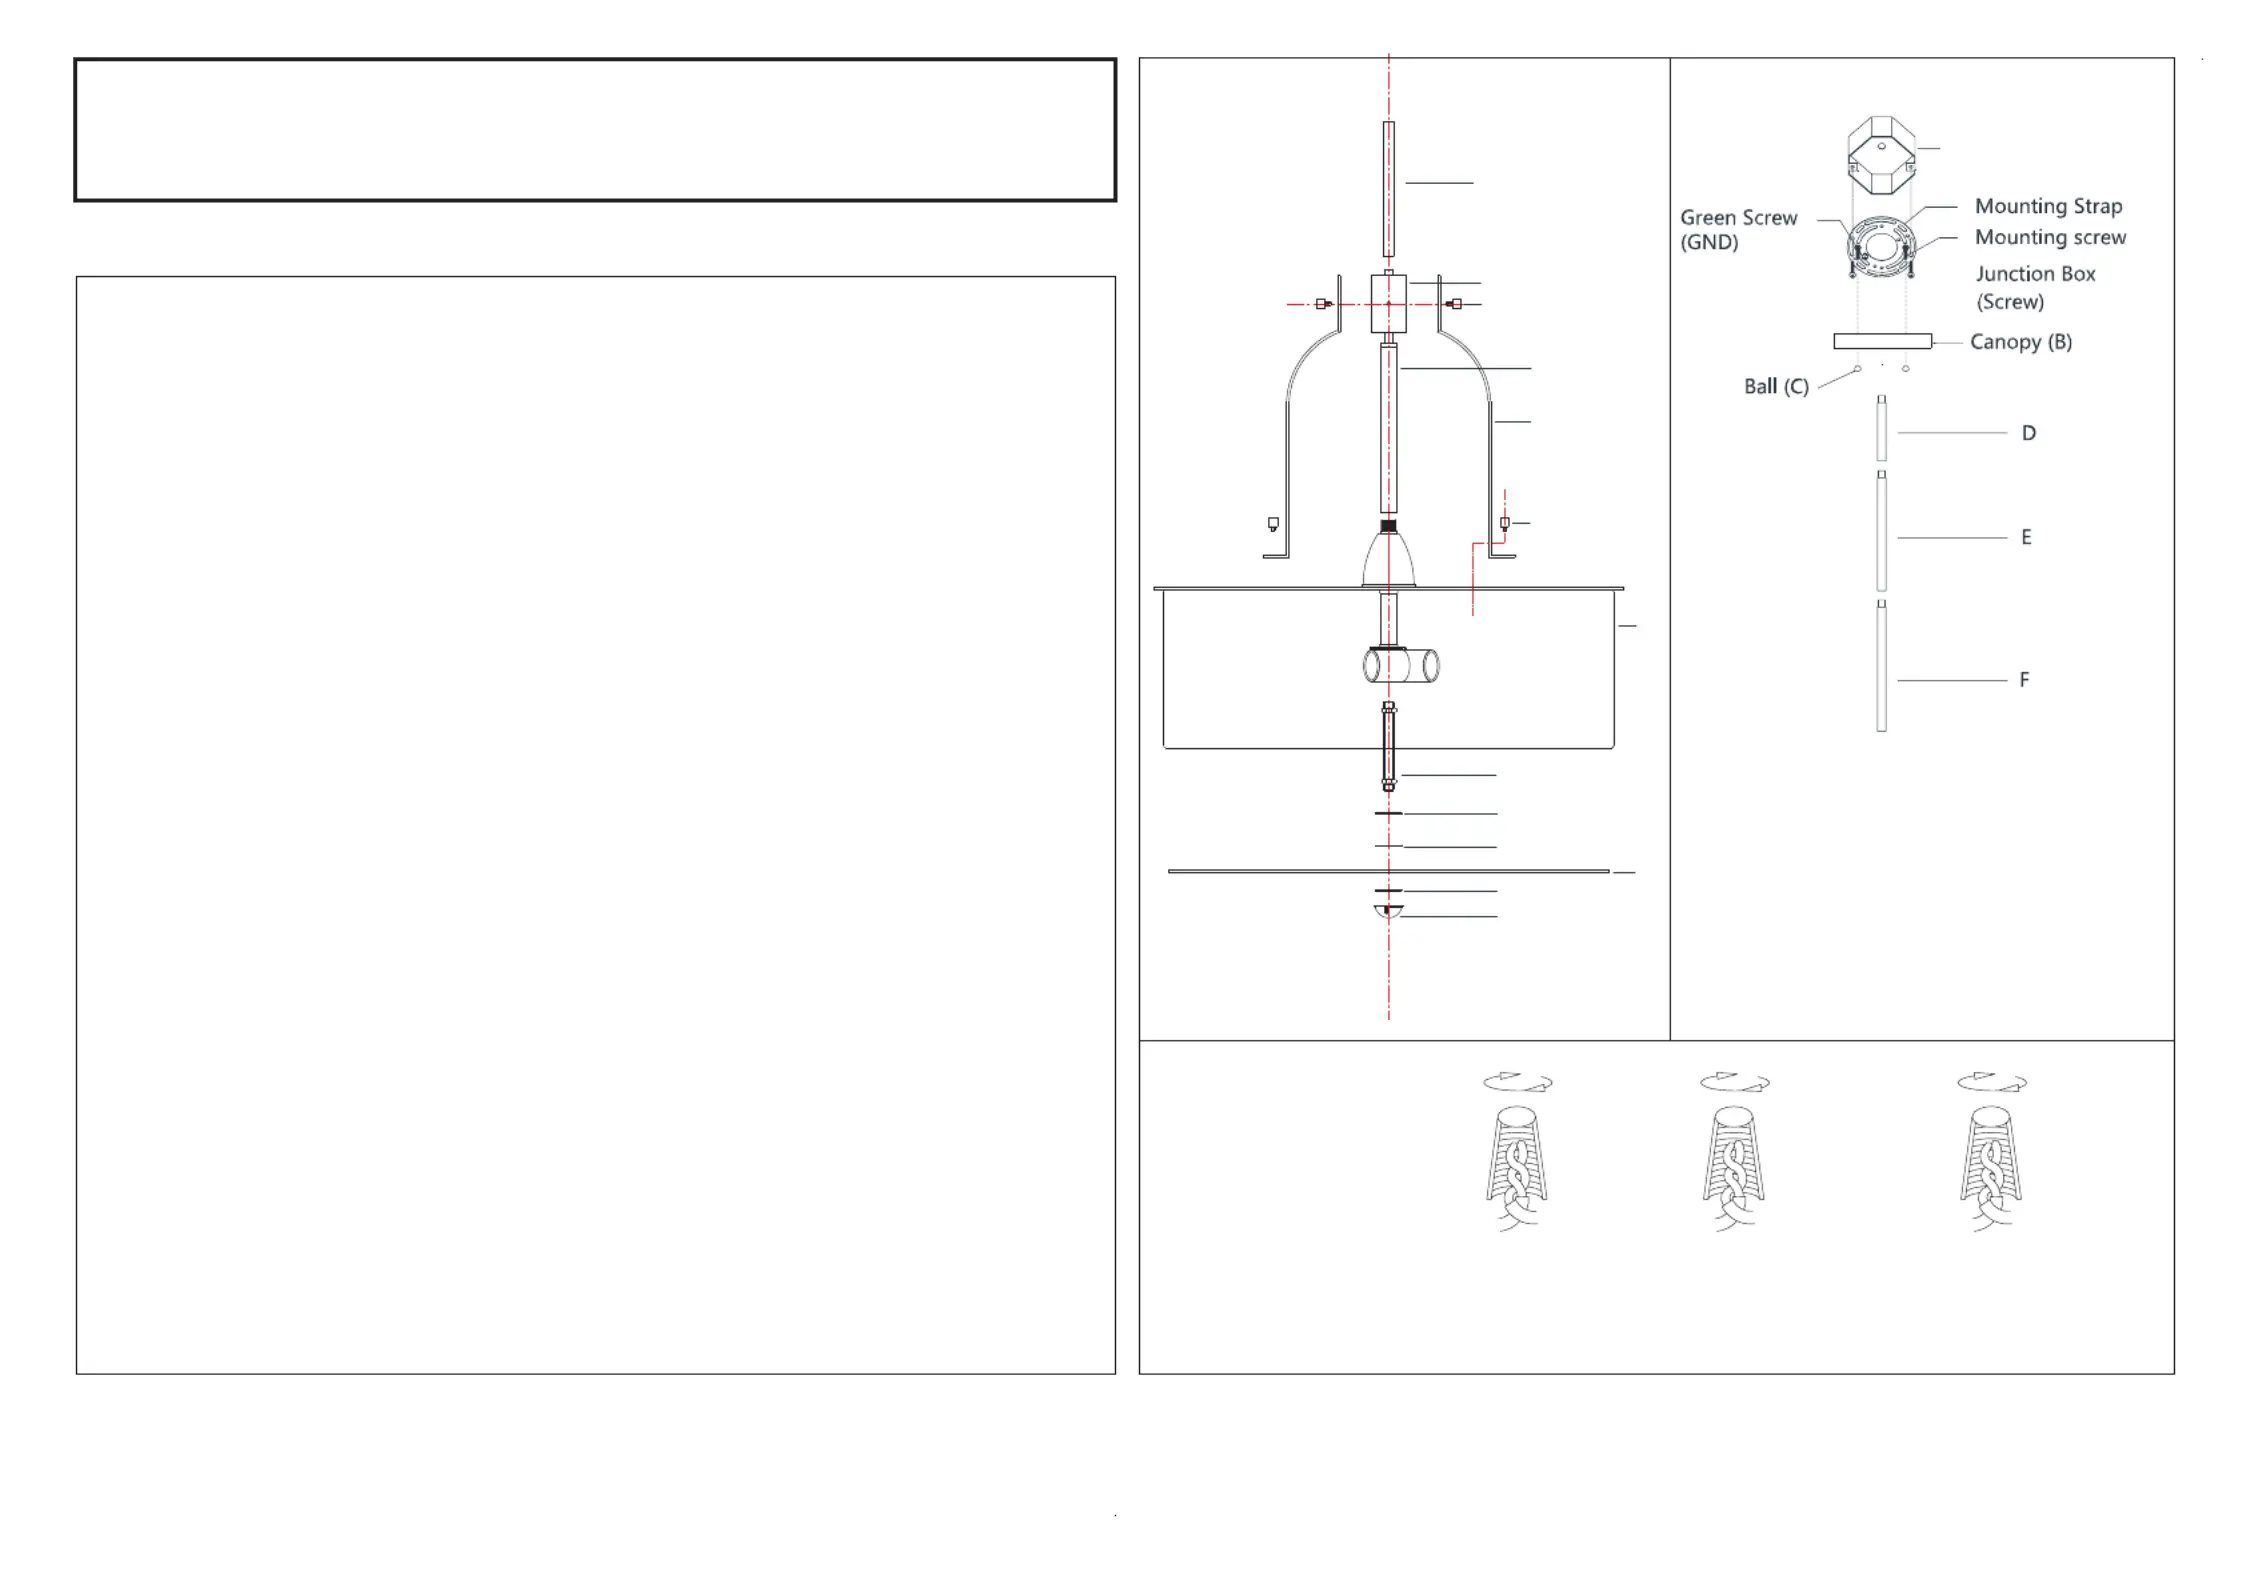
Lys
2738-03
| Mærke: | Forte Lighting |
| Kategori: | Lys |
| Model: | 2738-03 |
Har du brug for hjælp?
Hvis du har brug for hjælp til Forte Lighting 2738-03 stil et spørgsmål nedenfor, og andre brugere vil svare dig
Lys Forte Lighting Manualer

8 December 2025

8 December 2025

8 December 2025

8 December 2025

8 December 2025

8 December 2025

7 December 2025

7 December 2025

7 December 2025

7 December 2025
Lys Manualer
- Kobi
- ETC
- Prismate
- Portman
- Heitronic
- Ecolight
- BeamZ
- Varytec
- Eden
- Genesis
- Eheim
- OK
- VELVET
- JMAZ Lighting
- LTC
Nyeste Lys Manualer

8 December 2025

8 December 2025

8 December 2025

8 December 2025

7 December 2025

7 December 2025

7 December 2025

7 December 2025

7 December 2025

7 December 2025