GE GSS27RSPBS Manual

GE Køleskab GSS27RSPBS

Læs gratis den danske manual til GE GSS27RSPBS (108 sider) i kategorien Køleskab. Denne vejledning er vurderet som hjælpsom af 16 personer og har en gennemsnitlig bedømmelse på 4.6 stjerner ud af 8.5 anmeldelser. Har du et spørgsmål om GE GSS27RSPBS, eller vil du spørge andre brugere om produktet?

Side 1/108
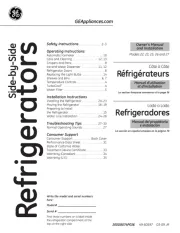
www.GEAppliances.com
Refrigerators
Side by Side
200D2600P0247 49-60372 05-05 JR
La section française commence à la page 40
La sección en español empieza en la página 74
Safety Instructions . . . . . . . . . . . . . . .2–4
Operating Instructions
Automatic Icemaker . . . . . . . . . . . . . . .11
Care and Cleaning . . . . . . . . . . . . . .13, 14
Crispers and Pans . . . . . . . . . . . . . . . . .10
Ice and Water Dispenser . . . . . . . . .12, 13
Refrigerator Doors . . . . . . . . . . . . . . . . .9
Replacing the Light Bulbs . . . . . . . . . . .15
Shelves and Bins . . . . . . . . . . . . . . . . .7, 8
Temperature Controls . . . . . . . . . . . . . . .5
TurboCool . . . . . . . . . . . . . . . . . . . . . . .5
Water Filter . . . . . . . . . . . . . . . . . . . . . . .6
Installation Instructions
Installing the Refrigerator . . . . . . . .21–24
Moving the Refrigerator . . . . . . . . .17–20
Preparing to Install
the Refrigerator . . . . . . . . . . . . . . . . . . .16
Water Line Installation . . . . . . . . . .25–27
Troubleshooting Tips . . . . . . . . . . .28–31
Normal Operating Sounds . . . . . . . . . .28
Consumer Support
Consumer Support . . . . . . . . .Back Cover
Performance Data Sheet . . . . . . . . . . . .32
Product Registration (U.S.) . . . . . . .33, 34
Product Registration (Canadian)
. . .35, 36
State of California Water
Treatment Device Certificate . . . . . . . . .37
Warranty (Canadian) . . . . . . . . . . . . . . .38
Warranty (U.S.) . . . . . . . . . . . . . . . . . . .39
Réfrigérateurs
Côte àte
Refrigeradores
Lado a Lado
Models 23, 25 and 27
Write the model and serial numbers here:
Model # __________________________
Serial # __________________________
Find these numbers on a label inside
the refrigerator compartment at the
top on the right side.
Owners Manual
and Installation
Manuel dutilisation
et dinstallation
Manual del propietario
e instalación
Consumer Support Troubleshooting Tips Operating Instructions Safety InstructionsInstallation Instructions
2
IMPORTANT SAFETY INFORMATION.
READ ALL INSTRUCTIONS BEFORE USING.
WARNING!
Use this appliance only for its intended purpose as described in this Owners Manual.
SAFETY PRECAUTIONS
When using electrical appliances, basic safety precautions should be followed, including the following:
This refrigerator must be properly installed
and located in accordance with the Installation
Instructions before it is used.
Do not allow children to climb, stand or hang
on the shelves in the refrigerator. They could
damage the refrigerator and seriously injure
themselves.
Do not touch the cold surfaces in the freezer
compartment when hands are damp or wet. Skin
may stick to these extremely cold surfaces.
Do not store or use gasoline or other flammable
vapors and liquids in the vicinity of this or any
other appliance.
In refrigerators with automatic icemakers,
avoid contact with the moving parts of the
ejector mechanism, or with the heating element
located on the bottom of the icemaker. Do
not place fingers or hands on the automatic
icemaking mechanism while the refrigerator
is plugged in.
Keep fingers out of the “pinch point” areas;
clearances between the doors and between
the doors and cabinet are necessarily small.
Be careful closing doors when children are
in the area.
Unplug the refrigerator before cleaning and
making repairs.
NOTE: We strongly recommend that any servicing be
performed by a qualified individual.
Setting either or both controls to 0 (off) does not
remove power to the light circuit.
Do not refreeze frozen foods which have
thawed completely.
20
Installation Instructions
REMOVE THE
REFRIGERATOR DOOR (cont.)
Lift the refrigerator door up and off the
bottom hinge.
If the refrigerator has a refreshment
center, one person should slowly lift the
door up and off the bottom hinge and the
second person should carefully guide the
electrical lines (harnesses) through the
bottom hinge.
Set the door on a non-scratching surface
with the inside up.
8
D
E
90°
REPLACING THE DOORS
To replace the doors, simply reverse
steps 3 through 8.
However, please note the following:
When lowering the doors onto the
bottom hinges, make sure the second
person carefully guides the tube and
harnesses through the holes in the
hinges.
When connecting the water line, make
sure you insert the tubing all the way
to the mark.
Do not pinch the tubing and harnesses
when placing the doors on the bottom
hinges.
When connecting the power line and
the electrical lines (refreshment center
models only), be sure that the
connectors are seated together fully.
9
Mark
MOVING THE REFRIGERATOR (CONT.)
Refreshment Center Models only
21
Installation Instructions
INSTALLING THE REFRIGERATOR
REFRIGERATOR LOCATION
Do not install the refrigerator where the
temperature will go below 60°F (16°C)
because it will not run often enough to
maintain proper temperatures.
Do not install the refrigerator where the
temperature will go above 100°F (37°C)
because it will not perform properly.
Install it on a floor strong enough to
support it fully loaded.
CLEARANCES
Allow the following clearances for ease
of installation, proper air circulation and
plumbing and electrical connections:
Sides 1/8″ (4 mm)
Top 1″ (25 mm)
Back 1″ (25 mm)
23
Installation Instructions
PUT THE REFRIGERATOR
IN PLACE
Move the refrigerator to its final location.
4
LEVEL THE REFRIGERATOR
The refrigerator can be leveled by
adjusting the rollers located near the
bottom hinges.
Rollers have three purposes:
Rollers adjust so the door closes easily
when opened about halfway. (Raise the
front about 5/8 [16 mm] from the floor.)
Rollers adjust so the refrigerator is
firmly positioned on the floor and does
not wobble.
Rollers allow you to move the
refrigerator away from the wall for
cleaning.
To adjust the rollers:
Turn the roller
adjusting screws
clockwise to
raise the
refrigerator,
counterclockwise
to lower it. Use a
3/8″ hex socket
or wrench, or an
adjustable
wrench.
5
Rollers
Roller adjusting screw
LEVEL THE DOORS
Adjust the refrigerator door to make the
doors even at the top.
To align:
Using a 7/16″ wrench, turn the door
adjusting screw to the right to raise the
door, to the left to lower it.
NOTE:
A nylon plug, imbedded in the threads
of the pin, prevents the pin from turning
unless a wrench is used.
After one or two turns of the wrench,
open and close the refrigerator door and
check the alignment at the top of the doors.
6
A
B
Doors should be even at top
Raise
7/16″ wrench
Raise
Consumer SupportTroubleshooting TipsOperating Instructions
Safety Instructions
Installation Instructions
Before you call for service www.GEAppliances.com
Troubleshooting Tips
Save time and money! Review the charts on the following
pages first and you may not need to call for service.
Problem Possible Causes What To Do
Refrigerator does not Refrigerator in defrost cycle. Wait about 30 minutes for defrost cycle to end.
operate Either or both controls set to 0. Set the controls to a temperature setting.
Refrigerator is unplugged. Push the plug completely into the outlet.
The fuse is blown/circuit Replace fuse or reset the breaker.
breaker is tripped.
Refrigerator is in showroom mode.Unplug the refrigerator and plug it back in.
Vibration or rattling Rollers need adjusting. See Rollers.
(slight vibration
is normal)
Motor operates for Normal when refrigerator Wait 24 hours for the refrigerator to completely
long periods or cycles is first plugged in. cool down.
on and off frequently. Often occurs when large This is normal.
(Modern refrigerators amounts of food are
with more storage placed in refrigerator.
space and a larger
Door left open. Check to see if package is holding door open.
freezer require more
Hot weather or frequent This is normal.
operating time. They
door openings.
start and stop often
Temperature controls See About the controls.
to maintain even
set at the coldest
temperatures.)
setting.
Refrigerator or freezer Temperature control not set See About the controls.
compartment too warm cold enough.
Warm weather or frequent Set the temperature control one step colder.
door openings. See About the controls.
Door left open. Check to see if package is holding door open.
Frost or ice crystals Door left open. Check to see if package is holding door open.
on frozen food Too frequent or too long
(frost within package door openings.
is normal)
Divider between Automatic energy saver This helps prevent condensation on the outside.
refrigerator and freezer system circulates warm
compartments liquid around front edge
feels warm of freezer compartment.
Automatic icemaker l (on)Icemaker power switch Set the power switch to the position.
does not work O (off)is in the position.
Water supply turned off or See Installing the water line.
not connected.
Freezer compartment Wait 24 hours for the refrigerator to completely
too warm. cool down.
Piled up cubes in the storage Level cubes by hand.
bin cause the icemaker
to shut off.
Ice cubes stuck in icemaker. Turn off the icemaker, remove cubes, and turn the
(Green power light on icemaker back on.
icemaker blinking).
29
34
Consumer Product Ownership Registration
Important
Mail
Today!
GE Appliance
s
GE Consumer & Industrial
Appliances
General Electric Company
Louisville, KY 40225
ge.com
First
Name
Mr.
Ms.
Mrs.
Miss
Street
Address
City State
Date Placed
In Use
Month Day Year
Zip
Code
Apt. #
Last
Name
Phone
Number _ _
Consumer Product Ownership Registration
Dear Customer:
Thank you for purchasing our product and thank you for placing your confidence in us.
We are proud to have you as a customer!
Follow these three steps to protect your new appliance investment:
Important: If you did not get a registration card with your
product, detach and return the form below to
ensure that your product is registered, or register
online at ge.com.
12 3
Model Number Serial Number
Cut here
Complete and mail
your Consumer
Product Ownership
Registration today.
Have the peace of
mind of knowing we
can contact you in
the unlikely event of
a safety modification.
After mailing the
registration below,
store this document
in a safe place. It
contains information
you will need should
you require service.
Our service number is
800.GE.CARES
(800.432.2737).
Read your Owners
Manual carefully.
It will help you
operate your new
appliance properly.
Model Number Serial Number
E-mail Address*
* Please provide your e-mail address to receive, via e-mail, discounts, special offers and other
important communications from GE Appliances (GEA).
Check here if you do not want to receive communications from GEA’s carefully selected partners.
FAILURE TO COMPLETE AND RETURN THIS CARD DOES NOT DIMINISH YOUR
WARRANTY RIGHTS.
For information about GEA's privacy and data usage policy, go to ge.com and
click on "Privacy Policy" or call 800.626.2224.
Soutien au
consommateur Conseils de dépannage Fonctionnement Mesures de sécuriInstallation
Mesures de sécurité . . . . . . . . . . . . . . .41, 42
Fonctionnement
Clayettes et bacs . . . . . . . . . . . . . . . . . . .45, 46
Entretien et nettoyage
dufrirateur . . . . . . . . . . . . . . . . . . .51, 52
Le distributeur deau et de glaçons . . .50, 51
Le filtre à eau . . . . . . . . . . . . . . . . . . . . . . .44
Les commandes . . . . . . . . . . . . . . . . . . . . .43
Les portes du frirateur . . . . . . . . . . . . .47
Les tiroirs et contenants à légume . . . . . . .48
Machine à glaçons automatique . . . . . . . .49
Remplacement des ampoules . . . . . . . . . .53
TurboCool . . . . . . . . . . . . . . . . . . . . . .43
Installation
Déménagement du réfrigérateur . . .55–58
Installation de la conduite d’eau . . . . .6365
Installation du réfrigérateur . . . . . .59–62
Préparation . . . . . . . . . . . . . . . . . . . . . . . . .54
Conseils depannage . . . . . . . . . . . .66–70
Bruits de fonctionnement normaux . . . . .66
Soutien au consommateur
Feuillet de dones relatives à la
performance de la cartouche MWF . . . . . .72
Garantie pour la clientèle au Canada . . . .71
Soutien au consommateur . . . . . . . . . . . . .73
40
Transcrivez les numéros de modèle et de série ici :
# de modèle______________________________
# derie________________________________
Ils figurent sur létiquette qui se trouve à linterieur
du compartiment réfrigérateur en haute à droite.


Produkt Specifikationer

Mærke: GE
Kategori: Køleskab
Model: GSS27RSPBS

Har du brug for hjælp?

Hvis du har brug for hjælp til GE GSS27RSPBS stil et spørgsmål nedenfor, og andre brugere vil svare dig