GE JX36CSS Manual

GE Magnetron JX36CSS

Læs gratis den danske manual til GE JX36CSS (2 sider) i kategorien Magnetron. Denne vejledning er vurderet som hjælpsom af 22 personer og har en gennemsnitlig bedømmelse på 4.6 stjerner ud af 11.5 anmeldelser. Har du et spørgsmål om GE JX36CSS, eller vil du spørge andre brugere om produktet?

Side 1/2
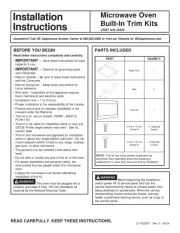
Installation Filler Panel Kit
Instructions JX36
FOR 36” INSTALLATIONS
49-40720-4 07-17 GEA
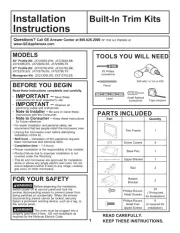
TOOLS YOU WILL NEED
Phillips screwdriver
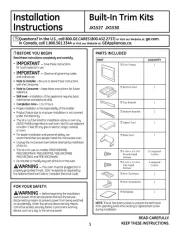
PARTS INCLUDED
Trim kit side mount (2)
Connecting Bar (1)
Installation screws (2)
Kit Model
JX36B CVM1750/CVM1790/CSA1201/
PSA9120/PSA9240/JVM3162/
JNM3163/PVM9179EF/
PVM9179DF/PVM9179SF
JX36C JVM6170/JNM6171/JVM6172/
JVM6175/JVM6177
JX36D JVM7195/DVM7195/JNM7196/
PVM9195/PNM9196/PVM9215/
PNM9216/
PVM9179EK/PVM9179DK/
PVM9179SK
CVM9179/CVM9215
2
Installation Instructions
Install the OTR bracket according to OTR
Installation Instructions.
NOTE: This kit is best installed with 12” base
cabinets. Cabinets with greater than a 12” base
may have a larger gap between back wall and
kit.
NOTE: Ensure the OTR and the Cooking
Product installation manuals are followed.
1. Place the microwave on a flat surface where
you can work on the bottom of both sides.
2. Remove all 3 pieces from the package (right
panel, left panel, top brace.
3. Remove the screws from the lower back
corner of the microwave.
4. Your microwave will have 1-3 screws on the
bottom left side. Remove these screws to
create a gap between the bottom plate and
the case of the microwave.
NOTE: For CVM9179 and CVM9215, Also
remove the screw from the bottom left front
side attaching the heat deflector.
5. With the short edge of the side trim to the
back of the left side of the microwave, slide
the lower lip of the side panel inside the gap
between the bottom plate and the case.
6. Attach the side trim to the back of the
microwave using the screw removed in step 3,
then reattach the screws removed in step 4 to
the underside of the microwave.
7. Make adjustments so the side panel is in line
with the front of the microwave case.
8. Repeat the same procedure for the other side.
9. Using the 2 flat head screws provided, attach
the top brace to the 2 side panels to pull both
panels together.
10. Install the over-the-range microwave with side
panels into the 36 opening.
NOTE: Make sure you have installed the
mounting wall bracket in the center of the 36
opening per the installation instructions provided
with your microwave.
OTR Bracket
Flush with front of
microwave case.
KIT INSTALLATION
Screw
Holes
Printed in USA


Produkt Specifikationer

Mærke: GE
Kategori: Magnetron
Model: JX36CSS

Har du brug for hjælp?

Hvis du har brug for hjælp til GE JX36CSS stil et spørgsmål nedenfor, og andre brugere vil svare dig


Magnetron GE Manualer
GE

GE GCST09U1 Manual

9 Januar 2025
GE

GE UVM9125STSS Manual

30 December 2025
GE

GE PVM9215DFWW Manual

29 December 2024
GE

GE JVM6175SFSS Manual

29 December 2024
GE

GE JX9152ELDS Manual

27 December 2024
GE

GE JX827BMTS Manual

27 December 2024
GE

GE Café CSA1201RSS Manual

15 December 2024
GE

GE JX7227BLTS Manual

8 December 2024
GE

GE JX1530SMSS Manual

8 December 2024

Magnetron Manualer

Nyeste Magnetron Manualer

LG

LG MSER1130B Manual

3 Marts 2025
Stoves

Stoves ST BIMWG6025 Manual

27 Februar 2025
Midea

Midea EM720CWW Manual

26 Februar 2025
Sheffield

Sheffield PLA0920 Manual

26 Februar 2025
Sheffield

Sheffield PLA0925 Manual

26 Februar 2025
Amana

Amana AMV6507RGS Manual

20 Februar 2025
Rival

Rival RGTM702 Manual

27 Januar 2025