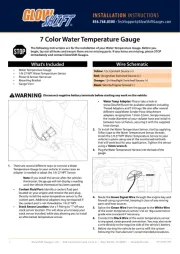
GlowShift GS-W706-SM Manual

GlowShift Måling GS-W706-SM

Læs gratis den danske manual til GlowShift GS-W706-SM (3 sider) i kategorien Måling. Denne vejledning er vurderet som hjælpsom af 4 personer og har en gennemsnitlig bedømmelse på 4.6 stjerner ud af 2.5 anmeldelser. Har du et spørgsmål om GlowShift GS-W706-SM, eller vil du spørge andre brugere om produktet?

Side 1/3
INSTALLATION INSTRUCTIONS
856.768.8300 TechSupport@GlowShiftGauges.com
Glo wShi ft G auge s, L LC 44 4 Co mmer ce L ane Suit e A Wes t Be rlin , NJ 080 91 G lowS hift .com
Water Temperature Gauge
1/8-27 NPT Water Temperature Sensor
Power & Sensor Harnesses
Mounting Bracket
Gauge Visor
Temperature Gauge to your vehicle. In some cases an
adapter is needed to adapt the 1/8-27 NPT Sensor.
Note: If you install the sensor after the vehicles
thermostat, the gauge will not display a reading
until the vehicle thermostat has been opened.
Coolant Fluid Port: Identify a coolant uid port
located on your engine and remove the port plug.
Directly install the water temperature sensor to the
coolant port. Additional adapters may be required if
the coolant port is not threaded to 1/8-27 NPT.
Stock Sensor Location: Use a T-tting to T o your
stock sensor location. This will allow you to keep your
stock sensor installed, while also allowing you to install
an aftermarket temperature sensor.
The following instructions are for the installation of your Water Temperature Gauge. Before you
begin, lay out all items and ensure there are no missing parts. If any items are missing, please STOP
immediately and contact GlowShift Gauges.
7 Color Water Temperature Gauge
Wire Schematic
Disconnect negative battery terminals before starting any work on the vehicle.
Water Temp Adapter: Please take a look at
www.GlowShift.com for available adapters including
Thread Adapters and T-Fittings. We also oer several
dierent-sized Water Sender Hose Attachment
adapters ranging from 13mm-52mm. Simply measure
the inside diameter of your radiator hose and install in
between two cut halves, securing it with the supplied
hose clamps.
2. To install the Water Temperature Sensor, start by applying
Teon tape to the Water Temperature Sensor threads.
Install the 1/8-27 NPT Water Temperature Sensor to your
vehicle’s system using one of the mentioned methods
that will work best for your application. Tighten the sensor
using a 14mm wrench.
3. Plug the Water Temperature Harness into the back of the
gauge.
Grommet
4. Route the Green Signal Wire through the engine bay and
rewall using a grommet, keeping it clear of any moving
parts and heat sources.
5. Splice the Green Wire from the gauge to the White Wire
of the water temperature sensor. Use an 18ga automotive
grade wire to extend if necessary.
6. Connect the Black Wire of the water temperature sensor
to any good, clean ground connection. You may also route
a wire directly to the negative side of the vehicle’s battery.
7. Before starting the vehicle be sure to rell the system
following the manufacturer’s recommended procedures.
STOP
Revised Mar 2020
Yellow: 12v Constant Source (+)
Red: 12v Ignition Switched Source (+)
Orange: 12v Headlight Switched Source (+)
Black: Vehicle/Engine Ground (-)
What’s Included
INSTALLATION INSTRUCTIONS
856.768.8300 TechSupport@GlowShiftGauges.com
Glo wShi ft G auge s, L LC 444 Comm erce Lan e Su ite A We st B erli n, N J 08 091 Glow Shif t.co m
Gauge Wiring
1. In order to test for power, reconnect the Negative Battery
Terminal.
2. It may be necessary to remove the Vehicle Trim and/or Kick
Panels in order to gain access to the vehicles Fuse Box.
3. Using a test light, locate a constant 12-Volt power source in
the vehicles fuse panel that receives 12- Volt power when
the ignition is turned o. You can splice into the circuit or
use an optional Expandable Circuit. Connect the Yellow
Wire of the gauge to the Constant 12-Volt Power Source.
4. Repeat the same step for the Red Wire of the gauge to
locate an Ignition Switched 12-Volt Power Source. This
source should not have any power with the key turned o
and have 12 Volts with the key turned on.
5. Connect the Orange Wire of the gauge to the positive
Headlight Switch Power Source using a Splice Connector,
either in the fuse box or at the switch itself.
Note: Make sure the connection source does not
dim. If the voltage is reduced when you lower the
Dimmer Wheel it will cause the gauges to icker
from not having enough voltage.
Orange 12v
Head Lamp
Yellow 12v
constant
red 12v switch
6. Locate a clean, reliable grounding source and connect the
Black Wire from the gauge.
7. After all wiring is complete, turn the vehicles key to the
“Onposition and conrm that your gauge illuminates.
8. Press the COLOR Changing Button on your gauge and
scroll through the 7 Color options as well as the Color
Change and Color Fade option: this will allow you to
have the Gauge Face change between all of the colors
automatically.
9. Turn on the headlights to ensure that the gauge is
dimming.
10. Reinstall any panels that may have been removed.
11. Ensure your gauge is functioning properly.
Additional Information
The supplied optional gauge visor is intended to be placed on the gauge so that the thickest part is at the top, creating a
cover over the gauge to help keep sun glare o of the gauge face.
The included mounting bracket is designed to be used on a universal-style mount in order to keep the gauge secure. In
some cases one or both legs of the bracket may need to be modied to t the thickness and contour of the mount. Our
A-pillar gauge pods do not require the use of the mounting bracket but can be used if you desire, and there is enough
space to t it between the gauge and the gauge pod. When installing the bracket onto the gauge, make sure not to over-
tighten as it could pull the rear studs on the back of the gauge and damage it.
GlowShift Gauges Installation Instructions: Installation documents are solely to provide a guide for individuals that are
mechanically and electronically able to install products. If you are unsure about the correct procedure for the installation of
a product, you should consult a licensed professional.


Produkt Specifikationer

Mærke: GlowShift
Kategori: Måling
Model: GS-W706-SM

Har du brug for hjælp?

Hvis du har brug for hjælp til GlowShift GS-W706-SM stil et spørgsmål nedenfor, og andre brugere vil svare dig