Assembly Instructions: (Duncan)3602-BA3
• ALL INSTALLATION WORK SHOULD BE DONE BY ACCREDITED PROFESSIONAL.
• SHUT OFF POWER SUPPLY AT FUSE OR CIRCUIT BREAKER!
• USE ONLY THE SPECIFIED BULBS. DO NOT EXCEED THE MAXIMUM WATTAGE!
PREPARING FOR INSTALLATION
Remove all of the contents from the carton. See the important
notes above. Shut off the power at the circuit breaker and
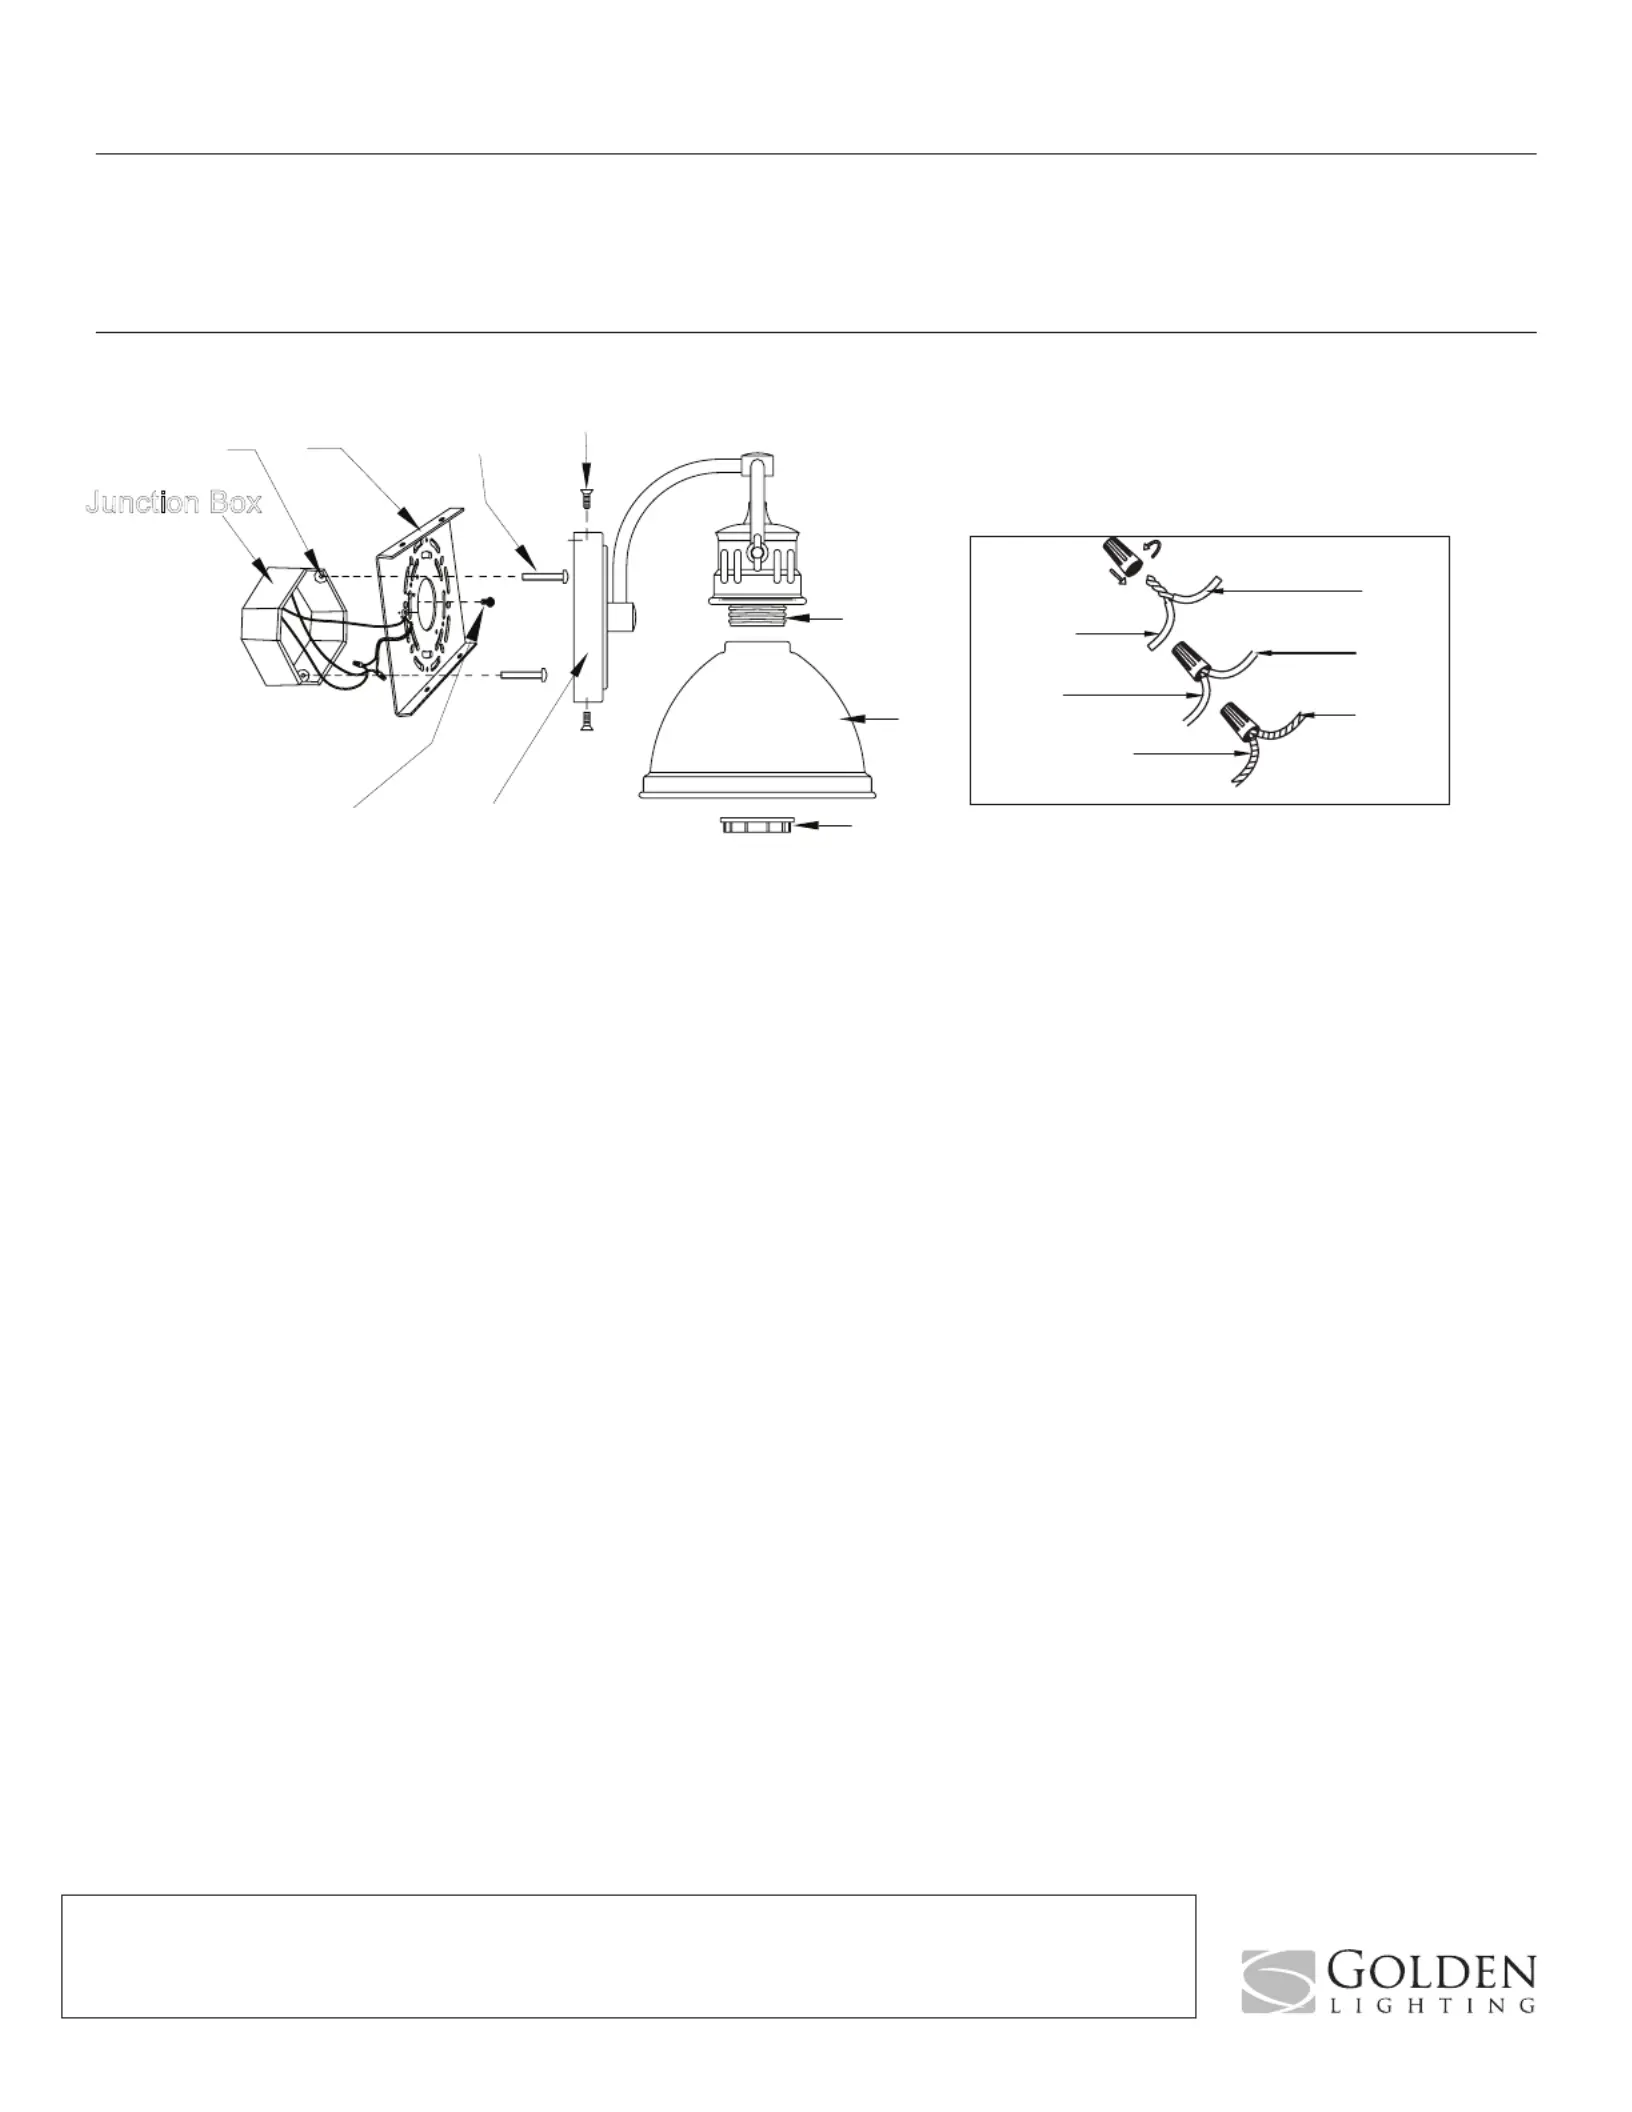
completelyremovetheoldxturefromthewall,includingtheold
Mountingbracket(B)maybeattachedtobackplate(G).Ifso,
use a screwdriver to remove screws (F). Place the screws aside
forfutureuse.Mountingbracket(B)containsseveralpairsof
threadedholes.Findthepairofholesthatmatchesthespacing
oftheholesonthejunctionboxandbackplate(G).Pullthe
housewiresthroughthecenterofmountingbracket(B).Place
mountingbracket(B)overthejunctionboxandsecuremounting
bracket(B)tothejunctionboxwithmountingscrews(D)anda
screwdriver.Besurethatthemountingbracketislevel.Tighten
Attachthexture’swirestothepowersupplywiresfromthe
junctionbox.Connectblacktoblack(orsmooth);whitetowhite
(orribbed);groundtoground(greenorcopper).Twisttheends
ofthewirepairstogether,thentwistonawireconnector.Make
surealltwistsareinthesamedirection.Ifthereisnogroundwire
(greenorcopper)fromthejunctionbox,locategroundscrew
(E)onmountingbracket(B)andwrapthexture’sgroundwire
aroundthegreengroundscrew(E).Useascrewdrivertosecure
groundscrew(E)ontothemountingbracket.Tuckallwires
neatlyintothejunctionbox.
FINISHING THE INSTALLATION
Placebackplate(G)overmountingbracket(B)sothattheholes
onthetopofbackplate(G)matchupwiththeholesinmounting
bracket (B). Thread screws (F) into the holes in the top of
backplate(G)andintotheholesinmountingbracket(B).Tighten
thescrewsuntilthebackplateofthextureissnugagainstthe
Slideshade(I)oversocket(H)andtwistsocketring(J)ontothe
threads of the socket to secure in place.
Installlightbulbsinaccordancewiththexture’sspecications.
Donotexceedthemaximumrecommendedwattage.
Your installation is now complete. Turn on the power and test the
For Customer Service, contact
the place of purchase to arrange
Treat the xture gently! Regular cleaning will reduce the need for deep cleaning. For regular cleaning, turn off the light and wipe down the
xture with a clean lint-free cotton or microber cloth. Never spray cleaner directly onto the xture.